24 / 7 / 365 Emergency Service

Water Damage Prevention for New Homeowners

As a new homeowner, protecting your investment is a top priority—and one of the most critical aspects of home maintenance is water damage prevention. Water damage can strike unexpectedly, whether from a burst pipe, heavy rainfall, or a leaking appliance, leading to costly repairs and long-term structural issues. Understanding how to prevent water damage not only safeguards your property but also ensures a healthier living environment for you and your family. At COMMITTED TO QUALITY SERVICE, we specialize in fast, friendly, and professional water damage restoration services, using advanced equipment designed specifically for drying and restoring affected structures. Whether you’re dealing with a minor leak or a major flood, our expert team is here to help. Call us now at 855-933-7935 to learn more about how we can protect your home from water damage and provide peace of mind. Don’t wait until it’s too late—take proactive steps today to prevent water damage and keep your home safe and sound.

Understanding the Risks of Water Damage

Water damage is one of the most common and costly issues that new homeowners face. It can strike suddenly due to natural disasters like floods or gradually through unnoticed leaks and poor maintenance. Understanding the risks associated with water damage is crucial for protecting your investment, maintaining a safe living environment, and avoiding expensive repairs. Many new homeowners underestimate the potential severity of water damage, often focusing more on cosmetic upgrades than on structural integrity and moisture control. However, the consequences of ignoring water-related issues can be devastating.

Water damage can originate from a variety of sources, including plumbing failures, roof leaks, foundation cracks, and even high indoor humidity levels. Each of these sources presents unique challenges and risks. For example, a small leak under a sink might seem insignificant at first but can lead to mold growth, wood rot, and even structural damage over time. According to the Insurance Information Institute, water damage and freezing account for nearly 29 percent of all homeowner insurance claims in the United States. This statistic underscores the importance of early detection and prevention.

One of the most insidious aspects of water damage is that it often goes unnoticed until it has already caused significant harm. Hidden leaks behind walls, under floors, or in attics can persist for months before any visible signs appear. By the time discoloration, warping, or a musty odor becomes evident, the damage may already be extensive. This is why it is essential for homeowners to educate themselves on how to identify hidden water damage early. For more information on this topic, visit our guide on how to identify hidden water damage early.

The risks of water damage extend beyond structural issues. Mold growth is a common consequence of prolonged moisture exposure and can pose serious health risks, especially for individuals with allergies, asthma, or compromised immune systems. The Centers for Disease Control and Prevention (CDC) warns that mold can begin to grow within 24 to 48 hours of water exposure. Once established, mold can be difficult and costly to remove. It can also spread quickly, contaminating air ducts, furniture, and personal belongings.

In addition to health concerns, water damage can significantly reduce the value of your home. Potential buyers are often wary of properties with a history of water issues, even if repairs have been made. A home inspection revealing past water damage can lead to reduced offers or even the loss of a sale. Therefore, proactive prevention and timely remediation are not just about maintaining your home’s condition but also about preserving its market value.

To better understand the various ways water damage can occur, consider the following common scenarios:

  1. Leaking or burst pipes due to aging plumbing or freezing temperatures
  2. Roof damage from storms or clogged gutters causing water to seep into the attic
  3. Poor drainage around the foundation leading to basement flooding
  4. Malfunctioning appliances such as washing machines, dishwashers, or water heaters
  5. HVAC system condensation or blocked drains causing moisture buildup

Each of these situations can lead to significant damage if not addressed promptly. Regular maintenance, inspections, and awareness are key to minimizing these risks. For example, inspecting your roof annually and cleaning gutters can prevent water from entering your home during heavy rains. Similarly, ensuring that your plumbing is in good condition and that appliances are properly installed and maintained can reduce the likelihood of leaks.

Another critical aspect of water damage risk is the potential for electrical hazards. Water and electricity are a dangerous combination, and water intrusion can compromise electrical systems, leading to short circuits, fires, or electrocution. If you suspect water has come into contact with your electrical wiring or outlets, it is essential to shut off the power and contact a professional immediately.

Homeowners should also be aware of the long-term financial implications of water damage. Repairing water-damaged areas can be expensive, especially if structural components like beams, drywall, or flooring need to be replaced. Additionally, if mold remediation is required, the costs can escalate quickly. Insurance may cover some of these expenses, but policies often have limitations and exclusions. It is advisable to review your homeowner’s insurance policy to understand what is covered and consider additional coverage if you live in a high-risk area.

Preventing water damage requires a proactive approach. This includes regular inspections, timely repairs, and investing in preventive measures such as sump pumps, water leak detectors, and proper landscaping to direct water away from the foundation. For a comprehensive overview of the services available to help protect your home, visit our services page.

It is also beneficial to familiarize yourself with the signs of water damage so you can act quickly when issues arise. These signs include:

  1. Discoloration or staining on walls and ceilings
  2. Warped or buckling floors
  3. Peeling paint or wallpaper
  4. Musty odors indicating mold or mildew
  5. Unexplained increases in water bills

Being vigilant and addressing these signs early can save you time, money, and stress. If you are unsure about the extent of potential damage or how to proceed, consulting with a professional restoration company can provide peace of mind. Learn more about our approach and commitment to quality by visiting our our mission page.

“The best way to deal with water damage is to prevent it from happening in the first place. Awareness, maintenance, and quick action are your best defenses.”

In conclusion, understanding the risks of water damage is essential for new homeowners. It is not just about fixing problems when they occur but about implementing strategies to prevent them. From health hazards and structural damage to financial loss and decreased property value, the consequences of water damage are far-reaching. By staying informed and proactive, you can protect your home and ensure a safe, comfortable living environment for years to come.

For additional tips and expert advice, explore our detailed resources on the blog or reach out through our contact page to speak with a water damage specialist.

Common Causes of Water Damage in Homes

Water damage is one of the most common and costly issues new homeowners face, often occurring without warning and leading to significant repairs if not addressed promptly. Understanding the typical causes of water damage is essential for prevention and long-term home maintenance. One of the leading culprits is plumbing system failures. Leaky pipes, worn-out hose connections, and broken pipe joints can all lead to gradual or sudden water leaks. These issues often go unnoticed behind walls or under floors until the damage becomes extensive. Regular inspections and timely repairs of your plumbing system are crucial to avoid such problems.

Another frequent source of water damage is roof leaks. Over time, roofing materials can deteriorate due to weather exposure, poor installation, or lack of maintenance. Missing shingles, cracked flashing, or clogged gutters can allow water to seep into the attic and walls, causing structural damage and mold growth. Homeowners should schedule regular roof inspections, especially after severe weather events, to ensure their roofing system remains intact and functional.

Appliances are also a common cause of water damage in homes. Washing machines, dishwashers, water heaters, and refrigerators with ice makers are all connected to water lines and can malfunction or develop leaks. Aging appliances or those with faulty connections can release large volumes of water in a short time. It is advisable to check hoses and connections regularly and replace them as needed. Installing water leak detectors near these appliances can also provide an early warning and help prevent extensive damage.

Poor drainage around the foundation of a home is another significant contributor to water damage. When water is not directed away from the house, it can pool around the foundation and eventually seep into the basement or crawl space. This can lead to structural issues, mold growth, and even foundation cracks. Ensuring proper grading around the home, maintaining clean gutters and downspouts, and installing a sump pump if necessary are effective ways to manage water flow and protect your home’s foundation.

Weather-related events such as heavy rainfall, snowmelt, and flooding can also lead to water damage. While these natural occurrences are beyond a homeowner’s control, there are steps that can be taken to minimize their impact. Installing a sump pump, sealing cracks in the foundation, and using flood barriers or sandbags during extreme weather can help reduce the risk. Additionally, understanding your home’s flood risk and having adequate insurance coverage can provide peace of mind and financial protection.

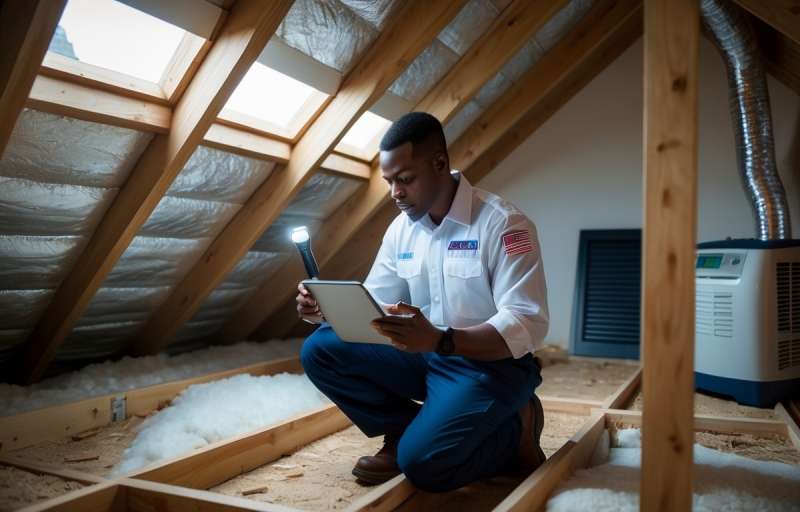
HVAC systems, particularly air conditioners, can also be a hidden source of water damage. When not properly maintained, condensation from these systems can accumulate and overflow, especially if the drain lines are clogged. This can lead to water pooling in ceilings, walls, or floors, causing damage and promoting mold growth. Regular maintenance of your HVAC system, including cleaning and inspecting drain lines, is essential to prevent such issues.

Clogged gutters and downspouts are often overlooked but can have a significant impact on water damage. When gutters are filled with leaves, debris, or ice, they cannot effectively channel water away from the home. This can lead to water spilling over the sides and pooling around the foundation or leaking into the roof and walls. Cleaning gutters regularly and installing gutter guards can help maintain proper water flow and prevent damage.

Sewer backups are another potential cause of water damage that can be particularly hazardous due to the health risks associated with contaminated water. These backups can occur due to blockages in the main sewer line, tree root intrusion, or heavy rainfall overwhelming the municipal sewer system. Installing a backwater valve and avoiding flushing inappropriate items down the toilet can help prevent sewer backups and the resulting water damage.

Windows and doors that are not properly sealed can also allow water to enter the home, especially during storms or heavy rain. Over time, weather stripping and caulking can degrade, creating gaps that let water seep in. Inspecting and maintaining the seals around windows and doors is a simple yet effective way to prevent water intrusion and protect your home’s interior.

In some cases, water damage can be caused by construction defects or poor workmanship. Improperly installed roofing, plumbing, or waterproofing systems can lead to leaks and water infiltration. New homeowners should ensure that any construction or renovation work is performed by licensed and reputable contractors. It is also wise to have a thorough home inspection before purchasing a property to identify any potential issues.

Condensation is another often-overlooked source of water damage. In areas with high humidity, condensation can form on cold surfaces such as windows, pipes, and walls. Over time, this moisture can lead to mold growth and damage to building materials. Using dehumidifiers, improving ventilation, and insulating cold surfaces can help control condensation and reduce the risk of water damage.

Understanding these common causes of water damage is the first step toward effective prevention. New homeowners should take proactive measures to inspect and maintain their property regularly. Partnering with a trusted restoration company can also provide valuable support in identifying potential risks and addressing issues before they escalate. For more information about how we can help protect your home, visit our services page or learn more about our team and expertise. By staying informed and vigilant, you can safeguard your investment and enjoy peace of mind in your new home.

Inspecting Your Roof and Gutters Regularly

One of the most effective ways to prevent water damage in your new home is by consistently checking the condition of your roof and gutters. These components serve as the first line of defense against rain, snow, and other environmental elements that can lead to costly water-related issues if left unchecked. Your roof acts as a protective barrier, and your gutters are responsible for channeling water away from your home’s foundation. When either of these systems is compromised, water can seep into your attic, walls, or basement, leading to structural damage, mold growth, and other serious problems.

Start by visually inspecting your roof at least twice a year, ideally in the spring and fall. Look for missing, cracked, or curling shingles, as these are signs that your roof may be vulnerable to leaks. Pay attention to any sagging areas or dark spots, which could indicate trapped moisture or rotting materials beneath the surface. If your home has a flat roof, check for pooling water or debris buildup, which can accelerate wear and tear. Additionally, examine flashing around chimneys, vents, and skylights to ensure they are securely sealed and not allowing water to penetrate.

Gutters and downspouts should also be inspected and cleaned regularly. Clogged gutters can cause water to overflow and run down the sides of your home, potentially damaging siding, windows, and the foundation. Remove leaves, twigs, and other debris that may obstruct water flow, and make sure downspouts are directing water at least five to ten feet away from your home. Consider installing gutter guards to minimize the frequency of cleanings and reduce the risk of blockages. Also, check for signs of rust, sagging, or separation from the roofline, which may indicate that your gutter system needs repair or replacement.

Routine maintenance of your roof and gutters not only helps prevent water damage but also extends the lifespan of these critical components. If you are unsure about the condition of your roof or gutters, it is wise to consult a professional for a thorough inspection. Many homeowners overlook these areas until a problem arises, but proactive care can save you thousands of dollars in repairs and protect your investment in the long run.

For those new to homeownership, understanding the importance of these inspections is crucial. You can learn more about the types of services available to help maintain your home by visiting our services page. Additionally, if you are curious about our company’s values and commitment to quality, take a look at our our mission page. Regular inspections and timely maintenance are essential steps in safeguarding your home from the damaging effects of water intrusion.

Sealing Windows and Doors Properly

One of the most critical yet often overlooked aspects of water damage prevention for new homeowners is ensuring that all windows and doors are properly sealed. These entry points are among the most vulnerable areas in any home, and when not adequately sealed, they can allow rainwater, moisture, and even humidity to seep inside. Over time, this can lead to structural damage, mold growth, and costly repairs. Proper sealing not only protects your home from water intrusion but also improves energy efficiency by preventing drafts and heat loss.

When inspecting your home, start by checking the condition of the caulking and weatherstripping around all windows and doors. Caulking is a flexible material used to seal gaps and cracks, and it can deteriorate over time due to exposure to the elements. If you notice any cracks, gaps, or peeling, it is essential to remove the old caulk and apply a fresh, high-quality waterproof sealant. Weatherstripping, on the other hand, is typically made of rubber or foam and is used to seal the moving parts of doors and windows. Replacing worn or damaged weatherstripping can significantly reduce the risk of water infiltration.

Another important step is to examine the frames and sills for signs of rot, warping, or water stains. These issues may indicate that water has already penetrated the area, and immediate action is necessary to prevent further damage. In some cases, you may need to replace the entire window or door frame if the damage is extensive. Additionally, ensure that all exterior doors have proper thresholds and door sweeps installed. These components act as barriers to prevent water from entering underneath the door during heavy rain or flooding.

For homes located in areas prone to severe weather, consider installing storm windows or doors. These add an extra layer of protection and can help shield your primary windows and doors from wind-driven rain. Regular maintenance is also key. Make it a habit to inspect your windows and doors at least twice a year, ideally before the rainy season and after any major storms. Cleaning the tracks and ensuring that the drainage holes are not clogged can also help prevent water buildup.

Educating yourself about the importance of sealing windows and doors is just one part of a comprehensive water damage prevention strategy. For more detailed guidance and professional assistance, consider exploring our services page to learn how we can help safeguard your home. You can also visit our FAQ section for answers to common questions about water damage and home maintenance. Taking these proactive steps will not only protect your investment but also provide peace of mind knowing your home is well-defended against the elements.

Checking and Maintaining Plumbing Systems

One of the most critical steps in preventing water damage in your new home is ensuring that your plumbing system is in optimal condition. Plumbing issues are among the leading causes of water damage, often resulting from unnoticed leaks, burst pipes, or faulty fixtures. As a new homeowner, it is essential to familiarize yourself with the layout of your plumbing system, including the location of shut-off valves, water heaters, and main water lines. Regular inspections can help detect early signs of wear and tear, such as corrosion, rust, or moisture accumulation around pipes and joints. These early indicators, if ignored, can escalate into costly repairs and significant structural damage.

To maintain your plumbing system effectively, start by scheduling routine checks at least twice a year. Look for signs of leaks under sinks, behind appliances, and around toilets. Even a small drip can waste gallons of water over time and weaken the surrounding structure. Pay attention to water pressure as well; unusually high or low pressure can signal underlying issues like blockages or failing pressure regulators. Additionally, inspect your water heater for signs of rust or sediment buildup, which can reduce efficiency and increase the risk of leaks. Flushing the tank annually can help extend its lifespan and maintain optimal performance.

Another important aspect of plumbing maintenance is protecting your pipes from freezing during colder months. Insulate exposed pipes in basements, attics, and exterior walls to prevent them from bursting due to temperature fluctuations. If you plan to be away from home for an extended period during winter, consider shutting off the main water supply and draining the pipes to avoid unexpected damage. Also, ensure that your sump pump is functioning correctly, especially if your home is in an area prone to flooding. Test it periodically by pouring water into the pit and observing whether it activates and drains properly.

In addition to self-inspections, it is wise to hire a licensed plumber for a comprehensive evaluation of your plumbing system. A professional can identify hidden issues that may not be visible to the untrained eye, such as slow leaks within walls or under flooring. They can also assess the condition of older pipes and recommend upgrades if necessary. Modern plumbing materials like PEX or copper are more durable and less prone to corrosion compared to outdated galvanized steel or polybutylene pipes. Investing in these upgrades can significantly reduce the risk of future water damage.

Preventive maintenance also involves being mindful of what goes down your drains. Avoid flushing non-biodegradable items or pouring grease and food particles into the kitchen sink, as these can lead to clogs and backups. Installing drain screens and using enzymatic cleaners can help keep your pipes clear and functioning efficiently. Additionally, check your washing machine and dishwasher hoses regularly for signs of wear or bulging, and replace them every five years to prevent sudden leaks.

Smart home technology can also play a role in plumbing maintenance. Devices such as water leak detectors and smart water shut-off valves can alert you to potential problems in real-time, allowing you to take immediate action before significant damage occurs. These tools are especially useful for new homeowners who may not yet be familiar with the warning signs of plumbing issues. Integrating these technologies into your home can provide peace of mind and an added layer of protection.

Understanding the importance of plumbing maintenance is just one part of a comprehensive water damage prevention strategy. For more information on how to safeguard your home, visit our blog where we share expert tips and insights. You can also explore our wide range of services designed to help you maintain a safe and damage-free living environment. Taking proactive steps today can save you from the stress and expense of water damage in the future.

Installing a Sump Pump in the Basement

One of the most effective ways to protect your basement from water damage is by installing a sump pump. This device plays a crucial role in preventing flooding, especially in areas prone to heavy rainfall or with high water tables. A sump pump works by collecting excess water in a sump basin and then pumping it away from your home’s foundation, usually to a storm drain or dry well. For new homeowners, understanding the importance of this system can be a game-changer in maintaining a dry and safe basement environment. The installation process begins with identifying the lowest point in your basement where water naturally collects. A pit is then dug to house the sump basin, followed by the installation of the pump itself. It’s essential to ensure the system includes a check valve to prevent water from flowing back into the pit and a backup power source in case of electrical outages. Regular maintenance, such as cleaning the pump and testing it periodically, ensures it functions efficiently when needed most. Beyond just preventing water accumulation, a sump pump also helps reduce humidity levels, which can deter mold growth and protect your home’s structural integrity. If you’re unsure whether your home requires a sump pump, consulting with a professional can provide clarity and peace of mind. At Projekt Restoration, we offer a range of services tailored to help homeowners safeguard their properties from water-related issues. You can also learn more about our team and commitment to quality by visiting our about page. Taking proactive steps like installing a sump pump not only protects your investment but also contributes to a healthier living environment for you and your family.

Monitoring Indoor Humidity Levels

One of the most effective ways to prevent water damage in your new home is by keeping a close eye on indoor humidity levels. Excess moisture in the air can lead to a range of problems, including mold growth, wood rot, and structural deterioration. For new homeowners, understanding and managing indoor humidity is a crucial step in maintaining a safe and healthy living environment. Ideally, indoor humidity should be kept between 30 to 50 percent. Levels above this range can create the perfect conditions for mold and mildew to thrive, especially in areas like basements, bathrooms, and kitchens. These microorganisms not only damage your home but can also pose serious health risks to your family, such as respiratory issues and allergic reactions.

To monitor humidity effectively, consider investing in a digital hygrometer. These affordable devices provide real-time readings of indoor humidity and temperature, allowing you to take timely action if levels become too high. In addition to using a hygrometer, it is essential to ensure proper ventilation throughout your home. Use exhaust fans in bathrooms and kitchens, and consider installing a whole-house ventilation system if your home is particularly prone to moisture buildup. Dehumidifiers are another excellent tool for maintaining optimal humidity, especially in damp areas like basements. Regularly emptying and cleaning your dehumidifier will ensure it operates efficiently and continues to protect your home from moisture-related issues.

Another important aspect of humidity control is maintaining your HVAC system. A well-functioning HVAC system not only regulates temperature but also helps manage indoor humidity. Make sure to schedule regular maintenance checks and replace filters as needed. Additionally, sealing leaks around windows, doors, and plumbing fixtures can prevent excess moisture from entering your home. Pay attention to signs of condensation on windows or walls, as these can indicate high humidity levels that need to be addressed promptly.

New homeowners should also be aware of the seasonal changes in humidity. During the summer months, humidity tends to rise, making it even more important to monitor and control indoor moisture. In contrast, winter can bring dry air, which might require the use of a humidifier to maintain balance. Understanding these seasonal variations will help you take proactive steps to protect your home year-round.

If you suspect that high humidity has already caused damage, it is crucial to act quickly. Mold and mildew can spread rapidly and compromise the structural integrity of your home. In such cases, professional help may be necessary. At Projekt Restoration, we offer a range of specialized services designed to address water damage and prevent future issues. Our team of experts can assess your home, identify problem areas, and implement effective solutions tailored to your needs.

For those looking to learn more about how we operate and what sets us apart, visit our about page. We are committed to helping new homeowners protect their investment and ensure a safe living environment. Monitoring indoor humidity is not just about comfort; it is a vital part of a comprehensive water damage prevention strategy. By staying vigilant and taking the necessary precautions, you can avoid costly repairs and enjoy peace of mind in your new home.

Using Water Leak Detectors and Alarms

One of the most effective ways for new homeowners to prevent costly water damage is by installing water leak detectors and alarms. These devices are designed to identify leaks in their earliest stages, giving you the opportunity to address issues before they escalate into major problems. Water leak detectors can be placed in high-risk areas such as under sinks, behind toilets, near water heaters, and around appliances like dishwashers and washing machines. When moisture is detected, the alarm sounds or sends a notification to your smartphone, allowing you to take immediate action. Some advanced systems can even shut off the water supply automatically to prevent further damage. This proactive approach is especially beneficial for those who travel frequently or own second homes, as it provides peace of mind knowing that your property is being monitored around the clock. In addition to preventing structural damage, early detection can also help avoid the growth of mold and mildew, which can pose serious health risks. For homeowners looking to enhance their protection, integrating leak detectors with a smart home system can offer even greater control and convenience. These systems can be customized to monitor specific zones and provide real-time updates, ensuring that you are always informed about the condition of your home. Investing in water leak detectors is a small cost compared to the potential expenses of repairing extensive water damage. For more information on how to safeguard your home, explore our detailed services or visit our guide on identifying hidden water damage early. Taking these preventative steps not only protects your property but also contributes to long-term savings and a healthier living environment.

Landscaping Tips to Direct Water Away from Your Home

One of the most effective ways to prevent water damage in your new home is by implementing smart landscaping strategies that direct water away from your foundation. Poor drainage around your property can lead to serious issues such as basement flooding, foundation cracks, and mold growth. To avoid these costly problems, it’s essential to understand how your yard’s layout and features influence water flow. Start by evaluating the slope of your yard. Ideally, the ground should slope away from your home at a gradient of at least 5 percent, or about six inches over ten feet. This natural incline helps ensure that rainwater and runoff move away from your foundation rather than pooling around it. If your yard is flat or slopes toward your house, consider regrading the soil or installing a French drain system to redirect water effectively.

Another important landscaping tip is to use downspout extensions. These simple yet effective tools carry water from your gutters several feet away from your home, reducing the risk of water seeping into your basement or crawl space. Make sure your gutters are clean and in good repair, as clogged or damaged gutters can overflow and deposit water directly at your foundation. Additionally, consider installing a rain garden in a low-lying area of your yard. Rain gardens are shallow, planted depressions that collect and absorb runoff from roofs, driveways, and other impervious surfaces. They not only help manage stormwater but also enhance the aesthetic appeal of your landscape.

Mulching is another valuable technique for controlling water flow. Organic mulch, such as wood chips or bark, helps retain soil moisture and reduces erosion. However, avoid piling mulch directly against your home’s foundation, as it can trap moisture and encourage rot or pest infestations. Instead, maintain a mulch-free buffer zone of at least six inches around your home. Planting native vegetation is also beneficial. Native plants typically have deep root systems that improve soil structure and increase water absorption, reducing runoff and promoting natural drainage.

For homes located in areas with heavy rainfall, installing a dry creek bed can be a visually appealing and functional solution. These shallow trenches, lined with rocks and gravel, mimic the appearance of a natural stream and help channel excess water away from your home. They can be integrated seamlessly into your landscape design and are particularly effective when combined with other drainage solutions. Retaining walls can also be used to manage water flow on sloped properties. These structures help prevent soil erosion and can be designed with built-in drainage systems to guide water away from your home.

Regular maintenance of your landscaping features is crucial to ensure they continue to function properly. Check for signs of erosion, pooling water, or blocked drainage paths, and address any issues promptly. Seasonal inspections, especially before and after heavy rains, can help you identify potential problems early and take corrective action. If you’re unsure about how to implement these strategies or need professional assistance, consider reaching out to experts who specialize in water damage prevention and landscaping solutions. You can learn more about the services offered by Projekt Restoration by visiting their services page.

Understanding the importance of proper landscaping in water damage prevention is just one part of being a responsible homeowner. For more insights and expert advice, explore the blog section, where you’ll find helpful tips and real-life examples of how proactive measures can protect your home. By taking the time to design and maintain a landscape that effectively manages water flow, you can safeguard your investment and enjoy peace of mind, knowing your home is protected from the damaging effects of water intrusion.

Protecting Your Home During Heavy Rain or Storms

When heavy rain or storms strike, the risk of water damage to your home increases significantly, especially for new homeowners who may not yet be familiar with the necessary precautions. Taking proactive steps to safeguard your property can prevent costly repairs and long-term structural issues. One of the first things to consider is the condition of your roof. Ensure that shingles are intact and that there are no visible signs of wear or damage. A compromised roof can allow water to seep into your attic and walls, leading to hidden moisture problems that may not be immediately noticeable. Regular inspections and timely repairs are essential to maintaining a watertight barrier overhead.

Equally important is the state of your gutters and downspouts. These systems are designed to channel rainwater away from your home’s foundation. Clogged or damaged gutters can cause water to overflow and pool around the base of your house, increasing the risk of foundation cracks and basement flooding. Clean your gutters regularly and make sure downspouts extend at least several feet away from your home. Installing gutter guards can also help reduce debris buildup and ensure proper water flow during storms.

Landscaping plays a crucial role in water damage prevention as well. The grading around your home should slope away from the foundation to direct rainwater away from the structure. If the ground slopes toward your house, consider regrading or installing a French drain system to redirect water. Additionally, avoid planting trees or large shrubs too close to your home, as their roots can interfere with drainage systems and even damage the foundation over time.

Windows and doors are common entry points for water during storms. Check the seals and weather stripping around these areas to ensure they are intact and functioning properly. Replacing worn-out seals can prevent water from seeping in and causing damage to interior walls and flooring. For added protection, consider installing storm shutters or impact-resistant windows, especially if you live in an area prone to severe weather.

Basements are particularly vulnerable to water intrusion during heavy rain. Installing a sump pump can be a highly effective way to keep your basement dry. Make sure the pump is in good working condition and test it periodically, especially before the rainy season begins. A battery backup system is also recommended to ensure the pump continues to operate during power outages. In addition, sealing basement walls and floors with waterproof coatings can provide an extra layer of defense against moisture.

Another often overlooked area is the attic. Proper ventilation and insulation in the attic can help prevent condensation and mold growth, which are common issues following storms. Check for any signs of water stains or mold on the underside of the roof and around vents. If you notice any issues, it may be time to consult a professional for a more thorough inspection and remediation plan.

It’s also wise to familiarize yourself with your home’s plumbing system. During storms, increased water pressure or debris in the municipal system can lead to backups. Installing a backwater valve can prevent sewage from entering your home through the drains. Additionally, inspect your sump pump discharge line to ensure it is not blocked or frozen, as this could cause water to back up into your basement.

Emergency preparedness is another key aspect of protecting your home. Keep an emergency kit on hand that includes flashlights, batteries, a first-aid kit, and essential tools. Know where your main water shut-off valve is located so you can quickly stop the flow of water in case of a burst pipe or other emergency. It’s also a good idea to have a list of emergency contacts, including a trusted water damage restoration company, readily available.

Technology can also aid in water damage prevention. Smart home devices such as water leak detectors and moisture sensors can alert you to potential issues before they become major problems. These devices can be placed near appliances, under sinks, or in the basement to provide real-time monitoring and notifications. Some systems can even be integrated with your smartphone, allowing you to take immediate action no matter where you are.

If water damage does occur despite your best efforts, acting quickly is crucial. The longer water sits, the more extensive the damage can become. Contacting a professional restoration service immediately can help mitigate the impact and prevent secondary issues like mold growth. At Projekt Restoration, we offer comprehensive services designed to address water damage efficiently and effectively. Our team is equipped with the latest tools and techniques to restore your home to its original condition.

Understanding the risks and taking preventive measures can make a significant difference in how your home weathers a storm. For more information on how we can help you protect your property, visit our about page to learn more about our team and our commitment to quality service. Whether you’re dealing with a current issue or looking to prevent future problems, being proactive is the best strategy for safeguarding your investment and maintaining a safe, dry living environment.

Knowing Where Your Main Water Shut-Off Valve Is

One of the most crucial steps in preventing water damage in your new home is knowing the exact location of your main water shut-off valve. This valve controls the flow of water into your home, and in the event of a plumbing emergency such as a burst pipe or a major leak, shutting it off quickly can significantly reduce the extent of water damage. Many homeowners are unaware of where this valve is located until it’s too late, resulting in costly repairs and potential structural issues. Typically, the main shut-off valve is found in the basement, crawl space, garage, or along the perimeter of the home where the water line enters the house. In warmer climates, it might be located outside near an exterior wall or in a ground-level utility box. It is essential to familiarize yourself with its location as soon as you move in and ensure that all household members know how to operate it. Turning off the main valve can stop thousands of gallons of water from flooding your home, buying you time to call for professional help. Regularly inspecting the valve for signs of rust, corrosion, or difficulty turning can also prevent problems before they start. If you are unsure about how to locate or operate your shut-off valve, consider reaching out to a professional for guidance. You can learn more about our expert services that help homeowners prepare for and respond to water-related emergencies. Additionally, understanding the broader implications of water damage and how to address it can be found in our detailed water damage resource. Taking proactive steps like this not only protects your property but also provides peace of mind knowing you are prepared for unexpected situations.

Regular Maintenance for Appliances That Use Water

One of the most effective ways to prevent water damage in your new home is by regularly maintaining appliances that use water. These include dishwashers, washing machines, refrigerators with ice makers, water heaters, and HVAC systems. Each of these appliances has the potential to leak or malfunction, leading to costly repairs and significant water damage if not properly maintained. As a new homeowner, understanding the importance of routine checks and upkeep can save you from unexpected disasters and preserve the integrity of your property.

Start by inspecting hoses and connections on your washing machine and dishwasher. Over time, these hoses can wear out, crack, or loosen, leading to slow leaks that may go unnoticed until significant damage has occurred. It is recommended to replace rubber hoses with braided stainless steel ones, which are more durable and less prone to bursting. Additionally, ensure that connections are tight and free of corrosion. A quick monthly inspection can help catch early signs of wear and tear.

Refrigerators with built-in ice makers or water dispensers also require attention. The water supply line, usually located at the back of the appliance, can become brittle or disconnected. Make sure the line is secure and inspect it for any signs of moisture or mold, which could indicate a slow leak. Cleaning the drip pan and checking for clogs in the defrost drain can also prevent water from pooling underneath the fridge.

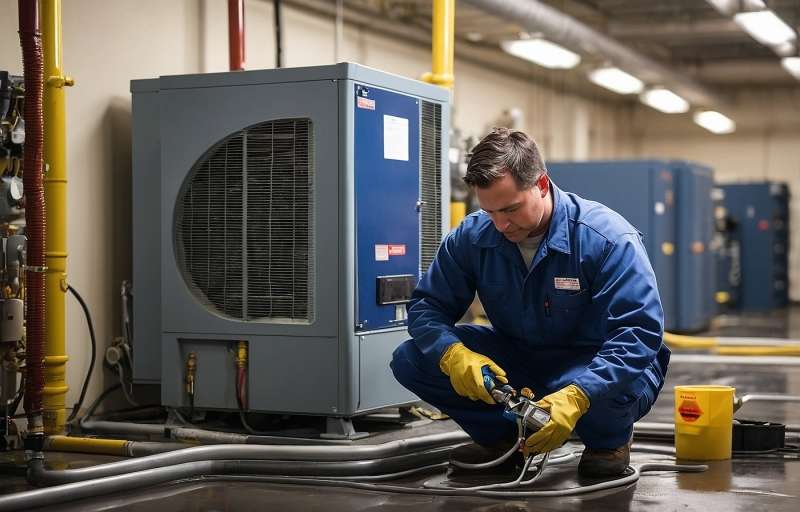
Water heaters are another common source of leaks. Sediment buildup at the bottom of the tank can cause corrosion and reduce efficiency, eventually leading to leaks. Flushing the tank once or twice a year helps remove this sediment and extends the life of the appliance. Also, inspect the pressure relief valve and the area around the base of the heater for any signs of moisture. If you notice rust or water pooling, it may be time to call a professional for further evaluation.

HVAC systems, particularly those with built-in humidifiers or condensate drain lines, can also contribute to water damage if not properly maintained. Ensure that the condensate drain is clear of debris and flowing freely. A clogged drain can cause water to back up and overflow, potentially damaging ceilings, walls, and flooring. Regular servicing by a qualified technician can help keep your HVAC system running efficiently and prevent moisture-related issues.

It is also wise to install water leak detectors near these appliances. These devices can alert you to the presence of water before it causes significant damage. Some advanced models can even shut off the water supply automatically when a leak is detected, offering an extra layer of protection.

In addition to these maintenance tasks, familiarize yourself with the location of your main water shut-off valve. In the event of a major leak, being able to quickly turn off the water supply can significantly reduce the extent of the damage. Make sure all household members know where the valve is and how to operate it.

For new homeowners, understanding the risks associated with water-using appliances and taking proactive steps to maintain them is essential. Not only does this help prevent water damage, but it also ensures that your appliances operate efficiently and last longer. If you are unsure about how to perform these maintenance tasks or if you suspect a leak, it is best to consult a professional. You can learn more about the services available to help protect your home by visiting our services page.

Additionally, staying informed about the early signs of hidden water damage can be crucial in preventing long-term issues. Our guide on how to identify hidden water damage early offers valuable insights that every homeowner should know. Regular maintenance, combined with awareness and prompt action, forms the foundation of a comprehensive water damage prevention strategy for your new home.

Insurance Coverage for Water Damage

Understanding how insurance coverage works in the event of water damage is crucial for new homeowners aiming to protect their investment. Water damage can result from a variety of sources, including burst pipes, roof leaks, appliance malfunctions, or even natural disasters. While preventive measures are essential, having the right insurance policy in place provides a safety net when unexpected issues arise. Homeowners insurance typically covers sudden and accidental water damage, such as a pipe that bursts unexpectedly. However, it often does not cover damage resulting from poor maintenance or gradual leaks. This distinction is important because insurance providers expect homeowners to take reasonable steps to maintain their property and prevent foreseeable problems.

When selecting a homeowners insurance policy, it is vital to read the fine print and understand what types of water damage are included. For instance, damage from a sudden plumbing failure may be covered, but if the insurer determines that the issue developed over time due to neglect, the claim could be denied. Additionally, standard policies usually do not cover flood damage caused by natural disasters. For that, homeowners need to purchase separate flood insurance through the National Flood Insurance Program or a private insurer. This is especially important for those living in flood-prone areas, where the risk of water intrusion is significantly higher.

Another aspect to consider is the coverage limit and deductible. The coverage limit is the maximum amount your insurance will pay for a covered loss, while the deductible is the amount you must pay out of pocket before your insurance kicks in. Choosing a policy with adequate coverage and a manageable deductible ensures that you are not left with significant financial burdens in the event of water damage. It is also wise to review your policy annually and update it as needed, especially after making home improvements or changes that could affect your risk profile.

In addition to understanding your policy, it is beneficial to document your belongings and keep records of home maintenance. Taking photos or videos of your home and valuable items can help support your claim if you ever need to file one. Keeping receipts for repairs and maintenance work also demonstrates that you have taken steps to prevent damage, which can strengthen your case with the insurance company. Some insurers may even offer discounts for homes equipped with water detection systems or other preventive technologies, so be sure to inquire about any available incentives.

If you do experience water damage, acting quickly is essential. Contact your insurance provider as soon as possible to report the incident and begin the claims process. Most insurers require prompt notification and may send an adjuster to assess the damage. It is also important to take immediate steps to mitigate further damage, such as shutting off the water supply, removing standing water, and starting the drying process. Hiring a professional restoration company can help ensure that the cleanup is thorough and meets industry standards. For more information on professional restoration services, you can explore our services page.

Working with a trusted restoration company can also streamline the insurance process. Experienced professionals can provide detailed documentation, including moisture readings, photographs, and repair estimates, which can be submitted to your insurance provider. This level of documentation not only supports your claim but also helps ensure that you receive fair compensation for the damage. At Projekt Restoration, we understand the stress that comes with water damage and are committed to helping homeowners navigate the recovery process with confidence. Learn more about our team and values by visiting our about page.

In summary, while water damage can be a daunting challenge for new homeowners, having the right insurance coverage in place provides essential financial protection. Understanding the terms of your policy, maintaining your home, and acting quickly in the event of damage are all key components of a successful response. By staying informed and prepared, you can minimize the impact of water damage and protect your home for years to come.

Creating a Water Damage Emergency Plan

As a new homeowner, one of the most crucial steps in safeguarding your investment is preparing for unexpected situations like water damage. While preventive measures are essential, having a well-thought-out emergency plan can significantly reduce the impact of water-related incidents. A comprehensive water damage emergency plan ensures that you and your family know exactly what to do when disaster strikes, minimizing property damage and speeding up recovery. Start by identifying the main water shut-off valve in your home and ensure every household member knows its location and how to operate it. This simple step can prevent gallons of water from flooding your home in the event of a burst pipe or appliance failure.

Next, compile a list of emergency contacts, including your insurance provider, a trusted plumber, and a professional restoration company. Keep this list in an easily accessible location, such as on the refrigerator or saved in your phone. It’s also wise to familiarize yourself with local emergency services and community resources. Knowing who to call and when can save precious time during a crisis. Additionally, consider creating a digital and physical inventory of your belongings, including photos and receipts. This documentation will be invaluable when filing insurance claims and assessing the extent of the damage.

Another key component of your emergency plan should be identifying potential water damage risks within your home. Inspect areas prone to leaks, such as under sinks, around windows, and near appliances like washing machines and water heaters. Regular maintenance and early detection can prevent minor issues from escalating into major problems. For more guidance on spotting early signs of water damage, visit our detailed guide on how to identify hidden water damage early. Being proactive in these areas not only protects your home but also gives you peace of mind.

Incorporating technology into your emergency plan can also be beneficial. Water leak detectors and smart home systems can alert you to issues in real time, even when you’re away. These devices can be programmed to shut off the water supply automatically, reducing the risk of extensive damage. Make sure to test these systems regularly and replace batteries as needed to ensure they function correctly when needed most.

Equally important is understanding your homeowner’s insurance policy. Review your coverage to ensure it includes water damage and understand the process for filing a claim. Some policies may not cover certain types of water damage, such as flooding from natural disasters. In such cases, additional flood insurance may be necessary. If you’re unsure about your coverage or need help navigating the claims process, our team is here to assist. Learn more about our comprehensive services designed to support homeowners through every step of water damage restoration.

Communication is another vital element of your emergency plan. Establish a family communication strategy that includes meeting points and contact methods in case you are separated during an emergency. Practice your plan regularly to ensure everyone knows their role and can act quickly and efficiently. This is especially important for families with young children, elderly members, or pets who may need additional assistance during an emergency.

Finally, consider partnering with a reliable restoration company before an emergency occurs. Having a trusted professional on standby can make all the difference in how quickly and effectively your home is restored. At Projekt Restoration, we are committed to helping homeowners prepare for and recover from water damage. Learn more about our mission and values by visiting our our mission page. By taking these proactive steps, you can create a robust water damage emergency plan that not only protects your property but also ensures the safety and well-being of your loved ones.

Sure! Here’s a suitable FAQ section for a blog post titled “Water Damage Prevention for New Homeowners,” incorporating relevant and helpful information:

Frequently Asked Questions (FAQ) – Water Damage Prevention for New Homeowners

  1. Why is water damage prevention important for new homeowners?
    Water damage can lead to costly repairs, mold growth, and structural issues. As a new homeowner, taking proactive steps to prevent water damage helps protect your investment, maintain your home’s value, and ensure a safe living environment.
  2. What are the most common causes of water damage in homes?
    Common causes include leaking or burst pipes, roof leaks, clogged gutters, poor drainage, malfunctioning appliances (like washing machines or water heaters), and foundation cracks. Severe weather and flooding can also contribute to water damage.
  3. How can I prevent water damage from plumbing issues?
    Regularly inspect pipes for signs of leaks or corrosion, especially under sinks and behind appliances. Install water leak detectors near high-risk areas, and consider upgrading old plumbing. Also, know where your main water shut-off valve is located in case of emergencies.
  4. What should I do to protect my home during heavy rain or storms?
    Ensure your gutters and downspouts are clean and direct water away from your foundation. Check that your roof is in good condition and repair any damaged shingles. Consider installing a sump pump in your basement and sealing any cracks in your foundation.
  5. How often should I inspect my home for potential water damage risks?
    It’s a good idea to do a thorough inspection at least twice a year—once in the spring and once in the fall. Also, check after major storms or if you notice signs of moisture, such as musty odors, water stains, or peeling paint.
  6. Are there any smart home devices that can help prevent water damage?
    Yes! Smart water leak detectors and automatic shut-off valves can alert you to leaks and even stop the water supply to prevent major damage. These devices are especially useful for monitoring areas you don’t check regularly.
  7. What should I do if I discover water damage in my home?
    Act quickly. Stop the source of the water if possible, remove excess water, and dry the area thoroughly. Contact a professional water damage restoration service if the damage is extensive. Also, notify your homeowner’s insurance provider to determine if the damage is covered.
  8. Does homeowner’s insurance cover water damage?
    It depends on the cause. Most standard policies cover sudden and accidental water damage (like a burst pipe), but not damage from poor maintenance or gradual leaks. Flood damage typically requires separate flood insurance.
  9. How can landscaping help prevent water damage?
    Proper grading around your home ensures water flows away from the foundation. Use downspout extensions, install French drains if needed, and avoid planting trees with invasive roots near your foundation or water lines.
  10. What are some signs of hidden water damage I should watch for?
    Look for discoloration on walls or ceilings, warped flooring, a musty smell, or an unexplained increase in your water bill. These can all indicate a hidden leak or moisture problem.

By staying informed and proactive, new homeowners can significantly reduce the risk of water damage and enjoy peace of mind in their new space.

How to Prevent Mold in Attic Spaces

Mold in attic spaces is a common yet often overlooked issue that can lead to serious health risks and costly structural damage if not addressed promptly. Understanding how to prevent mold in attic spaces is essential for maintaining a safe and healthy home environment. Factors such as poor ventilation, roof leaks, and high humidity levels can create the perfect breeding ground for mold growth. By taking proactive steps like improving airflow, sealing leaks, and managing moisture, homeowners can effectively reduce the risk of mold infestation. At COMMITTED TO QUALITY SERVICE, we specialize in water damage restoration and mold prevention, using advanced equipment and techniques to protect your home. Whether you’re dealing with water damage, fire damage, or need expert advice on mold prevention, our fast, friendly, and professional team is here to help. Call us now at 855-933-7935 to learn more about our comprehensive services and how we can assist you in keeping your attic mold-free.

Understanding the Causes of Attic Mold

Mold growth in attic spaces is a common yet often overlooked issue that can lead to serious structural damage and health concerns if not addressed promptly. To effectively prevent mold in attics, it is essential to first understand the underlying causes that contribute to its development. Mold thrives in environments that are warm, damp, and poorly ventilated—conditions that are frequently found in attics due to their unique position in a home’s structure.

One of the primary causes of attic mold is poor ventilation. When warm, moist air from the living spaces below rises and becomes trapped in the attic, it creates a humid environment that is ideal for mold spores to flourish. This is especially problematic during colder months when the temperature difference between the attic and the rest of the house causes condensation to form on cold surfaces like rafters and roof sheathing. According to the Environmental Protection Agency (EPA), maintaining proper ventilation is crucial in controlling moisture and preventing mold growth in enclosed spaces.

Another significant contributor to attic mold is roof leaks. Even minor leaks can introduce enough moisture to support mold growth over time. Water can seep through damaged shingles, flashing, or improperly sealed roof penetrations, saturating insulation and wooden structures. If left unchecked, this moisture can lead to extensive mold colonization. Homeowners should regularly inspect their roofs and address any signs of damage promptly to avoid such issues. For more information on how water damage can lead to mold, visit our page on water damage.

Inadequate insulation is also a common factor. When insulation is improperly installed or insufficient, it can allow warm air to escape from the living areas into the attic. This warm air, when it meets the cooler surfaces of the attic, condenses and creates moisture—an ideal breeding ground for mold. Ensuring that your attic is properly insulated and sealed can significantly reduce the risk of mold formation.

Bathroom and kitchen exhaust fans that vent into the attic instead of outside the home are another hidden cause of attic mold. These fans expel moist air from showers and cooking, which, if directed into the attic, increases humidity levels and promotes mold growth. It is vital to ensure that all exhaust fans are properly vented to the exterior of the home.

“According to the Centers for Disease Control and Prevention (CDC), mold can begin to grow within 24 to 48 hours in moist conditions, making early detection and prevention critical.”

Here are some common scenarios that often lead to attic mold:

  1. Blocked or insufficient soffit and ridge vents that prevent proper airflow.
  2. Leaky roofs or flashing that allow water intrusion.
  3. Improperly vented bathroom or kitchen exhaust fans.
  4. Condensation from HVAC systems or ductwork running through the attic.
  5. Stored items in the attic that trap moisture or restrict airflow.

Understanding these causes is the first step toward effective mold prevention. Regular inspections, proper ventilation, and timely repairs can go a long way in keeping your attic mold-free. If you suspect mold in your attic, it is advisable to consult professionals who specialize in mold remediation to assess the situation and recommend appropriate solutions.

For those interested in learning more about our approach and values, please visit our our mission page. You can also explore our wide range of services to see how we can help protect your home from mold and other damage.

For additional guidance on identifying early signs of water damage that could lead to mold, check out this helpful resource from the EPA: https://www.epa.gov/mold/mold-guide. Taking proactive steps today can save you from costly repairs and health risks in the future.

Importance of Proper Ventilation

Proper ventilation plays a critical role in preventing mold growth in attic spaces. Without adequate airflow, moisture can accumulate due to daily household activities such as cooking, bathing, and even breathing. This trapped moisture creates a damp environment that is ideal for mold spores to thrive. Attics are particularly vulnerable because they are often overlooked and poorly ventilated, allowing humidity to build up unnoticed. Ensuring that your attic has a well-designed ventilation system helps regulate temperature and humidity levels, significantly reducing the risk of mold development.

One of the main functions of attic ventilation is to allow fresh air to enter while letting moist, stale air escape. This exchange helps maintain a balanced environment, preventing condensation from forming on insulation, wood, and other structural components. When condensation occurs, it can lead to wood rot, insulation damage, and ultimately, mold infestation. Over time, this can compromise the structural integrity of your home and lead to costly repairs. Proper ventilation not only protects your attic but also contributes to the overall health of your home.

In colder climates, warm air from the living space can rise and enter the attic, where it meets the cooler air. This temperature difference can cause condensation on the underside of the roof deck. In warmer climates, poor ventilation can trap hot air in the attic, increasing indoor temperatures and causing your HVAC system to work harder. Both scenarios create conditions conducive to mold growth. Installing ridge vents, soffit vents, or attic fans can help maintain consistent airflow and prevent these issues.

Homeowners should also be aware that insulation and ventilation must work together. Over-insulating without proper ventilation can trap moisture, while under-insulating can lead to temperature fluctuations that also encourage condensation. A balanced system ensures that your attic stays dry and mold-free year-round. Regular inspections and maintenance are essential to ensure that vents are not blocked by insulation, debris, or pests.

In addition to preventing mold, proper attic ventilation can improve energy efficiency and extend the life of your roofing materials. Excess heat and moisture can cause shingles to deteriorate prematurely, leading to leaks and further water damage. If you suspect mold or moisture issues in your attic, it is crucial to consult professionals who specialize in mold remediation to assess the situation and recommend appropriate solutions.

Understanding the importance of ventilation is just one part of maintaining a healthy attic. For more information about how to protect your home from mold and other related issues, visit our blog where we share expert tips and insights. You can also learn more about our comprehensive range of services designed to keep your home safe and mold-free.

Ultimately, investing in proper attic ventilation is a proactive step that can save you from the health risks and financial burdens associated with mold infestations. By ensuring your attic is well-ventilated, you are not only protecting your property but also promoting a healthier living environment for you and your family.

Controlling Moisture and Humidity Levels

One of the most critical steps in preventing mold growth in attic spaces is effectively managing moisture and humidity levels. Mold thrives in damp, poorly ventilated environments, and attics are particularly vulnerable due to their location and often limited airflow. To keep your attic mold-free, it is essential to understand the sources of moisture and implement strategies to control them.

First, ensure that your attic is properly ventilated. Without adequate airflow, humidity can build up, especially during colder months when warm air from the living space rises and condenses on cooler attic surfaces. Installing or upgrading soffit and ridge vents can significantly improve air circulation, helping to maintain a balanced humidity level. In some cases, adding attic fans may also be beneficial to enhance ventilation further.

Another key factor is insulation. Proper insulation not only helps regulate temperature but also prevents warm, moist air from entering the attic from the living areas below. When insulation is insufficient or improperly installed, it can lead to condensation on attic surfaces, creating a perfect environment for mold to develop. Make sure insulation is evenly distributed and not blocking any vents, as this can hinder airflow and trap moisture.

Moisture can also enter the attic through roof leaks or damaged flashing. Regularly inspect your roof for missing shingles, cracks, or other signs of wear and tear. Even minor leaks can introduce enough moisture to support mold growth over time. If you suspect water intrusion, it is crucial to address it promptly. You can learn more about identifying hidden water issues by visiting our guide on how to identify hidden water damage early.

In addition to roof maintenance, check for any plumbing or HVAC components that run through the attic. Condensation from air conditioning ducts or leaks from plumbing lines can contribute to elevated moisture levels. Wrapping ducts with insulation and ensuring all joints are sealed can help prevent condensation. Similarly, any exhaust fans from bathrooms or kitchens should vent directly outside and not into the attic, as this can introduce significant humidity.

Using a hygrometer to monitor attic humidity levels can be a helpful tool in maintaining a mold-resistant environment. Ideally, attic humidity should stay below 60 percent. If levels are consistently high, consider using a dehumidifier designed for attic spaces. These devices can effectively reduce moisture in the air, especially in climates with high humidity.

Regular inspections are essential for early detection of moisture problems. Look for signs such as water stains, musty odors, or visible mold on wood or insulation. Addressing these issues early can prevent more extensive damage and costly repairs. If you are unsure about the condition of your attic or need professional assistance, our team offers comprehensive services to help you maintain a healthy home environment.

Preventing mold in attic spaces is not just about fixing problems as they arise but also about implementing proactive measures. By controlling moisture and humidity levels through proper ventilation, insulation, and maintenance, you can significantly reduce the risk of mold growth. For more information about our company and our commitment to quality, visit our about page. Taking these steps will not only protect your attic but also contribute to the overall health and safety of your home.

Insulating Your Attic Effectively

Proper attic insulation plays a critical role in preventing mold growth by maintaining consistent temperatures and reducing moisture buildup. When an attic is poorly insulated, warm air from the living spaces below can rise and meet the colder surfaces of the attic, leading to condensation. This excess moisture creates an ideal environment for mold to thrive. To avoid this, homeowners should ensure that their attic is insulated with the appropriate materials and techniques suited to their climate zone. Common insulation materials include fiberglass batts, blown-in cellulose, and spray foam, each offering different levels of thermal resistance and moisture control. Choosing the right type of insulation depends on the structure of your attic and your specific needs, such as energy efficiency and mold prevention.

In addition to selecting the right insulation material, it is essential to install it correctly. Gaps, compression, or uneven distribution of insulation can significantly reduce its effectiveness and allow moisture to accumulate. For example, insulation should never block soffit vents, as this can restrict airflow and trap humidity. Proper ventilation works hand-in-hand with insulation to keep the attic dry and mold-free. Ridge vents, soffit vents, and gable vents help circulate air, preventing the buildup of warm, moist air that can lead to mold growth. Ensuring that your attic has both adequate insulation and ventilation is key to maintaining a healthy and mold-resistant environment.

Another important aspect of effective attic insulation is sealing air leaks. Small openings around light fixtures, plumbing vents, and chimneys can allow warm, moist air to seep into the attic. These leaks should be sealed with caulk or expanding foam before insulation is installed. This not only helps in controlling moisture but also improves energy efficiency by reducing heat loss. Homeowners should also consider installing vapor barriers in colder climates to prevent moisture from migrating into the attic insulation. A vapor barrier is typically a plastic or foil sheet that blocks moisture from passing through walls and ceilings, further reducing the risk of mold.

Regular inspection and maintenance of attic insulation are also necessary to ensure long-term effectiveness. Over time, insulation can settle, become compacted, or be damaged by pests or water intrusion. If you notice signs of water damage or mold, it is crucial to address the issue promptly. You can learn more about identifying early signs of water damage by visiting our guide on how to identify hidden water damage early. If mold is already present, professional remediation may be required to safely remove it and prevent recurrence. Our team offers comprehensive mold remediation services to restore your attic to a safe and healthy condition.

For homeowners unsure about the condition of their attic insulation or how to improve it, consulting with a professional restoration service is highly recommended. Experts can assess your attic’s current insulation, identify problem areas, and recommend solutions tailored to your home’s specific needs. At Projekt Restoration, we are committed to helping homeowners protect their properties from mold and moisture damage. Learn more about our approach and values by visiting our mission page or explore the full range of services we offer.

In summary, effective attic insulation is a foundational step in mold prevention. By choosing the right materials, ensuring proper installation, sealing air leaks, and maintaining adequate ventilation, homeowners can significantly reduce the risk of mold growth. Regular inspections and timely maintenance further enhance the longevity and performance of your insulation system. Taking these proactive steps not only protects your home from mold but also improves energy efficiency and indoor air quality, contributing to a healthier living environment.

Identifying and Fixing Roof Leaks

One of the most common causes of mold growth in attic spaces is undetected or unresolved roof leaks. Even minor leaks can introduce enough moisture to create the ideal environment for mold to thrive. Identifying these leaks early is crucial to preventing long-term damage and costly repairs. Start by inspecting your attic regularly, especially after heavy rain or snow. Look for signs such as water stains on the ceiling or insulation, damp or rotting wood, and a musty odor. These indicators often point to a leak that may not be visible from the outside. Pay close attention to areas around chimneys, skylights, and roof vents, as these are common entry points for water. If you suspect a leak but cannot locate it, consider hiring a professional to conduct a thorough inspection. Once a leak is identified, prompt repair is essential. Depending on the severity, this may involve replacing damaged shingles, sealing flashing, or even repairing structural components. Ignoring these issues can lead to extensive water damage, which not only compromises the integrity of your home but also accelerates mold development. For homeowners dealing with persistent moisture problems, it may be beneficial to explore professional services that specialize in water damage and mold prevention. Additionally, understanding the broader implications of water intrusion can help you take proactive steps. Our detailed guide on how to identify hidden water damage early offers valuable insights into spotting issues before they escalate. Regular maintenance, timely repairs, and professional assessments are key strategies in keeping your attic dry and mold-free. By addressing roof leaks promptly and effectively, you can protect your home’s structure and ensure a healthier living environment.

Regular Attic Inspections and Maintenance

One of the most effective ways to prevent mold growth in attic spaces is through consistent inspections and routine maintenance. Mold thrives in dark, damp, and poorly ventilated areas, making the attic a prime location for potential infestations. Regularly checking your attic allows you to identify early signs of moisture buildup, leaks, or ventilation issues before they escalate into serious mold problems. Homeowners should inspect their attic at least twice a year, ideally during the spring and fall, to catch seasonal changes that might affect humidity levels or structural integrity. During these inspections, look for water stains, musty odors, or visible mold on wood beams, insulation, and other surfaces. Pay close attention to areas around vents, chimneys, and roof valleys, as these are common entry points for water intrusion.

Proper attic maintenance goes hand-in-hand with inspections. This includes ensuring that insulation is dry and evenly distributed, checking that vents are not blocked, and confirming that the attic has adequate airflow. A well-ventilated attic helps regulate temperature and humidity, reducing the chances of condensation and mold formation. Homeowners should also make sure that bathroom and kitchen exhaust fans are vented outside and not into the attic, as this can introduce excess moisture. If any signs of water damage or mold are detected, it is crucial to address them immediately. Delaying repairs can lead to more extensive damage and higher remediation costs. For those unsure about what to look for or how to properly maintain their attic, consulting with professionals can be a wise decision. Companies like Projekt Restoration offer a range of services that include mold prevention and remediation, ensuring your home remains safe and healthy.

In addition to visual inspections, homeowners should also monitor the attic environment using tools like hygrometers to measure humidity levels. Ideally, attic humidity should remain below 60 percent to prevent mold growth. If levels are consistently high, it may be necessary to install additional ventilation or a dehumidifier. Another important aspect of attic maintenance is checking for pests, as rodents and insects can damage insulation and create openings for moisture to enter. Sealing any gaps or cracks in the attic structure can help prevent both pest infestations and water intrusion.

For those living in areas prone to heavy rainfall or snow, it is especially important to inspect the attic after major weather events. Ice dams, for example, can cause water to back up under shingles and leak into the attic. Regular maintenance helps identify and fix these issues promptly, preventing long-term damage. Additionally, homeowners should be aware of the signs of hidden water damage, which can often go unnoticed until mold has already begun to spread. Our guide on how to identify hidden water damage early provides valuable insights into spotting these problems before they become severe.

Maintaining a mold-free attic is not just about protecting your property; it also safeguards your family’s health. Mold spores can travel through HVAC systems and affect indoor air quality, leading to respiratory issues and other health concerns. By committing to regular attic inspections and maintenance, homeowners can significantly reduce the risk of mold growth and ensure a healthier living environment. For more information about our approach and commitment to quality, visit our about page to learn more about our team and values.

Choosing Mold-Resistant Materials

When it comes to preventing mold in attic spaces, one of the most effective strategies is selecting the right building materials from the start. Mold thrives in moist, organic environments, so choosing materials that resist moisture absorption and inhibit mold growth is essential. For instance, mold-resistant drywall, also known as green board or purple board, is specifically designed to withstand high humidity and is a smart choice for attic walls and ceilings. Similarly, fiberglass insulation is less likely to support mold growth compared to traditional cellulose insulation, making it a better option for attic spaces prone to moisture accumulation.

Another key material to consider is mold-resistant paint. These paints contain antimicrobial agents that help prevent mold spores from taking hold on surfaces. Applying such paint to attic walls, ceilings, and even wooden beams can provide an additional layer of protection. Additionally, pressure-treated wood or wood that has been sealed with a mold-inhibiting sealant can significantly reduce the risk of mold development on structural components. These materials are especially useful in attics where ventilation may be limited or where temperature fluctuations are common.

Roofing materials also play a critical role in mold prevention. Metal roofing, for example, is less likely to retain moisture than traditional asphalt shingles and can help reduce the chances of leaks that lead to mold. Properly installed vapor barriers and underlayment materials beneath the roofing can further protect the attic from moisture intrusion. It is also important to ensure that attic ventilation systems are compatible with the materials used, as poor airflow can negate the benefits of mold-resistant products.

In addition to selecting the right materials, regular maintenance and inspections are crucial. Even the most mold-resistant materials can become vulnerable if exposed to prolonged moisture due to leaks or poor ventilation. Homeowners should routinely check for signs of water damage, such as discoloration, musty odors, or warped surfaces. For more information on how to detect these issues early, visit our guide on how to identify hidden water damage early.

When planning an attic renovation or new construction, consulting with professionals who specialize in mold prevention can make a significant difference. At Projekt Restoration, we offer a range of services tailored to help homeowners choose the best materials and solutions for their specific needs. Our team understands the importance of using high-quality, mold-resistant products and can guide you through the selection and installation process to ensure long-term protection.

Ultimately, investing in mold-resistant materials is a proactive step that can save homeowners time, money, and stress in the long run. By combining these materials with proper ventilation, insulation, and regular maintenance, you can create an attic environment that is far less hospitable to mold. For more information about our approach and values, feel free to explore our mission and learn how we are committed to helping you maintain a safe and healthy home.

In conclusion, preventing mold in attic spaces requires a proactive approach centered around proper ventilation, moisture control, and regular maintenance. By ensuring your attic is well-ventilated, sealing any air leaks, managing insulation effectively, and addressing roof leaks promptly, you can create an environment that is inhospitable to mold growth. Regular inspections and timely repairs are key to catching potential issues before they escalate. With these preventative measures in place, you can protect your home’s structural integrity, maintain healthy indoor air quality, and avoid costly mold remediation in the future.

Fire Safety Tips for Commercial Properties

Fire safety is a critical concern for every commercial property owner. Whether you manage an office building, retail store, warehouse, or restaurant, the risk of fire can have devastating consequences—not only for the physical structure but also for the lives of employees, customers, and the continuity of business operations. Implementing effective fire safety measures is not just a legal requirement; it’s a moral and financial imperative. In this comprehensive guide, we’ll explore essential fire safety tips for commercial properties, focusing on prevention, preparedness, and recovery. We’ll also discuss how professional restoration services can help you recover quickly and efficiently in the unfortunate event of a fire.

At Projekt Restoration, we are COMMITTED TO QUALITY SERVICE. Call Us Now! 855-933-7935 for Fast, Friendly, and Professional Service. Our services include water damage restoration, fire damage restoration, mold remediation, biohazard clean up, and reconstruction services. We are dedicated to ensuring customer satisfaction through every step of the property restoration process.

1. Fire Prevention Strategies for Commercial Properties

Fire prevention is the first and most crucial step in ensuring the safety of your commercial property. A proactive approach can significantly reduce the risk of fire and protect your investment, employees, and customers. Here are several key strategies to implement:

  • Install and Maintain Fire Detection Systems: Smoke detectors, heat sensors, and fire alarms should be installed throughout the property. Regular maintenance and testing are essential to ensure they function correctly in an emergency.
  • Use Fire-Resistant Materials: When constructing or renovating your property, opt for fire-resistant building materials. These materials can slow the spread of fire and provide more time for evacuation and emergency response.
  • Electrical Safety: Faulty wiring and overloaded circuits are common causes of commercial fires. Hire licensed electricians to inspect and maintain your electrical systems regularly. Avoid using extension cords as permanent wiring solutions.
  • Proper Storage of Flammable Materials: Store flammable liquids and chemicals in designated, ventilated areas away from heat sources. Use appropriate containers and follow OSHA guidelines for hazardous materials.
  • Employee Training: Educate your staff on fire safety protocols, including how to use fire extinguishers, identify hazards, and evacuate the building safely. Conduct regular fire drills to reinforce these practices.

Implementing these fire prevention strategies not only enhances safety but also reduces the likelihood of needing emergency service or fire damage restoration. For more information on how to protect your property, visit our services page.

2. Fire Safety Equipment and Maintenance

Having the right fire safety equipment in place is essential for minimizing damage and ensuring the safety of occupants during a fire. However, simply installing equipment is not enough—it must be properly maintained and regularly inspected to remain effective. Here’s what every commercial property should have:

  • Fire Extinguishers: Ensure that fire extinguishers are readily accessible and appropriate for the types of fires that may occur in your facility (e.g., electrical, chemical, grease). Train employees on how to use them effectively.
  • Sprinkler Systems: Automatic sprinkler systems are one of the most effective tools for controlling fires in commercial buildings. Regular inspections and maintenance are required to ensure they function properly when needed.
  • Fire Alarms and Smoke Detectors: These should be installed in all areas of the building and connected to a central monitoring system. Test alarms monthly and replace batteries as needed.
  • Emergency Lighting and Exit Signs: In the event of a fire, visibility can be severely compromised. Emergency lighting and illuminated exit signs help guide occupants to safety. Test these systems regularly to ensure they are operational.
  • Fire Doors and Fire Escapes: Fire-rated doors help contain fires and prevent them from spreading. Ensure that fire escapes are unobstructed and clearly marked.

Routine maintenance of fire safety equipment is not just a best practice—it’s a legal requirement in many jurisdictions. Neglecting this responsibility can lead to severe consequences, including fines, increased liability, and greater damage in the event of a fire. If your property has already suffered damage, our reconstruction services can help restore it to its original condition. Learn more about our process on the How It Works page.

3. Emergency Preparedness and Evacuation Planning

Even with the best prevention and equipment, fires can still occur. That’s why having a well-developed emergency preparedness and evacuation plan is essential. A clear, practiced plan can save lives and reduce panic during a crisis. Here’s how to create an effective fire emergency plan for your commercial property:

  • Develop a Comprehensive Evacuation Plan: Identify all possible exits and ensure they are clearly marked. Create evacuation routes and post them throughout the building. Assign roles to staff members, such as fire wardens, to assist in the evacuation process.
  • Conduct Regular Fire Drills: Practice makes perfect. Conduct fire drills at least twice a year to ensure everyone knows what to do in an emergency. Evaluate each drill and make improvements as needed.
  • Establish a Communication Plan: During a fire, communication is critical. Establish a system for alerting employees and emergency services. Designate a meeting point outside the building where everyone can be accounted for.
  • Train Employees: Provide training on how to respond to a fire, including how to use fire extinguishers, shut down equipment, and assist others during evacuation. Include fire safety training as part of your onboarding process for new hires.
  • Keep Emergency Contacts Handy: Maintain an up-to-date list of emergency contacts, including local fire departments, medical services, and emergency service providers like Projekt Restoration.

Preparation is key to minimizing the impact of a fire. A well-executed evacuation plan can prevent injuries and fatalities, while also reducing the chaos and confusion that often accompany emergencies. For more tips on emergency preparedness, check out our blog.

4. Post-Fire Recovery and Restoration Services

After a fire, the road to recovery can be long and challenging. Smoke, soot, and water used to extinguish the fire can cause extensive damage to your property. That’s where professional restoration services come in. At Projekt Restoration, we specialize in comprehensive fire damage restoration to help you get back on your feet quickly and safely.

Here’s what our post-fire recovery process typically includes:

  • Emergency Response: Our team is available 24/7 to provide immediate assistance. We assess the damage and take steps to prevent further deterioration, such as boarding up windows and tarping roofs.
  • Damage Assessment: We conduct a thorough inspection to determine the extent of fire, smoke, and water damage. This helps us create a customized restoration plan tailored to your needs.
  • Smoke and Soot Removal: Smoke and soot can penetrate walls, furniture, and HVAC systems. We use specialized equipment and techniques to remove these contaminants and improve air quality.
  • Water Damage Restoration: Firefighting efforts often leave behind significant water damage. Our water damage restoration services include drying, dehumidification, and mold prevention.
  • Reconstruction Services: Once the cleanup is complete, we begin the process of rebuilding and restoring your property. From structural repairs to cosmetic improvements, we handle it all.

Our goal is to restore your property to its pre-loss condition while ensuring your complete customer satisfaction. We also offer mold remediation and biohazard clean up services to address any additional issues that may arise during the restoration process. Learn more about our mission and values on our Our Mission page.

5. Long-Term Fire Safety and Compliance

Fire safety is not a one-time effort—it requires ongoing attention and commitment. Ensuring long-term fire safety involves regular inspections, compliance with local fire codes, and continuous improvement of safety protocols. Here’s how to maintain a fire-safe commercial property over the long term:

  • Schedule Regular Inspections: Work with certified fire safety professionals to conduct annual inspections of your fire alarms, sprinkler systems, extinguishers, and other safety equipment.
  • Stay Updated on Fire Codes: Fire safety regulations can change over time. Stay informed about local, state, and federal fire codes to ensure your property remains compliant.
  • Review and Update Safety Plans: As your business grows or changes, your fire safety plan should evolve as well. Review and update your evacuation routes, emergency contacts, and training programs regularly.
  • Invest in Employee Education: Fire safety training should be an ongoing process. Offer refresher courses and new training sessions to keep employees informed and prepared.
  • Partner with Restoration Experts: Establish a relationship with a trusted property restoration company like Projekt Restoration. Having a go-to provider for emergency service ensures a faster response and smoother recovery in the event of a fire.

Maintaining long-term fire safety not only protects your property but also demonstrates your commitment to the well-being of your employees and customers. For answers to common questions about fire safety and restoration, visit our FAQ page.

Conclusion

Fire safety in commercial properties is a multifaceted responsibility that requires vigilance, preparation, and the right partnerships. From prevention and equipment maintenance to emergency planning and post-fire recovery, every step plays a vital role in protecting your property and the people within it. By implementing the fire safety tips outlined in this guide, you can significantly reduce the risk of fire and ensure a swift, effective response should one occur.

When disaster strikes, you need a team you can trust. Projekt Restoration offers comprehensive restoration services designed to handle every aspect of fire recovery—from fire damage restoration and water damage restoration to mold remediation and reconstruction services. Our commitment to customer satisfaction and professional restoration ensures that your property is in the best hands. Don’t wait until it’s too late—take proactive steps today to safeguard your commercial property. Contact us now to learn how we can help you prepare, protect, and restore.

How to Handle Water Damage in Schools

How to handle water damage in schools? It’s a question every school administrator dreads but must be prepared to answer. From burst pipes to roof leaks, water damage can disrupt learning, endanger health, and cost thousands in repairs. At Projekt Property Restoration, we specialize in fast, professional water damage restoration using advanced equipment and expert teams. Are your school facilities ready to face such emergencies?

Quick action is the key. Our article walks you through immediate steps to take, how to assess the damage, and when to call in professionals. We also cover long-term prevention strategies and how to work with insurance for a smooth recovery process.

But that’s just the beginning. Experts like Dr. Richard L. Harvey, a leading voice in environmental health, stress the importance of early intervention in school water damage cases. So, let’s dive into the essential steps every school must take to protect students, staff, and infrastructure from water-related disasters.

Understanding the Impact of Water Damage in Schools

Water damage in schools often stems from aging plumbing systems, leaking roofs, or severe weather events like floods and storms. These issues can quickly escalate, disrupting daily operations and compromising safety. In the short term, water intrusion can damage ceilings, walls, and flooring, leading to costly repairs. Over time, persistent moisture fosters mold growth, which poses serious health risks to students and staff.

Exposure to mold and damp environments can trigger allergies, asthma, and other respiratory conditions. Structural integrity may also weaken, increasing the risk of collapse or long-term facility closures. According to the Environmental Protection Agency, nearly 50% of U.S. schools report issues related to indoor air quality, often linked to water damage.

In 2022, a school district in California spent over $2 million repairing flood-related damage after a winter storm. Such incidents highlight the urgent need for proactive maintenance and rapid response. Schools must prioritize inspections and invest in reliable restoration services to prevent recurring issues. For more insights into our approach, visit our how-it-works page. Addressing water damage early protects both infrastructure and the well-being of everyone on campus.

Identifying Signs of Water Damage

Discoloration on ceilings or walls often signals water intrusion. Peeling paint and bubbling surfaces are also common indicators. Warped flooring, especially in hallways or bathrooms, suggests prolonged moisture exposure. A persistent musty odor may point to hidden mold growth. Mold patches, even small ones, should never be ignored.

Hidden damage can lurk behind walls or under tiles. Use a flashlight to inspect dark corners and under sinks. Check ceilings for sagging or soft spots. Basements and crawl spaces require extra attention due to poor ventilation. Bathrooms and locker rooms are high-risk zones and need frequent checks.

Schedule monthly inspections to catch issues early. Focus on areas near plumbing, HVAC systems, and rooflines. Moisture meters help detect dampness behind surfaces. Thermal imaging cameras reveal temperature changes caused by water leaks.

For expert help, explore our services or learn more about hidden water damage. Early detection prevents costly repairs and ensures a safe learning environment.

Immediate Steps to Take After Discovering Water Damage

The moment water damage is discovered, act fast. First, shut off the main water supply to prevent further flooding. Ensure the area is safe—check for electrical hazards and evacuate if needed. Immediately notify your maintenance team and school administrators. Quick communication can prevent costly delays.

Next, document everything. Take clear photos and detailed notes of all affected areas. This evidence is crucial for insurance claims and repair planning. Don’t forget to include timestamps and descriptions for each image.

Create a checklist for your emergency response team. Include tasks like assessing structural damage, securing the area, and contacting restoration professionals. Assign responsibilities to avoid confusion during the crisis.

Keep emergency contact numbers easily accessible. Include local authorities, utility companies, and a trusted restoration service. For expert help, visit our services page or learn more about our mission.

Acting quickly and methodically can minimize long-term damage. Stay calm, stay organized, and follow your emergency plan.

Health and Safety Considerations

Water damage in schools can lead to serious health threats. Mold exposure may trigger allergies, asthma, and respiratory infections. Standing water often harbors bacteria, increasing the risk of illness. Damaged structures also pose physical hazards like collapsing ceilings or weakened floors.

Immediate evacuation of affected areas is essential. Limit access until professionals assess the damage. Staff must wear proper personal protective equipment (PPE) during cleanup to avoid exposure. Gloves, masks, and protective clothing reduce health risks significantly.

Clear communication is vital during emergencies. Notify teachers, students, and parents promptly about safety protocols. Use emails, school apps, and bulletin boards to share updates. Transparency builds trust and ensures cooperation.

Implementing a response plan helps minimize confusion. Assign roles to staff and conduct regular safety drills. For more guidance on emergency response, visit our how-it-works page.

Professional help is often necessary to restore safety. Learn more about our specialized services designed for educational facilities. Acting quickly protects both health and infrastructure.

Water Damage Assessment and Professional Evaluation

Begin by inspecting all affected areas, including ceilings, walls, and flooring. Look for discoloration, warping, or musty odors. Identify the water source to determine its category—clean, gray, or black. Clean water poses minimal risk, while black water contains harmful contaminants and requires urgent action.

If the damage spans multiple rooms or involves sewage, hire certified restoration experts immediately. These professionals use advanced tools to detect hidden moisture and prevent mold growth. Their expertise ensures a thorough and safe recovery process.

Document every step of the evaluation. Take clear photos, record videos, and keep detailed notes. This information is crucial when filing insurance claims. Work closely with your insurance adjuster to ensure accurate assessments and fair compensation.

Choose a trusted company with proven experience in school restoration. Visit their about page to review credentials and certifications. Explore their full range of services to understand how they can support your recovery efforts.

Act quickly to minimize long-term damage and protect student safety.

Restoration and Repair Process

The restoration process begins with immediate water extraction to prevent further damage. Industrial pumps and vacuums remove standing water quickly. Once extracted, high-powered fans and dehumidifiers dry affected areas thoroughly. This step is crucial to stop mold growth and structural weakening.

After drying, sanitization eliminates bacteria and contaminants. Technicians use EPA-approved disinfectants to ensure a safe environment for students and staff. Repairs then begin based on the extent of the damage. For drywall, sections may need replacement or patching. Flooring options vary—some may require full removal, while others can be restored.

Electrical systems demand expert inspection and rewiring if compromised. Safety remains the top priority throughout the process. During reconstruction, professionals recommend using mold-resistant drywall and water-resistant flooring. These materials help prevent future issues and extend the building’s lifespan.

To learn more about our expert solutions, visit our services page. For insights into our team’s commitment, explore our mission. Choosing the right materials and process ensures a safe, long-lasting recovery.

Preventative Measures and Maintenance Strategies

Regular inspections are essential to prevent costly water damage in schools. Schedule biannual roof assessments to catch leaks early. Check plumbing systems monthly for corrosion, loose fittings, or hidden drips. Service HVAC units every season to avoid condensation buildup and drainage issues. These proactive steps reduce long-term repair costs.

Install water detection systems in high-risk areas like basements, restrooms, and kitchens. These sensors alert staff to leaks before they escalate. Backflow preventers are also crucial to stop contaminated water from entering clean supplies. Ensure they are tested and maintained annually.

Develop a comprehensive water damage prevention plan tailored to your facility. Include clear emergency protocols and designate response teams. Train all staff regularly to ensure swift action during incidents. Keep emergency contacts and shut-off valve locations accessible.

Review and update your plan yearly to reflect building changes or new risks. For expert help, explore our services or learn more about our mission. Staying prepared minimizes disruption and protects your school’s infrastructure.

Budgeting and Funding for Water Damage Repairs

Start by assessing the full scope of the damage. Use professional evaluations to estimate repair costs accurately. Include labor, materials, and potential long-term fixes. Allocate a portion of your emergency maintenance budget for unexpected issues. Always prioritize safety and structural integrity.

Explore multiple funding options. Insurance should be your first step—review your policy for water damage coverage. If coverage falls short, apply for government grants or emergency relief programs. These resources can ease financial strain and speed up the recovery process.

When presenting costs to school boards, focus on transparency. Break down expenses clearly and support them with expert assessments. Emphasize the urgency and long-term savings of immediate repairs. Use before-and-after visuals or case studies to strengthen your case.

For more insight into professional restoration, visit our services page. You can also explore our gallery to see real project outcomes. These resources help justify the investment and demonstrate proven results.

Legal and Regulatory Compliance

Schools must adhere to strict safety regulations at the local, state, and federal levels. These include guidelines from the Environmental Protection Agency (EPA), the Americans with Disabilities Act (ADA), and state health departments. Failing to comply can lead to fines, lawsuits, or even school closures. Regular inspections help ensure that water damage doesn’t compromise structural integrity or indoor air quality.

Health codes require immediate action to prevent mold growth and contamination. Building standards demand proper drainage, ventilation, and moisture control systems. Ignoring these can put students and staff at risk. Compliance also protects the school’s reputation and funding eligibility.

For legal guidance, consult your district’s legal counsel or state education department. You can also reach out to local building inspectors or environmental health agencies. For more insights, visit our blog or explore our FAQ section for common concerns. Staying informed and proactive ensures your school remains safe, compliant, and operational.

Creating a Water Damage Response Plan for Schools

A well-structured response plan is essential for minimizing water damage in schools. Start by assigning clear roles to staff members. Designate a response leader, communication coordinator, and maintenance supervisor. Each team member must understand their duties during an emergency.

Establish a communication protocol that includes internal alerts and parent notifications. Keep an updated emergency contact list accessible to all staff. Include local emergency services, restoration experts, and district officials.

Regularly conduct water damage drills to test the plan’s effectiveness. These drills help identify gaps and improve response times. Review and update the plan annually or after any incident.

Ensure your school partners with a reliable restoration service. Learn more about available services to prepare for quick recovery. Also, familiarize staff with signs of hidden damage by reviewing this helpful guide.

A proactive approach reduces downtime and protects students and staff. Keep documentation organized and accessible. With the right plan, your school can respond swiftly and effectively to any water-related emergency.

Frequently Asked Questions (FAQs)

Water damage in schools often stems from burst pipes, roof leaks, or faulty HVAC systems. Immediate action is crucial—ideally within 24 to 48 hours—to prevent structural issues and mold. Typically, school administrators or facility managers oversee the response and coordinate with restoration professionals. In most cases, students and staff should evacuate affected areas until it’s safe.

Poor air quality from water damage can trigger allergies, asthma, and respiratory issues. A solid emergency plan should include contact lists, shut-off procedures, and a reliable restoration partner. To prevent mold, schools must dry all areas thoroughly and use dehumidifiers. Yes, some government grants and programs can assist with repair costs.

Choosing a trusted restoration company is vital. Look for certifications, experience, and positive reviews. For guidance, visit our services page. Accurate documentation—photos, repair estimates, and incident reports—is essential for insurance claims. For more insights, explore our blog section.

Mold Prevention Tips for Property Managers

Understanding the Mold Menace: Why Property Managers Should Care

If you’re a property manager, you’ve probably dealt with your fair share of maintenance issues. But mold? That’s a whole different beast. It’s sneaky, persistent, and can cause serious damage—not just to your property, but also to your tenants’ health. Mold doesn’t knock before it enters. It thrives in hidden corners, behind walls, under carpets, and in damp basements. And once it settles in, it spreads like wildfire.

So, why should you care? Because mold can lead to costly mold remediation, potential lawsuits, and a tarnished reputation. Not to mention, it’s a major red flag during inspections. Mold is more than just an eyesore—it’s a liability. That’s why prevention is your best friend.

At Projekt Restoration, we understand the importance of keeping your properties mold-free. With our full suite of restoration services—including water damage restoration, fire damage restoration, and biohazard clean up—we’re here to help you stay ahead of the game. Our team is COMMITTED TO QUALITY SERVICE. Call Us Now! 855-933-7935 for Fast, Friendly and Professional Service.

Let’s dive into some practical, actionable mold prevention tips that every property manager should have in their toolkit.

Tip #1: Control Moisture Like a Pro

Mold’s best friend? Moisture. If you can control moisture, you can control mold. It’s that simple. But how do you do that in a building full of tenants, pipes, and unpredictable weather?

Start with regular inspections. Check for leaks under sinks, around windows, and in basements. Don’t forget the roof—one small leak can lead to a major mold problem. Use dehumidifiers in areas prone to dampness, like basements and laundry rooms. And make sure your HVAC systems are working efficiently to keep humidity levels in check.

Another pro tip? Educate your tenants. Let them know how important it is to report leaks immediately. Encourage them to use exhaust fans when cooking or showering. The more eyes you have on potential moisture issues, the better.

If you do find water damage, act fast. The longer you wait, the more likely mold will grow. That’s where our water damage restoration services come in. We use specialized equipment to dry structures quickly and thoroughly, preventing mold before it starts.

Need help identifying hidden water damage? Check out our guide on How to Identify Hidden Water Damage Early.

Tip #2: Schedule Routine Inspections and Maintenance

Think of your property like a car. Without regular maintenance, things start to break down. And when it comes to mold, prevention is way cheaper than remediation. That’s why routine inspections are key.

Set up a maintenance schedule that includes checking plumbing, HVAC systems, roofing, and gutters. Look for signs of water intrusion, like stains on ceilings or walls, musty odors, or peeling paint. Don’t forget crawl spaces and attics—mold loves to hide in dark, damp places.

It’s also smart to inspect after heavy rains or storms. Water can sneak in through the smallest cracks, and if you catch it early, you can avoid a full-blown mold infestation. If you’re not sure what to look for, our team at Projekt Restoration can help. We offer comprehensive property restoration services, including emergency service for unexpected issues.

And don’t forget to document everything. Keep a log of inspections, repairs, and tenant complaints. This not only helps you stay organized but also protects you legally if mold becomes an issue down the line.

Tip #3: Invest in Proper Ventilation

Ventilation is like giving your property a breath of fresh air—literally. Without it, moisture builds up, and mold moves in. Bathrooms, kitchens, laundry rooms—these are all hotspots for mold if not properly ventilated.

Make sure all exhaust fans are working and vented to the outside (not just the attic). Encourage tenants to use them regularly, especially after showers or cooking. If your property has older systems, consider upgrading to energy-efficient models that run continuously at a low speed. These help maintain airflow and reduce humidity.

In multi-unit buildings, ventilation becomes even more critical. Shared walls and ceilings can trap moisture, especially in older buildings. Regularly inspect and clean air ducts, and consider installing dehumidifiers in common areas.

Need help improving your building’s ventilation? Our reconstruction services can help you upgrade your systems to prevent future mold issues. We’re all about customer satisfaction and long-term solutions.

Tip #4: Respond Quickly to Water Intrusions

Time is not on your side when it comes to water damage. Whether it’s a burst pipe, a leaking roof, or a flooded basement, the clock starts ticking the moment water hits your property. Mold can start growing in as little as 24-48 hours. That’s why a fast response is crucial.

Have a plan in place for emergencies. Know who to call, what steps to take, and how to communicate with tenants. Partnering with a reliable restoration company like Projekt Restoration ensures you get immediate help when you need it. We offer 24/7 emergency service for water and fire damage, so you’re never left scrambling.

Our water damage restoration team uses advanced drying equipment and moisture detection tools to ensure every drop is gone. We don’t just clean up the mess—we prevent mold from taking hold. And if mold has already started to grow, our mold remediation experts will handle it safely and thoroughly.

Want to see our work in action? Visit our gallery for before-and-after photos of real restoration projects.

Tip #5: Use Mold-Resistant Materials During Renovations

Renovating or upgrading your property? That’s the perfect time to think about mold prevention. Traditional building materials like drywall and wood are mold magnets. But today, there are mold-resistant options that can save you a lot of headaches down the road.

Consider using mold-resistant drywall, especially in high-moisture areas like bathrooms and basements. These materials are treated with anti-microbial agents that inhibit mold growth. You can also opt for mold-resistant insulation and paints, which add an extra layer of protection.

Flooring is another area to consider. Carpets can trap moisture and become a breeding ground for mold. Instead, go for tile, vinyl, or sealed concrete in moisture-prone areas. These materials are easier to clean and less likely to harbor mold.

Need help choosing the right materials? Our reconstruction services team can guide you through the process. We’ll help you make smart choices that enhance your property’s durability and value.

Tip #6: Educate Tenants and Staff

You can’t be everywhere at once. That’s why educating your tenants and staff is one of the most effective ways to prevent mold. When everyone knows what to look for and how to respond, small issues get caught before they become big problems.

Start by providing tenants with a simple mold prevention guide. Include tips like using exhaust fans, reporting leaks immediately, and avoiding overwatering houseplants. You can even include this info in your lease agreements or welcome packets.

Train your maintenance staff to recognize early signs of mold and water damage. Equip them with moisture meters and inspection checklists. The more proactive your team is, the better your chances of keeping mold at bay.

Need a resource to share with your team? Our blog is packed with helpful articles on mold, water damage, and property restoration. Bookmark it and share it with your crew!

Tip #7: Partner with a Professional Restoration Company

Let’s face it—mold prevention isn’t a one-person job. It takes a team. And when things go wrong, you need a partner you can trust. That’s where Projekt Restoration comes in.

We offer a full range of professional restoration services, including water damage restoration, fire damage restoration, mold remediation, and biohazard clean up. We’re available 24/7 for emergency service, and we’re committed to customer satisfaction every step of the way.

Our team is trained, certified, and equipped with the latest technology to handle any restoration challenge. Whether you’re dealing with a minor leak or a major disaster, we’ll help you get back on track—fast.

Want to learn more about how we work? Visit our How It Works page for a step-by-step breakdown of our process.

Conclusion

Mold prevention isn’t just about keeping your property looking good—it’s about protecting your investment, your tenants, and your peace of mind. As a property manager, you have the power to stop mold before it starts. With the right knowledge, tools, and partners, you can keep your buildings safe, healthy, and mold-free.

At Projekt Restoration, we’re here to support you every step of the way. From emergency response to long-term prevention, our restoration services are designed to meet your needs. Ready to take the next step? Contact us today or call 855-933-7935 for fast, friendly, and professional service.

What causes mold to grow in rental properties?

Mold grows when moisture is present, especially in areas with poor ventilation. Common causes include leaks, high humidity, and water damage. Keeping your property dry and well-ventilated is key to prevention.

How quickly should I respond to water damage?

Immediately. Mold can start growing within 24-48 hours. The faster you act, the better your chances of preventing mold. Call a professional restoration company like Projekt Restoration for emergency service.

Can tenants be held responsible for mold growth?

It depends. If mold results from tenant negligence—like not reporting leaks or failing to use ventilation—they may be held accountable. However, landlords are typically responsible for structural issues and repairs.

What are the signs of hidden mold?

Musty odors, water stains, peeling paint, and unexplained health issues can all indicate hidden mold. Learn more in our guide on how to identify hidden water damage early.

How can I find a reliable mold remediation company?

Look for certified professionals with experience in mold remediation and property restoration. Check reviews, ask for references, and make sure they offer 24/7 emergency service. Projekt Restoration checks all those boxes and more!

How to Prevent Water Damage from HVAC Leaks

Understanding the Hidden Dangers of HVAC Leaks

Let’s face it—your HVAC system is like the silent workhorse of your home. It keeps you cool in the summer, warm in the winter, and comfortable all year round. But what happens when that same system starts leaking water? You might not notice it right away, but over time, those small drips can turn into a full-blown disaster. Water damage from HVAC leaks is sneaky, expensive, and can lead to mold growth, structural issues, and even health hazards.

So, why does this happen? HVAC systems, especially air conditioners, produce condensation as they cool the air. Normally, this moisture is drained away through a condensate line. But when that line gets clogged or the system malfunctions, water can start pooling in places it shouldn’t. Before you know it, you’re calling in restoration services for emergency water damage restoration.

And trust us, it’s not just about puddles on the floor. Water can seep into walls, ceilings, and floors, causing hidden damage that’s hard to detect until it’s too late. That’s why it’s crucial to understand the risks and take proactive steps to prevent HVAC leaks from wreaking havoc on your property.

If you’re wondering how to spot the signs early, check out our guide on how to identify hidden water damage early. It’s a game-changer for homeowners who want to stay ahead of the curve.

Common Causes of HVAC Water Leaks

Alright, let’s dig into the “why.” What causes your HVAC system to leak in the first place? Understanding the root causes is the first step toward prevention. Here are the most common culprits:

  • Clogged Condensate Drain Line: This is the most frequent offender. Dirt, dust, and algae can build up in the drain line, blocking the flow of water and causing it to back up into your home.
  • Damaged or Rusted Drain Pan: Over time, the drain pan can crack or rust, especially if your system is older. When this happens, water has nowhere to go but down—into your ceiling or floor.
  • Improper Installation: If your HVAC system wasn’t installed correctly, it might not be level. This can cause water to pool in the wrong areas and eventually leak out.
  • Low Refrigerant Levels: When refrigerant levels drop, the evaporator coil can freeze. When it melts, the excess water can overwhelm the drain pan and cause leaks.

Each of these issues can lead to serious water damage if not addressed promptly. That’s why it’s essential to have a trusted property restoration partner on speed dial—someone who offers not just water damage restoration, but also fire damage restoration, mold remediation, and even biohazard clean up.

At Projekt Restoration, we’re COMMITTED TO QUALITY SERVICE. Call Us Now! 855-933-7935 for Fast, Friendly and Professional Service.

Signs Your HVAC System Might Be Leaking

So, how do you know if your HVAC system is leaking? Sometimes, the signs are obvious—like water pooling around the unit. But other times, the clues are more subtle. Here’s what to look for:

  • Unusual Moisture or Dampness: If you notice damp spots on your ceiling, walls, or floors near your HVAC unit, that’s a red flag.
  • Musty Odors: A musty smell often indicates mold growth, which thrives in damp environments caused by leaks.
  • Increased Humidity: If your home feels more humid than usual, your HVAC system might not be draining properly.
  • Water Stains: Brown or yellow stains on the ceiling or walls are a telltale sign of water damage.

Don’t ignore these signs. The longer you wait, the worse the damage can get. And once mold sets in, you’ll need professional mold remediation to make your home safe again.

Need help figuring out what’s going on? Our FAQ section answers common questions about HVAC leaks and water damage restoration. Or check out our blog for more tips and tricks.

Preventative Maintenance Tips for Your HVAC System

Now that you know what to look for, let’s talk prevention. Keeping your HVAC system in tip-top shape can save you thousands in water damage restoration costs. Here are some easy maintenance tips you can follow:

  • Clean the Condensate Drain Line: Use a mixture of vinegar and water to flush the line every few months. This helps prevent clogs and algae buildup.
  • Inspect the Drain Pan: Check for cracks or rust. If it’s damaged, replace it immediately to avoid leaks.
  • Change Your Air Filters: Dirty filters can restrict airflow, causing the evaporator coil to freeze and leak when it melts.
  • Schedule Regular Inspections: Have a professional inspect your HVAC system at least once a year. They can catch small issues before they become big problems.

Think of it like going to the dentist. You wouldn’t skip your annual check-up, right? The same logic applies here. Regular maintenance is the key to avoiding costly repairs and ensuring customer satisfaction.

Need help with maintenance? Our how it works page breaks down our process step-by-step, so you know exactly what to expect when you call us for professional restoration.

What to Do If You Discover a Leak

Okay, so you’ve found a leak. Now what? First, don’t panic. Here’s a step-by-step guide to minimize the damage and get things under control:

  1. Turn Off the HVAC System: This prevents more water from leaking and gives you a chance to assess the situation.
  2. Soak Up Standing Water: Use towels or a wet/dry vacuum to remove as much water as possible.
  3. Call for Emergency Service: Time is of the essence. Reach out to a company that offers 24/7 emergency service for water damage restoration.
  4. Document the Damage: Take photos and videos for insurance purposes. This will help speed up your claim.
  5. Schedule a Professional Inspection: Even if the leak seems minor, hidden damage can be extensive. A professional can assess the full extent and recommend next steps.

At Projekt Restoration, we offer comprehensive reconstruction services to restore your home to its original condition—or better. From water damage to fire damage restoration, we’ve got you covered.

Why Professional Restoration Matters

You might be tempted to handle water damage yourself, especially if it seems minor. But here’s the thing—DIY fixes often miss the hidden damage lurking behind walls and under floors. That’s where professional restoration services come in.

We use specialized equipment to detect moisture, dry out affected areas, and prevent mold growth. Our team is trained in mold remediation, biohazard clean up, and structural repairs. We don’t just clean up the mess—we make sure it doesn’t come back.

And let’s not forget about peace of mind. When you hire a professional, you’re not just paying for a service—you’re investing in your home’s future. You’re ensuring customer satisfaction and protecting your family’s health and safety.

Want to see our work in action? Check out our gallery for before-and-after photos of real restoration projects.

Conclusion

Preventing water damage from HVAC leaks isn’t just about saving money—it’s about protecting your home, your health, and your peace of mind. By understanding the risks, recognizing the signs, and taking proactive steps, you can avoid costly repairs and keep your HVAC system running smoothly.

And if the worst does happen? Don’t worry. Projekt Restoration is here to help with fast, friendly, and professional service. From water damage restoration to fire damage restoration, mold remediation, and more—we’ve got your back.

COMMITTED TO QUALITY SERVICE Call Us Now! 855-933-7935

What should I do if I notice water near my HVAC unit?

First, turn off the system to prevent further leakage. Then, soak up any standing water and call a professional restoration company like Projekt Restoration for an inspection. Acting quickly can prevent more serious damage.

How often should I clean my HVAC drain line?

It’s a good idea to clean your condensate drain line every 3-6 months. You can use a vinegar and water solution to flush it out and prevent clogs. Regular maintenance helps avoid leaks and water damage.

Can HVAC leaks cause mold growth?

Absolutely. Moisture from HVAC leaks creates the perfect environment for mold to thrive. If you notice a musty smell or see visible mold, contact a professional for mold remediation immediately.

Is water damage from HVAC leaks covered by insurance?

In many cases, yes—especially if the leak was sudden and accidental. However, damage from long-term neglect may not be covered. Always check with your insurance provider and document the damage thoroughly.

Why should I hire a professional restoration company?

Professional restoration companies have the tools and expertise to detect hidden damage, dry out affected areas, and prevent future issues like mold. They also handle reconstruction services and ensure customer satisfaction from start to finish.

Fire Damage Risks During Home Renovations

Home renovations can breathe new life into your living space, but they also come with unexpected hazards—one of the most serious being fire damage risks during home renovations. Whether you’re upgrading your kitchen, rewiring electrical systems, or using heat-producing tools, the potential for fire hazards increases significantly. At COMMITTED TO QUALITY SERVICE, we understand how critical it is to protect your home during every phase of remodeling. Our team offers fast, friendly, and professional fire damage restoration services to help homeowners recover quickly and safely. With our specialized equipment and expert knowledge, we mitigate affected areas efficiently to prevent further damage. If you’re planning a renovation, it’s essential to be aware of fire safety measures and have a trusted partner ready to respond. Call Us Now! 855-933-7935 for expert assistance and peace of mind.

Common Causes of Fire During Renovation Projects

Home renovation projects are exciting opportunities to enhance the comfort, value, and aesthetics of your living space. However, they also come with a unique set of risks, particularly the increased potential for fire damage. Understanding the common causes of fire during renovation projects is crucial for homeowners, contractors, and renovation teams to ensure safety and prevent costly disasters.

One of the leading causes of fire during home renovations is the use of heat-producing tools and equipment. Devices such as soldering irons, heat guns, welding torches, and grinders are frequently used in tasks like plumbing, roofing, and metalwork. These tools can easily ignite flammable materials such as insulation, wood framing, or dust particles if not handled with care. According to the National Fire Protection Association (NFPA), “hot work” was responsible for an average of 4,580 structure fires per year between 2014 and 2018.

Another significant risk factor is faulty or temporary electrical wiring. During renovations, it’s common to install temporary power sources or rewire parts of the home. If these electrical systems are not properly grounded or are overloaded, they can spark and ignite nearby combustible materials. Older homes are particularly vulnerable, as outdated wiring may not meet current safety standards. It’s essential to have a licensed electrician inspect and manage any electrical modifications to minimize fire hazards.

Improper storage and handling of flammable materials also contribute to fire risks. Paints, solvents, adhesives, and other chemicals used in construction are highly combustible. When stored near heat sources or exposed to open flames, these substances can ignite quickly. Contractors and homeowners should always follow manufacturer guidelines for storage and ensure that these materials are kept in cool, ventilated areas away from ignition sources.

Negligence or lack of awareness is another common cause of fire during renovations. Workers may leave tools running unattended, discard cigarette butts improperly, or fail to clean up flammable debris. These seemingly minor oversights can lead to devastating consequences. Ensuring that all personnel are trained in fire safety protocols and that a fire extinguisher is readily available on-site can significantly reduce these risks.

Additionally, demolition work can expose hidden fire hazards. Tearing down walls or ceilings may reveal old wiring, gas lines, or other combustible elements that were previously concealed. If these components are damaged or disturbed during the renovation process, they can become ignition points. A thorough inspection before beginning any demolition is essential to identify and mitigate these hidden dangers.

“Fire safety should be a top priority during any home renovation project. A single spark can lead to significant property damage, injury, or even loss of life,” warns the U.S. Fire Administration.

To illustrate the most common causes of fire during renovations, consider the following examples:

  1. A homeowner using a heat gun to remove old paint accidentally ignites nearby insulation, leading to a fire that causes extensive damage to the attic.
  2. Temporary lighting installed during a kitchen remodel overloads the circuit, sparking a fire that spreads through the walls before firefighters can contain it.
  3. Improper disposal of oily rags used for staining wood results in spontaneous combustion overnight, destroying a newly renovated basement.

Preventing fire damage during renovations requires a proactive approach. Homeowners should work with licensed professionals who understand the risks and follow strict safety protocols. It’s also wise to consult with a restoration expert to assess potential vulnerabilities before beginning any major project.

For more information on how to protect your home during renovations, visit our services page. If you’re dealing with the aftermath of a fire, our fire damage restoration team is here to help you recover quickly and safely.

To stay informed about other home safety topics, check out our helpful resources such as the blog or learn more about our commitment to safety and excellence on our our mission page.

By understanding and addressing the common causes of fire during renovation projects, you can ensure that your home improvement efforts are both successful and safe.

Electrical Hazards and Wiring Mistakes

During home renovations, one of the most overlooked yet critical fire damage risks stems from electrical hazards and improper wiring practices. Whether you are upgrading your lighting, installing new appliances, or rewiring entire sections of your home, any misstep in electrical work can lead to severe consequences. Faulty wiring is a leading cause of residential fires, and during renovations, the risk increases significantly due to the temporary disruption of existing systems and the introduction of new electrical components. Homeowners often assume that minor electrical tasks can be handled without professional help, but even small errors—such as overloading circuits, using the wrong wire gauge, or failing to secure connections properly—can result in overheating, sparks, or short circuits that ignite surrounding materials.

One common mistake during renovations is failing to adhere to local electrical codes. These codes are in place to ensure safety and efficiency, but DIY renovators or unlicensed contractors may overlook them, either out of ignorance or in an attempt to cut costs. For example, running wires through insulation without proper protection can cause the wires to overheat, increasing the risk of fire. Similarly, connecting new wiring to outdated or damaged electrical panels can create dangerous imbalances in the system. It is essential to have a licensed electrician inspect and approve any electrical work to ensure compliance and safety.

Another significant hazard arises when temporary power sources are used during renovations. Extension cords and temporary wiring setups are often employed to power tools and lighting, but these are not designed for long-term use. Overloading extension cords or daisy-chaining multiple cords together can lead to overheating and electrical fires. Additionally, exposed wires and open junction boxes are common on renovation sites, posing a direct fire risk if they come into contact with flammable materials like wood, drywall dust, or insulation.

Renovation projects also often involve drilling, cutting, or demolishing walls, which can inadvertently damage hidden electrical wiring. Accidentally cutting into a live wire not only poses a risk of electrocution but can also cause sparks that ignite nearby debris. This is particularly dangerous in older homes where wiring may not be up to modern safety standards. Before beginning any demolition or structural changes, it is crucial to map out existing electrical layouts and shut off power to affected areas.

To mitigate these risks, homeowners should prioritize hiring qualified professionals for all electrical work during renovations. A certified electrician will ensure that all installations meet current safety standards and are properly grounded and insulated. Additionally, using high-quality materials and avoiding shortcuts can significantly reduce the likelihood of fire hazards. Regular inspections throughout the renovation process can help identify potential issues early, preventing costly and dangerous outcomes later.

Understanding the broader implications of electrical safety during renovations is vital for protecting your home and family. Fire damage resulting from electrical mistakes can be devastating, leading to loss of property, costly repairs, and even injury. If your home has already suffered from fire-related incidents, seeking professional help is essential. Learn more about our specialized fire damage restoration services to ensure your home is safely restored and protected against future risks.

At Projekt Restoration, we are committed to helping homeowners navigate the complexities of renovation safety. Our team provides a wide range of services designed to identify and address potential hazards before they become serious problems. Whether you are planning a minor remodel or a full-scale renovation, we are here to support you every step of the way. For more information about our approach and values, visit our about page to learn how we prioritize safety, quality, and customer satisfaction in every project.

The Role of Flammable Materials in Fire Risk

During home renovations, one of the most overlooked yet critical fire hazards is the presence and use of flammable materials. These substances, which include solvents, adhesives, paint thinners, insulation, and even sawdust, can significantly increase the risk of fire if not handled properly. Renovation projects often involve a combination of heat-producing tools, open electrical wiring, and combustible materials, creating a perfect storm for potential fire outbreaks. Understanding how these materials contribute to fire risk is essential for homeowners and contractors alike to ensure safety throughout the renovation process.

Flammable materials are commonly used in various stages of home improvement. For instance, oil-based paints and varnishes emit volatile organic compounds (VOCs) that can ignite when exposed to high temperatures or sparks. Similarly, construction dust, especially fine particles like sawdust, can become highly combustible when suspended in the air. When combined with power tools or faulty wiring, these materials can ignite quickly, leading to devastating fire damage. This is why it is crucial to store and dispose of these substances correctly and to maintain proper ventilation in work areas.

Another significant concern is the improper storage of flammable liquids. Many homeowners and even contractors store these materials in garages or basements without considering the potential fire hazards. These areas often lack adequate ventilation and may contain ignition sources such as water heaters or electrical panels. A small spark in such an environment can lead to a major fire. To mitigate this risk, flammable materials should be stored in approved containers and kept away from heat sources. Additionally, it is advisable to limit the quantity of these substances on-site and to use them only when necessary.

Electrical systems also play a role in increasing fire risk during renovations. Temporary lighting, extension cords, and power tools can overload circuits, especially in older homes with outdated wiring. When these electrical components come into contact with flammable materials, the risk of fire escalates. Ensuring that all electrical work is performed by licensed professionals and that circuits are not overloaded is a key step in reducing fire hazards. Moreover, using ground fault circuit interrupters (GFCIs) and circuit breakers can provide an added layer of protection.

It is also important to consider the role of human error in fire incidents. Workers may inadvertently leave heat-producing tools like soldering irons or heat guns unattended, or they may smoke near flammable substances. These actions, though seemingly minor, can have catastrophic consequences. Establishing strict safety protocols and ensuring that all workers are trained in fire prevention can significantly reduce these risks. Homeowners should also be proactive in discussing fire safety measures with their contractors before the renovation begins.

In the unfortunate event that a fire does occur, the damage can be extensive, affecting not only the structure of the home but also personal belongings and indoor air quality. Fire damage restoration is a complex process that requires professional expertise to ensure thorough cleanup and repair. For more information on how to handle such situations, visit our fire damage page. Additionally, our services section provides a comprehensive overview of the restoration solutions we offer to help homeowners recover quickly and safely.

Preventing fire damage during home renovations starts with awareness and proper planning. By understanding the risks associated with flammable materials and taking proactive steps to manage them, homeowners can protect their property and loved ones. Whether you are planning a minor update or a major remodel, always prioritize fire safety to ensure a successful and hazard-free renovation experience.

Importance of Fire Safety Planning Before Renovation

Before beginning any home renovation project, it is crucial to prioritize fire safety planning to prevent potential fire damage risks. Renovations often involve activities that increase the likelihood of fire hazards, such as electrical rewiring, the use of flammable materials, and the operation of power tools. Without a comprehensive fire safety plan in place, homeowners may unknowingly expose their property and loved ones to serious danger. Proper planning not only safeguards the home but also ensures that the renovation process proceeds smoothly and without costly setbacks.

One of the key reasons fire safety planning is essential before renovation is the presence of combustible materials. During remodeling, materials like wood, insulation, and solvents are often stored on-site. When combined with heat sources such as welding equipment or faulty wiring, these materials can easily ignite. A fire safety plan helps identify these risks in advance and outlines strategies to mitigate them, such as proper storage, ventilation, and the use of fire-retardant materials.

Another important aspect of fire safety planning is ensuring that all electrical systems are up to code. Renovations frequently involve modifying or upgrading electrical wiring, which, if done improperly, can lead to short circuits or overheating. Hiring licensed professionals and conducting thorough inspections before and after electrical work can significantly reduce the risk of fire. Additionally, a fire safety plan should include the installation of smoke detectors and fire extinguishers in key areas of the home, especially near construction zones.

Communication with contractors and workers is also vital. Everyone involved in the renovation should be aware of the fire safety protocols in place. This includes knowing the location of fire extinguishers, understanding emergency exit routes, and being trained on how to respond in case of a fire. Clear communication ensures that all parties are aligned in maintaining a safe working environment.

Moreover, fire safety planning should take into account the specific layout and structure of the home. Older homes, for example, may have outdated wiring or hidden structural vulnerabilities that increase fire risk. A thorough assessment of the property before starting renovations can help uncover these issues and allow for proactive measures to be taken. This is especially important for homeowners who have previously experienced water or fire damage, as these incidents can compromise the integrity of building materials.

Incorporating fire safety into the renovation process also aligns with broader home protection strategies. For instance, homeowners who are already addressing issues like water damage or mold remediation can integrate fire prevention measures into their overall restoration plan. This holistic approach not only enhances safety but also adds long-term value to the property.

For those seeking professional guidance, working with experienced restoration and renovation experts can make a significant difference. Companies that specialize in damage restoration often offer comprehensive services that include fire risk assessments and safety planning. These professionals understand the complexities of home construction and can provide tailored solutions that address both immediate and future fire hazards.

Homeowners can also benefit from exploring additional resources and insights provided by reputable restoration companies. Visiting the blog section of a trusted service provider’s website can offer valuable tips on fire prevention, renovation best practices, and emergency preparedness. Staying informed empowers homeowners to make smarter decisions and reinforces the importance of proactive planning.

In conclusion, fire safety planning is a critical step that should never be overlooked before starting a home renovation. By identifying potential hazards, ensuring code compliance, and fostering clear communication among all parties involved, homeowners can significantly reduce the risk of fire damage. Taking these precautions not only protects the home and its occupants but also ensures that the renovation process is both safe and successful.

How to Safely Use Power Tools and Equipment

Using power tools and equipment during home renovations can significantly increase the risk of fire damage if not handled properly. These tools often generate heat, friction, and sparks, all of which can ignite nearby flammable materials. To minimize fire hazards, it is essential to follow strict safety protocols and understand the proper use of each tool. Start by reading the manufacturer’s instructions and safety guidelines for every piece of equipment. Ensure that all tools are in good working condition before use, and never attempt to operate a damaged or malfunctioning device. Regular maintenance and inspections can help prevent electrical faults that may lead to overheating or short circuits.

One of the most important safety measures is to keep your work area clean and free of combustible materials such as sawdust, paper, and solvents. These substances can easily catch fire if exposed to sparks or high heat. Always unplug tools when not in use and avoid overloading electrical circuits, which can cause overheating and potentially start a fire. Using power tools with built-in safety features like automatic shut-off mechanisms and thermal protection can also reduce the risk of fire-related incidents.

Proper ventilation is another critical factor when using power tools, especially those that emit fumes or dust. Poor air circulation can allow flammable vapors to accumulate, increasing the likelihood of ignition. Make sure your workspace is well-ventilated, and consider using fans or exhaust systems to disperse hazardous particles. Additionally, always wear appropriate personal protective equipment such as gloves, goggles, and fire-resistant clothing to protect yourself from sparks and debris.

It is also wise to have a fire extinguisher readily accessible in your work area. Knowing how to use it effectively can make a significant difference in containing a small fire before it spreads. Make sure everyone involved in the renovation project is aware of the location of fire extinguishers and understands basic fire safety procedures. In case of an emergency, having a clear evacuation plan can help ensure everyone’s safety.

When working in older homes, be especially cautious, as outdated wiring and insulation materials can pose additional fire risks. Before beginning any renovation, it may be beneficial to consult with professionals who specialize in fire damage prevention. You can learn more about these services by visiting our services page. If you suspect any hidden issues that could contribute to fire hazards, such as faulty wiring or previous fire damage, it’s crucial to address them before starting your project.

For those unfamiliar with the proper handling of power tools, consider taking a safety course or hiring a licensed contractor. This not only ensures the job is done correctly but also significantly reduces the risk of accidents. At Projekt Restoration, we emphasize the importance of safety and preparedness in every renovation project. To understand more about our commitment to safety and excellence, visit our our mission page.

In conclusion, while power tools are essential for efficient home renovations, they must be used with caution to prevent fire damage. By maintaining equipment, keeping workspaces clean, ensuring proper ventilation, and staying informed about fire safety practices, homeowners can significantly reduce the risk of fire-related incidents. Taking these precautions not only protects your property but also ensures the safety of everyone involved in the renovation process.

Tips for Working with Contractors to Minimize Fire Risk

When undertaking a home renovation, collaborating effectively with contractors is essential to minimizing fire risks. Clear communication and proactive planning can significantly reduce the chances of fire-related incidents during construction or remodeling. Begin by selecting licensed and insured contractors who have experience with fire safety protocols. Before any work begins, discuss fire prevention strategies and ensure that your contractor understands the importance of maintaining a clean and organized worksite. Flammable materials such as paint, solvents, and construction debris should be stored properly and away from heat sources. It is also wise to request a detailed project plan that outlines how fire hazards will be managed throughout the renovation process.

One of the most effective ways to prevent fire damage is by ensuring that all electrical work is performed by a certified electrician. Faulty wiring or overloaded circuits are common causes of fires during renovations. Make sure your contractor obtains the necessary permits and follows local building codes. If your renovation involves welding, soldering, or other heat-producing activities, insist on a fire watch protocol. This includes having a fire extinguisher nearby and monitoring the area for at least 30 minutes after the work is completed to ensure no smoldering materials are left behind.

Daily inspections are another important step in reducing fire risk. Encourage your contractor to conduct end-of-day checks to ensure that all tools are turned off, extension cords are unplugged, and combustible materials are secured. If you are living in the home during renovations, establish clear boundaries between the construction zone and your living space. This not only protects your family but also limits the spread of fire should an incident occur.

It is also beneficial to review your homeowner’s insurance policy before starting any renovation. Some policies may require notification or additional coverage for construction projects. Discuss this with your contractor to ensure that their insurance also covers fire-related incidents. In case of an emergency, having a fire response plan in place can make a significant difference. Make sure all workers know the location of fire extinguishers and exits, and consider installing temporary smoke detectors in the renovation area.

Working with a contractor who values safety and transparency can make your renovation smoother and safer. Ask for references and check reviews to ensure they have a good track record. You can also explore the contractor’s background and values by visiting their about page. A company that prioritizes safety will often have clear guidelines and training in place for their team.

In addition to fire prevention, consider how your renovation might impact other areas of your home. For instance, fire damage can sometimes lead to secondary issues like water damage from firefighting efforts. Understanding the full scope of potential risks can help you plan more effectively. Learn more about comprehensive restoration services that address both fire and water damage to ensure your home is fully protected.

Ultimately, minimizing fire risk during home renovations requires a collaborative effort between you and your contractor. By setting clear expectations, maintaining open communication, and prioritizing safety at every stage, you can significantly reduce the likelihood of fire damage and ensure a successful renovation project.

What to Do If a Fire Breaks Out During Renovation

In the unfortunate event that a fire breaks out during a home renovation, acting quickly and efficiently is crucial to minimize damage and ensure the safety of everyone involved. The first and most important step is to evacuate the premises immediately. Make sure all workers, family members, and pets are safely out of the house. Do not attempt to retrieve personal belongings or tools, as time is of the essence and your safety is the top priority. Once everyone is at a safe distance, call emergency services to report the fire. Provide them with clear information about the location and any potential hazards, such as flammable materials or structural vulnerabilities due to ongoing renovations.

While waiting for emergency responders, avoid re-entering the building under any circumstances. Fires during renovations can spread rapidly, especially when construction materials like wood, insulation, and solvents are present. These materials can accelerate the fire and release toxic fumes, making the environment extremely dangerous. If it is safe to do so and you have access to a fire extinguisher, you may attempt to control a small fire, but only if you are trained and confident in using it. Otherwise, leave firefighting to the professionals.

After the fire has been extinguished and the property is deemed safe to enter, it is essential to assess the extent of the damage. Contact a professional restoration company that specializes in fire damage recovery. They can help evaluate structural integrity, remove debris, and begin the cleanup process. At Projekt Restoration, our expert team offers comprehensive fire damage services to help homeowners recover quickly and safely. We understand the unique challenges that come with fire incidents during renovations and are equipped to handle both minor and extensive damage.

Documenting the damage is another critical step. Take photographs and detailed notes of all affected areas and items. This documentation will be invaluable when filing an insurance claim. Notify your insurance provider as soon as possible and provide them with all necessary information. A reputable restoration company can also assist with the insurance process, ensuring that you receive the compensation you are entitled to.

In addition to fire damage, it is not uncommon for water damage to occur as a result of firefighting efforts. Water used to extinguish the flames can seep into walls, floors, and ceilings, leading to further complications such as mold growth. Prompt action is necessary to address this secondary damage. Our team at Projekt Restoration also offers specialized water damage services to mitigate these risks and restore your home to its pre-loss condition.

Preventing future incidents is equally important. After the fire, take time to review what may have caused the outbreak. Common culprits during renovations include faulty wiring, unattended heat sources, and improper storage of flammable materials. Implementing stricter safety protocols, such as regular inspections and proper storage practices, can significantly reduce the risk of another fire. Educate all workers and household members on fire safety procedures and ensure that fire extinguishers and smoke detectors are readily available and functional.

For more information on how we handle emergencies and support homeowners through the restoration process, visit our services page. You can also learn more about our company values and commitment to safety by exploring our about section. Taking proactive steps and knowing how to respond effectively can make all the difference when facing the unexpected challenge of a fire during home renovations.

In conclusion, while home renovations can breathe new life into your living space, they also come with increased fire risks that should not be overlooked. From electrical upgrades and welding work to the use of flammable materials, each stage of a renovation project presents potential hazards. By staying informed, working with licensed professionals, and implementing proper safety measures, homeowners can significantly reduce the risk of fire damage. Prioritizing fire safety not only protects your investment but also ensures the well-being of everyone in your home. Renovate smart—plan ahead, stay vigilant, and keep fire safety at the forefront of your renovation journey.

How to Handle Mold in Commercial Bathrooms

How to Handle Mold in Commercial Bathrooms: A Complete Guide for Business Owners


COMMITTED TO QUALITY SERVICE

Call Us Now! 855-933-7935

Fast, Friendly and Professional Service.

Our Services:

Water Damage – Water Damage Restoration requires special equipment designed specifically for drying structures that have suffered severe water damage. LEARN MORE

Fire Damage – The most crucial step in the fire restoration process is to quickly mitigate the affected area and recover as much as possible. LEARN MORE


Mold in Commercial Bathrooms: Why It’s a Serious Problem

Mold in commercial bathrooms isn’t just an eyesore—it’s a ticking time bomb for your business. From health risks to structural damage, mold can wreak havoc if left unchecked. Whether you run a restaurant, office building, or retail space, understanding how to handle mold is crucial for maintaining a safe and professional environment.

In this comprehensive guide, we’ll walk you through everything you need to know about identifying, treating, and preventing mold in commercial bathrooms. We’ll also explore how restoration services like water damage restoration, fire damage restoration, and mold remediation can help you stay ahead of the curve.


Understanding the Causes of Mold in Commercial Bathrooms

High Humidity and Poor Ventilation

Bathrooms are naturally humid, but when ventilation is poor, moisture lingers. This creates the perfect breeding ground for mold. Installing exhaust fans and ensuring proper airflow can significantly reduce the risk.

Leaky Pipes and Plumbing Issues

Even a small leak behind a wall or under a sink can lead to mold growth. Regular plumbing inspections are essential to catch issues early. Learn more about identifying hidden water damage here.


Signs of Mold in Commercial Bathrooms

Visible Mold Growth

Black, green, or white patches on walls, ceilings, or tiles are clear indicators. Don’t ignore them—what you see is often just the tip of the iceberg.

Musty Odors

If your bathroom smells like a damp basement, mold is likely present. This odor is caused by microbial volatile organic compounds (MVOCs) released by mold spores.


Health Risks Associated with Mold Exposure

Respiratory Issues

Mold spores can trigger asthma, allergies, and other respiratory problems, especially in sensitive individuals. This poses a liability risk for businesses.

Skin and Eye Irritation

Prolonged exposure can cause rashes, itchy eyes, and other skin conditions. Employees and customers alike are at risk.


Legal and Compliance Concerns

OSHA Regulations

The Occupational Safety and Health Administration (OSHA) requires employers to maintain a safe workplace. Mold violations can lead to fines and lawsuits.

ADA Accessibility and Mold

Mold can compromise accessibility features like grab bars and non-slip flooring, putting your business at odds with the Americans with Disabilities Act (ADA).


Initial Steps to Take When You Discover Mold

Isolate the Area

Prevent the spread of spores by closing off the affected area. Use plastic sheeting and seal vents if necessary.

Call a Professional Restoration Company

DIY methods won’t cut it. Contact a company that specializes in mold remediation and water damage restoration for a thorough assessment.


Why Professional Mold Remediation is Essential

Advanced Equipment and Techniques

Professionals use HEPA vacuums, air scrubbers, and antimicrobial treatments to eliminate mold at the source. This ensures long-term results.

Certified Technicians

Certified mold remediation experts follow industry standards like those set by the IICRC (Institute of Inspection Cleaning and Restoration Certification).


The Role of Water Damage Restoration in Mold Prevention

Drying and Dehumidification

After a leak or flood, drying the area quickly is crucial. Water damage restoration services use industrial-grade dehumidifiers and air movers to prevent mold growth.

Moisture Detection Tools

Infrared cameras and moisture meters help detect hidden dampness behind walls and under floors, ensuring nothing is missed.


Fire Damage Restoration and Mold Risks

Water Used to Extinguish Fires

Ironically, putting out a fire can lead to water damage, which in turn causes mold. Fire damage restoration must include mold prevention strategies.

Smoke and Soot Residue

These residues can trap moisture and create a breeding ground for mold. Proper cleaning is essential.


Emergency Service for Mold Outbreaks

24/7 Availability

Mold doesn’t wait for business hours. Choose a company that offers emergency service to tackle the problem immediately.

Rapid Response Teams

Time is of the essence. A quick response can mean the difference between a minor issue and a major renovation.


Property Restoration After Mold Removal

Rebuilding Damaged Areas

Once mold is removed, affected drywall, flooring, and fixtures may need replacing. Property restoration ensures your bathroom looks brand new.

Upgrading Materials

Consider mold-resistant drywall and anti-microbial paint to prevent future problems.


Biohazard Clean Up and Mold

When Mold Becomes a Biohazard

In extreme cases, mold can be classified as a biohazard, especially if it’s toxic black mold. Biohazard clean up protocols must be followed.

Protective Gear and Disposal

Professionals wear hazmat suits and use sealed containers to dispose of contaminated materials safely.


Reconstruction Services Post-Mold Remediation

Structural Repairs

Mold can weaken walls, ceilings, and floors. Reconstruction services restore your property to its original condition—or better.

Code Compliance

Ensure all repairs meet local building codes and health regulations to avoid future issues.


Customer Satisfaction: The Ultimate Goal

Transparent Communication

From start to finish, you should be kept in the loop. A professional restoration company values customer satisfaction above all else.

Post-Service Follow-Up

Reputable companies offer follow-up inspections to ensure the mold hasn’t returned. Learn more about our commitment to quality here.


Professional Restoration: What to Look For

Certifications and Experience

Choose a company with IICRC certification and years of experience in professional restoration.

Positive Reviews and Case Studies

Check out their gallery and blog for real-world examples of successful mold remediation projects.


Preventative Measures for Mold in Commercial Bathrooms

Routine Inspections

Schedule regular inspections to catch mold early. Prevention is always cheaper than remediation.

Humidity Control

Install dehumidifiers and monitor humidity levels to keep them below 60%.


Cleaning Protocols to Prevent Mold

Daily Cleaning Routines

Use mold-killing cleaners and disinfectants on all surfaces. Pay special attention to grout lines and corners.

Weekly Deep Cleans

Scrub tiles, clean vents, and check for leaks. Document your cleaning schedule for compliance purposes.


Training Staff to Spot Mold Early

Employee Education

Train janitorial and maintenance staff to recognize early signs of mold. Empower them to report issues immediately.

Clear Reporting Channels

Set up a system for staff to report mold sightings quickly and efficiently.


Using Technology to Monitor Mold Risk

Smart Sensors

Install moisture and humidity sensors that alert you to potential problems in real-time.

Data Logging

Track environmental conditions over time to identify trends and prevent outbreaks.


Cost of Mold Remediation in Commercial Bathrooms

Factors That Affect Pricing

Size of the affected area, type of mold, and extent of damage all play a role. Get a detailed quote before work begins.

Insurance Coverage

Check with your provider to see if mold remediation is covered under your commercial property insurance.


Choosing the Right Restoration Partner

Local Expertise

Choose a company familiar with your area’s climate and building codes. See our serving areas for more info.

Full-Service Capabilities

From mold remediation to reconstruction services, your provider should handle it all under one roof.


FAQs About Mold in Commercial Bathrooms

1. How fast does mold grow in a bathroom?

Mold can begin growing within 24-48 hours in damp conditions. That’s why immediate action is critical.

2. Can I remove mold myself?

Small patches may be manageable, but commercial bathrooms require professional remediation to ensure safety and compliance.

3. Is black mold more dangerous than other types?

Yes, black mold (Stachybotrys chartarum) can produce mycotoxins that are harmful to health. Always consult a professional.

4. How do I prevent mold from returning?

Control humidity, fix leaks promptly, and schedule regular inspections. Use mold-resistant materials during renovations.

5. What’s the difference between mold removal and mold remediation?

Mold removal is just cleaning visible mold. Mold remediation addresses the root cause and prevents recurrence.

6. How do I choose a mold remediation company?

Look for certifications, experience, and positive customer reviews. Visit our FAQ page for more tips.


Final Thoughts: Take Mold in Commercial Bathrooms Seriously

Ignoring mold in commercial bathrooms is like playing with fire—it’s only a matter of time before it burns you. From health hazards to legal liabilities, the risks are too great to overlook. But with the right knowledge, tools, and partners, you can tackle mold head-on and keep your business safe and compliant.

Need help now? COMMITTED TO QUALITY SERVICE

Call Us Today: 855-933-7935

Fast, Friendly and Professional Service.

Explore our full range of services including water damage restoration, fire damage restoration, mold remediation, biohazard clean up, and reconstruction services.

We’re here to restore your property and your peace of mind—with a commitment to customer satisfaction and professional restoration every step of the way.

Fire Damage Safety Tips for Property Managers

Understanding the Importance of Fire Safety in Property Management

Let’s face it—being a property manager isn’t just about collecting rent and scheduling maintenance. It’s about protecting your tenants, your property, and your peace of mind. One of the most critical threats to any building is fire. Whether it’s a small kitchen mishap or a full-blown blaze, fire damage can be devastating. That’s why knowing how to prevent, respond to, and recover from fire incidents is essential.

Fire safety isn’t just a checkbox on your to-do list—it’s a responsibility. Property managers are the first line of defense when it comes to ensuring that buildings are up to code, tenants are informed, and emergency plans are in place. And when disaster strikes, knowing who to call for fire damage restoration and emergency service can make all the difference.

At Projekt Restoration, we’re COMMITTED TO QUALITY SERVICE. Call Us Now! 855-933-7935 for Fast, Friendly and Professional Service. We specialize in water damage restoration, fire damage restoration, mold remediation, and more. Let’s dive into the essential fire damage safety tips every property manager should know.

Conduct Regular Fire Risk Assessments

Think of a fire risk assessment like a health check-up for your property. You wouldn’t ignore a strange noise in your car, right? So why ignore potential fire hazards in your building? Regular assessments help you identify risks before they become disasters.

Start by walking through your property with a critical eye. Look for overloaded electrical outlets, blocked fire exits, and improperly stored flammable materials. Don’t forget to check smoke detectors and fire extinguishers—they’re your first line of defense. If you’re not sure what to look for, consider hiring a professional to conduct a thorough inspection.

Once you’ve identified the risks, take action. Replace faulty wiring, clear out cluttered hallways, and ensure all fire safety equipment is up to date. Document everything. This not only helps with compliance but also shows tenants you take their safety seriously.

Need help understanding what to look for? Check out our blog for more tips or visit our FAQ section for answers to common questions.

Install and Maintain Fire Safety Equipment

Imagine trying to put out a fire with a garden hose. Not ideal, right? That’s why having the right fire safety equipment—and keeping it in working order—is non-negotiable. As a property manager, you’re responsible for ensuring that smoke alarms, fire extinguishers, sprinkler systems, and emergency lighting are installed and functional.

Start with smoke detectors. These should be installed in every unit, hallway, and common area. Test them monthly and replace batteries at least once a year. Fire extinguishers should be easily accessible and clearly labeled. Make sure your tenants know where they are and how to use them.

Sprinkler systems are your building’s built-in firefighters. Have them inspected annually by a licensed professional. Emergency lighting and illuminated exit signs are also crucial—they guide people to safety when visibility is low.

Don’t forget to keep a maintenance log. This helps you stay on top of inspections and can be a lifesaver during insurance claims or legal disputes. For more on our professional restoration and safety services, visit our About page.

Educate Tenants on Fire Prevention

Let’s be real—tenants aren’t always the most safety-conscious. That’s why it’s up to you to educate them. Think of it as building a fire-smart community. The more your tenants know, the safer everyone will be.

Start by providing a fire safety handbook when new tenants move in. Include tips on cooking safety, proper use of space heaters, and the importance of not disabling smoke detectors. Host annual fire drills and safety workshops. Yes, it might feel like overkill, but when a real emergency hits, preparation pays off.

Use newsletters, emails, and even social media to share seasonal fire safety tips. For example, remind tenants not to overload power strips during the holidays or to keep grills away from the building in summer.

Encourage open communication. If tenants notice a potential hazard, they should feel comfortable reporting it. This fosters a culture of safety and accountability. For more tenant-focused safety advice, check out our How It Works page.

Develop a Comprehensive Emergency Response Plan

When a fire breaks out, every second counts. That’s why having a well-thought-out emergency response plan is crucial. Think of it as your property’s fire escape route—literally and figuratively.

Your plan should include evacuation routes, designated meeting points, and contact information for emergency services. Post this information in common areas and provide copies to all tenants. Make sure your staff is trained to assist during evacuations, especially in buildings with elderly or disabled residents.

Practice makes perfect. Conduct regular fire drills to ensure everyone knows what to do. Review and update your plan annually or whenever there’s a change in building layout or occupancy.

Also, establish a relationship with a reliable fire damage restoration company like Projekt Restoration. We offer 24/7 emergency service and specialize in property restoration, biohazard clean up, and reconstruction services. Knowing who to call can save you time, money, and stress.

Partner with Professional Restoration Services

Let’s say the worst happens—a fire damages your property. What now? This is where partnering with a trusted professional restoration company becomes invaluable. At Projekt Restoration, we’re not just about fixing damage—we’re about restoring peace of mind.

Our team offers comprehensive restoration services, including water damage restoration, mold remediation, and fire damage restoration. We use state-of-the-art equipment and proven techniques to get your property back to pre-loss condition quickly and efficiently.

We also handle biohazard clean up and reconstruction services, so you don’t have to juggle multiple contractors. Our goal? Customer satisfaction from start to finish. We work directly with insurance companies to streamline the claims process and minimize your out-of-pocket expenses.

Want to see our work in action? Visit our Gallery or read real stories on our Blog. Ready to get started? Contact us today for a free consultation.

Post-Fire Recovery and Property Restoration

Once the flames are out and the smoke clears, the real work begins. Post-fire recovery isn’t just about cleaning up—it’s about rebuilding lives. As a property manager, your role is to coordinate the recovery process and ensure your tenants can return safely and swiftly.

Start by securing the property. Board up broken windows, cover damaged roofs, and restrict access to unsafe areas. Then, bring in a professional restoration team like Projekt Restoration to assess the damage and begin the cleanup process.

We handle everything from soot and smoke removal to structural repairs and reconstruction services. If water was used to extinguish the fire, we also provide water damage restoration to prevent mold growth and further deterioration.

Speaking of mold, don’t overlook the importance of mold remediation. Firefighting efforts often leave behind moisture that can lead to mold infestations if not addressed promptly.

Throughout the process, keep tenants informed. Transparency builds trust and helps manage expectations. For more on our recovery process, visit our How It Works page or explore our Our Mission statement.

Conclusion

Fire safety is more than just a legal obligation—it’s a moral one. As a property manager, you have the power to protect lives, preserve property, and promote peace of mind. By conducting regular assessments, maintaining equipment, educating tenants, and partnering with trusted professionals like Projekt Restoration, you’re not just managing a building—you’re safeguarding a community.

Remember, when disaster strikes, every second counts. Don’t wait until it’s too late. Be proactive, be prepared, and most importantly, be committed to quality service. Call us now at 855-933-7935 for fast, friendly, and professional restoration services.

What should I do immediately after a fire in my property?

First, ensure everyone is safe and accounted for. Then, contact emergency services and a professional restoration company like Projekt Restoration. We’ll help secure the property, assess the damage, and begin the restoration process.

How often should I inspect fire safety equipment?

Smoke detectors should be tested monthly and have their batteries replaced annually. Fire extinguishers and sprinkler systems should be inspected by professionals at least once a year.

Can fire damage lead to mold problems?

Absolutely. Water used to extinguish fires can seep into walls and floors, creating the perfect environment for mold. That’s why we offer both water damage restoration and mold remediation services.

What services does Projekt Restoration offer?

We provide a full range of restoration services, including fire damage restoration, water damage restoration, mold remediation, biohazard clean up, and reconstruction services. We’re your one-stop shop for property restoration.

How can I prepare my tenants for fire emergencies?

Provide fire safety handbooks, conduct regular fire drills, and use newsletters or emails to share seasonal safety tips. Educating tenants is key to preventing fires and ensuring a swift, safe response when emergencies occur.

How to Prevent Mold in Storage Areas

Meta Description: Discover expert strategies to prevent mold in storage areas. Learn how to protect your belongings with professional restoration tips, mold remediation advice, and emergency service insights.

Let’s face it—mold is the uninvited guest that no one wants. It creeps in silently, thrives in the dark, and before you know it, your storage area smells like a damp basement from a horror movie. Whether it’s your attic, basement, garage, or a rented storage unit, mold doesn’t discriminate. But here’s the good news: you can stop it in its tracks. In this comprehensive guide, we’ll show you exactly how to prevent mold in storage areas using proven techniques, expert advice, and a dash of common sense.

And if things ever get out of hand, remember—COMMITTED TO QUALITY SERVICE. Call Us Now! 855-933-7935 for Fast, Friendly and Professional Service. We specialize in restoration services including water damage restoration, fire damage restoration, mold remediation, and more.

Understanding the Mold Menace

What Is Mold and Why Does It Love Storage Areas?

Mold is a type of fungus that thrives in moist, dark, and poorly ventilated environments—basically, the exact conditions found in most storage areas. It reproduces via spores that float through the air and settle on surfaces, waiting for the right conditions to grow. Once it takes hold, mold can damage your belongings, compromise indoor air quality, and even pose health risks.

The Science Behind Mold Growth

Mold needs three things to grow: moisture, organic material (like cardboard or wood), and the right temperature. Storage areas often provide all three. That’s why it’s crucial to control humidity and eliminate water sources to prevent mold in storage areas.

Choosing the Right Storage Space

Climate-Controlled vs. Non-Climate-Controlled Units

If you’re renting a storage unit, opt for a climate-controlled one. These units maintain consistent temperature and humidity levels, making it much harder for mold to grow. Non-climate-controlled units are cheaper but come with a higher risk of mold infestation.

Inspect Before You Store

Before moving your items into any storage space, inspect it thoroughly. Look for signs of water damage, musty odors, or visible mold. If anything seems off, don’t risk it—mold can spread faster than gossip in a small town.

Controlling Humidity Levels

Why Humidity Is Mold’s Best Friend

Humidity is the silent enabler of mold. Anything above 60% relative humidity creates a breeding ground for mold spores. Use a hygrometer to monitor humidity levels and keep them below 50% to prevent mold in storage areas.

Dehumidifiers: Your Secret Weapon

Invest in a good-quality dehumidifier, especially if your storage area is in a basement or garage. These devices pull moisture from the air, making it less hospitable for mold. Some even come with built-in hygrometers for easy monitoring.

Proper Ventilation Techniques

Airflow Is Everything

Stagnant air is a mold magnet. Make sure your storage area has adequate ventilation. Use fans, open windows periodically, or install air vents to keep the air moving and fresh.

DIY Ventilation Hacks

If your storage space lacks built-in ventilation, don’t worry. You can create airflow using small, battery-operated fans or by simply leaving the door ajar for a few hours each week. Just be sure it’s secure and weather-permitting.

Waterproofing Your Storage Area

Seal the Deal

Water intrusion is a major cause of mold. Check for leaks in the roof, walls, and foundation. Use waterproof sealants and weather stripping to keep moisture out. This is especially important in older homes or buildings.

Floor Protection Tips

Concrete floors can absorb moisture from the ground. Lay down a vapor barrier or use raised pallets to keep your items off the floor. This simple step can go a long way in helping you prevent mold in storage areas.

Smart Storage Practices

Use Mold-Resistant Containers

Cardboard boxes are mold’s favorite snack. Instead, use plastic bins with airtight lids. These containers not only keep moisture out but also protect your items from pests and dust.

Label and Rotate

Label your storage bins and rotate them periodically. This gives you a chance to inspect for mold and ensures that nothing gets forgotten in the back corner, where mold loves to hide.

Cleaning and Maintenance Routines

Regular Inspections Are Key

Set a schedule to inspect your storage area at least once a month. Look for signs of moisture, leaks, or mold. Catching problems early can save you a ton of money and stress down the line.

Cleaning with Mold-Resistant Products

Use cleaning products that contain mold inhibitors. Vinegar, hydrogen peroxide, and baking soda are natural options. For a more aggressive approach, use commercial mold-resistant sprays available at most hardware stores.

Restoration Services: When Prevention Isn’t Enough

Calling in the Pros

Sometimes, despite your best efforts, mold finds a way. That’s when you need professional restoration services. At Projekt Restoration, we offer comprehensive mold remediation, water damage restoration, and fire damage restoration to restore your property to its former glory.

Water Damage Restoration and Mold Prevention

Dry It Fast, Dry It Right

Water damage is a leading cause of mold. Whether it’s from a leaky pipe or a flood, the key is to act fast. Our water damage restoration services use industrial-grade drying equipment to eliminate moisture quickly and efficiently.

Fire Damage Restoration and Mold Risks

After the Flames, Watch for Mold

Fire damage often leads to water damage from firefighting efforts. This creates a perfect storm for mold growth. Our fire damage restoration team ensures that all moisture is removed and mold is kept at bay.

Mold Remediation: A Deep Dive

What It Involves

Mold remediation goes beyond surface cleaning. It involves identifying the source, containing the area, removing contaminated materials, and treating the space to prevent future growth. It’s a job best left to certified professionals.

Emergency Service for Mold Outbreaks

Time Is of the Essence

Mold spreads fast. That’s why we offer 24/7 emergency service to tackle mold outbreaks before they get worse. One call to 855-933-7935 and we’re on our way.

Property Restoration After Mold Damage

Bringing Your Space Back to Life

Once the mold is gone, it’s time to restore your property. Our property restoration services include cleaning, repairs, and even reconstruction to make your space safe and livable again.

Biohazard Clean Up and Mold

When Mold Meets Hazardous Waste

In some cases, mold can be part of a larger biohazard issue, especially in hoarding situations or after a flood. Our biohazard clean up team is trained to handle these complex scenarios safely and effectively.

Reconstruction Services Post-Mold

Rebuild with Confidence

Sometimes, mold damage is so extensive that reconstruction is necessary. Our reconstruction services cover everything from drywall replacement to full-scale remodeling.

Customer Satisfaction Is Our Priority

We’re Not Happy Until You Are

At Projekt Restoration, customer satisfaction is at the heart of everything we do. From your first call to the final walkthrough, we’re committed to delivering professional restoration with a personal touch.

Professional Restoration: Why It Matters

Experience You Can Trust

DIY solutions can only go so far. When it comes to mold, you need professional restoration services that are thorough, safe, and effective. Trust the experts at Projekt Restoration to get the job done right.

FAQs About Preventing Mold in Storage Areas

1. How often should I inspect my storage area for mold?

At least once a month. Regular inspections help catch mold early before it spreads.

2. Can I use bleach to kill mold?

Bleach can kill surface mold but doesn’t penetrate porous materials. For deep infestations, professional remediation is recommended.

3. What’s the best humidity level to prevent mold?

Keep humidity below 50%. Use a dehumidifier and monitor with a hygrometer.

4. Are plastic bins better than cardboard boxes?

Absolutely. Plastic bins with airtight lids are mold-resistant and protect your items better.

5. Can mold grow in climate-controlled storage units?

It’s less likely but still possible if there’s a water leak or poor maintenance. Always inspect your unit.

6. What should I do if I find mold in my storage area?

Call a professional restoration company like Projekt Restoration immediately. We offer emergency service and expert mold remediation.

Final Thoughts: Stay Vigilant, Stay Mold-Free

Preventing mold in storage areas isn’t rocket science, but it does require vigilance, smart planning, and sometimes a little help from the pros. By controlling humidity, improving ventilation, and using proper storage techniques, you can keep your belongings safe and your space mold-free.

And remember, if mold ever does rear its ugly head, Projekt Restoration is just a phone call away. COMMITTED TO QUALITY SERVICE. Call Us Now! 855-933-7935 for Fast, Friendly and Professional Service. Learn more about our services here.

For more expert tips, visit our blog or check out our gallery to see our work in action.

Stay dry, stay safe, and keep mold at bay!

Schedule Your Mold Inspection Today!

Privacy Policy

Projekt Restoration we respects your privacy and is committed to protecting your personal information. This Privacy Policy outlines how we collect, use, and protect the information you provide when you visit our website, contact us, or use our services related to Mold Remediation, Mold Inspection & Testing, Mold Removal / Cleanup, and Black Mold Removal.


1. Information We Collect

We may collect the following types of personal and non-personal information:

  • Personal Information: Name, email address, phone number, physical address, and any other information you provide when contacting us or requesting services.

  • Usage Data: IP address, browser type, operating system, pages visited, and time/date of your visit.

  • Cookies: We may use cookies to enhance your website experience. You can disable cookies in your browser settings.


2. How We Use Your Information

We use your information to:

  • Respond to your inquiries or service requests

  • Schedule and deliver mold-related services

  • Improve our website and customer service

  • Send service updates, promotions, or important notices (if you opt-in)

  • Comply with legal obligations


3. Information Sharing and Disclosure

We do not sell, trade, or rent your personal information. We may share your data with:

  • Trusted third-party service providers (e.g., payment processors, contractors) to perform services on our behalf

  • Law enforcement or government agencies if required by law


4. Data Security

We implement reasonable safeguards (physical, electronic, and managerial) to protect your information from unauthorized access, alteration, disclosure, or destruction.


5. Your Privacy Rights (California Residents)

Under the California Consumer Privacy Act (CCPA), California residents have the right to:

  • Request disclosure of the personal information we collect and how we use it

  • Request deletion of your personal information

  • Opt-out of the sale of personal information (note: we do not sell your data)

To exercise any of these rights, please contact us at:
📞 Phone: (855) 933-7935


6. Third-Party Links

Our website may contain links to third-party sites. We are not responsible for their privacy practices. Please review their privacy policies separately.


7. Children’s Privacy

Our services are not directed to children under 13. We do not knowingly collect personal information from minors.


8. Changes to This Privacy Policy

We may update this Privacy Policy from time to time. Changes will be posted on this page with the updated effective date.


9. Contact Us

If you have any questions or concerns about this Privacy Policy, please contact:
Projekt Restoration

📞 (855) 933-7935