24 / 7 / 365 Emergency Service

Fire Damage Risks During Home Renovations

Home renovations can breathe new life into your living space, but they also come with unexpected hazards—one of the most serious being fire damage risks during home renovations. Whether you’re upgrading your kitchen, rewiring electrical systems, or using heat-producing tools, the potential for fire hazards increases significantly. At COMMITTED TO QUALITY SERVICE, we understand how critical it is to protect your home during every phase of remodeling. Our team offers fast, friendly, and professional fire damage restoration services to help homeowners recover quickly and safely. With our specialized equipment and expert knowledge, we mitigate affected areas efficiently to prevent further damage. If you’re planning a renovation, it’s essential to be aware of fire safety measures and have a trusted partner ready to respond. Call Us Now! 855-933-7935 for expert assistance and peace of mind.

Common Causes of Fire During Renovation Projects

Home renovation projects are exciting opportunities to enhance the comfort, value, and aesthetics of your living space. However, they also come with a unique set of risks, particularly the increased potential for fire damage. Understanding the common causes of fire during renovation projects is crucial for homeowners, contractors, and renovation teams to ensure safety and prevent costly disasters.

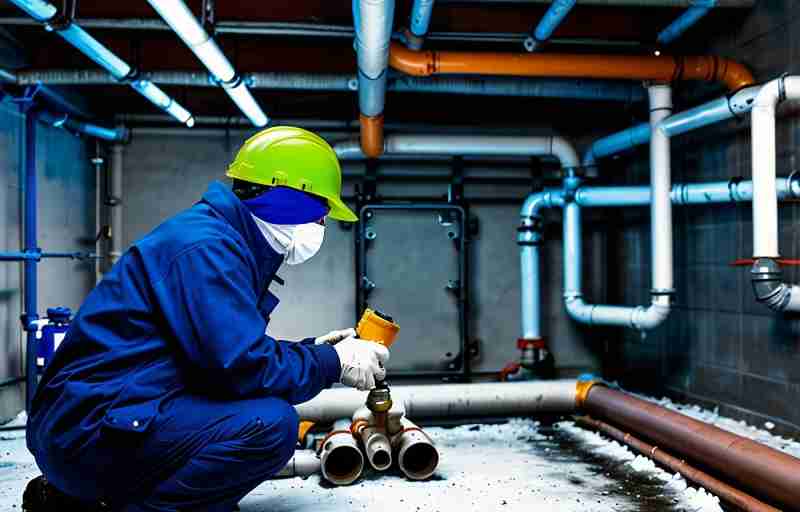
One of the leading causes of fire during home renovations is the use of heat-producing tools and equipment. Devices such as soldering irons, heat guns, welding torches, and grinders are frequently used in tasks like plumbing, roofing, and metalwork. These tools can easily ignite flammable materials such as insulation, wood framing, or dust particles if not handled with care. According to the National Fire Protection Association (NFPA), “hot work” was responsible for an average of 4,580 structure fires per year between 2014 and 2018.

Another significant risk factor is faulty or temporary electrical wiring. During renovations, it’s common to install temporary power sources or rewire parts of the home. If these electrical systems are not properly grounded or are overloaded, they can spark and ignite nearby combustible materials. Older homes are particularly vulnerable, as outdated wiring may not meet current safety standards. It’s essential to have a licensed electrician inspect and manage any electrical modifications to minimize fire hazards.

Improper storage and handling of flammable materials also contribute to fire risks. Paints, solvents, adhesives, and other chemicals used in construction are highly combustible. When stored near heat sources or exposed to open flames, these substances can ignite quickly. Contractors and homeowners should always follow manufacturer guidelines for storage and ensure that these materials are kept in cool, ventilated areas away from ignition sources.

Negligence or lack of awareness is another common cause of fire during renovations. Workers may leave tools running unattended, discard cigarette butts improperly, or fail to clean up flammable debris. These seemingly minor oversights can lead to devastating consequences. Ensuring that all personnel are trained in fire safety protocols and that a fire extinguisher is readily available on-site can significantly reduce these risks.

Additionally, demolition work can expose hidden fire hazards. Tearing down walls or ceilings may reveal old wiring, gas lines, or other combustible elements that were previously concealed. If these components are damaged or disturbed during the renovation process, they can become ignition points. A thorough inspection before beginning any demolition is essential to identify and mitigate these hidden dangers.

“Fire safety should be a top priority during any home renovation project. A single spark can lead to significant property damage, injury, or even loss of life,” warns the U.S. Fire Administration.

To illustrate the most common causes of fire during renovations, consider the following examples:

  1. A homeowner using a heat gun to remove old paint accidentally ignites nearby insulation, leading to a fire that causes extensive damage to the attic.
  2. Temporary lighting installed during a kitchen remodel overloads the circuit, sparking a fire that spreads through the walls before firefighters can contain it.
  3. Improper disposal of oily rags used for staining wood results in spontaneous combustion overnight, destroying a newly renovated basement.

Preventing fire damage during renovations requires a proactive approach. Homeowners should work with licensed professionals who understand the risks and follow strict safety protocols. It’s also wise to consult with a restoration expert to assess potential vulnerabilities before beginning any major project.

For more information on how to protect your home during renovations, visit our services page. If you’re dealing with the aftermath of a fire, our fire damage restoration team is here to help you recover quickly and safely.

To stay informed about other home safety topics, check out our helpful resources such as the blog or learn more about our commitment to safety and excellence on our our mission page.

By understanding and addressing the common causes of fire during renovation projects, you can ensure that your home improvement efforts are both successful and safe.

Electrical Hazards and Wiring Mistakes

During home renovations, one of the most overlooked yet critical fire damage risks stems from electrical hazards and improper wiring practices. Whether you are upgrading your lighting, installing new appliances, or rewiring entire sections of your home, any misstep in electrical work can lead to severe consequences. Faulty wiring is a leading cause of residential fires, and during renovations, the risk increases significantly due to the temporary disruption of existing systems and the introduction of new electrical components. Homeowners often assume that minor electrical tasks can be handled without professional help, but even small errors—such as overloading circuits, using the wrong wire gauge, or failing to secure connections properly—can result in overheating, sparks, or short circuits that ignite surrounding materials.

One common mistake during renovations is failing to adhere to local electrical codes. These codes are in place to ensure safety and efficiency, but DIY renovators or unlicensed contractors may overlook them, either out of ignorance or in an attempt to cut costs. For example, running wires through insulation without proper protection can cause the wires to overheat, increasing the risk of fire. Similarly, connecting new wiring to outdated or damaged electrical panels can create dangerous imbalances in the system. It is essential to have a licensed electrician inspect and approve any electrical work to ensure compliance and safety.

Another significant hazard arises when temporary power sources are used during renovations. Extension cords and temporary wiring setups are often employed to power tools and lighting, but these are not designed for long-term use. Overloading extension cords or daisy-chaining multiple cords together can lead to overheating and electrical fires. Additionally, exposed wires and open junction boxes are common on renovation sites, posing a direct fire risk if they come into contact with flammable materials like wood, drywall dust, or insulation.

Renovation projects also often involve drilling, cutting, or demolishing walls, which can inadvertently damage hidden electrical wiring. Accidentally cutting into a live wire not only poses a risk of electrocution but can also cause sparks that ignite nearby debris. This is particularly dangerous in older homes where wiring may not be up to modern safety standards. Before beginning any demolition or structural changes, it is crucial to map out existing electrical layouts and shut off power to affected areas.

To mitigate these risks, homeowners should prioritize hiring qualified professionals for all electrical work during renovations. A certified electrician will ensure that all installations meet current safety standards and are properly grounded and insulated. Additionally, using high-quality materials and avoiding shortcuts can significantly reduce the likelihood of fire hazards. Regular inspections throughout the renovation process can help identify potential issues early, preventing costly and dangerous outcomes later.

Understanding the broader implications of electrical safety during renovations is vital for protecting your home and family. Fire damage resulting from electrical mistakes can be devastating, leading to loss of property, costly repairs, and even injury. If your home has already suffered from fire-related incidents, seeking professional help is essential. Learn more about our specialized fire damage restoration services to ensure your home is safely restored and protected against future risks.

At Projekt Restoration, we are committed to helping homeowners navigate the complexities of renovation safety. Our team provides a wide range of services designed to identify and address potential hazards before they become serious problems. Whether you are planning a minor remodel or a full-scale renovation, we are here to support you every step of the way. For more information about our approach and values, visit our about page to learn how we prioritize safety, quality, and customer satisfaction in every project.

The Role of Flammable Materials in Fire Risk

During home renovations, one of the most overlooked yet critical fire hazards is the presence and use of flammable materials. These substances, which include solvents, adhesives, paint thinners, insulation, and even sawdust, can significantly increase the risk of fire if not handled properly. Renovation projects often involve a combination of heat-producing tools, open electrical wiring, and combustible materials, creating a perfect storm for potential fire outbreaks. Understanding how these materials contribute to fire risk is essential for homeowners and contractors alike to ensure safety throughout the renovation process.

Flammable materials are commonly used in various stages of home improvement. For instance, oil-based paints and varnishes emit volatile organic compounds (VOCs) that can ignite when exposed to high temperatures or sparks. Similarly, construction dust, especially fine particles like sawdust, can become highly combustible when suspended in the air. When combined with power tools or faulty wiring, these materials can ignite quickly, leading to devastating fire damage. This is why it is crucial to store and dispose of these substances correctly and to maintain proper ventilation in work areas.

Another significant concern is the improper storage of flammable liquids. Many homeowners and even contractors store these materials in garages or basements without considering the potential fire hazards. These areas often lack adequate ventilation and may contain ignition sources such as water heaters or electrical panels. A small spark in such an environment can lead to a major fire. To mitigate this risk, flammable materials should be stored in approved containers and kept away from heat sources. Additionally, it is advisable to limit the quantity of these substances on-site and to use them only when necessary.

Electrical systems also play a role in increasing fire risk during renovations. Temporary lighting, extension cords, and power tools can overload circuits, especially in older homes with outdated wiring. When these electrical components come into contact with flammable materials, the risk of fire escalates. Ensuring that all electrical work is performed by licensed professionals and that circuits are not overloaded is a key step in reducing fire hazards. Moreover, using ground fault circuit interrupters (GFCIs) and circuit breakers can provide an added layer of protection.

It is also important to consider the role of human error in fire incidents. Workers may inadvertently leave heat-producing tools like soldering irons or heat guns unattended, or they may smoke near flammable substances. These actions, though seemingly minor, can have catastrophic consequences. Establishing strict safety protocols and ensuring that all workers are trained in fire prevention can significantly reduce these risks. Homeowners should also be proactive in discussing fire safety measures with their contractors before the renovation begins.

In the unfortunate event that a fire does occur, the damage can be extensive, affecting not only the structure of the home but also personal belongings and indoor air quality. Fire damage restoration is a complex process that requires professional expertise to ensure thorough cleanup and repair. For more information on how to handle such situations, visit our fire damage page. Additionally, our services section provides a comprehensive overview of the restoration solutions we offer to help homeowners recover quickly and safely.

Preventing fire damage during home renovations starts with awareness and proper planning. By understanding the risks associated with flammable materials and taking proactive steps to manage them, homeowners can protect their property and loved ones. Whether you are planning a minor update or a major remodel, always prioritize fire safety to ensure a successful and hazard-free renovation experience.

Importance of Fire Safety Planning Before Renovation

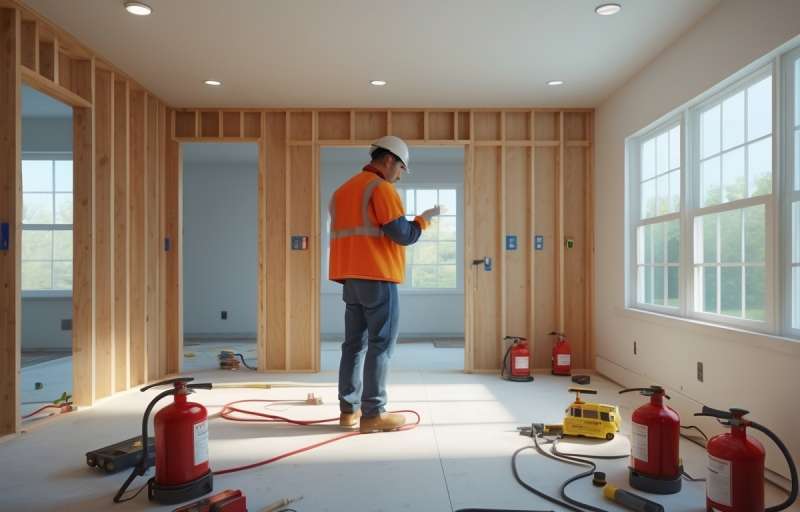
Before beginning any home renovation project, it is crucial to prioritize fire safety planning to prevent potential fire damage risks. Renovations often involve activities that increase the likelihood of fire hazards, such as electrical rewiring, the use of flammable materials, and the operation of power tools. Without a comprehensive fire safety plan in place, homeowners may unknowingly expose their property and loved ones to serious danger. Proper planning not only safeguards the home but also ensures that the renovation process proceeds smoothly and without costly setbacks.

One of the key reasons fire safety planning is essential before renovation is the presence of combustible materials. During remodeling, materials like wood, insulation, and solvents are often stored on-site. When combined with heat sources such as welding equipment or faulty wiring, these materials can easily ignite. A fire safety plan helps identify these risks in advance and outlines strategies to mitigate them, such as proper storage, ventilation, and the use of fire-retardant materials.

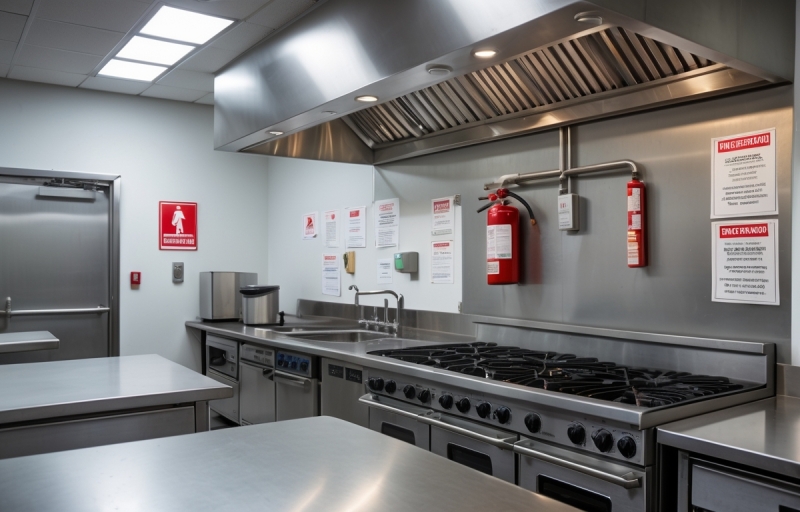
Another important aspect of fire safety planning is ensuring that all electrical systems are up to code. Renovations frequently involve modifying or upgrading electrical wiring, which, if done improperly, can lead to short circuits or overheating. Hiring licensed professionals and conducting thorough inspections before and after electrical work can significantly reduce the risk of fire. Additionally, a fire safety plan should include the installation of smoke detectors and fire extinguishers in key areas of the home, especially near construction zones.

Communication with contractors and workers is also vital. Everyone involved in the renovation should be aware of the fire safety protocols in place. This includes knowing the location of fire extinguishers, understanding emergency exit routes, and being trained on how to respond in case of a fire. Clear communication ensures that all parties are aligned in maintaining a safe working environment.

Moreover, fire safety planning should take into account the specific layout and structure of the home. Older homes, for example, may have outdated wiring or hidden structural vulnerabilities that increase fire risk. A thorough assessment of the property before starting renovations can help uncover these issues and allow for proactive measures to be taken. This is especially important for homeowners who have previously experienced water or fire damage, as these incidents can compromise the integrity of building materials.

Incorporating fire safety into the renovation process also aligns with broader home protection strategies. For instance, homeowners who are already addressing issues like water damage or mold remediation can integrate fire prevention measures into their overall restoration plan. This holistic approach not only enhances safety but also adds long-term value to the property.

For those seeking professional guidance, working with experienced restoration and renovation experts can make a significant difference. Companies that specialize in damage restoration often offer comprehensive services that include fire risk assessments and safety planning. These professionals understand the complexities of home construction and can provide tailored solutions that address both immediate and future fire hazards.

Homeowners can also benefit from exploring additional resources and insights provided by reputable restoration companies. Visiting the blog section of a trusted service provider’s website can offer valuable tips on fire prevention, renovation best practices, and emergency preparedness. Staying informed empowers homeowners to make smarter decisions and reinforces the importance of proactive planning.

In conclusion, fire safety planning is a critical step that should never be overlooked before starting a home renovation. By identifying potential hazards, ensuring code compliance, and fostering clear communication among all parties involved, homeowners can significantly reduce the risk of fire damage. Taking these precautions not only protects the home and its occupants but also ensures that the renovation process is both safe and successful.

How to Safely Use Power Tools and Equipment

Using power tools and equipment during home renovations can significantly increase the risk of fire damage if not handled properly. These tools often generate heat, friction, and sparks, all of which can ignite nearby flammable materials. To minimize fire hazards, it is essential to follow strict safety protocols and understand the proper use of each tool. Start by reading the manufacturer’s instructions and safety guidelines for every piece of equipment. Ensure that all tools are in good working condition before use, and never attempt to operate a damaged or malfunctioning device. Regular maintenance and inspections can help prevent electrical faults that may lead to overheating or short circuits.

One of the most important safety measures is to keep your work area clean and free of combustible materials such as sawdust, paper, and solvents. These substances can easily catch fire if exposed to sparks or high heat. Always unplug tools when not in use and avoid overloading electrical circuits, which can cause overheating and potentially start a fire. Using power tools with built-in safety features like automatic shut-off mechanisms and thermal protection can also reduce the risk of fire-related incidents.

Proper ventilation is another critical factor when using power tools, especially those that emit fumes or dust. Poor air circulation can allow flammable vapors to accumulate, increasing the likelihood of ignition. Make sure your workspace is well-ventilated, and consider using fans or exhaust systems to disperse hazardous particles. Additionally, always wear appropriate personal protective equipment such as gloves, goggles, and fire-resistant clothing to protect yourself from sparks and debris.

It is also wise to have a fire extinguisher readily accessible in your work area. Knowing how to use it effectively can make a significant difference in containing a small fire before it spreads. Make sure everyone involved in the renovation project is aware of the location of fire extinguishers and understands basic fire safety procedures. In case of an emergency, having a clear evacuation plan can help ensure everyone’s safety.

When working in older homes, be especially cautious, as outdated wiring and insulation materials can pose additional fire risks. Before beginning any renovation, it may be beneficial to consult with professionals who specialize in fire damage prevention. You can learn more about these services by visiting our services page. If you suspect any hidden issues that could contribute to fire hazards, such as faulty wiring or previous fire damage, it’s crucial to address them before starting your project.

For those unfamiliar with the proper handling of power tools, consider taking a safety course or hiring a licensed contractor. This not only ensures the job is done correctly but also significantly reduces the risk of accidents. At Projekt Restoration, we emphasize the importance of safety and preparedness in every renovation project. To understand more about our commitment to safety and excellence, visit our our mission page.

In conclusion, while power tools are essential for efficient home renovations, they must be used with caution to prevent fire damage. By maintaining equipment, keeping workspaces clean, ensuring proper ventilation, and staying informed about fire safety practices, homeowners can significantly reduce the risk of fire-related incidents. Taking these precautions not only protects your property but also ensures the safety of everyone involved in the renovation process.

Tips for Working with Contractors to Minimize Fire Risk

When undertaking a home renovation, collaborating effectively with contractors is essential to minimizing fire risks. Clear communication and proactive planning can significantly reduce the chances of fire-related incidents during construction or remodeling. Begin by selecting licensed and insured contractors who have experience with fire safety protocols. Before any work begins, discuss fire prevention strategies and ensure that your contractor understands the importance of maintaining a clean and organized worksite. Flammable materials such as paint, solvents, and construction debris should be stored properly and away from heat sources. It is also wise to request a detailed project plan that outlines how fire hazards will be managed throughout the renovation process.

One of the most effective ways to prevent fire damage is by ensuring that all electrical work is performed by a certified electrician. Faulty wiring or overloaded circuits are common causes of fires during renovations. Make sure your contractor obtains the necessary permits and follows local building codes. If your renovation involves welding, soldering, or other heat-producing activities, insist on a fire watch protocol. This includes having a fire extinguisher nearby and monitoring the area for at least 30 minutes after the work is completed to ensure no smoldering materials are left behind.

Daily inspections are another important step in reducing fire risk. Encourage your contractor to conduct end-of-day checks to ensure that all tools are turned off, extension cords are unplugged, and combustible materials are secured. If you are living in the home during renovations, establish clear boundaries between the construction zone and your living space. This not only protects your family but also limits the spread of fire should an incident occur.

It is also beneficial to review your homeowner’s insurance policy before starting any renovation. Some policies may require notification or additional coverage for construction projects. Discuss this with your contractor to ensure that their insurance also covers fire-related incidents. In case of an emergency, having a fire response plan in place can make a significant difference. Make sure all workers know the location of fire extinguishers and exits, and consider installing temporary smoke detectors in the renovation area.

Working with a contractor who values safety and transparency can make your renovation smoother and safer. Ask for references and check reviews to ensure they have a good track record. You can also explore the contractor’s background and values by visiting their about page. A company that prioritizes safety will often have clear guidelines and training in place for their team.

In addition to fire prevention, consider how your renovation might impact other areas of your home. For instance, fire damage can sometimes lead to secondary issues like water damage from firefighting efforts. Understanding the full scope of potential risks can help you plan more effectively. Learn more about comprehensive restoration services that address both fire and water damage to ensure your home is fully protected.

Ultimately, minimizing fire risk during home renovations requires a collaborative effort between you and your contractor. By setting clear expectations, maintaining open communication, and prioritizing safety at every stage, you can significantly reduce the likelihood of fire damage and ensure a successful renovation project.

What to Do If a Fire Breaks Out During Renovation

In the unfortunate event that a fire breaks out during a home renovation, acting quickly and efficiently is crucial to minimize damage and ensure the safety of everyone involved. The first and most important step is to evacuate the premises immediately. Make sure all workers, family members, and pets are safely out of the house. Do not attempt to retrieve personal belongings or tools, as time is of the essence and your safety is the top priority. Once everyone is at a safe distance, call emergency services to report the fire. Provide them with clear information about the location and any potential hazards, such as flammable materials or structural vulnerabilities due to ongoing renovations.

While waiting for emergency responders, avoid re-entering the building under any circumstances. Fires during renovations can spread rapidly, especially when construction materials like wood, insulation, and solvents are present. These materials can accelerate the fire and release toxic fumes, making the environment extremely dangerous. If it is safe to do so and you have access to a fire extinguisher, you may attempt to control a small fire, but only if you are trained and confident in using it. Otherwise, leave firefighting to the professionals.

After the fire has been extinguished and the property is deemed safe to enter, it is essential to assess the extent of the damage. Contact a professional restoration company that specializes in fire damage recovery. They can help evaluate structural integrity, remove debris, and begin the cleanup process. At Projekt Restoration, our expert team offers comprehensive fire damage services to help homeowners recover quickly and safely. We understand the unique challenges that come with fire incidents during renovations and are equipped to handle both minor and extensive damage.

Documenting the damage is another critical step. Take photographs and detailed notes of all affected areas and items. This documentation will be invaluable when filing an insurance claim. Notify your insurance provider as soon as possible and provide them with all necessary information. A reputable restoration company can also assist with the insurance process, ensuring that you receive the compensation you are entitled to.

In addition to fire damage, it is not uncommon for water damage to occur as a result of firefighting efforts. Water used to extinguish the flames can seep into walls, floors, and ceilings, leading to further complications such as mold growth. Prompt action is necessary to address this secondary damage. Our team at Projekt Restoration also offers specialized water damage services to mitigate these risks and restore your home to its pre-loss condition.

Preventing future incidents is equally important. After the fire, take time to review what may have caused the outbreak. Common culprits during renovations include faulty wiring, unattended heat sources, and improper storage of flammable materials. Implementing stricter safety protocols, such as regular inspections and proper storage practices, can significantly reduce the risk of another fire. Educate all workers and household members on fire safety procedures and ensure that fire extinguishers and smoke detectors are readily available and functional.

For more information on how we handle emergencies and support homeowners through the restoration process, visit our services page. You can also learn more about our company values and commitment to safety by exploring our about section. Taking proactive steps and knowing how to respond effectively can make all the difference when facing the unexpected challenge of a fire during home renovations.

In conclusion, while home renovations can breathe new life into your living space, they also come with increased fire risks that should not be overlooked. From electrical upgrades and welding work to the use of flammable materials, each stage of a renovation project presents potential hazards. By staying informed, working with licensed professionals, and implementing proper safety measures, homeowners can significantly reduce the risk of fire damage. Prioritizing fire safety not only protects your investment but also ensures the well-being of everyone in your home. Renovate smart—plan ahead, stay vigilant, and keep fire safety at the forefront of your renovation journey.

How to Handle Mold in Commercial Bathrooms

How to Handle Mold in Commercial Bathrooms: A Complete Guide for Business Owners


COMMITTED TO QUALITY SERVICE

Call Us Now! 855-933-7935

Fast, Friendly and Professional Service.

Our Services:

Water Damage – Water Damage Restoration requires special equipment designed specifically for drying structures that have suffered severe water damage. LEARN MORE

Fire Damage – The most crucial step in the fire restoration process is to quickly mitigate the affected area and recover as much as possible. LEARN MORE


Mold in Commercial Bathrooms: Why It’s a Serious Problem

Mold in commercial bathrooms isn’t just an eyesore—it’s a ticking time bomb for your business. From health risks to structural damage, mold can wreak havoc if left unchecked. Whether you run a restaurant, office building, or retail space, understanding how to handle mold is crucial for maintaining a safe and professional environment.

In this comprehensive guide, we’ll walk you through everything you need to know about identifying, treating, and preventing mold in commercial bathrooms. We’ll also explore how restoration services like water damage restoration, fire damage restoration, and mold remediation can help you stay ahead of the curve.


Understanding the Causes of Mold in Commercial Bathrooms

High Humidity and Poor Ventilation

Bathrooms are naturally humid, but when ventilation is poor, moisture lingers. This creates the perfect breeding ground for mold. Installing exhaust fans and ensuring proper airflow can significantly reduce the risk.

Leaky Pipes and Plumbing Issues

Even a small leak behind a wall or under a sink can lead to mold growth. Regular plumbing inspections are essential to catch issues early. Learn more about identifying hidden water damage here.


Signs of Mold in Commercial Bathrooms

Visible Mold Growth

Black, green, or white patches on walls, ceilings, or tiles are clear indicators. Don’t ignore them—what you see is often just the tip of the iceberg.

Musty Odors

If your bathroom smells like a damp basement, mold is likely present. This odor is caused by microbial volatile organic compounds (MVOCs) released by mold spores.


Health Risks Associated with Mold Exposure

Respiratory Issues

Mold spores can trigger asthma, allergies, and other respiratory problems, especially in sensitive individuals. This poses a liability risk for businesses.

Skin and Eye Irritation

Prolonged exposure can cause rashes, itchy eyes, and other skin conditions. Employees and customers alike are at risk.


Legal and Compliance Concerns

OSHA Regulations

The Occupational Safety and Health Administration (OSHA) requires employers to maintain a safe workplace. Mold violations can lead to fines and lawsuits.

ADA Accessibility and Mold

Mold can compromise accessibility features like grab bars and non-slip flooring, putting your business at odds with the Americans with Disabilities Act (ADA).


Initial Steps to Take When You Discover Mold

Isolate the Area

Prevent the spread of spores by closing off the affected area. Use plastic sheeting and seal vents if necessary.

Call a Professional Restoration Company

DIY methods won’t cut it. Contact a company that specializes in mold remediation and water damage restoration for a thorough assessment.


Why Professional Mold Remediation is Essential

Advanced Equipment and Techniques

Professionals use HEPA vacuums, air scrubbers, and antimicrobial treatments to eliminate mold at the source. This ensures long-term results.

Certified Technicians

Certified mold remediation experts follow industry standards like those set by the IICRC (Institute of Inspection Cleaning and Restoration Certification).


The Role of Water Damage Restoration in Mold Prevention

Drying and Dehumidification

After a leak or flood, drying the area quickly is crucial. Water damage restoration services use industrial-grade dehumidifiers and air movers to prevent mold growth.

Moisture Detection Tools

Infrared cameras and moisture meters help detect hidden dampness behind walls and under floors, ensuring nothing is missed.


Fire Damage Restoration and Mold Risks

Water Used to Extinguish Fires

Ironically, putting out a fire can lead to water damage, which in turn causes mold. Fire damage restoration must include mold prevention strategies.

Smoke and Soot Residue

These residues can trap moisture and create a breeding ground for mold. Proper cleaning is essential.


Emergency Service for Mold Outbreaks

24/7 Availability

Mold doesn’t wait for business hours. Choose a company that offers emergency service to tackle the problem immediately.

Rapid Response Teams

Time is of the essence. A quick response can mean the difference between a minor issue and a major renovation.


Property Restoration After Mold Removal

Rebuilding Damaged Areas

Once mold is removed, affected drywall, flooring, and fixtures may need replacing. Property restoration ensures your bathroom looks brand new.

Upgrading Materials

Consider mold-resistant drywall and anti-microbial paint to prevent future problems.


Biohazard Clean Up and Mold

When Mold Becomes a Biohazard

In extreme cases, mold can be classified as a biohazard, especially if it’s toxic black mold. Biohazard clean up protocols must be followed.

Protective Gear and Disposal

Professionals wear hazmat suits and use sealed containers to dispose of contaminated materials safely.


Reconstruction Services Post-Mold Remediation

Structural Repairs

Mold can weaken walls, ceilings, and floors. Reconstruction services restore your property to its original condition—or better.

Code Compliance

Ensure all repairs meet local building codes and health regulations to avoid future issues.


Customer Satisfaction: The Ultimate Goal

Transparent Communication

From start to finish, you should be kept in the loop. A professional restoration company values customer satisfaction above all else.

Post-Service Follow-Up

Reputable companies offer follow-up inspections to ensure the mold hasn’t returned. Learn more about our commitment to quality here.


Professional Restoration: What to Look For

Certifications and Experience

Choose a company with IICRC certification and years of experience in professional restoration.

Positive Reviews and Case Studies

Check out their gallery and blog for real-world examples of successful mold remediation projects.


Preventative Measures for Mold in Commercial Bathrooms

Routine Inspections

Schedule regular inspections to catch mold early. Prevention is always cheaper than remediation.

Humidity Control

Install dehumidifiers and monitor humidity levels to keep them below 60%.


Cleaning Protocols to Prevent Mold

Daily Cleaning Routines

Use mold-killing cleaners and disinfectants on all surfaces. Pay special attention to grout lines and corners.

Weekly Deep Cleans

Scrub tiles, clean vents, and check for leaks. Document your cleaning schedule for compliance purposes.


Training Staff to Spot Mold Early

Employee Education

Train janitorial and maintenance staff to recognize early signs of mold. Empower them to report issues immediately.

Clear Reporting Channels

Set up a system for staff to report mold sightings quickly and efficiently.


Using Technology to Monitor Mold Risk

Smart Sensors

Install moisture and humidity sensors that alert you to potential problems in real-time.

Data Logging

Track environmental conditions over time to identify trends and prevent outbreaks.


Cost of Mold Remediation in Commercial Bathrooms

Factors That Affect Pricing

Size of the affected area, type of mold, and extent of damage all play a role. Get a detailed quote before work begins.

Insurance Coverage

Check with your provider to see if mold remediation is covered under your commercial property insurance.


Choosing the Right Restoration Partner

Local Expertise

Choose a company familiar with your area’s climate and building codes. See our serving areas for more info.

Full-Service Capabilities

From mold remediation to reconstruction services, your provider should handle it all under one roof.


FAQs About Mold in Commercial Bathrooms

1. How fast does mold grow in a bathroom?

Mold can begin growing within 24-48 hours in damp conditions. That’s why immediate action is critical.

2. Can I remove mold myself?

Small patches may be manageable, but commercial bathrooms require professional remediation to ensure safety and compliance.

3. Is black mold more dangerous than other types?

Yes, black mold (Stachybotrys chartarum) can produce mycotoxins that are harmful to health. Always consult a professional.

4. How do I prevent mold from returning?

Control humidity, fix leaks promptly, and schedule regular inspections. Use mold-resistant materials during renovations.

5. What’s the difference between mold removal and mold remediation?

Mold removal is just cleaning visible mold. Mold remediation addresses the root cause and prevents recurrence.

6. How do I choose a mold remediation company?

Look for certifications, experience, and positive customer reviews. Visit our FAQ page for more tips.


Final Thoughts: Take Mold in Commercial Bathrooms Seriously

Ignoring mold in commercial bathrooms is like playing with fire—it’s only a matter of time before it burns you. From health hazards to legal liabilities, the risks are too great to overlook. But with the right knowledge, tools, and partners, you can tackle mold head-on and keep your business safe and compliant.

Need help now? COMMITTED TO QUALITY SERVICE

Call Us Today: 855-933-7935

Fast, Friendly and Professional Service.

Explore our full range of services including water damage restoration, fire damage restoration, mold remediation, biohazard clean up, and reconstruction services.

We’re here to restore your property and your peace of mind—with a commitment to customer satisfaction and professional restoration every step of the way.

Fire Damage Safety Tips for Property Managers

Understanding the Importance of Fire Safety in Property Management

Let’s face it—being a property manager isn’t just about collecting rent and scheduling maintenance. It’s about protecting your tenants, your property, and your peace of mind. One of the most critical threats to any building is fire. Whether it’s a small kitchen mishap or a full-blown blaze, fire damage can be devastating. That’s why knowing how to prevent, respond to, and recover from fire incidents is essential.

Fire safety isn’t just a checkbox on your to-do list—it’s a responsibility. Property managers are the first line of defense when it comes to ensuring that buildings are up to code, tenants are informed, and emergency plans are in place. And when disaster strikes, knowing who to call for fire damage restoration and emergency service can make all the difference.

At Projekt Restoration, we’re COMMITTED TO QUALITY SERVICE. Call Us Now! 855-933-7935 for Fast, Friendly and Professional Service. We specialize in water damage restoration, fire damage restoration, mold remediation, and more. Let’s dive into the essential fire damage safety tips every property manager should know.

Conduct Regular Fire Risk Assessments

Think of a fire risk assessment like a health check-up for your property. You wouldn’t ignore a strange noise in your car, right? So why ignore potential fire hazards in your building? Regular assessments help you identify risks before they become disasters.

Start by walking through your property with a critical eye. Look for overloaded electrical outlets, blocked fire exits, and improperly stored flammable materials. Don’t forget to check smoke detectors and fire extinguishers—they’re your first line of defense. If you’re not sure what to look for, consider hiring a professional to conduct a thorough inspection.

Once you’ve identified the risks, take action. Replace faulty wiring, clear out cluttered hallways, and ensure all fire safety equipment is up to date. Document everything. This not only helps with compliance but also shows tenants you take their safety seriously.

Need help understanding what to look for? Check out our blog for more tips or visit our FAQ section for answers to common questions.

Install and Maintain Fire Safety Equipment

Imagine trying to put out a fire with a garden hose. Not ideal, right? That’s why having the right fire safety equipment—and keeping it in working order—is non-negotiable. As a property manager, you’re responsible for ensuring that smoke alarms, fire extinguishers, sprinkler systems, and emergency lighting are installed and functional.

Start with smoke detectors. These should be installed in every unit, hallway, and common area. Test them monthly and replace batteries at least once a year. Fire extinguishers should be easily accessible and clearly labeled. Make sure your tenants know where they are and how to use them.

Sprinkler systems are your building’s built-in firefighters. Have them inspected annually by a licensed professional. Emergency lighting and illuminated exit signs are also crucial—they guide people to safety when visibility is low.

Don’t forget to keep a maintenance log. This helps you stay on top of inspections and can be a lifesaver during insurance claims or legal disputes. For more on our professional restoration and safety services, visit our About page.

Educate Tenants on Fire Prevention

Let’s be real—tenants aren’t always the most safety-conscious. That’s why it’s up to you to educate them. Think of it as building a fire-smart community. The more your tenants know, the safer everyone will be.

Start by providing a fire safety handbook when new tenants move in. Include tips on cooking safety, proper use of space heaters, and the importance of not disabling smoke detectors. Host annual fire drills and safety workshops. Yes, it might feel like overkill, but when a real emergency hits, preparation pays off.

Use newsletters, emails, and even social media to share seasonal fire safety tips. For example, remind tenants not to overload power strips during the holidays or to keep grills away from the building in summer.

Encourage open communication. If tenants notice a potential hazard, they should feel comfortable reporting it. This fosters a culture of safety and accountability. For more tenant-focused safety advice, check out our How It Works page.

Develop a Comprehensive Emergency Response Plan

When a fire breaks out, every second counts. That’s why having a well-thought-out emergency response plan is crucial. Think of it as your property’s fire escape route—literally and figuratively.

Your plan should include evacuation routes, designated meeting points, and contact information for emergency services. Post this information in common areas and provide copies to all tenants. Make sure your staff is trained to assist during evacuations, especially in buildings with elderly or disabled residents.

Practice makes perfect. Conduct regular fire drills to ensure everyone knows what to do. Review and update your plan annually or whenever there’s a change in building layout or occupancy.

Also, establish a relationship with a reliable fire damage restoration company like Projekt Restoration. We offer 24/7 emergency service and specialize in property restoration, biohazard clean up, and reconstruction services. Knowing who to call can save you time, money, and stress.

Partner with Professional Restoration Services

Let’s say the worst happens—a fire damages your property. What now? This is where partnering with a trusted professional restoration company becomes invaluable. At Projekt Restoration, we’re not just about fixing damage—we’re about restoring peace of mind.

Our team offers comprehensive restoration services, including water damage restoration, mold remediation, and fire damage restoration. We use state-of-the-art equipment and proven techniques to get your property back to pre-loss condition quickly and efficiently.

We also handle biohazard clean up and reconstruction services, so you don’t have to juggle multiple contractors. Our goal? Customer satisfaction from start to finish. We work directly with insurance companies to streamline the claims process and minimize your out-of-pocket expenses.

Want to see our work in action? Visit our Gallery or read real stories on our Blog. Ready to get started? Contact us today for a free consultation.

Post-Fire Recovery and Property Restoration

Once the flames are out and the smoke clears, the real work begins. Post-fire recovery isn’t just about cleaning up—it’s about rebuilding lives. As a property manager, your role is to coordinate the recovery process and ensure your tenants can return safely and swiftly.

Start by securing the property. Board up broken windows, cover damaged roofs, and restrict access to unsafe areas. Then, bring in a professional restoration team like Projekt Restoration to assess the damage and begin the cleanup process.

We handle everything from soot and smoke removal to structural repairs and reconstruction services. If water was used to extinguish the fire, we also provide water damage restoration to prevent mold growth and further deterioration.

Speaking of mold, don’t overlook the importance of mold remediation. Firefighting efforts often leave behind moisture that can lead to mold infestations if not addressed promptly.

Throughout the process, keep tenants informed. Transparency builds trust and helps manage expectations. For more on our recovery process, visit our How It Works page or explore our Our Mission statement.

Conclusion

Fire safety is more than just a legal obligation—it’s a moral one. As a property manager, you have the power to protect lives, preserve property, and promote peace of mind. By conducting regular assessments, maintaining equipment, educating tenants, and partnering with trusted professionals like Projekt Restoration, you’re not just managing a building—you’re safeguarding a community.

Remember, when disaster strikes, every second counts. Don’t wait until it’s too late. Be proactive, be prepared, and most importantly, be committed to quality service. Call us now at 855-933-7935 for fast, friendly, and professional restoration services.

What should I do immediately after a fire in my property?

First, ensure everyone is safe and accounted for. Then, contact emergency services and a professional restoration company like Projekt Restoration. We’ll help secure the property, assess the damage, and begin the restoration process.

How often should I inspect fire safety equipment?

Smoke detectors should be tested monthly and have their batteries replaced annually. Fire extinguishers and sprinkler systems should be inspected by professionals at least once a year.

Can fire damage lead to mold problems?

Absolutely. Water used to extinguish fires can seep into walls and floors, creating the perfect environment for mold. That’s why we offer both water damage restoration and mold remediation services.

What services does Projekt Restoration offer?

We provide a full range of restoration services, including fire damage restoration, water damage restoration, mold remediation, biohazard clean up, and reconstruction services. We’re your one-stop shop for property restoration.

How can I prepare my tenants for fire emergencies?

Provide fire safety handbooks, conduct regular fire drills, and use newsletters or emails to share seasonal safety tips. Educating tenants is key to preventing fires and ensuring a swift, safe response when emergencies occur.

How to Prevent Mold in Storage Areas

Meta Description: Discover expert strategies to prevent mold in storage areas. Learn how to protect your belongings with professional restoration tips, mold remediation advice, and emergency service insights.

Let’s face it—mold is the uninvited guest that no one wants. It creeps in silently, thrives in the dark, and before you know it, your storage area smells like a damp basement from a horror movie. Whether it’s your attic, basement, garage, or a rented storage unit, mold doesn’t discriminate. But here’s the good news: you can stop it in its tracks. In this comprehensive guide, we’ll show you exactly how to prevent mold in storage areas using proven techniques, expert advice, and a dash of common sense.

And if things ever get out of hand, remember—COMMITTED TO QUALITY SERVICE. Call Us Now! 855-933-7935 for Fast, Friendly and Professional Service. We specialize in restoration services including water damage restoration, fire damage restoration, mold remediation, and more.

Understanding the Mold Menace

What Is Mold and Why Does It Love Storage Areas?

Mold is a type of fungus that thrives in moist, dark, and poorly ventilated environments—basically, the exact conditions found in most storage areas. It reproduces via spores that float through the air and settle on surfaces, waiting for the right conditions to grow. Once it takes hold, mold can damage your belongings, compromise indoor air quality, and even pose health risks.

The Science Behind Mold Growth

Mold needs three things to grow: moisture, organic material (like cardboard or wood), and the right temperature. Storage areas often provide all three. That’s why it’s crucial to control humidity and eliminate water sources to prevent mold in storage areas.

Choosing the Right Storage Space

Climate-Controlled vs. Non-Climate-Controlled Units

If you’re renting a storage unit, opt for a climate-controlled one. These units maintain consistent temperature and humidity levels, making it much harder for mold to grow. Non-climate-controlled units are cheaper but come with a higher risk of mold infestation.

Inspect Before You Store

Before moving your items into any storage space, inspect it thoroughly. Look for signs of water damage, musty odors, or visible mold. If anything seems off, don’t risk it—mold can spread faster than gossip in a small town.

Controlling Humidity Levels

Why Humidity Is Mold’s Best Friend

Humidity is the silent enabler of mold. Anything above 60% relative humidity creates a breeding ground for mold spores. Use a hygrometer to monitor humidity levels and keep them below 50% to prevent mold in storage areas.

Dehumidifiers: Your Secret Weapon

Invest in a good-quality dehumidifier, especially if your storage area is in a basement or garage. These devices pull moisture from the air, making it less hospitable for mold. Some even come with built-in hygrometers for easy monitoring.

Proper Ventilation Techniques

Airflow Is Everything

Stagnant air is a mold magnet. Make sure your storage area has adequate ventilation. Use fans, open windows periodically, or install air vents to keep the air moving and fresh.

DIY Ventilation Hacks

If your storage space lacks built-in ventilation, don’t worry. You can create airflow using small, battery-operated fans or by simply leaving the door ajar for a few hours each week. Just be sure it’s secure and weather-permitting.

Waterproofing Your Storage Area

Seal the Deal

Water intrusion is a major cause of mold. Check for leaks in the roof, walls, and foundation. Use waterproof sealants and weather stripping to keep moisture out. This is especially important in older homes or buildings.

Floor Protection Tips

Concrete floors can absorb moisture from the ground. Lay down a vapor barrier or use raised pallets to keep your items off the floor. This simple step can go a long way in helping you prevent mold in storage areas.

Smart Storage Practices

Use Mold-Resistant Containers

Cardboard boxes are mold’s favorite snack. Instead, use plastic bins with airtight lids. These containers not only keep moisture out but also protect your items from pests and dust.

Label and Rotate

Label your storage bins and rotate them periodically. This gives you a chance to inspect for mold and ensures that nothing gets forgotten in the back corner, where mold loves to hide.

Cleaning and Maintenance Routines

Regular Inspections Are Key

Set a schedule to inspect your storage area at least once a month. Look for signs of moisture, leaks, or mold. Catching problems early can save you a ton of money and stress down the line.

Cleaning with Mold-Resistant Products

Use cleaning products that contain mold inhibitors. Vinegar, hydrogen peroxide, and baking soda are natural options. For a more aggressive approach, use commercial mold-resistant sprays available at most hardware stores.

Restoration Services: When Prevention Isn’t Enough

Calling in the Pros

Sometimes, despite your best efforts, mold finds a way. That’s when you need professional restoration services. At Projekt Restoration, we offer comprehensive mold remediation, water damage restoration, and fire damage restoration to restore your property to its former glory.

Water Damage Restoration and Mold Prevention

Dry It Fast, Dry It Right

Water damage is a leading cause of mold. Whether it’s from a leaky pipe or a flood, the key is to act fast. Our water damage restoration services use industrial-grade drying equipment to eliminate moisture quickly and efficiently.

Fire Damage Restoration and Mold Risks

After the Flames, Watch for Mold

Fire damage often leads to water damage from firefighting efforts. This creates a perfect storm for mold growth. Our fire damage restoration team ensures that all moisture is removed and mold is kept at bay.

Mold Remediation: A Deep Dive

What It Involves

Mold remediation goes beyond surface cleaning. It involves identifying the source, containing the area, removing contaminated materials, and treating the space to prevent future growth. It’s a job best left to certified professionals.

Emergency Service for Mold Outbreaks

Time Is of the Essence

Mold spreads fast. That’s why we offer 24/7 emergency service to tackle mold outbreaks before they get worse. One call to 855-933-7935 and we’re on our way.

Property Restoration After Mold Damage

Bringing Your Space Back to Life

Once the mold is gone, it’s time to restore your property. Our property restoration services include cleaning, repairs, and even reconstruction to make your space safe and livable again.

Biohazard Clean Up and Mold

When Mold Meets Hazardous Waste

In some cases, mold can be part of a larger biohazard issue, especially in hoarding situations or after a flood. Our biohazard clean up team is trained to handle these complex scenarios safely and effectively.

Reconstruction Services Post-Mold

Rebuild with Confidence

Sometimes, mold damage is so extensive that reconstruction is necessary. Our reconstruction services cover everything from drywall replacement to full-scale remodeling.

Customer Satisfaction Is Our Priority

We’re Not Happy Until You Are

At Projekt Restoration, customer satisfaction is at the heart of everything we do. From your first call to the final walkthrough, we’re committed to delivering professional restoration with a personal touch.

Professional Restoration: Why It Matters

Experience You Can Trust

DIY solutions can only go so far. When it comes to mold, you need professional restoration services that are thorough, safe, and effective. Trust the experts at Projekt Restoration to get the job done right.

FAQs About Preventing Mold in Storage Areas

1. How often should I inspect my storage area for mold?

At least once a month. Regular inspections help catch mold early before it spreads.

2. Can I use bleach to kill mold?

Bleach can kill surface mold but doesn’t penetrate porous materials. For deep infestations, professional remediation is recommended.

3. What’s the best humidity level to prevent mold?

Keep humidity below 50%. Use a dehumidifier and monitor with a hygrometer.

4. Are plastic bins better than cardboard boxes?

Absolutely. Plastic bins with airtight lids are mold-resistant and protect your items better.

5. Can mold grow in climate-controlled storage units?

It’s less likely but still possible if there’s a water leak or poor maintenance. Always inspect your unit.

6. What should I do if I find mold in my storage area?

Call a professional restoration company like Projekt Restoration immediately. We offer emergency service and expert mold remediation.

Final Thoughts: Stay Vigilant, Stay Mold-Free

Preventing mold in storage areas isn’t rocket science, but it does require vigilance, smart planning, and sometimes a little help from the pros. By controlling humidity, improving ventilation, and using proper storage techniques, you can keep your belongings safe and your space mold-free.

And remember, if mold ever does rear its ugly head, Projekt Restoration is just a phone call away. COMMITTED TO QUALITY SERVICE. Call Us Now! 855-933-7935 for Fast, Friendly and Professional Service. Learn more about our services here.

For more expert tips, visit our blog or check out our gallery to see our work in action.

Stay dry, stay safe, and keep mold at bay!

Water Damage Prevention in High-Risk Areas

Water damage can strike at any time, especially in high-risk areas prone to flooding, heavy rainfall, or plumbing failures. The consequences can be devastating—structural damage, mold growth, and costly repairs. At Projekt Property Restoration, we believe that the best way to protect your home or business is through proactive Water Damage Prevention. With our fast, friendly, and professional restoration services, we help property owners safeguard their investments before disaster hits.

Why Water Damage Prevention Matters

High-risk areas—such as basements, coastal properties, and buildings with aging infrastructure—are especially vulnerable to water intrusion. Without proper prevention, even a minor leak can escalate into a major issue requiring extensive water damage restoration. Prevention not only saves money but also protects your health and safety by reducing the risk of mold and structural instability.

Top Strategies for Water Damage Prevention

  • Regular Inspections: Check roofing, plumbing, and drainage systems regularly to identify vulnerabilities early.
  • Install Sump Pumps and Backflow Valves: These devices help prevent flooding in basements and lower levels.
  • Seal Cracks and Gaps: Ensure that windows, doors, and foundations are properly sealed to keep moisture out.
  • Maintain Gutters and Downspouts: Clean and repair them to ensure proper water flow away from your property.
  • Monitor Humidity Levels: Use dehumidifiers in damp areas to prevent mold growth and moisture buildup.

When Prevention Isn’t Enough

Despite your best efforts, emergencies can still occur. That’s why Projekt Property Restoration offers 24/7 emergency service to respond quickly when disaster strikes. Our team of licensed professionals is trained in water damage restoration, fire damage restoration, mold remediation, biohazard clean up, and reconstruction services. We work directly with insurance companies to streamline the process and reduce your stress.

Customer Satisfaction Is Our Priority

Our mission is simple: to restore your property and peace of mind. We’re proud to offer transparent pricing, free onsite estimates, and flexible financing options. Whether you’re a homeowner, business owner, or property manager, our commitment to customer satisfaction sets us apart. Don’t just take our word for it—our clients consistently praise our professionalism, speed, and attention to detail.

Stay One Step Ahead

Understanding how to identify early signs of water damage is crucial. Learn more in our blog post on how to identify hidden water damage early. Being informed is your first line of defense.

Conclusion

Preventing water damage in high-risk areas requires vigilance, preparation, and the right support. By taking proactive steps and partnering with a trusted restoration company, you can minimize risks and protect your property. At Projekt Property Restoration, we’re more than just a service provider—we’re your partner in professional restoration.

If you’re ready to protect your property or need immediate assistance, reach out to our team today. Let us help you get things back to normal—quickly, efficiently, and with care.

How to Handle Fire Damage in Retail Spaces


COMMITTED TO QUALITY SERVICE Call Us Now! 855-933-7935 Fast, Friendly and Professional Service.

Our Services: Water Damage – Water Damage Restoration requires special equipment designed specifically for drying structures that have suffered severe water damage. Fire Damage – The most crucial step in the fire restoration process is to quickly mitigate the affected area and recover as…

When disaster strikes your retail space, it’s not just the flames that leave a mark—it’s the aftermath. Fire damage in retail spaces can be catastrophic, affecting inventory, infrastructure, and customer trust. But don’t worry—we’ve got your back. This guide walks you through every step of the recovery process, from emergency response to full reconstruction. Let’s dive in.


Understanding Fire Damage in Retail Spaces

What Makes Retail Fire Damage Unique?

Unlike residential fires, fire damage in retail spaces often involves complex layouts, high-value inventory, and customer-facing areas. The stakes are higher, and the response must be swift and strategic. Retail fires can disrupt business continuity, tarnish brand reputation, and lead to significant financial loss.

Common Causes of Retail Fires

Retail fires can stem from various sources:

  • Electrical malfunctions
  • Overloaded circuits
  • Kitchen equipment in stores with food services
  • Arson or vandalism
  • Negligence with flammable materials

Understanding the root cause helps in both prevention and insurance claims.


Immediate Steps After a Fire

Ensure Safety First

Before anything else, ensure everyone is safe. Evacuate the premises and call emergency services. Do not re-enter the building until it’s declared safe by authorities.

Contact Emergency Service Providers

Time is of the essence. Reach out to a professional emergency service provider like Projekt Restoration to begin the mitigation process immediately.


Assessing the Extent of Fire Damage

Structural and Surface Damage

Fire can compromise walls, ceilings, and floors. A thorough inspection is needed to determine if the structure is safe or requires reconstruction services.

Smoke and Soot Residue

Even if flames didn’t reach certain areas, smoke and soot can cause extensive damage. These residues are acidic and can corrode surfaces over time.


Working with Insurance Companies

Document Everything

Take photos, videos, and detailed notes of all damage. This documentation is crucial for insurance claims and future legal protection.

Hire a Public Adjuster

Consider hiring a public adjuster to ensure you get the maximum payout. They work for you—not the insurance company.


Choosing the Right Restoration Services

Why Professional Restoration Matters

DIY won’t cut it here. You need professional restoration experts who understand the nuances of commercial fire damage.

What to Look for in a Restoration Company

Choose a company with:

  • 24/7 emergency response
  • Certified technicians
  • Proven track record
  • Full-service offerings

Fire Damage Restoration Process

Step 1: Emergency Board-Up

To prevent further damage or theft, the first step is securing the property with emergency board-up services.

Step 2: Damage Assessment

Experts evaluate the extent of fire, smoke, and water damage to create a tailored restoration plan.


Water Damage Restoration After Firefighting

Why Water Damage Follows Fire

Firefighters use thousands of gallons of water to extinguish flames. That water seeps into walls, floors, and merchandise, causing secondary damage.

Drying and Dehumidification

Using industrial-grade equipment, water damage restoration teams dry out the space to prevent mold growth and structural weakening.


Mold Remediation in Fire-Damaged Retail Spaces

How Mold Develops Post-Fire

Moisture from firefighting efforts creates a breeding ground for mold. Within 24-48 hours, spores can spread rapidly.

Professional Mold Remediation

Mold remediation involves identifying, containing, and removing mold colonies using HEPA filtration and antimicrobial treatments.


Biohazard Clean Up Considerations

When Biohazards Are Present

Fires can expose hazardous materials like asbestos, chemicals, or even bodily fluids in extreme cases. This requires specialized biohazard clean up.

Certified Cleanup Teams

Only certified professionals should handle biohazards to ensure safety and compliance with OSHA regulations.


Reconstruction Services for Retail Spaces

From Demolition to Rebuild

Once the site is clean and dry, reconstruction services begin. This includes framing, drywall, painting, and restoring fixtures.

Designing for Resilience

Consider fire-resistant materials and layouts that minimize future risks during the rebuild.


Restoring Inventory and Equipment

Salvage vs. Replace

Experts assess what can be salvaged. Items like electronics and textiles may need specialized cleaning or replacement.

Inventory Documentation

Maintain a detailed list of damaged goods for insurance and tax purposes.


Customer Satisfaction During Recovery

Transparent Communication

Keep your customers informed about reopening timelines and safety measures. Transparency builds trust.

Temporary Relocation Options

Consider pop-up shops or online sales to maintain revenue during restoration.


Professional Restoration vs. DIY

Why DIY Falls Short

Without the right tools and expertise, DIY efforts can worsen damage or delay recovery.

Benefits of Hiring Experts

Professional restoration ensures compliance, safety, and speed—three things you can’t compromise on.


Preventing Future Fire Damage in Retail Spaces

Install Fire Suppression Systems

Sprinklers, extinguishers, and alarms are your first line of defense.

Regular Electrical Inspections

Faulty wiring is a leading cause of retail fires. Schedule annual inspections to stay safe.


Training Staff for Fire Emergencies

Evacuation Drills

Practice makes perfect. Regular drills ensure your team knows what to do in an emergency.

Fire Safety Education

Teach staff how to use extinguishers and identify hazards before they escalate.


Legal and Compliance Considerations

Building Codes and Permits

Ensure all restoration work complies with local building codes and fire safety regulations.

Insurance Policy Review

Update your policy to reflect new assets and improvements post-restoration.


Leveraging Technology in Restoration

Thermal Imaging and Moisture Mapping

Advanced tools help detect hidden damage, ensuring nothing is overlooked.

Digital Project Management

Track progress, communicate with contractors, and manage timelines through restoration apps.


Customer Testimonials and Case Studies

Real Stories, Real Results

Visit our gallery and blog to see how we’ve helped other retail businesses bounce back stronger.

Why Clients Trust Projekt Restoration

Our commitment to customer satisfaction and professional restoration is unmatched. We’re not just restoring buildings—we’re restoring livelihoods.


FAQs About Fire Damage in Retail Spaces

1. How long does fire damage restoration take?

It depends on the extent of the damage. Minor incidents may take a few days, while major restorations can span weeks or months.

2. Can I stay open during restoration?

In some cases, yes. We can isolate affected areas and work around your schedule to minimize disruption.

3. Will insurance cover all restoration costs?

Most commercial policies cover fire damage, but coverage varies. Always consult your provider and consider a public adjuster.

4. What certifications should a restoration company have?

Look for IICRC certification and OSHA compliance. These ensure the company meets industry standards.

5. How do I prevent mold after a fire?

Quick drying and dehumidification are key. Hire professionals for mold remediation to avoid long-term issues.

6. What should I do immediately after a fire?

Ensure safety, call emergency services, document damage, and contact a restoration company like Projekt Restoration.


Final Thoughts: Rebuilding Stronger After Fire Damage

Fire damage in retail spaces is a serious challenge—but not an insurmountable one. With the right team, tools, and timeline, you can turn disaster into opportunity. At Projekt Restoration, we’re committed to quality service and ready to help you every step of the way. From water damage restoration and fire damage restoration to mold remediation and biohazard clean up, we’ve got you covered.

Don’t wait. Call us now at 855-933-7935 for fast, friendly, and professional service. Let’s rebuild your retail space—stronger, safer, and smarter.

About Us | FAQs | Serving Areas | How It Works

Mold Inspection Tips for Multi-Unit Properties

Mold Inspection Tips for Multi-Unit Properties are essential for property managers and landlords who want to maintain safe, healthy living environments. But how do you ensure every unit is mold-free without disrupting tenants or missing hidden growth? At Projekt Property Restoration, we specialize in mold remediation and property restoration, offering fast, friendly, and professional service across California. Visit us at https://www.projektrestorationca.com or call 855-933-7935 to learn how we help property owners stay ahead of mold issues.

The key to effective mold inspection in multi-unit buildings lies in early detection, consistent maintenance, and professional evaluation. Experts like Michael Pinto, a certified mold specialist and author of “Fungal Contamination: A Comprehensive Guide,” emphasize the importance of proactive inspections. This article covers practical tips for identifying mold, understanding its causes, and knowing when to call in professionals like Projekt Property Restoration.

But these are just the basics every property manager should know. We’ve gathered expert-backed strategies and actionable advice to help you tackle mold before it spreads. Ready to protect your property and your tenants? Let’s dive into the must-know mold inspection tips for multi-unit properties.

Understanding Mold in Multi-Unit Properties

Mold is a type of fungus that thrives in damp, humid environments. In residential buildings, common types include black mold, mildew, and Aspergillus. Black mold, known for its dark green or black appearance, poses serious health risks. Mildew, a surface mold, often appears white or gray and grows in bathrooms or kitchens.

Mold needs three things to grow: moisture, warmth, and organic material. Leaky pipes, poor ventilation, and high humidity create the perfect breeding ground. Once mold spores land on a damp surface, they begin to spread quickly.

Multi-unit properties face unique challenges. Shared walls and ceilings can hide moisture issues. Centralized HVAC systems can circulate spores throughout the building. Plumbing leaks in one unit may affect several others. These factors make early detection and prevention essential.

Routine inspections and prompt repairs are critical. Property managers should educate tenants on signs of mold and encourage immediate reporting. For professional help, explore our mold remediation services. Learn more about our process by visiting how it works. Taking action early can prevent costly damage and protect residents’ health.

Common Causes of Mold in Multi-Unit Buildings

Moisture problems in multi-unit buildings often stem from several overlooked sources. Roof leaks are a major culprit, especially in older structures. Plumbing issues, such as dripping pipes or faulty seals, can go unnoticed behind walls. Poor ventilation in bathrooms and kitchens traps humidity, creating the perfect breeding ground for mold.

Tenant behavior also plays a significant role. Drying clothes indoors without proper airflow increases indoor humidity. Failing to report minor leaks or spills allows moisture to linger and spread. Even blocking air vents with furniture can disrupt airflow and encourage mold growth.

Structural flaws further compound the issue. Inadequate insulation leads to condensation on walls and ceilings. Poor drainage systems around the foundation allow water to seep into basements or crawl spaces. These hidden problems often go undetected until mold becomes visible.

Routine inspections and proactive maintenance are essential. For more on how to handle these issues, explore our services or visit our mold remediation page. Addressing these causes early helps prevent costly damage and health risks.

Signs and Symptoms of Mold Infestation

Dark patches on walls, ceilings, or floors often signal mold growth. Watch for yellow or brown water stains. Peeling or bubbling paint may also indicate moisture issues. A musty odor is another strong warning sign. Check for warped wood or soft drywall, especially near plumbing.

Health symptoms can be just as telling. Persistent coughing, sneezing, or nasal congestion may point to mold exposure. Individuals with asthma or allergies often experience worsened symptoms. Headaches, fatigue, and skin irritation are also common.

To distinguish mold from dirt, try wiping the area with a damp cloth. Mold usually smears or spreads, while dirt wipes away cleanly. Mold often returns quickly after cleaning if moisture remains. Use a flashlight to inspect hidden corners, under sinks, and behind appliances.

If you suspect mold, don’t wait. Visit our mold remediation page for expert help. Learn more about our process on the how it works section. Early detection can prevent costly repairs and protect your health.

Legal Responsibilities and Regulations

Landlords and property managers must comply with federal, state, and local mold regulations. They are legally obligated to maintain habitable living conditions. This includes addressing water leaks and moisture issues promptly. Failure to act can result in legal consequences or tenant lawsuits.

Tenants have the right to live in a safe, mold-free environment. If mold is suspected, they should notify the landlord in writing. If ignored, tenants can report the issue to local housing authorities. In some states, they may withhold rent or terminate the lease legally.

Disclosure laws vary by location but often require landlords to inform tenants of existing mold problems. During property sales, sellers must disclose any known mold or water damage. Transparency protects both parties and prevents future disputes.

Understanding these legal duties helps avoid costly litigation. For more insights, visit our blog or explore our FAQ section. Staying informed ensures compliance and promotes healthier living spaces.

Preparing for a Mold Inspection

Start by clearing all clutter and furniture from areas with visible mold or moisture damage. Ensure easy access to basements, attics, and behind appliances. Open locked rooms or storage spaces to avoid delays during the inspection. Next, gather essential documents like maintenance logs, repair records, and tenant complaints related to leaks or mold.

Photograph any visible mold or water stains before the inspection. These images help track changes and support documentation. If tenants have reported issues, compile their statements and note the dates. This information provides valuable context for the inspector.

Notify tenants at least 48 hours in advance. Explain the purpose, schedule, and expected duration of the inspection. Encourage them to report any hidden concerns. Clear communication builds trust and ensures cooperation.

For more guidance on mold-related concerns, visit our mold remediation page. You can also explore our how it works section to understand the full process. Proper preparation ensures a smoother inspection and faster resolution of any issues found.

Choosing a Qualified Mold Inspector

When selecting a mold inspector, prioritize certifications like IICRC or NORMI. These credentials ensure proper training and adherence to industry standards. A certified inspector understands how to assess mold presence without causing unnecessary disruption.

Don’t confuse mold inspectors with mold remediators. Inspectors identify and report mold issues, while remediators handle the cleanup. Hiring separate professionals avoids conflicts of interest and ensures unbiased evaluations.

Always vet candidates thoroughly. Start by reading online reviews and checking their Better Business Bureau rating. Ask for references and follow up with past clients. Confirm they carry liability insurance and are bonded for added protection.

Request a sample report to evaluate their thoroughness and clarity. A professional should also explain their inspection process clearly. If they hesitate, consider it a red flag.

Explore their background through their official about page. Review the range of services they offer to ensure they align with your property’s needs.

Choosing the right expert can prevent costly mistakes. Take your time and make an informed decision.

What to Expect During a Mold Inspection

A professional mold inspection begins with a thorough visual assessment of all accessible areas. Inspectors look for visible mold, water stains, and signs of excess moisture. They use tools like infrared cameras to detect hidden moisture behind walls or ceilings. Hygrometers measure humidity levels, while moisture meters pinpoint damp spots in building materials.

Next, air and surface samples are collected to identify mold types and concentrations. These samples are sent to a lab for analysis. The process helps determine if the indoor air quality poses health risks. Inspectors may also check HVAC systems, basements, attics, and crawl spaces for contamination.

Most inspections take between one to three hours, depending on the property size. Multi-unit buildings may require more time due to the number of units and shared spaces. Inspectors document their findings in a detailed report, often including photos and recommendations.

For more insight into our inspection approach, visit our how-it-works page. You can also explore our full range of services to understand how we handle mold and moisture issues efficiently.

Interpreting Mold Inspection Reports

A mold inspection report typically includes lab analysis, moisture readings, visual findings, and professional recommendations. Start by reviewing the lab results, which list mold types and spore counts. Compare indoor spore levels to outdoor baselines. Elevated levels indoors often indicate a problem, especially if toxic molds like Stachybotrys are present.

Moisture readings help pinpoint areas with potential water intrusion. High readings suggest active leaks or poor ventilation. Use this data to identify the source of mold growth. Recommendations in the report usually outline next steps, including containment, removal, and prevention strategies.

Understanding spore count thresholds is crucial. Normal levels vary by region, but any significant indoor spike requires attention. If the report shows high counts, plan for immediate mold remediation. Delaying action can worsen property damage and health risks.

Use the report to prioritize repairs and schedule follow-up inspections. For more insights, visit our blog or explore our full range of services. A clear understanding of the report ensures effective remediation and long-term protection.

Mold Remediation and Prevention Strategies

Begin mold removal by isolating affected areas to prevent spores from spreading. Wear protective gear and use HEPA-filtered vacuums. Remove and discard porous materials like drywall and carpeting if contaminated. Clean non-porous surfaces with EPA-approved solutions. If the infestation covers over 10 square feet, hire certified professionals for mold remediation.

Prevent future outbreaks by controlling indoor humidity. Use dehumidifiers and ensure proper ventilation in bathrooms and kitchens. Repair leaks immediately and inspect plumbing regularly. Schedule routine property maintenance to catch early signs of water damage.

Educate tenants on mold risks and prevention. Provide clear guidelines on reporting leaks or musty odors. Encourage them to keep windows open when weather permits. Share resources from your property management team or link to your blog for ongoing tips.

Consistent communication and proactive measures reduce long-term costs. Mold thrives in silence and neglect—stay ahead with awareness and action.

Coordinating Mold Management Across Multiple Units

When mold affects multiple units or shared spaces, swift coordination is essential. Start by identifying all impacted areas through a thorough inspection. Notify tenants immediately, outlining the steps being taken and expected timelines. Clear, consistent communication builds trust and reduces panic.

Work closely with maintenance teams to schedule inspections and repairs efficiently. Assign responsibilities to ensure no unit is overlooked. Use digital tools or shared calendars to streamline updates and progress tracking.

Budgeting for large-scale remediation requires foresight. Allocate funds for both immediate removal and long-term prevention. Consider partnering with professionals who specialize in mold remediation to ensure compliance and effectiveness.

Prevent future outbreaks by investing in regular inspections and moisture control systems. Educate tenants on early signs of mold and encourage prompt reporting. Include mold management in your annual maintenance plan.

For more insights, explore our blog or learn about our full range of services. Proactive coordination not only protects the property but also ensures tenant safety and satisfaction.

Frequently Asked Questions (FAQs)

Mold exposure in multi-unit properties can trigger allergies, asthma, and respiratory infections. Vulnerable individuals face higher health risks. Inspections should occur at least once a year or after water damage. Tenants can’t legally deny access if proper notice is given. Landlords are typically responsible for paying for mold remediation in rental units.

To prevent mold from returning, landlords must fix leaks, improve ventilation, and monitor humidity. Tenants should report visible mold or musty odors immediately. DIY mold tests often lack accuracy and can miss hidden growth. Shared HVAC systems can spread spores between units, worsening the issue.

If landlords ignore mold complaints, tenants may file health department reports or pursue legal action. Property managers should document all complaints, inspections, and repairs to protect against liability. Keeping detailed records and photos is essential. For more guidance, visit our FAQ page or explore our full list of services.

Proactive communication and regular maintenance are key to managing mold in multi-unit buildings. Don’t wait for the problem to escalate. Address it early to protect both health and property.

How to Prevent Water Damage from Frozen Pipes

Frozen pipes are a common winter woe that can lead to serious water damage if not addressed promptly. When temperatures drop, the water inside your pipes can freeze, expand, and eventually cause the pipes to burst—resulting in costly repairs and potential damage to your home or business. Learning how to prevent water damage from frozen pipes is essential for protecting your property during the colder months. At COMMITTED TO QUALITY SERVICE, we understand the urgency of such situations. That’s why we offer fast, friendly, and professional water damage restoration services, using specialized equipment designed to dry and restore structures affected by severe water damage. Whether you’re dealing with frozen pipes, water leaks, or emergency flooding, our expert team is here to help. Don’t wait until it’s too late—call us now at 855-933-7935 to safeguard your home and avoid the stress of unexpected repairs.

Understand Why Pipes Freeze

Frozen pipes are a common winter hazard that can lead to significant water damage if not properly addressed. When temperatures drop below 32°F (0°C), the water inside pipes can freeze, expand, and create pressure that causes the pipe to burst. This is especially common in uninsulated or exposed pipes in basements, attics, and exterior walls.

“According to the Insurance Institute for Business & Home Safety, a burst pipe can release up to 250 gallons of water per day, causing extensive damage to property and belongings.”

Understanding the science behind frozen pipes helps in taking proactive steps to prevent them. Water expands as it freezes, and since pipes are rigid, this expansion creates immense pressure. The weakest point in the pipe—often a joint or crack—will give way, leading to leaks or bursts.

  1. Pipes located in unheated interior spaces like garages, crawl spaces, and basements are most at risk.
  2. Sudden temperature drops, poor insulation, and thermostats set too low can increase the likelihood of freezing.
  3. Homes in warmer climates are often more vulnerable because pipes are not typically insulated against cold weather.

To learn more about how to protect your home, visit our services page or explore our detailed guide on hidden water damage.

For additional tips and expert advice, check out this helpful resource from the American Red Cross: Preventing and Thawing Frozen Pipes.

Understanding the causes of frozen pipes is the first step in preventing costly water damage and ensuring your home stays safe during the winter months.

Insulate Pipes in Vulnerable Areas

One of the most effective ways to prevent water damage from frozen pipes is by properly insulating pipes located in vulnerable areas. These areas typically include basements, attics, crawl spaces, garages, and exterior walls—places where temperatures can drop significantly during winter. Insulating these pipes helps maintain a stable temperature, reducing the risk of freezing and subsequent bursting.

There are various types of pipe insulation available, such as foam rubber sleeves, fiberglass wraps, and heat tape. Choosing the right insulation depends on your specific needs and the climate in your region. For added protection, consider sealing any gaps or cracks in walls and around pipe entry points to prevent cold air from reaching the pipes.

Homeowners should also pay attention to older plumbing systems, as they may be more susceptible to freezing. Regular maintenance and inspection can help identify potential risks before they become costly problems. If you’re unsure about the best approach, consulting a professional can ensure your home is properly protected.

For more information on how to safeguard your property, visit our services page. You can also explore our blog for expert tips and seasonal advice. Taking proactive steps now can save you from extensive water damage repairs later.

Keep a Consistent Indoor Temperature

Maintaining a stable indoor temperature is one of the most effective ways to prevent your pipes from freezing and bursting during cold weather. Sudden drops in temperature can cause the water inside your pipes to freeze, expand, and eventually crack the pipe, leading to costly water damage. To avoid this, keep your thermostat set to a consistent temperature—ideally above 55°F—even when you’re away from home. This ensures that warm air continues to circulate throughout your home, especially in areas where pipes are located, such as basements, attics, and under sinks.

Proper insulation also plays a critical role in maintaining indoor warmth. Insulate exposed pipes and seal any drafts near windows, doors, or vents. Additionally, opening cabinet doors in kitchens and bathrooms allows warm air to reach pipes more easily. If you’re unsure about your home’s insulation or heating system, consider consulting a professional for an inspection.

For more tips on protecting your property from seasonal damage, visit our blog or explore our full range of services. Taking proactive steps now can save you from expensive repairs and the inconvenience of dealing with water damage later. Don’t wait until it’s too late—ensure your home stays warm and your pipes stay safe all winter long.

Let Faucets Drip During Extreme Cold

During periods of extreme cold, one of the simplest yet most effective ways to prevent frozen pipes is to allow your faucets to drip slightly. This small, continuous flow of water helps relieve pressure in the plumbing system, reducing the risk of pipes freezing and bursting. When water freezes, it expands, which can cause pipes to crack or rupture, leading to significant water damage. By keeping the water moving, even at a trickle, you can avoid the costly repairs and restoration that often follow a pipe burst.

Focus on faucets connected to pipes that run along exterior walls or in unheated areas like basements, attics, and garages. These are the most vulnerable to freezing temperatures. Additionally, open cabinet doors under sinks to allow warm air to circulate around the plumbing.

If you’re unsure whether your home is at risk or if you’ve already experienced issues, it’s wise to consult professionals. Learn more about our comprehensive services designed to protect your property from water-related damage. You can also explore our expert tips on identifying hidden water damage before it becomes a major problem.

Taking proactive steps during cold weather can save you from the stress and expense of emergency repairs. Don’t wait until it’s too late—prepare your home now to stay safe and dry all winter long.

Seal Cracks and Openings Around Pipes

One of the most effective ways to prevent water damage from frozen pipes is by sealing any cracks or openings around pipes, especially where they enter your home. These gaps can allow cold air to seep in, increasing the risk of pipes freezing and bursting during winter. Use caulk or spray foam insulation to seal these vulnerable areas, particularly in basements, crawl spaces, attics, and exterior walls. This simple step can significantly reduce the chances of costly water damage.

In addition to sealing gaps, consider insulating exposed pipes with foam pipe insulation or heat tape. This is especially important for pipes located in unheated areas. Regularly inspecting your home for any signs of wear or damage around pipe entry points can help you catch potential issues early. If you’re unsure where to start, our services page offers detailed information on professional solutions for protecting your home.

Water damage from frozen pipes can lead to mold growth, structural issues, and expensive repairs. To learn more about the risks and how to address them, visit our water damage resource page. Taking proactive steps now can save you time, money, and stress in the long run. For personalized advice or assistance, don’t hesitate to reach out to our expert team.

Disconnect and Drain Outdoor Hoses

One of the most overlooked yet crucial steps in preventing water damage from frozen pipes is properly managing your outdoor water sources before winter sets in. Outdoor hoses left connected to faucets can trap water inside the pipe, which may freeze, expand, and cause the pipe to burst. This can lead to extensive water damage not only outside but also inside your home’s walls and foundation.

To avoid this, start by disconnecting all garden hoses from outdoor spigots. Drain any remaining water from the hoses and store them in a dry place. Next, shut off the water supply to outdoor faucets if your home has a separate valve for them. After turning off the supply, open the faucet to allow any residual water to drain out completely. For added protection, consider installing insulated faucet covers to shield them from freezing temperatures.

Taking these simple precautions can save you from costly repairs and potential water damage restoration services. If you’re unsure about your home’s winter readiness, consult our expert team for professional guidance. Learn more about our full range of services designed to protect your property year-round. For additional tips and insights, visit our blog and stay informed on how to keep your home safe during the colder months.

Know How to Shut Off Your Water Supply

In the event of frozen pipes, knowing how to shut off your water supply can be the difference between a minor inconvenience and a major disaster. When water inside pipes freezes, it expands and increases pressure, which can cause pipes to burst. If this happens, shutting off the main water supply immediately can help prevent extensive water damage to your home.

The main water shut-off valve is typically located near where the water line enters your home—often in basements, crawl spaces, or utility rooms. It’s crucial to locate this valve in advance and ensure it’s accessible and functional. Everyone in your household should know its location and how to operate it in case of an emergency.

In addition to turning off the main valve, consider draining your pipes by opening faucets and flushing toilets to remove any remaining water. This step can further reduce the risk of damage if a pipe bursts.

Understanding how to act quickly during a plumbing emergency is part of a broader strategy to protect your home. For more tips on preventing and managing water-related issues, explore our blog or learn more about our comprehensive services. If you suspect damage has already occurred, visit our water damage page to find out how we can help restore your property efficiently and effectively.

In conclusion, preventing water damage from frozen pipes is all about preparation and vigilance. By insulating your pipes, maintaining a consistent indoor temperature, sealing leaks, and allowing faucets to drip during extreme cold, you can significantly reduce the risk of freezing. Regular maintenance and awareness of your plumbing system are key to avoiding costly repairs and water damage. Taking these proactive steps not only protects your home during the winter months but also provides peace of mind knowing that you’re ready for whatever the cold weather brings. Stay warm, stay safe, and keep your pipes flowing freely.

Fire Damage Risks in Commercial Kitchens

Commercial kitchens are bustling environments where precision, speed, and safety must coexist. However, amidst the clatter of pots and pans, sizzling grills, and high-powered appliances, the risk of fire damage looms large. Fire incidents in commercial kitchens are not only common but can be devastating, leading to significant property loss, business interruption, and even endangering lives. Understanding the fire damage risks in these high-stakes environments is crucial for prevention and rapid response.

In this comprehensive guide, we delve deep into the causes, consequences, and solutions related to fire damage in commercial kitchens. Whether you’re a restaurant owner, facility manager, or part of a property management team, this article will equip you with the knowledge to mitigate risks and ensure safety. We also explore the role of restoration services, including fire damage restoration, water damage restoration, and mold remediation, in helping businesses recover swiftly and efficiently.

At Projekt Restoration, we are COMMITTED TO QUALITY SERVICE. Call Us Now! 855-933-7935. Fast, Friendly, and Professional Service. Our Services include Water Damage Restoration, which requires special equipment designed specifically for drying structures that have suffered severe water damage. Fire Damage Restoration is another critical service where quick mitigation and recovery are key.

1. Common Causes of Fire in Commercial Kitchens

Commercial kitchens are inherently high-risk environments due to the constant use of open flames, hot surfaces, and flammable materials. Understanding the common causes of fire in these settings is the first step toward effective prevention.

  • Cooking Equipment: The leading cause of fires in commercial kitchens is cooking equipment. Deep fryers, ovens, stoves, and grills can easily ignite fires if not properly maintained or monitored. Grease buildup on these appliances can catch fire and spread rapidly.
  • Electrical Malfunctions: Faulty wiring, overloaded circuits, and malfunctioning appliances are significant fire hazards. In older buildings, outdated electrical systems may not support the power demands of modern kitchen equipment.
  • Improper Storage: Storing flammable materials like cooking oils, paper products, and cleaning chemicals near heat sources increases the risk of fire. These materials should be stored in designated, safe areas away from potential ignition points.
  • Human Error: Negligence, such as leaving cooking unattended or failing to turn off appliances, is a common cause of kitchen fires. Proper training and adherence to safety protocols are essential to minimize human error.
  • Poor Ventilation: Inadequate ventilation systems can lead to the accumulation of grease and smoke, which are highly flammable. Regular cleaning and maintenance of hoods, ducts, and fans are critical for fire prevention.

To mitigate these risks, commercial kitchens must implement strict safety protocols, conduct regular equipment inspections, and ensure staff are trained in fire safety. Additionally, having access to professional restoration services ensures that in the event of a fire, recovery can begin immediately, minimizing downtime and losses.

2. The Impact of Fire Damage on Commercial Properties

The aftermath of a fire in a commercial kitchen extends far beyond the visible damage. The financial, operational, and emotional toll can be overwhelming. Understanding the full scope of fire damage helps in preparing for and mitigating its effects.

Structural Damage: Fires can compromise the structural integrity of a building. High temperatures can weaken steel supports, warp metal fixtures, and cause concrete to crack. Walls, ceilings, and floors may need extensive repairs or complete reconstruction. This is where reconstruction services become essential to restore the property to its original state.

Smoke and Soot Damage: Even areas not directly affected by flames can suffer from smoke and soot damage. These residues can corrode surfaces, stain walls, and create persistent odors. Specialized fire damage restoration techniques are required to clean and deodorize the premises effectively.

Water Damage: Ironically, water used to extinguish fires often causes additional damage. Excess moisture can seep into walls and floors, leading to mold growth and structural issues. Immediate water damage restoration is crucial to prevent long-term problems.

Business Interruption: A fire can halt operations for days, weeks, or even months. This downtime results in lost revenue, disrupted supply chains, and potential loss of clientele. Quick response and efficient emergency service are vital to resume operations as soon as possible.

Health Hazards: Fires can release toxic fumes and particulates, posing serious health risks to employees and customers. In some cases, biohazard clean up may be necessary to ensure a safe environment.

The comprehensive approach offered by Projekt Restoration ensures that all aspects of fire damage—from structural repairs to health hazards—are addressed with professionalism and care. Our commitment to customer satisfaction drives us to deliver top-tier property restoration services tailored to each client’s needs.

3. The Role of Professional Restoration Services

When disaster strikes, the response time and quality of restoration services can make all the difference. In the wake of a fire, engaging a team of experts for fire damage restoration is not just advisable—it’s essential.

Rapid Response: Time is of the essence after a fire. The longer the delay in addressing damage, the more extensive and costly the repairs become. Professional restoration companies offer emergency service to begin mitigation immediately, preventing further deterioration.

Comprehensive Assessment: Restoration professionals conduct thorough inspections to assess the extent of fire, smoke, and water damage. This evaluation forms the basis for a customized restoration plan that addresses all affected areas.

Advanced Equipment and Techniques: From industrial-grade dehumidifiers to ozone generators and thermal foggers, professional restoration teams use specialized equipment to clean, dry, and deodorize the property. These tools are essential for effective mold remediation and odor removal.

Reconstruction Services: In cases of severe damage, parts of the structure may need to be rebuilt. Restoration companies often provide reconstruction services to restore the property to its pre-loss condition, ensuring safety and compliance with building codes.

Insurance Coordination: Navigating insurance claims can be daunting. Restoration professionals assist with documentation, estimates, and communication with insurers, streamlining the claims process and ensuring fair compensation.

At Projekt Restoration, we pride ourselves on delivering professional restoration services that prioritize quality, speed, and customer satisfaction. Our team is trained to handle every aspect of the restoration process, providing peace of mind during a stressful time. Learn more about our process by visiting our How It Works page.

4. Preventative Measures and Safety Protocols

Prevention is always better than cure, especially when it comes to fire safety in commercial kitchens. Implementing robust safety protocols and preventative measures can significantly reduce the risk of fire and ensure a safer working environment.

Regular Maintenance: All kitchen equipment should be inspected and maintained regularly. This includes cleaning grease traps, checking gas lines, and ensuring that electrical systems are up to code. Preventative maintenance helps identify potential hazards before they escalate.

Proper Training: Staff should be trained in fire safety protocols, including how to use fire extinguishers, shut off gas lines, and evacuate the premises. Regular fire drills and safety workshops reinforce these practices and prepare employees for emergencies.

Fire Suppression Systems: Installing automatic fire suppression systems, such as hood suppression units and sprinkler systems, is crucial. These systems can quickly contain and extinguish fires, minimizing damage and risk to personnel.

Safe Storage Practices: Flammable materials should be stored away from heat sources in clearly labeled, fire-resistant containers. Cleaning supplies, cooking oils, and paper products must be kept in designated storage areas.

Ventilation and Airflow: Proper ventilation reduces the buildup of grease and smoke, which are common fire hazards. Regular cleaning of hoods, ducts, and fans is essential to maintain airflow and prevent ignition.

Routine Inspections: Schedule regular inspections by fire safety professionals to ensure compliance with local fire codes and regulations. These inspections can identify vulnerabilities and recommend improvements.

By adopting these preventative measures, commercial kitchens can significantly reduce the likelihood of fire incidents. For more tips on identifying hidden risks, check out our guide on how to identify hidden water damage early, which can also contribute to fire hazards if left unchecked.

5. Recovery and Business Continuity Planning

Even with the best preventative measures, accidents can happen. That’s why having a comprehensive recovery and business continuity plan is essential for commercial kitchens. Such a plan ensures that operations can resume quickly and efficiently after a fire.

Emergency Response Plan: Develop a clear emergency response plan that outlines evacuation procedures, emergency contacts, and roles and responsibilities. Ensure all staff are familiar with the plan and conduct regular drills.

Backup Systems: Invest in backup systems for critical operations, such as power generators, data storage, and communication tools. These systems help maintain essential functions during and after an emergency.

Insurance Coverage: Review your insurance policies to ensure adequate coverage for fire damage, business interruption, and property restoration. Work with your insurer to understand the claims process and required documentation.

Partnership with Restoration Experts: Establish a relationship with a trusted professional restoration company like Projekt Restoration. Having a go-to provider for fire damage restoration, water damage restoration, and mold remediation ensures a faster and more coordinated response.

Communication Strategy: Develop a communication plan to keep employees, customers, and stakeholders informed during the recovery process. Transparency builds trust and helps manage expectations.

Post-Incident Review: After recovery, conduct a thorough review of the incident to identify lessons learned and improve future preparedness. Update your emergency and continuity plans accordingly.

Projekt Restoration offers end-to-end support for businesses recovering from fire damage. From initial assessment to full reconstruction services, we are dedicated to restoring your operations with minimal disruption. Explore our blog for more insights and expert advice on disaster recovery and prevention.

Conclusion

Fire damage in commercial kitchens is a serious threat that requires proactive management, swift response, and expert restoration. From understanding the common causes and impacts to implementing preventative measures and recovery plans, every step plays a vital role in safeguarding your business.

At Projekt Restoration, we understand the complexities of fire damage and are equipped to handle every aspect of the restoration process. Our comprehensive services—including fire damage restoration, water damage restoration, mold remediation, biohazard clean up, and reconstruction services—are designed to deliver fast, effective, and professional results. With a commitment to customer satisfaction and 24/7 emergency service, we are your trusted partner in property restoration.

Don’t wait for disaster to strike. Take the first step toward a safer, more resilient kitchen environment. Contact us today to learn how we can help protect your business and ensure a swift recovery when it matters most.

How to Handle Mold in Shared Living Spaces


COMMITTED TO QUALITY SERVICE Call Us Now! 855-933-7935 – Fast, Friendly and Professional Service.

Our Services:

  • Water Damage: Water Damage Restoration requires special equipment designed specifically for drying structures that have suffered severe water damage.
  • Fire Damage: The most crucial step in the fire restoration process is to quickly mitigate the affected area and recover as much as possible.

Mold in Shared Living Spaces: What You Need to Know

Mold in shared living spaces can be a nightmare. Whether you’re in a college dorm, a rented apartment, or a co-living community, mold doesn’t just affect the walls—it affects relationships, health, and peace of mind. Let’s dive into how to tackle this sneaky intruder head-on.


Understanding the Basics of Mold Growth

What Is Mold and Why Does It Thrive Indoors?

Mold is a type of fungus that thrives in moist, warm environments. It reproduces through spores that float through the air and settle on damp surfaces. In shared spaces, mold can spread quickly due to poor ventilation, shared bathrooms, and inconsistent cleaning habits.

Common Types of Mold Found in Shared Living Spaces

From the notorious black mold (Stachybotrys chartarum) to the more common Aspergillus and Cladosporium, mold types vary in toxicity and appearance. Knowing what you’re dealing with is the first step toward effective mold remediation.


Signs of Mold in Shared Living Spaces

Visual Indicators: What to Look For

Look for discolored patches on walls, ceilings, and around windows. Mold often appears as black, green, or white fuzzy spots. Don’t ignore peeling paint or warped drywall—these are red flags.

Smell That Funk? Mold Has a Distinct Odor

If your shared space smells musty or earthy, mold might be lurking. Trust your nose—it’s often the first to detect what your eyes can’t see.


Health Risks of Mold Exposure

Short-Term Symptoms You Shouldn’t Ignore

Exposure to mold can cause sneezing, coughing, skin rashes, and eye irritation. In shared spaces, these symptoms can spread like wildfire among roommates.

Long-Term Health Effects of Mold

Prolonged exposure can lead to chronic respiratory issues, asthma, and even neurological problems. If you or your roommates have pre-existing conditions, mold can be especially dangerous.


Why Mold in Shared Living Spaces Is a Unique Challenge

Multiple People, Multiple Habits

Different cleaning routines, shower habits, and ventilation practices can create the perfect storm for mold growth. Coordination is key.

Shared Responsibility, Shared Consequences

When mold appears, finger-pointing often follows. Establishing clear responsibilities for cleaning and maintenance can prevent disputes and mold outbreaks.


Initial Steps to Take When You Discover Mold

Don’t Panic—Document Everything

Take photos, note the date, and inform your roommates. If you’re renting, notify your landlord immediately. Documentation is crucial for legal and insurance purposes.

Isolate the Area if Possible

Close off the affected area to prevent spores from spreading. Use plastic sheeting and seal vents if necessary.


When to Call in Restoration Services

DIY vs. Professional Restoration: Know the Limits

Small patches of mold can sometimes be handled with vinegar or hydrogen peroxide. But if the affected area is larger than 10 square feet, it’s time to call in professional restoration services.

Why Professional Restoration Is Worth It

Experts use specialized equipment and follow strict protocols to ensure complete mold removal. Plus, they can identify hidden mold and moisture sources you might miss.


Water Damage Restoration and Mold Prevention

How Water Damage Leads to Mold

Leaks, floods, and even high humidity can create the perfect breeding ground for mold. Water damage restoration is essential to prevent mold from taking hold.

Drying Techniques That Work

Professional-grade dehumidifiers, air movers, and moisture meters ensure that every drop of water is removed. This is the cornerstone of effective mold prevention.


Fire Damage Restoration and Mold Risks

Post-Fire Water Use Can Trigger Mold

Firefighting efforts often leave behind water damage. Without prompt fire damage restoration, mold can set in within 24-48 hours.

Why Speed Matters After a Fire

Quick mitigation prevents secondary damage like mold. Restoration teams can handle both fire and mold issues simultaneously.


Mold Remediation: The Gold Standard

What to Expect During Mold Remediation

Professionals will assess the damage, contain the area, remove contaminated materials, and treat surfaces with antimicrobial solutions. Air scrubbers and HEPA vacuums are often used.

How Long Does Mold Remediation Take?

Depending on the extent, it can take anywhere from a few hours to several days. Trust the pros to get it right the first time.


Emergency Service for Mold Outbreaks

Why You Shouldn’t Wait

Mold spreads fast. An emergency service call can mean the difference between a minor inconvenience and a full-blown disaster.

24/7 Response Teams Save the Day

Companies like Projekt Restoration offer round-the-clock services to tackle mold before it gets out of hand.


Property Restoration After Mold Removal

Bringing Your Space Back to Life

After mold is removed, walls may need repainting, carpets replacing, and drywall repairing. Property restoration ensures your space is safe and livable again.

Don’t Skip This Step

Restoration isn’t just cosmetic—it ensures that mold doesn’t return.


Biohazard Clean Up and Mold

When Mold Becomes a Biohazard

In severe cases, mold can be classified as a biohazard, especially when it affects immunocompromised individuals. Biohazard clean up teams are trained to handle these situations safely.

Protecting Occupants During Clean-Up

Proper PPE, containment, and disposal methods are essential to prevent cross-contamination.


Reconstruction Services Post-Mold

Rebuilding After Remediation

Sometimes, mold damage is so extensive that reconstruction is necessary. Reconstruction services can include replacing drywall, flooring, and even structural elements.

Choosing the Right Contractor

Look for licensed, insured professionals with experience in mold-related reconstruction.


Customer Satisfaction in Mold Remediation

Why Reviews Matter

Check testimonials and reviews to gauge a company’s commitment to customer satisfaction. A good reputation is earned through quality work and transparency.

Follow-Up Services and Guarantees

Top-tier companies offer follow-up inspections and satisfaction guarantees to ensure the mold stays gone.


Professional Restoration: The Smart Choice

What Sets Pros Apart

From advanced equipment to certified technicians, professional restoration teams bring peace of mind and proven results.

Saving Time, Money, and Stress

DIY might seem cheaper, but improper mold removal can lead to recurring issues and higher costs down the line.


Preventing Mold in Shared Living Spaces

Daily Habits That Keep Mold at Bay

  • Use exhaust fans in bathrooms and kitchens
  • Keep humidity below 50%
  • Fix leaks immediately
  • Clean regularly with mold-killing products

Seasonal Maintenance Tips

Check for leaks after storms, clean gutters, and inspect HVAC systems regularly.


Legal Responsibilities and Tenant Rights

Who’s Responsible for Mold?

In most cases, landlords are responsible for structural issues, while tenants must maintain cleanliness. Check your lease and local laws.

When to Seek Legal Help

If your landlord refuses to address mold, you may need to contact a housing authority or attorney.


FAQs About Mold in Shared Living Spaces

1. Is mold always visible?

No. Mold can grow behind walls, under carpets, and inside HVAC systems. A musty smell is often the first clue.

2. Can I stay in my room during mold remediation?

It depends on the severity. Professionals may recommend temporary relocation for safety.

3. Does renters insurance cover mold damage?

Some policies do, especially if the mold is caused by a covered peril like a burst pipe. Check your policy details.

4. How fast does mold grow?

Mold can begin growing within 24-48 hours of moisture exposure. Time is of the essence.

5. Can I clean mold myself?

Small areas can be cleaned with vinegar or bleach, but larger infestations require professional help.

6. What’s the cost of professional mold remediation?

Costs vary based on severity and location but typically range from $500 to $6,000.


Final Thoughts: Don’t Let Mold Take Over Your Shared Space

Mold in shared living spaces is more than just an eyesore—it’s a health hazard and a relationship wrecker. But with the right knowledge, tools, and professional help, you can reclaim your space and breathe easy again.

Need help now? Call Projekt Restoration at 855-933-7935 for fast, friendly, and professional service. Learn more about our restoration services, including water damage restoration, fire damage restoration, and mold remediation.

We’re committed to quality service and ready to help 24/7. Don’t wait—protect your health, your home, and your harmony today.

Schedule Your Mold Inspection Today!

Privacy Policy

Projekt Restoration we respects your privacy and is committed to protecting your personal information. This Privacy Policy outlines how we collect, use, and protect the information you provide when you visit our website, contact us, or use our services related to Mold Remediation, Mold Inspection & Testing, Mold Removal / Cleanup, and Black Mold Removal.


1. Information We Collect

We may collect the following types of personal and non-personal information:

  • Personal Information: Name, email address, phone number, physical address, and any other information you provide when contacting us or requesting services.

  • Usage Data: IP address, browser type, operating system, pages visited, and time/date of your visit.

  • Cookies: We may use cookies to enhance your website experience. You can disable cookies in your browser settings.


2. How We Use Your Information

We use your information to:

  • Respond to your inquiries or service requests

  • Schedule and deliver mold-related services

  • Improve our website and customer service

  • Send service updates, promotions, or important notices (if you opt-in)

  • Comply with legal obligations


3. Information Sharing and Disclosure

We do not sell, trade, or rent your personal information. We may share your data with:

  • Trusted third-party service providers (e.g., payment processors, contractors) to perform services on our behalf

  • Law enforcement or government agencies if required by law


4. Data Security

We implement reasonable safeguards (physical, electronic, and managerial) to protect your information from unauthorized access, alteration, disclosure, or destruction.


5. Your Privacy Rights (California Residents)

Under the California Consumer Privacy Act (CCPA), California residents have the right to:

  • Request disclosure of the personal information we collect and how we use it

  • Request deletion of your personal information

  • Opt-out of the sale of personal information (note: we do not sell your data)

To exercise any of these rights, please contact us at:
📞 Phone: (855) 933-7935


6. Third-Party Links

Our website may contain links to third-party sites. We are not responsible for their privacy practices. Please review their privacy policies separately.


7. Children’s Privacy

Our services are not directed to children under 13. We do not knowingly collect personal information from minors.


8. Changes to This Privacy Policy

We may update this Privacy Policy from time to time. Changes will be posted on this page with the updated effective date.


9. Contact Us

If you have any questions or concerns about this Privacy Policy, please contact:
Projekt Restoration

📞 (855) 933-7935