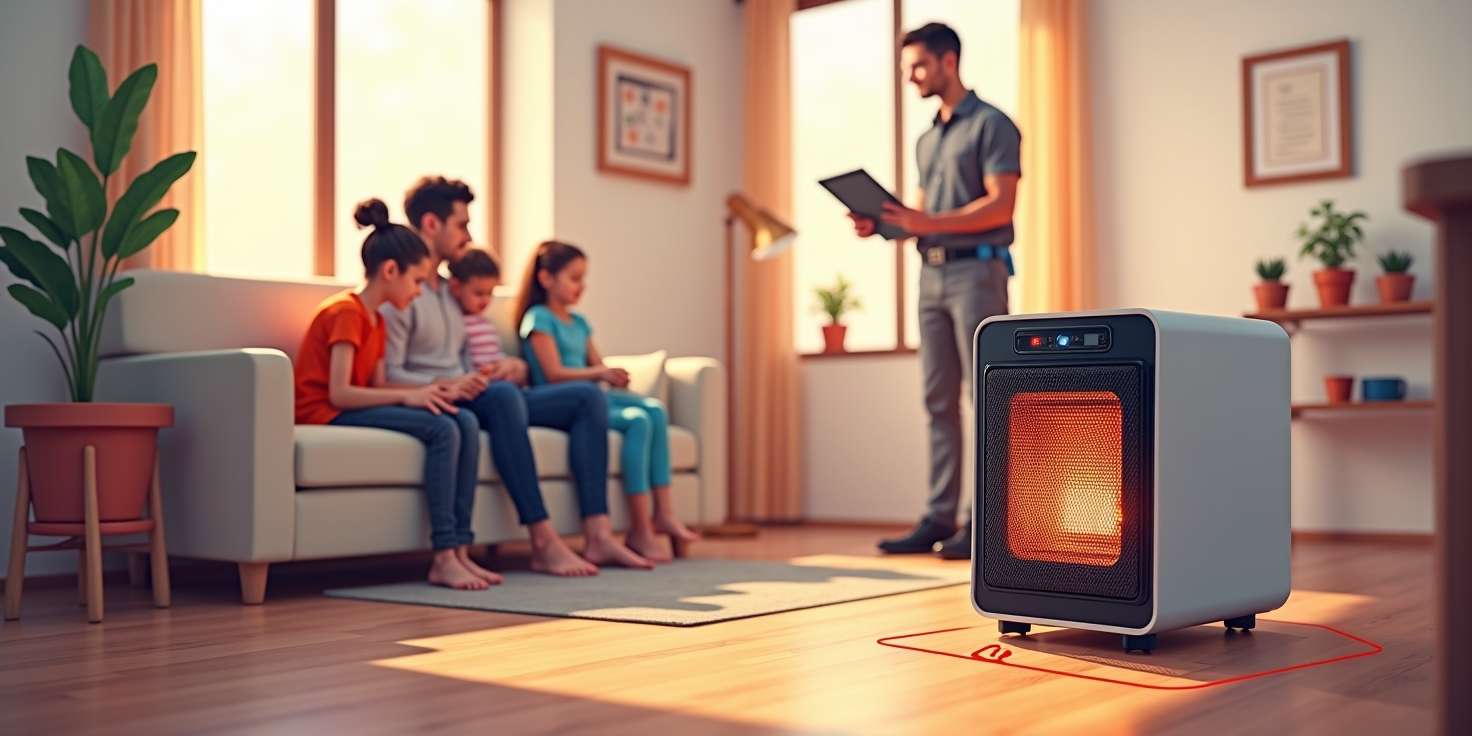
As the temperatures drop, many homeowners turn to space heaters for a quick and convenient source of warmth. While these portable devices offer comfort during colder months, they also pose a significant fire risk if not used properly. Understanding how to prevent fire damage from space heaters is essential for protecting your home and loved ones. At COMMITTED TO QUALITY SERVICE, we’ve seen firsthand how quickly a small mistake can lead to devastating fire damage. That’s why we’re here to share expert tips on space heater safety, fire prevention, and what to do if disaster strikes. Whether you’re looking to avoid costly fire damage restoration or simply want peace of mind, our fast, friendly, and professional service is just a call away at 855-933-7935. Don’t wait until it’s too late—learn how to use your space heater safely and keep your home secure this winter.
Understanding the Risks of Space Heaters
Space heaters are a popular solution for supplemental heating in homes and offices, especially during colder months. While they offer convenience and comfort, they also come with significant safety concerns that must not be overlooked. Understanding the potential risks associated with space heaters is essential for preventing fire damage and ensuring the safety of your property and loved ones.
One of the primary risks of space heaters is their potential to ignite nearby combustible materials. According to the National Fire Protection Association (NFPA), space heaters are responsible for 43% of home heating fires and 85% of associated deaths. These alarming statistics highlight the importance of using space heaters with caution and awareness. The majority of these incidents occur when heaters are placed too close to flammable items such as curtains, bedding, furniture, or clothing.
Another critical risk factor is the improper use or malfunction of the heater itself. Many older or low-quality space heaters lack modern safety features like automatic shut-off mechanisms or tip-over protection. These features are vital in preventing accidents, especially in households with children or pets. Additionally, using extension cords with space heaters can lead to overheating and electrical fires. The U.S. Consumer Product Safety Commission (CPSC) strongly advises plugging space heaters directly into wall outlets to reduce this risk.
Improper maintenance and neglect can also contribute to fire hazards. Dust and debris can accumulate inside the heater, causing it to overheat or malfunction. Regular cleaning and inspection are necessary to ensure the unit operates safely. Furthermore, leaving a space heater unattended or running it while sleeping significantly increases the risk of fire. It is crucial to turn off the heater when leaving the room or going to bed.
The location and environment in which a space heater is used also play a significant role in its safety. For instance, using a space heater in a bathroom or other damp areas can be extremely dangerous due to the risk of electrical shock. Heaters should always be used in dry, well-ventilated spaces and placed on flat, stable surfaces to prevent tipping.
To better understand the common causes of space heater-related fires, consider the following examples:
- A family in Ohio experienced a devastating house fire after a space heater was left running overnight near a pile of laundry. The heater ignited the clothes, resulting in significant fire damage and the loss of their home.
- In California, a tenant used a space heater with a damaged cord, which sparked and caused an electrical fire. The building suffered extensive damage, and several residents were displaced.
- A small office in New York faced a fire emergency when an employee placed a space heater under their desk near paper files. The heater overheated and ignited the papers, leading to a costly fire incident.
These real-life scenarios underscore the importance of using space heaters responsibly and understanding the risks involved. As the NFPA states:
“Half of home heating fires are reported during the months of December, January, and February. Space heaters, whether portable or stationary, account for the largest share of home heating fire deaths.”
To mitigate these risks, it is essential to follow safety guidelines and invest in high-quality space heaters that meet current safety standards. Look for models that are certified by recognized testing laboratories such as UL (Underwriters Laboratories), ETL (Intertek), or CSA (Canadian Standards Association). These certifications indicate that the heater has been tested for safety and performance.
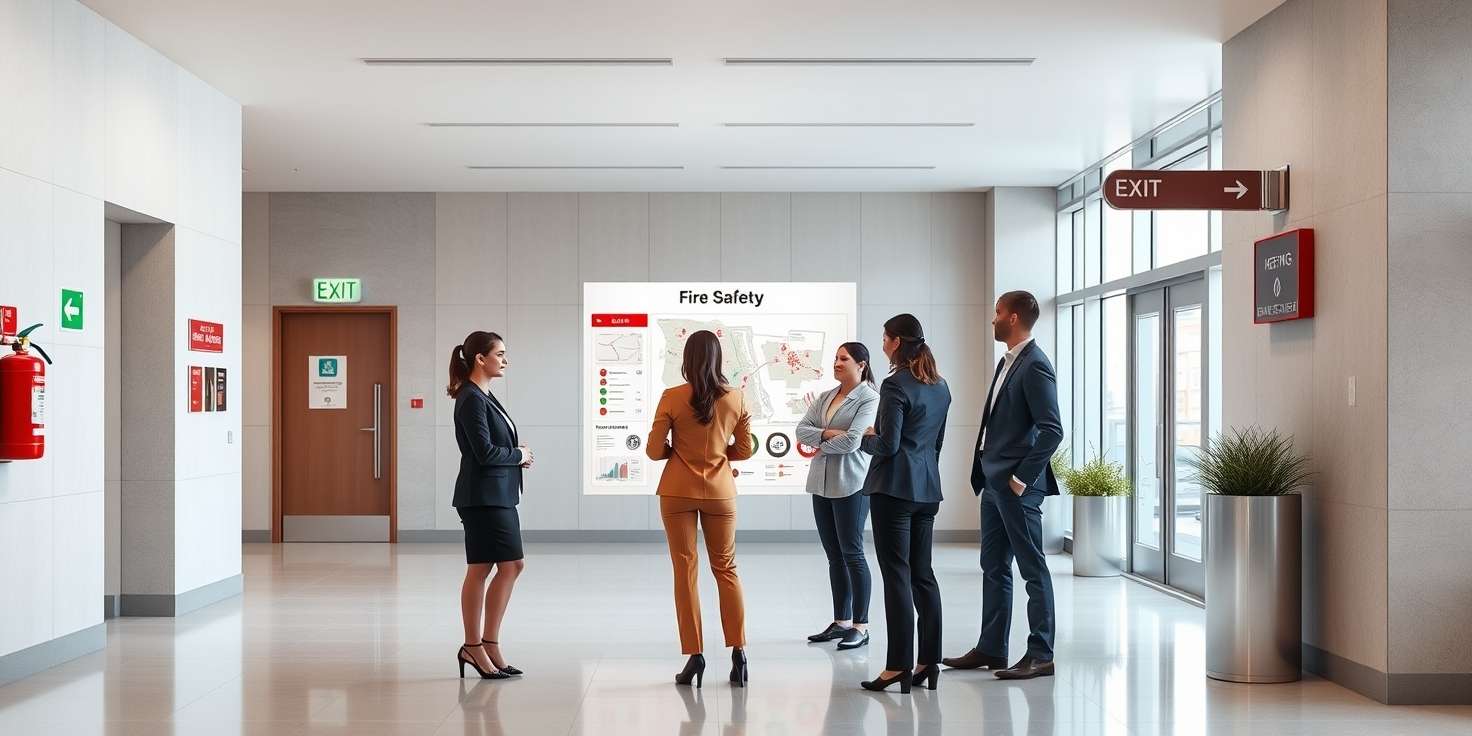
Additionally, homeowners should be proactive in educating themselves about fire safety and emergency preparedness. Installing smoke detectors in every room, having a fire extinguisher readily available, and creating an evacuation plan can make a significant difference in the event of a fire. For more information on fire safety and prevention, visit the NFPA’s official website at https://www.nfpa.org.
If your property has already suffered from fire damage due to a space heater or any other cause, it is crucial to seek professional help immediately. At Projekt Restoration, we specialize in comprehensive fire damage restoration services to help you recover quickly and safely. Our team is trained to assess the extent of the damage, remove hazardous materials, and restore your home or business to its original condition.
We also offer a range of other services, including mold remediation and water damage restoration, ensuring that your property remains safe and habitable after any disaster. To learn more about our full range of offerings, visit our services page.
In conclusion, while space heaters can be an effective way to stay warm, they must be used with caution and awareness of the risks involved. By understanding these dangers and taking appropriate safety measures, you can significantly reduce the likelihood of fire damage and protect your home and loved ones. Always prioritize safety, invest in quality equipment, and stay informed about best practices for heater use. For additional tips and resources, explore our blog or reach out to us through our contact page.
Choosing the Right Type of Space Heater
When it comes to preventing fire damage from space heaters, one of the most critical steps is selecting the right type of heater for your specific needs and environment. Not all space heaters are created equal, and understanding the differences can significantly reduce the risk of fire hazards. There are several types of space heaters available on the market, including convection heaters, radiant heaters, ceramic heaters, and oil-filled radiators. Each type has its own set of advantages and safety considerations. Convection heaters, for example, are ideal for heating entire rooms and are generally safer when placed away from flammable materials. Radiant heaters, on the other hand, provide direct heat and are best suited for small, enclosed spaces or for personal use. However, they can pose a greater fire risk if placed too close to furniture, curtains, or other combustible items. Ceramic heaters are popular for their quick heating capabilities and built-in safety features like tip-over and overheat protection. Oil-filled radiators are another safe option, as they provide consistent heat without exposed heating elements, reducing the risk of ignition.
Before purchasing a space heater, consider the size of the room you intend to heat and the heater’s wattage. A heater that is too powerful for a small space can overheat the area, while one that is too weak may run continuously, increasing the risk of malfunction. Look for models that are certified by recognized safety organizations such as UL (Underwriters Laboratories) or ETL (Intertek), which ensures the heater meets specific safety standards. Additionally, opt for heaters with modern safety features, including automatic shut-off mechanisms that activate if the unit tips over or overheats. These features are essential in preventing potential fire incidents, especially in households with children or pets.
Another important factor is the intended use of the heater. For instance, if you need a heater for a bathroom or other damp area, make sure it is specifically rated for such environments. Using a heater not designed for moisture-prone areas can lead to electrical shorts and increase the risk of fire. Similarly, if you plan to use a heater in a bedroom, choose a model with a programmable thermostat and timer to avoid running the unit all night, which can be a fire hazard. Always place the heater on a flat, stable surface and keep it at least three feet away from anything that can burn, including bedding, furniture, and curtains.
It is also wise to consider the energy source of the heater. Electric heaters are generally safer than fuel-burning models, which can emit carbon monoxide and require proper ventilation. If you must use a fuel-burning heater, ensure it is used in a well-ventilated area and never leave it unattended. Regular maintenance and inspection are crucial for all types of heaters. Dust and debris can accumulate over time, potentially causing overheating or electrical issues. Clean your heater regularly and inspect the cord and plug for any signs of wear or damage. If you notice any frayed wires or unusual smells, discontinue use immediately and consult a professional.
For homeowners looking to enhance their safety measures, it may be beneficial to consult with a restoration expert who can assess your home’s fire risk and recommend appropriate solutions. At Projekt Restoration, we offer a range of services designed to help you maintain a safe and secure living environment. Our team is experienced in identifying potential hazards and providing tailored recommendations to prevent fire damage. You can also learn more about our company and values by visiting our about page.
In conclusion, choosing the right type of space heater involves more than just picking the most affordable or aesthetically pleasing option. It requires careful consideration of the heater’s type, safety features, intended use, and maintenance requirements. By making an informed decision, you can enjoy the warmth and comfort of a space heater without compromising your safety. Always follow the manufacturer’s instructions, use the heater responsibly, and stay vigilant to ensure your home remains a safe haven during the colder months.
Look for Safety Certifications and Features
When choosing a space heater for your home or office, prioritizing safety certifications and built-in safety features is crucial to reducing the risk of fire damage. Space heaters, while convenient and effective for supplemental heating, can pose serious fire hazards if not properly designed or used. One of the most effective ways to ensure your space heater is safe is by checking for certifications from recognized testing laboratories. Look for labels from organizations such as Underwriters Laboratories UL, Intertek ETL, or the Canadian Standards Association CSA. These certifications indicate that the product has undergone rigorous testing and meets specific safety standards. Choosing a heater with these marks can give you peace of mind, knowing that the device has been evaluated for potential fire risks and electrical safety.
In addition to certifications, modern space heaters often come equipped with a variety of safety features designed to prevent accidents. One of the most important features is an automatic shut-off function. This feature turns the heater off if it tips over or overheats, significantly reducing the chance of a fire starting. Tip-over protection is especially important in households with pets or children, where the risk of knocking over a heater is higher. Overheat protection, on the other hand, ensures the unit shuts down if internal components reach unsafe temperatures. These features work together to provide an added layer of safety, especially when the heater is used for extended periods.
Another key safety feature to look for is a cool-touch exterior. This design prevents the outer surface of the heater from becoming dangerously hot, reducing the risk of burns or accidental fires if the unit comes into contact with flammable materials. Some advanced models also include timers and programmable thermostats, allowing users to control how long the heater operates and maintain a consistent temperature. This not only improves energy efficiency but also minimizes the risk of overheating or leaving the heater on unattended.
It is also advisable to choose space heaters with grounded plugs and to avoid using extension cords, which can overheat and cause electrical fires. Instead, plug the heater directly into a wall outlet and ensure the cord is not frayed or damaged. Some heaters are designed with cord storage or retractable cords to reduce tripping hazards and keep the area around the heater tidy and safe.
When shopping for a space heater, take the time to read the manufacturer’s instructions and safety guidelines. These documents often include valuable information about proper placement, maintenance, and usage. For example, most manufacturers recommend keeping the heater at least three feet away from furniture, curtains, bedding, and other combustible materials. Following these guidelines can significantly reduce the risk of fire and ensure the heater operates safely and efficiently.
In addition to selecting a safe heater, it is essential to maintain it properly. Regularly inspect the unit for signs of wear and tear, such as frayed cords, loose connections, or unusual noises. Clean the heater according to the manufacturer’s instructions to prevent dust buildup, which can become a fire hazard over time. If the heater shows any signs of malfunction, discontinue use immediately and consult a professional or replace the unit.
Understanding the importance of fire safety in your home extends beyond just choosing the right space heater. It also involves being prepared for emergencies and knowing how to respond if a fire does occur. Installing smoke detectors in every room and testing them regularly is a fundamental step in fire prevention. Additionally, having a fire extinguisher readily available and knowing how to use it can help contain small fires before they spread.
For homeowners who have experienced fire damage or want to learn more about fire prevention, exploring professional resources can be incredibly helpful. At Projekt Restoration, we offer a wide range of services designed to help you recover from and prevent property damage. Whether you are dealing with the aftermath of a fire or looking to safeguard your home, our team is here to support you every step of the way. You can also learn more about our commitment to safety and excellence by visiting our about page.
In conclusion, preventing fire damage from space heaters starts with making informed choices. By selecting heaters with proper safety certifications and features, following manufacturer guidelines, and maintaining the unit regularly, you can significantly reduce the risk of fire. These proactive steps not only protect your property but also ensure the safety and well-being of everyone in your home.
Proper Placement of Space Heaters
When using space heaters, one of the most critical safety measures to prevent fire damage is ensuring they are placed properly within your home or workspace. Improper placement is a leading cause of space heater-related fires, often resulting from the heater being too close to flammable materials or being used in high-traffic areas where it can be easily knocked over. To minimize these risks, always position your space heater on a flat, stable, and non-flammable surface such as tile or hardwood flooring. Avoid placing it on carpets, rugs, or furniture, as these materials can easily catch fire if the heater overheats or tips over. Additionally, maintain a clear radius of at least three feet around the heater, free from curtains, bedding, paper, furniture, and other combustible items. This buffer zone significantly reduces the chance of nearby objects igniting due to prolonged exposure to heat.
Another essential consideration is the location of the heater in relation to foot traffic and children or pets. Space heaters should be placed in low-traffic areas where they are less likely to be bumped or tripped over. If you have children or pets, consider using a heater with a cool-touch exterior and automatic shut-off features to enhance safety. Never place a space heater on an elevated surface like a table or shelf, as this increases the risk of it falling and causing a fire. It is also crucial to keep the heater away from water sources such as sinks, bathtubs, or aquariums, as water and electricity are a dangerous combination. For those dealing with moisture issues in the home, addressing potential water damage is equally important. You can learn more about this by visiting our page on water damage.
Proper ventilation is another factor to consider when placing a space heater. While most modern electric space heaters do not emit harmful gases, fuel-burning models such as kerosene or propane heaters require adequate ventilation to prevent carbon monoxide buildup. These types of heaters should never be used indoors unless they are specifically designed for indoor use and the area is well-ventilated. Always follow the manufacturer’s instructions regarding placement and usage to ensure safe operation. Additionally, avoid using extension cords or power strips with space heaters, as they can overheat and cause electrical fires. Plug the heater directly into a wall outlet and ensure the cord is not pinched under furniture or rugs.
In multi-room homes or offices, it may be tempting to move the heater from room to room. However, each time you relocate the heater, reassess the new environment for potential hazards. Make sure the new location adheres to the same safety guidelines, including distance from flammable materials and stability of the surface. If you are unsure about the safest way to use a space heater in your specific environment, consider consulting a fire safety expert or reviewing our FAQ section for more detailed guidance.
Proper placement of space heaters is not just about preventing immediate fire hazards but also about maintaining long-term safety in your home. Fires caused by space heaters can lead to extensive property damage, costly repairs, and even loss of life. If your property has already suffered from such an incident, our team is here to help. Learn more about our comprehensive fire damage restoration services and how we can assist in restoring your home to its original condition. By taking the time to place your space heater correctly and following all safety precautions, you can enjoy the warmth and comfort it provides without compromising your safety or that of your loved ones.
Keep Flammable Materials Away
One of the most crucial steps in preventing fire damage from space heaters is ensuring that all flammable materials are kept at a safe distance. Space heaters, while effective in providing supplemental warmth, can become dangerous if not used responsibly. These devices generate intense heat, and when placed too close to combustible items such as curtains, bedding, furniture, paper, or clothing, they can easily ignite these materials, leading to devastating fires. The general safety recommendation is to maintain at least a three-foot clearance around the heater on all sides. This buffer zone significantly reduces the risk of accidental ignition and gives the heater enough space to operate safely.
Many homeowners underestimate how quickly a fire can start when a space heater is placed near flammable objects. For example, a draped curtain that brushes against a heater can catch fire within seconds. Similarly, placing a heater on a carpeted floor or near a pile of laundry can lead to dangerous outcomes. It is essential to be vigilant about your surroundings and ensure that nothing combustible is within the heater’s immediate vicinity. This includes not only obvious items like paper and fabric but also aerosol cans, cleaning supplies, and even certain types of plastic that can melt or ignite when exposed to high temperatures.
Proper placement of your space heater is key. Always set it on a flat, stable, and non-flammable surface. Avoid placing it on rugs or carpets, which can trap heat and increase the risk of fire. Instead, opt for tile, hardwood, or other fire-resistant flooring. Additionally, never use a space heater in damp or wet areas such as bathrooms unless it is specifically designed for such environments. Moisture can cause electrical components to short-circuit, potentially leading to a fire.
It is also important to consider the layout of the room and the flow of foot traffic. Placing a heater in a high-traffic area increases the chances of it being knocked over, especially if it lacks a tip-over safety switch. Children and pets are particularly vulnerable to accidentally coming into contact with space heaters, so extra precautions should be taken in households with young family members or animals. Educate everyone in your home about the importance of keeping a safe distance from the heater and never using it to dry clothes or warm bedding.
Regular maintenance and inspection of your space heater can also help prevent fire hazards. Check the power cord for any signs of fraying or damage, and never use an extension cord or power strip, as these can overheat and cause a fire. Plug the heater directly into a wall outlet and ensure it is not sharing the outlet with other high-wattage appliances. If your heater has a filter, clean or replace it as recommended by the manufacturer to ensure efficient and safe operation.
In addition to these safety measures, it is wise to have working smoke detectors installed in every room where a space heater is used. Test them monthly and replace batteries at least once a year. Having a fire extinguisher readily accessible can also be a lifesaver in the event of an emergency. These proactive steps, combined with responsible heater use, can significantly reduce the risk of fire damage in your home.
Understanding the potential dangers of improper space heater use is essential for maintaining a safe living environment. At Projekt Restoration, we are committed to helping homeowners protect their properties from fire and other types of damage. If you want to learn more about our comprehensive services, including fire damage restoration, we invite you to explore our website. You can also visit our about page to learn more about our team and our dedication to safety and quality. By staying informed and taking the necessary precautions, you can enjoy the comfort of your space heater without compromising your home’s safety.
Never Leave Space Heaters Unattended
One of the most critical safety precautions when using space heaters is to ensure they are never left operating without supervision. Space heaters, while convenient and effective for warming small areas, can become serious fire hazards if not monitored properly. These devices generate intense heat in a compact space, and if something flammable comes into contact with them, the risk of ignition is high. Leaving a space heater on while you are asleep or away from home significantly increases the chances of a fire starting without anyone present to intervene. Even models equipped with safety features like automatic shut-off can malfunction or be improperly positioned, leading to dangerous situations. It is essential to always turn off your space heater when leaving the room or going to bed. This simple habit can prevent countless incidents of fire damage and protect your home and loved ones.
In addition to turning off space heaters when unattended, it is also wise to place them on a flat, stable surface away from foot traffic, pets, and children. This reduces the risk of the heater being knocked over or coming into contact with combustible materials such as curtains, bedding, or furniture. Many fire incidents occur because a heater was left running too close to flammable objects. By maintaining a clear three-foot radius around the heater, you can significantly reduce the risk of fire. Furthermore, always plug space heaters directly into a wall outlet rather than using extension cords or power strips, which can overheat and cause electrical fires. Regularly inspect the heater for signs of wear or damage, such as frayed cords or malfunctioning switches, and discontinue use if any issues are found.
Understanding the potential dangers of unattended space heaters is a key step in safeguarding your property. If a fire does occur, the consequences can be devastating, leading to costly repairs, loss of personal belongings, and even injury or death. In such cases, professional help is essential. At Projekt Restoration, we specialize in comprehensive fire damage restoration services to help homeowners recover quickly and safely. Our team is trained to handle all aspects of fire recovery, from soot and smoke removal to structural repairs and odor elimination. We also offer a wide range of services designed to restore your home to its pre-loss condition, ensuring peace of mind during a stressful time.
Preventing fire damage starts with responsible usage of heating equipment. By never leaving space heaters unattended and following basic safety guidelines, you can significantly reduce the risk of fire in your home. For more information about our commitment to safety and restoration excellence, visit our about page to learn more about our team and mission. Taking proactive steps today can help you avoid the devastating consequences of fire tomorrow.
Use the Correct Power Source
One of the most critical aspects of safely operating a space heater is ensuring it is connected to the correct power source. Using an improper power supply can significantly increase the risk of electrical fires, which are among the leading causes of home fire damage. Space heaters typically draw a substantial amount of electricity, and plugging them into overloaded circuits, extension cords, or power strips can lead to overheating and potentially ignite a fire. It is always recommended to plug space heaters directly into a wall outlet that can handle the electrical load. Avoid using extension cords or multi-outlet adapters, as these are not designed to support the high wattage that space heaters require. Additionally, homeowners should be aware of the electrical specifications of their space heater and ensure that their home’s wiring is compatible. If the circuit trips frequently or if the outlet feels warm to the touch, it may be a sign of an overloaded circuit or faulty wiring, both of which require immediate attention from a licensed electrician. Regular maintenance and inspection of electrical systems can help prevent such hazards. For those who are unsure about the safety of their home’s electrical infrastructure, consulting a professional is a wise step. At Projekt Restoration, we offer a range of services designed to help homeowners maintain a safe living environment, including fire damage prevention and recovery. Understanding the importance of proper power sources not only helps in preventing fire incidents but also extends the lifespan of your appliances. For more information about our mission to keep homes safe and secure, visit our our mission page. Taking proactive steps today can save lives and property tomorrow.
Avoid Using Extension Cords
One of the most crucial safety precautions when using space heaters is to plug them directly into a wall outlet rather than using extension cords or power strips. Extension cords are not designed to handle the high electrical load that space heaters require, and using them can significantly increase the risk of overheating, electrical short circuits, and ultimately, fire hazards. Many residential fires linked to space heaters are caused by improper electrical connections, with extension cords being a common culprit. These cords can easily overheat, especially if they are of low quality or not rated for heavy-duty use. Additionally, extension cords can become tripping hazards, which may lead to the heater being knocked over, further increasing the risk of fire. To ensure maximum safety, always place your space heater on a flat, stable surface and plug it directly into a grounded wall outlet. If you find that your home lacks sufficient outlets in the areas where you need heat, consider consulting a licensed electrician to install additional outlets rather than relying on temporary solutions. For those interested in learning more about fire safety and how to protect your home from potential hazards, our fire damage page offers valuable insights. You can also explore our wide range of services to see how we help homeowners prevent and recover from fire-related incidents. Taking these proactive steps can make a significant difference in keeping your home and loved ones safe during colder months when space heaters are commonly used.
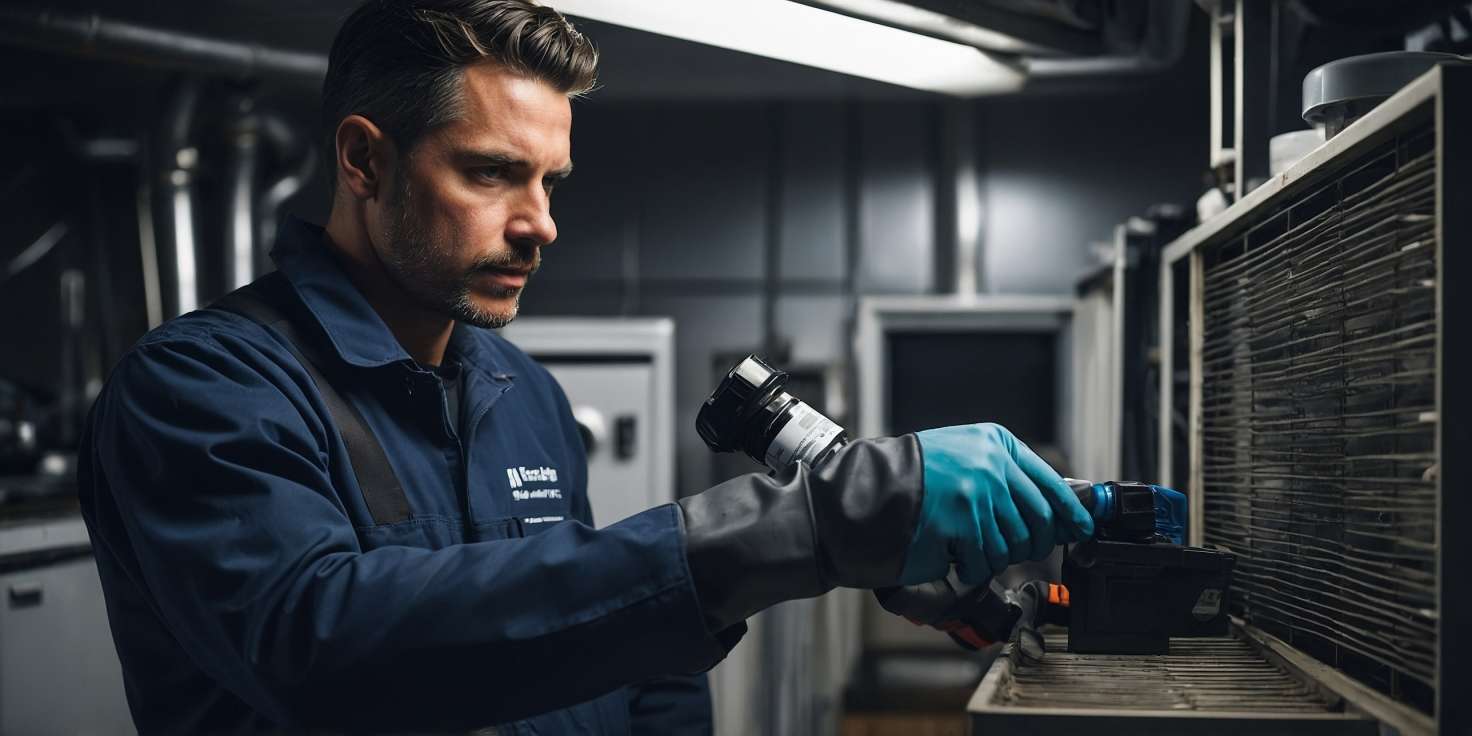
Regularly Inspect and Maintain Your Heater
To effectively prevent fire damage caused by space heaters, it is essential to implement a routine inspection and maintenance schedule. Space heaters, while convenient and efficient for supplemental heating, can become hazardous if not properly cared for. Over time, dust, debris, and wear and tear can compromise the safety and performance of these devices. Regularly checking your space heater ensures that it operates correctly and reduces the risk of malfunction that could lead to a fire. Begin by inspecting the power cord for any signs of fraying, cracking, or exposed wires. Damaged cords are a common cause of electrical fires and should be replaced immediately. Additionally, examine the plug and outlet for any discoloration or signs of overheating, which could indicate a potential electrical issue.
Cleaning your space heater is another crucial aspect of maintenance. Dust and lint can accumulate on the heating elements and internal components, increasing the risk of ignition. Use a vacuum or a soft brush to gently remove debris from vents and grills. Ensure the heater is unplugged and completely cool before performing any cleaning. For models with filters, check the manufacturer’s instructions on how often they should be cleaned or replaced. A clogged filter can restrict airflow, causing the unit to overheat and potentially catch fire.
It is also important to test the safety features of your space heater regularly. Most modern heaters come equipped with automatic shut-off mechanisms that activate if the unit tips over or overheats. Confirm that these features are functioning properly by carefully simulating a tip-over or monitoring the unit during extended use. If the heater fails to shut off as expected, discontinue use and consult the manufacturer or a qualified technician. Keeping your heater in good working condition not only extends its lifespan but also ensures it remains a safe source of warmth during colder months.
In addition to personal inspections, consider having your space heater professionally serviced at least once a year, especially before the winter season begins. A certified technician can perform a thorough check-up, identify hidden issues, and make necessary repairs or recommendations. This proactive approach can prevent minor problems from escalating into serious hazards. If you are unsure where to find reliable maintenance services, you can explore the range of professional services offered by trusted restoration and safety experts in your area.
Proper storage of your space heater when not in use is another often-overlooked aspect of maintenance. Store the unit in a dry, dust-free environment away from moisture and potential contaminants. Avoid wrapping the cord tightly around the heater, as this can cause internal damage to the wiring. When taking the heater out of storage, inspect it thoroughly before plugging it in. Look for any signs of rust, corrosion, or pest infestation that may have occurred during the off-season.
Educating all household members about the safe use and maintenance of space heaters is equally important. Everyone should understand the importance of keeping flammable materials at least three feet away from the heater, never leaving it unattended while in use, and turning it off before going to bed or leaving the house. Creating a culture of safety within your home significantly reduces the likelihood of accidents and fire damage.
If a fire incident does occur despite your best efforts, knowing how to respond quickly and effectively is crucial. Having a fire extinguisher nearby and ensuring that smoke detectors are functional can make a significant difference in minimizing damage. In the unfortunate event of fire damage, professional restoration services can help you recover and rebuild. Learn more about how experts handle fire damage restoration and what steps you can take to protect your property in the future.
Maintaining your space heater is not just about preserving the device itself but about safeguarding your home and loved ones. By incorporating regular inspections, cleaning, and professional servicing into your routine, you can enjoy the warmth and comfort of your space heater without compromising safety. For more information on home safety and restoration solutions, visit our about page to learn about our mission and commitment to protecting your home.
Install Smoke Alarms and Test Them Frequently
One of the most effective ways to safeguard your home from the dangers associated with space heaters is by installing smoke alarms and ensuring they are tested regularly. Space heaters, while convenient for supplemental heating, can pose a significant fire risk if not used properly. A functioning smoke alarm acts as an early warning system, alerting you to the presence of smoke or fire before it becomes uncontrollable. This early detection is crucial in preventing extensive fire damage and ensuring the safety of your family and property.
Smoke alarms should be installed on every level of your home, including inside each bedroom and outside sleeping areas. This strategic placement ensures that no matter where a fire starts, the alarm will sound in time to allow for a quick response. For homes with multiple rooms and floors, interconnected smoke alarms are highly recommended. When one alarm detects smoke, all alarms in the system will sound, providing a comprehensive alert system that can be life-saving, especially during nighttime hours when occupants are asleep.
Testing your smoke alarms at least once a month is equally important. Over time, batteries can lose their charge, or the alarm mechanism itself may become faulty. By pressing the test button on each unit, you can confirm that the alarm is functioning correctly. Additionally, it is advisable to replace the batteries at least once a year and to replace the entire smoke alarm unit every ten years, as recommended by fire safety experts. Keeping a maintenance schedule or setting reminders can help ensure that this critical task is not overlooked.
In addition to installing and maintaining smoke alarms, it is essential to educate all household members about what to do when an alarm sounds. Create and practice a fire escape plan that includes at least two ways out of every room and a designated meeting place outside the home. This preparation can make a significant difference in the event of a real emergency, reducing panic and ensuring everyone knows how to respond quickly and safely.
While smoke alarms are a vital component of fire safety, they are most effective when used in conjunction with other preventive measures. For example, always place space heaters on a flat, stable surface and keep them at least three feet away from flammable materials such as curtains, bedding, and furniture. Never leave a space heater unattended, especially when sleeping or leaving the room. These precautions, combined with a reliable smoke alarm system, significantly reduce the risk of fire damage.
It is also beneficial to understand the broader context of fire safety and damage prevention. For more information on how fire can impact your home and the steps you can take to mitigate these risks, visit our fire damage page. Here, you will find detailed insights into fire restoration services and how professionals can help you recover after an incident. Additionally, our services page outlines the comprehensive support we offer, including emergency response and damage assessment, to help you protect your home and loved ones.
Incorporating smoke alarms into your home safety plan is not just a precaution; it is a proactive step toward preventing tragedy. These devices are affordable, easy to install, and proven to save lives. When used alongside responsible space heater practices and regular maintenance, smoke alarms form a critical line of defense against fire hazards. By taking these steps seriously and staying informed, you can enjoy the warmth and comfort of space heaters without compromising your safety.
Educate Family Members on Heater Safety
One of the most effective ways to prevent fire damage from space heaters is by ensuring that every member of your household understands the potential risks and safety measures associated with their use. Education plays a critical role in maintaining a safe environment, especially when it comes to heating appliances that can pose serious fire hazards if misused. Start by discussing the basic safety guidelines with all family members, including children and elderly individuals who may be more vulnerable. Make sure everyone knows to keep space heaters at least three feet away from flammable materials such as curtains, bedding, and furniture. Emphasize the importance of never leaving a space heater unattended, especially when sleeping or leaving the room. It is also essential to teach family members how to properly plug in and unplug the heater, ensuring it is connected directly to a wall outlet rather than an extension cord, which can overheat and cause a fire.
In addition to these basic precautions, involve your family in regular safety checks. Show them how to inspect the heater for signs of wear and tear, such as frayed cords or unusual smells, and encourage them to report any issues immediately. Make it a habit to review the manufacturer’s instructions together, so everyone understands the specific safety features and operational guidelines of your particular model. For households with children, consider using space heaters with safety certifications and built-in features like tip-over protection and automatic shut-off. Explain to kids why they should never play near or touch the heater, and establish clear boundaries around its placement.
Another important aspect of heater safety education is emergency preparedness. Ensure that all family members know what to do in case of a fire. Conduct regular fire drills and teach everyone how to use a fire extinguisher. Make sure smoke detectors are installed in key areas of the home and that everyone knows the sound of the alarm and the appropriate response. It is also helpful to create a family emergency plan that includes evacuation routes and a designated meeting spot outside the home.
To reinforce these safety practices, consider posting a list of heater safety tips in a visible area, such as near the heater or on the refrigerator. This serves as a constant reminder and helps instill good habits. You can also encourage your family to stay informed by reading helpful resources and articles. For more insights on maintaining a safe and damage-free home environment, visit our blog where we share expert advice and practical tips. Additionally, if you are curious about the range of services we offer to help protect and restore your home, explore our services page for more information.
By fostering a culture of awareness and responsibility, you significantly reduce the risk of fire damage caused by space heaters. When every family member understands their role in maintaining safety, your home becomes a more secure place for everyone.
Turn Off Heaters When Not in Use
One of the most effective and straightforward ways to prevent fire damage from space heaters is to ensure they are turned off when not in use. Space heaters are designed to provide supplemental warmth, but when left unattended, they can quickly become a fire hazard. Many fire incidents occur simply because a heater was left running while the room was empty or while the occupants were asleep. These devices generate a significant amount of heat, and if they are operating near flammable materials such as curtains, bedding, or furniture, the risk of ignition increases dramatically. Therefore, making it a habit to switch off space heaters whenever you leave a room or go to bed is a crucial safety measure.
Modern space heaters often come with built-in safety features like automatic shut-off mechanisms and timers, but relying solely on these features can be risky. Mechanical failures or user errors can still lead to dangerous situations. It’s always best to manually turn off the heater and unplug it when it’s not actively being used. This not only reduces the risk of fire but also conserves energy and extends the life of the appliance. Additionally, unplugging the heater eliminates the risk of electrical issues such as short circuits or power surges, which can also lead to fires.
Another important consideration is the placement of the heater. Even when turned off, a heater that is left plugged in and positioned too close to combustible materials can pose a risk if accidentally turned on. Always ensure that the heater is placed on a flat, stable surface and away from high-traffic areas where it might be knocked over. When not in use, store the heater in a safe location where it cannot be accidentally activated or damaged.
Educating all household members about the importance of turning off space heaters is also essential. Children and elderly family members should be made aware of the potential dangers and instructed on how to safely operate and shut down the device. In shared living spaces or workplaces, clear guidelines should be established to ensure that everyone follows proper safety protocols. Posting reminders near the heater or setting alarms can be helpful in reinforcing this habit.
In addition to turning off heaters when not in use, it’s wise to have a comprehensive fire safety plan in place. This includes installing smoke detectors in every room, keeping fire extinguishers accessible, and conducting regular fire drills. These measures, combined with responsible heater usage, significantly reduce the risk of fire damage. If you ever experience fire-related issues, professional restoration services can help mitigate the damage and restore your property. Learn more about our fire damage solutions to understand how we can assist in such emergencies.
Regular maintenance of your space heater is another key aspect of fire prevention. Dust and debris can accumulate inside the unit, potentially causing it to overheat or malfunction. Always follow the manufacturer’s instructions for cleaning and maintenance, and inspect the heater for any signs of wear or damage before each use. If the heater shows any signs of malfunction, such as strange noises, burning smells, or inconsistent heating, discontinue use immediately and consult a professional.
For those seeking more information on safe heater usage and fire prevention strategies, our blog offers a wealth of resources and expert advice. Staying informed and proactive is the best defense against fire hazards. Additionally, if you have questions or need personalized guidance, our team is always ready to help. Visit our contact page to get in touch with our experienced professionals.
By adopting the simple habit of turning off space heaters when they are not needed, you take a significant step toward safeguarding your home and loved ones. This small action, when practiced consistently, can prevent devastating fire incidents and provide peace of mind during the colder months.
Follow Manufacturer Instructions Carefully
One of the most crucial steps in preventing fire damage from space heaters is to thoroughly read and adhere to the manufacturer’s instructions provided with the unit. These guidelines are specifically designed to ensure the safe operation of the heater and to minimize the risk of fire hazards. Manufacturers conduct extensive testing to determine the safest way to use their products, including proper placement, recommended clearance from flammable materials, and appropriate usage duration. Ignoring these instructions can lead to overheating, electrical malfunctions, or even direct contact with combustible items, all of which significantly increase the risk of fire. For instance, many space heaters are designed for use in well-ventilated areas and should not be used in enclosed spaces or near curtains, bedding, or furniture. Additionally, some models are not intended for use in bathrooms or other high-moisture environments, as this can lead to short circuits or electrical fires. It is also essential to use the correct power source and avoid using extension cords unless specified as safe by the manufacturer. Overloading circuits or using incompatible power supplies can result in overheating and potential ignition. Regular maintenance, such as cleaning filters and checking for frayed cords or other damage, is often recommended in the manual and should not be overlooked. By following these manufacturer guidelines, homeowners can significantly reduce the risk of fire and ensure their space heater operates efficiently and safely. For more information on how to protect your home from fire-related incidents, you can explore our fire damage page. If you are interested in learning more about the range of restoration solutions we offer, visit our services section. Taking these precautions not only safeguards your property but also contributes to the overall safety and well-being of your household.
Know What to Do in Case of a Fire
In the unfortunate event that a fire does occur despite all preventive measures, knowing how to respond quickly and effectively can make a significant difference in minimizing harm and damage. The first and most important step is to remain calm and act swiftly. If you detect smoke or flames coming from your space heater or any other source, immediately turn off the device if it is safe to do so. Do not attempt to move a burning heater, as this could spread the fire or cause injury. Alert everyone in the household and evacuate the premises using a pre-planned escape route. Make sure all family members are familiar with this plan and have practiced it regularly. Once outside, call emergency services without delay. Never re-enter a burning building under any circumstances. If the fire is small and you have been trained to use a fire extinguisher, you may attempt to put it out, but only if it is safe and you have a clear exit path. After the fire is extinguished and the area is declared safe by authorities, it is crucial to assess the damage and begin the recovery process. This is where professional restoration services become essential. Companies like Projekt Restoration specialize in helping homeowners recover from fire-related incidents. You can learn more about their comprehensive services that include fire damage restoration, smoke odor removal, and structural repairs. Additionally, understanding the long-term effects of fire and smoke exposure is important for maintaining a healthy living environment. For more insights into how fire damage can affect your property and what steps to take afterward, visit their detailed fire damage resource page. Being prepared and informed not only helps protect your loved ones but also ensures a smoother recovery process in the aftermath of a fire.
Sure! Here’s a suitable FAQ section for a blog post titled "How to Prevent Fire Damage from Space Heaters," incorporating essential safety tips and best practices:
Frequently Asked Questions (FAQ)
Q1: Are space heaters safe to use indoors?
A1: Yes, space heaters can be safe for indoor use if used properly. Always choose a model that is certified by a recognized testing laboratory (such as UL or ETL), and follow the manufacturer’s instructions carefully. Never leave a space heater unattended while it’s operating.
Q2: How far should I place a space heater from other objects?
A2: Keep space heaters at least 3 feet (1 meter) away from anything that can burn, including furniture, curtains, bedding, and paper products. This helps prevent accidental ignition and reduces the risk of fire.
Q3: Can I plug my space heater into a power strip or extension cord?
A3: No. Space heaters should always be plugged directly into a wall outlet. Using extension cords or power strips can overheat and cause a fire. If you must use an extension cord temporarily, make sure it is heavy-duty and rated for high power loads—but this is not recommended for long-term use.
Q4: Is it safe to leave a space heater on overnight?
A4: It is not recommended to leave a space heater on while sleeping or when you’re not in the room. Even models with safety features can malfunction. Always turn off and unplug the heater when it’s not in use.
Q5: What safety features should I look for in a space heater?
A5: Look for space heaters with built-in safety features such as:
- Tip-over protection (automatically shuts off if knocked over)
- Overheat protection (shuts off if the unit gets too hot)
- Cool-touch housing
- Thermostat and timer controls
Q6: Can I use a space heater in the bathroom?
A6: Only use space heaters specifically designed for bathroom or damp-area use. These models are built to handle moisture and reduce the risk of electrical shock. Never use a standard space heater in a bathroom.
Q7: How often should I inspect my space heater?
A7: Inspect your space heater before each use. Check for frayed cords, damaged plugs, or any signs of wear and tear. If you notice any damage, do not use the heater until it has been repaired or replaced.
Q8: What should I do if my space heater starts to smell or smoke?
A8: Turn it off immediately, unplug it, and remove it from the area. Do not attempt to use it again until it has been inspected by a professional or replaced. A burning smell or smoke can indicate a serious electrical issue or overheating.
Q9: Can children and pets be around space heaters?
A9: Always supervise children and pets around space heaters. Use models with cool-touch exteriors and place them in low-traffic areas to prevent accidental contact or tipping.
Q10: What’s the best way to store a space heater when not in use?
A10: Allow the heater to cool completely before storing. Wrap the cord loosely and store the unit in a dry, dust-free area away from flammable materials. Avoid stacking heavy items on top of it.
By following these guidelines and staying informed, you can enjoy the warmth of a space heater while minimizing the risk of fire damage.