24 / 7 / 365 Emergency Service

How to Handle Mold in Commercial Storage Rooms

Mold in commercial storage rooms is more than just an unsightly nuisance—it can pose serious health risks and cause extensive damage to valuable inventory and structural components. Whether you’re managing a warehouse, retail storage, or any other commercial facility, knowing how to handle mold in commercial storage rooms is essential for maintaining a safe and efficient environment. At COMMITTED TO QUALITY SERVICE, we understand the urgency and complexity of mold remediation. Our team offers fast, friendly, and professional service, backed by years of experience in water damage restoration and fire damage recovery. Mold often results from hidden water damage, which is why our specialized equipment is designed to detect and dry affected areas thoroughly. Don’t let mold compromise your business—call us now at 855-933-7935 for expert help in mold removal, moisture control, and restoring your commercial space to its optimal condition.

Identifying Common Signs of Mold in Storage Areas

Mold growth in commercial storage rooms can pose serious risks to both property and health, making early detection crucial. Identifying the common signs of mold in storage areas is the first step toward effective remediation and prevention. Mold thrives in damp, dark, and poorly ventilated environments—conditions often found in storage facilities. Recognizing the early indicators of mold can help businesses avoid costly damage and potential health hazards.

One of the most noticeable signs of mold is a persistent musty odor. This smell is often the first clue, even before visible signs appear. Mold emits microbial volatile organic compounds (MVOCs) as it grows, which produce a distinct, earthy scent. If you detect such an odor in your storage area, it’s essential to investigate further.

Visible mold is another clear indicator. Mold can appear in various colors, including black, green, white, or gray, and may present as spots, streaks, or fuzzy patches on surfaces. It often grows on walls, ceilings, cardboard boxes, wooden shelves, and even on stored items. However, not all mold is immediately visible, especially if it’s growing behind walls or under flooring. That’s why it’s important to look for indirect signs as well.

Water stains and discoloration on walls, ceilings, or floors can signal moisture problems that lead to mold. These stains may appear yellowish or brown and often indicate a leak or condensation issue. Peeling paint or wallpaper, warped wood, and bubbling surfaces are also signs of excess moisture and potential mold growth.

Humidity levels play a significant role in mold development. According to the Environmental Protection Agency (EPA), indoor humidity should be kept below 60 percent to prevent mold. A hygrometer can help monitor humidity levels in storage areas. If the air feels damp or condensation forms on windows and pipes, it’s a warning sign that conditions are ripe for mold.

Another important indicator is the health of individuals who access the storage room. Mold exposure can cause allergic reactions, respiratory issues, and skin irritation. If employees or visitors experience symptoms like sneezing, coughing, eye irritation, or headaches when entering the storage area, mold could be the culprit.

“Mold can begin growing within 24 to 48 hours of water exposure,” warns the Centers for Disease Control and Prevention (CDC). “Prompt action is essential to prevent widespread contamination.”

Here are some common signs to watch for in commercial storage rooms:

  1. Persistent musty or earthy odor
  2. Visible mold growth on walls, ceilings, or stored items
  3. Water stains, discoloration, or damp spots
  4. Peeling paint, warped wood, or bubbling surfaces
  5. High humidity or condensation on windows and pipes
  6. Unexplained health symptoms among staff or visitors

To ensure a thorough inspection, consider using moisture meters or infrared cameras to detect hidden moisture behind walls or under flooring. These tools can help identify areas at risk before mold becomes visible. For more detailed guidance, visit the EPA’s Mold Resources page at https://www.epa.gov/mold.

If you suspect mold in your storage facility, it’s crucial to act quickly. Professional mold remediation services can assess the extent of the problem and implement effective solutions. Learn more about our comprehensive services to address mold and moisture issues in commercial properties.

In addition to remediation, prevention is key. Regular inspections, proper ventilation, and moisture control can significantly reduce the risk of mold. For tips on preventing mold and identifying hidden water damage, check out our article on how to identify hidden water damage early.

Understanding the signs of mold and taking proactive measures can protect your storage assets and maintain a safe environment. If you need expert assistance, our team at Projekt Restoration is here to help. Visit our contact page to schedule an inspection or consultation.

Understanding the Causes of Mold Growth

Mold growth in commercial storage rooms is a common yet often overlooked issue that can lead to significant structural damage, inventory loss, and health risks. To effectively manage and prevent mold, it is essential to understand the underlying causes that contribute to its development. Mold thrives in environments where moisture, warmth, and organic material are present. One of the primary causes of mold in storage areas is excess humidity. Commercial storage rooms, especially those without proper ventilation or climate control, can trap moisture in the air, creating an ideal breeding ground for mold spores. Leaks from roofs, walls, or plumbing systems are another major contributor. Even small, unnoticed leaks can lead to persistent dampness, which supports mold growth over time.

Another common cause is condensation, which occurs when warm, moist air comes into contact with cooler surfaces, such as metal shelving or concrete walls. This is particularly problematic in facilities that experience fluctuating temperatures or lack insulation. Additionally, water intrusion from flooding or previous water damage incidents can leave behind residual moisture that seeps into building materials, creating hidden pockets of dampness. These areas often go undetected during routine inspections, allowing mold to flourish unnoticed.

Poor housekeeping and storage practices also play a role. Storing items directly against walls or on the floor can restrict airflow and trap moisture, especially if the items are made of porous materials like cardboard or fabric. Overcrowded storage rooms further exacerbate the problem by limiting air circulation and making it difficult to identify early signs of mold. In some cases, mold spores can even be introduced into the storage room through contaminated items or packaging materials, spreading quickly if the conditions are favorable.

HVAC systems, if not properly maintained, can also contribute to mold problems. Dirty filters, clogged drains, or malfunctioning components can lead to moisture buildup within the system, which may then be distributed throughout the storage area. Regular maintenance and inspections of HVAC systems are crucial to prevent this issue.

Understanding these causes is the first step toward effective mold prevention and remediation. Facility managers should prioritize regular inspections, moisture control, and proper storage practices to minimize the risk. For businesses seeking professional assistance, restoration services can provide comprehensive solutions tailored to the unique needs of commercial environments. Additionally, learning how to detect early signs of hidden water damage can be instrumental in preventing mold outbreaks. For more insights, visit our guide on how to identify hidden water damage early.

By addressing the root causes of mold growth, businesses can protect their assets, maintain a safe environment, and avoid costly repairs. Proactive measures, combined with expert support, ensure that commercial storage rooms remain clean, dry, and mold-free.

Assessing the Extent of Mold Contamination

Before taking any remediation steps, it is crucial to accurately assess the extent of mold contamination in a commercial storage room. Mold can spread quickly in environments with high humidity, poor ventilation, or hidden water damage, making early detection essential. Begin by conducting a thorough visual inspection of the entire storage area, including walls, ceilings, floors, HVAC systems, and behind shelving units. Look for visible signs such as discoloration, fuzzy growth, or water stains. However, not all mold is visible to the naked eye. Musty odors or complaints of respiratory irritation from employees may also indicate hidden mold growth. In such cases, professional mold testing may be necessary to determine the type and concentration of mold spores in the air.

Using moisture meters and infrared cameras can help identify areas with elevated moisture levels, which are often breeding grounds for mold. These tools are especially useful in detecting mold behind walls or under flooring where it may not be immediately visible. It is also important to evaluate the size of the affected area. According to industry guidelines, if the contaminated area exceeds 10 square feet, professional remediation is strongly recommended. This is particularly true in commercial settings where mold can compromise stored inventory, structural integrity, and employee health.

Documentation is another key step in the assessment process. Take detailed notes and photographs of all affected areas to help guide the remediation plan and provide evidence for insurance claims if needed. This documentation can also be useful when working with a professional restoration company. For more information on how professionals handle such situations, you can explore our services page.

In addition to identifying the visible and hidden mold, it is essential to determine the source of moisture that is fueling the mold growth. Common sources include roof leaks, plumbing issues, condensation from HVAC systems, or previous flooding incidents. Addressing the root cause is vital to prevent future outbreaks. If water damage is suspected, our guide on how to identify hidden water damage early can provide valuable insights.

Once the extent of contamination is fully understood, a tailored remediation plan can be developed. This plan should include containment strategies to prevent cross-contamination, removal of affected materials, and steps for cleaning and disinfecting the area. In commercial storage environments, it is also important to assess whether any stored goods have been compromised and need to be discarded or professionally cleaned.

Ultimately, a comprehensive assessment lays the foundation for effective mold remediation and long-term prevention. If you are unsure about the severity of the mold problem or how to proceed, consulting with a certified mold remediation specialist is highly recommended. You can learn more about our approach and commitment to quality by visiting our about page.

Immediate Steps to Take When Mold is Discovered

When mold is discovered in a commercial storage room, taking immediate and strategic action is critical to prevent further damage and protect the health of employees and clients. The first step is to isolate the affected area to prevent the spread of mold spores. This can be done by sealing off the space using plastic sheeting and turning off any HVAC systems that may circulate contaminated air throughout the building. It is essential to limit access to the area to only those involved in the remediation process. Next, assess the extent of the mold growth. While small patches of mold on non-porous surfaces may be manageable with proper cleaning techniques, larger infestations or mold on porous materials like drywall or insulation require professional intervention. Avoid disturbing the mold, as this can release spores into the air and exacerbate the problem.

Documenting the mold growth is another important step. Take clear photographs and notes detailing the location, size, and appearance of the mold. This documentation can be useful for insurance claims and for communicating with mold remediation professionals. Once documentation is complete, identify and eliminate the source of moisture that allowed the mold to grow. Mold thrives in damp environments, so it is crucial to address any leaks, condensation, or high humidity levels. This may involve repairing plumbing issues, improving ventilation, or using dehumidifiers to maintain optimal humidity levels.

After addressing the moisture source, contact a professional mold remediation company to evaluate the situation and recommend a course of action. Professionals have the training, equipment, and experience to safely and effectively remove mold and prevent its recurrence. For more information on professional services, visit our services page. It is also important to communicate with all stakeholders, including employees, tenants, or clients, about the situation and the steps being taken to resolve it. Transparency helps maintain trust and ensures that everyone is aware of potential health risks and safety precautions.

During the remediation process, follow all recommended safety guidelines, including the use of personal protective equipment such as gloves, masks, and goggles. Ensure that contaminated materials are properly disposed of according to local regulations. Once the mold has been removed, conduct a thorough inspection to confirm that the area is clean and dry. Consider implementing a regular inspection and maintenance schedule to monitor for signs of future mold growth. Preventative measures such as installing moisture sensors, improving drainage, and maintaining HVAC systems can significantly reduce the risk of mold returning.

For businesses looking to understand more about mold and its impact, our blog offers valuable insights and tips. Additionally, if you are unsure about the severity of the mold or how to proceed, our team is available to answer your questions and provide guidance. Visit our contact page to get in touch with our experts. Acting quickly and responsibly when mold is discovered in a commercial storage room not only protects your property but also ensures a safe and healthy environment for everyone involved.

Choosing the Right Mold Remediation Professionals

When dealing with mold in commercial storage rooms, selecting the right mold remediation professionals is a critical step toward ensuring a safe and effective cleanup process. Mold issues in commercial spaces can escalate quickly, leading to structural damage, inventory loss, and health risks for employees and clients. Therefore, hiring experienced and certified professionals is essential to address the problem thoroughly and prevent future outbreaks. Start by researching companies that specialize in commercial mold remediation and have a proven track record of success. Look for professionals who are certified by reputable industry organizations such as the Institute of Inspection, Cleaning and Restoration Certification (IICRC). These certifications indicate that the technicians have undergone rigorous training and adhere to industry standards.

Experience in handling mold in commercial environments is another key factor. Unlike residential properties, commercial storage rooms often have complex layouts, HVAC systems, and larger square footage, which require specialized knowledge and equipment. A qualified remediation team will conduct a comprehensive inspection to identify the source of the mold, assess the extent of the damage, and develop a customized remediation plan. They should also be equipped with advanced tools such as moisture meters, infrared cameras, and HEPA filtration systems to ensure a thorough and safe cleanup.

Transparency and communication are also vital when choosing a mold remediation company. A reputable provider will offer a clear explanation of the remediation process, including timelines, costs, and safety precautions. They should also provide a detailed estimate and be willing to answer any questions you may have. Reading customer reviews and checking references can offer valuable insights into the company’s reliability and quality of service. You can also explore their background and values by visiting their about page to learn more about their team and commitment to excellence.

In addition to technical expertise, the right professionals will prioritize safety and compliance with local regulations. Mold remediation in commercial settings often requires coordination with building managers, insurance companies, and sometimes local health departments. A knowledgeable remediation team will ensure that all necessary permits and documentation are in place and that the work is performed in accordance with health and safety guidelines. This not only protects your property but also minimizes liability and ensures a smooth restoration process.

It is also beneficial to choose a company that offers a range of related services, such as water damage restoration, since moisture is often the root cause of mold growth. A provider that can address both the mold and its underlying causes will offer a more comprehensive solution. For example, if your mold issue stems from a hidden leak or recent flooding, a team that specializes in water damage restoration can help prevent recurrence by fixing the source of moisture.

Finally, consider the company’s availability and response time. Mold can spread rapidly, so prompt action is crucial. Choose a remediation provider that offers emergency services and can respond quickly to assess and contain the situation. Timely intervention not only limits the extent of the damage but also reduces downtime for your business operations.

In summary, choosing the right mold remediation professionals involves evaluating their certifications, experience, transparency, and range of services. By partnering with a trusted and capable team, you can ensure that your commercial storage room is restored to a safe and functional condition. For more information on mold remediation and related services, visit the services page of a reputable provider to explore how they can support your business in maintaining a healthy environment.

Preventative Measures to Avoid Future Mold Issues

Preventing mold growth in commercial storage rooms requires a proactive approach that focuses on controlling moisture, maintaining cleanliness, and implementing regular inspections. One of the most effective ways to avoid future mold issues is by ensuring proper ventilation throughout the storage area. Adequate airflow helps regulate humidity levels, which is critical since mold thrives in damp, stagnant environments. Installing dehumidifiers and using HVAC systems with humidity control features can significantly reduce the risk of mold development. Additionally, it is important to monitor and maintain indoor humidity levels below 60 percent, with the ideal range being between 30 and 50 percent.

Routine inspections should be scheduled to identify early signs of moisture intrusion or mold growth. This includes checking for water stains, musty odors, or discoloration on walls, ceilings, and flooring. Pay special attention to areas near plumbing fixtures, HVAC units, and windows, as these are common sources of leaks and condensation. Implementing a regular maintenance plan for plumbing and roofing systems can help detect and address leaks before they lead to mold problems. For businesses looking to understand more about how moisture can lead to mold, our detailed guide on how to identify hidden water damage early offers valuable insights.

Another key preventative measure is to ensure that all stored items are kept off the floor and away from walls. Using shelving units and pallets allows for better air circulation and reduces the chances of moisture accumulation. It is also advisable to store items in sealed, waterproof containers, especially if they are sensitive to moisture. Regular cleaning and disinfecting of the storage space can further help in eliminating mold spores before they have a chance to grow. Using mold-resistant building materials and coatings in the construction or renovation of storage rooms can also provide long-term protection.

Training staff to recognize the early signs of mold and understand proper storage practices is equally important. Employees should be educated on the importance of reporting leaks or unusual dampness immediately. Establishing clear protocols for handling water damage incidents can prevent minor issues from escalating into major mold infestations. For businesses seeking professional assistance, our comprehensive services include mold prevention strategies tailored to commercial environments.

In addition to internal measures, partnering with a trusted restoration company can provide peace of mind and expert guidance. At Projekt Restoration, we are committed to helping businesses maintain safe and mold-free environments. Learn more about our values and dedication to quality service by visiting our mission page. By taking these preventative steps, commercial property owners can significantly reduce the risk of mold growth, protect their assets, and ensure a healthier environment for employees and customers alike.

Regular Maintenance Tips for Mold-Free Storage Rooms

Maintaining a mold-free commercial storage room requires consistent attention and proactive care. Regular maintenance is essential not only for preserving the integrity of stored items but also for ensuring a safe and healthy environment. One of the most effective ways to prevent mold growth is by controlling humidity levels. Mold thrives in damp, humid conditions, so it’s crucial to keep the indoor humidity below 60 percent. Installing a reliable dehumidifier and ensuring proper ventilation can significantly reduce the risk of mold development. Regularly inspect HVAC systems and clean or replace filters to ensure they are functioning efficiently and not contributing to moisture buildup.

Routine inspections are another key component of mold prevention. Conduct visual checks for signs of water damage, such as discoloration on walls or ceilings, musty odors, or warped materials. These can be early indicators of hidden moisture problems that may lead to mold growth. For more detailed guidance on spotting early signs of water issues, refer to our article on how to identify hidden water damage early. Addressing these issues promptly can prevent costly repairs and extensive mold remediation efforts down the line.

Cleaning schedules should also be part of your regular maintenance routine. Dust and organic debris can serve as food sources for mold, so keeping the storage area clean is vital. Use mold-inhibiting cleaning solutions on surfaces, especially in corners and behind shelving units where moisture can accumulate unnoticed. Additionally, avoid storing items directly on the floor. Use pallets or shelving to allow air circulation around stored goods, which helps prevent condensation and mold formation.

Proper storage practices play a significant role in mold prevention. Ensure that all items are dry before placing them in storage. Even slightly damp materials can introduce moisture into the environment, creating a breeding ground for mold. Use moisture-resistant containers and avoid overpacking shelves, which can restrict airflow and trap humidity. Regularly rotate stored inventory to ensure that no items remain untouched for extended periods, as stagnant conditions can encourage mold growth.

Another important aspect of maintenance is staff training. Ensure that all employees are aware of mold risks and understand the importance of reporting any signs of water damage or mold immediately. Creating a culture of awareness and responsibility can significantly enhance your mold prevention efforts. For more information about our approach and values, visit our our mission page.

Incorporating professional inspections and maintenance services into your routine can also be beneficial. Experts can identify potential problem areas that may not be visible during regular checks. They can also provide specialized cleaning and treatment services that go beyond basic maintenance. Learn more about the range of professional solutions we offer by visiting our services page.

Ultimately, preventing mold in commercial storage rooms is about consistency and vigilance. By implementing a comprehensive maintenance plan that includes humidity control, regular inspections, proper cleaning, and staff training, you can significantly reduce the risk of mold growth. These efforts not only protect your stored items but also contribute to a healthier and more efficient storage environment.

In conclusion, effectively handling mold in commercial storage rooms requires a proactive and systematic approach. By understanding the causes of mold growth—such as excess moisture, poor ventilation, and inadequate maintenance—you can implement preventive measures that protect your inventory, ensure a safe working environment, and maintain your facility’s reputation. Regular inspections, prompt remediation of water issues, and the use of mold-resistant materials are key strategies in keeping mold at bay. Remember, early detection and swift action are crucial. By staying vigilant and investing in proper mold management practices, you can safeguard your commercial storage space from the costly and potentially hazardous effects of mold.

How to Prevent Water Damage from Tree Roots

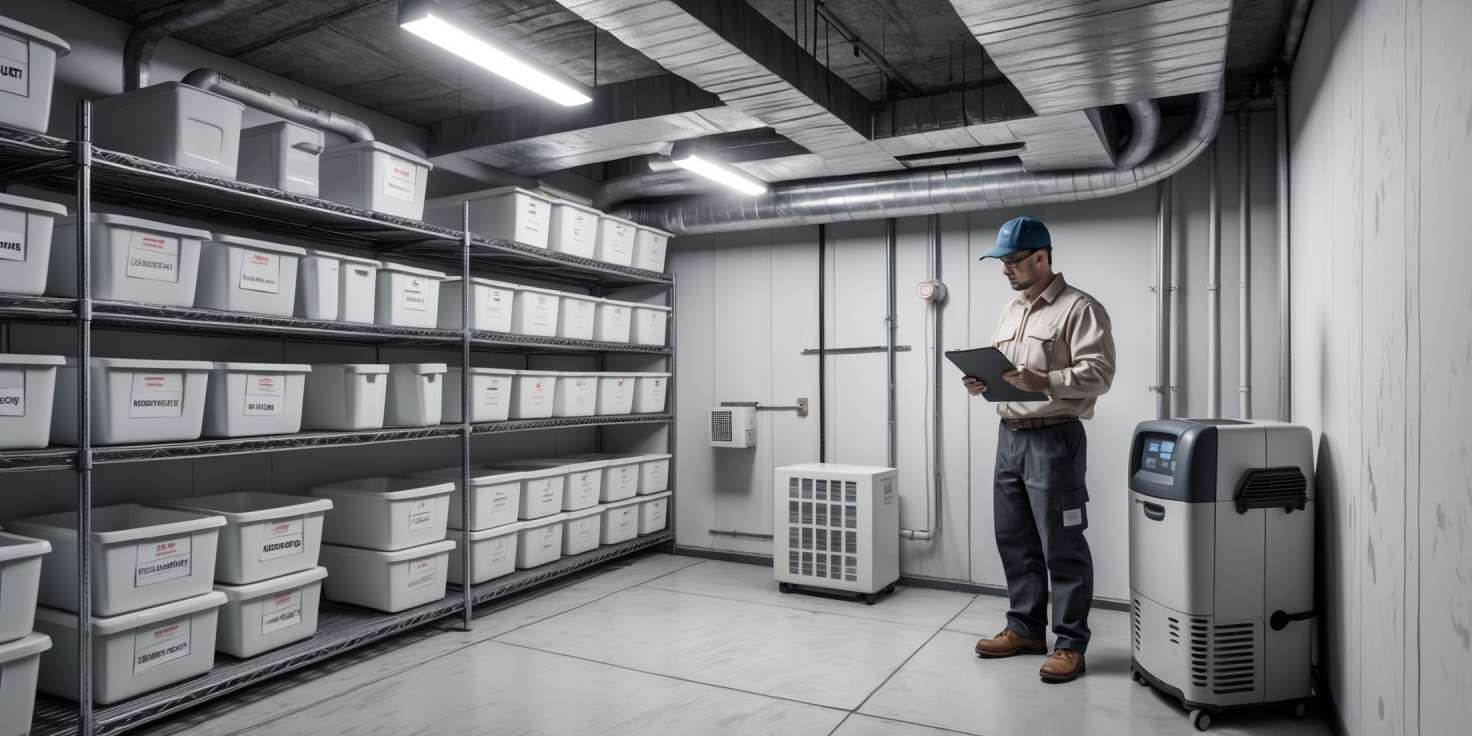
Tree roots may seem harmless, but over time, they can cause serious issues for your property—especially when it comes to water damage. If left unchecked, invasive roots can crack foundations, damage underground pipes, and lead to costly water damage restoration. Understanding how to prevent water damage from tree roots is essential for homeowners looking to protect their investment and avoid expensive repairs. At COMMITTED TO QUALITY SERVICE, we specialize in fast, friendly, and professional service, offering expert solutions for water damage and fire damage restoration. Whether you’re dealing with a minor leak or extensive structural damage, our team is equipped with advanced tools designed specifically for drying and restoring water-damaged areas. Don’t wait until it’s too late—call us now at 855-933-7935 to learn how to safeguard your home from the hidden dangers of tree root intrusion.

Understanding How Tree Roots Cause Water Damage

Tree roots are a powerful force of nature, often growing unnoticed beneath the surface until they begin to cause significant structural and environmental damage. One of the most common and costly issues associated with tree roots is water damage. Understanding how tree roots contribute to water damage is essential for homeowners, property managers, and landscapers who want to protect their properties from long-term harm. Tree roots naturally seek out moisture, and this biological imperative can lead them directly to underground water lines, sewer systems, and even the foundations of buildings. Once they infiltrate these areas, the consequences can be both extensive and expensive.

Tree roots grow in search of water and nutrients, and they are particularly attracted to areas where moisture is abundant. Cracks or leaks in underground pipes, for example, emit moisture into the surrounding soil, which acts as a beacon for nearby roots. Over time, roots can infiltrate these small openings, gradually expanding them and causing significant blockages or ruptures. According to the Environmental Protection Agency (EPA), invasive tree roots are one of the leading causes of sewer line damage in residential areas. This not only disrupts the plumbing system but can also lead to sewage backups and contamination of the surrounding soil and water.

In addition to damaging pipes, tree roots can also compromise the structural integrity of a building’s foundation. As roots grow and expand, they exert pressure on concrete slabs and foundation walls. This pressure can cause cracks, shifts, and even uplift in extreme cases. Once the foundation is compromised, water can seep into basements and crawl spaces, leading to mold growth, wood rot, and other forms of water damage. The American Society of Civil Engineers (ASCE) notes that expansive root systems are a common cause of foundation movement, particularly in regions with clay-rich soils that retain moisture.

Another way tree roots contribute to water damage is by altering the natural drainage patterns around a property. When roots grow densely in one area, they can block or redirect the flow of groundwater. This can lead to pooling or flooding in areas that were previously well-drained. Improper drainage increases the risk of water intrusion into basements and lower levels of buildings. Moreover, when the soil around a home becomes overly saturated due to poor drainage, hydrostatic pressure builds up against the foundation walls, forcing water through even the smallest cracks.

Tree roots can also damage landscaping and hardscaping features, such as patios, driveways, and walkways. As roots grow beneath these surfaces, they can cause them to lift, crack, or become uneven. These changes not only pose tripping hazards but also create pathways for water to infiltrate the ground and reach the foundation. Over time, this can lead to chronic moisture problems that are difficult to diagnose and repair.

To illustrate the various ways tree roots can cause water damage, consider the following examples:

  1. A homeowner in a suburban neighborhood notices frequent backups in their plumbing system. Upon inspection, it is discovered that tree roots have infiltrated the main sewer line, causing blockages and leaks that have led to water pooling in the yard and basement.
  2. A commercial property experiences uneven flooring and visible cracks in the foundation. Further investigation reveals that the roots of a large tree planted too close to the building have exerted pressure on the foundation, allowing water to seep into the lower levels of the structure.
  3. In a residential area with heavy clay soil, a cluster of trees has altered the natural drainage pattern, leading to water accumulation near the base of several homes. This has resulted in mold growth and structural damage due to prolonged exposure to moisture.

“Tree roots are not inherently destructive, but when they interact with man-made structures, the results can be devastating. Proper planning and maintenance are key to preventing root-related water damage.” — International Association of Certified Home Inspectors (InterNACHI)

Preventing water damage from tree roots begins with understanding their behavior and growth patterns. Trees with aggressive root systems, such as willows, poplars, and silver maples, should be planted far from buildings, underground utilities, and drainage systems. Regular inspections of plumbing and foundation systems can help detect early signs of root intrusion. Additionally, installing root barriers and using non-invasive landscaping techniques can significantly reduce the risk of damage.

For homeowners who suspect tree root-related water damage, it is crucial to seek professional assistance. Experts can assess the extent of the damage, recommend appropriate remediation strategies, and help implement preventive measures. At Projekt Restoration, we offer comprehensive services designed to address and prevent water damage caused by natural and structural factors. Our team is trained to identify hidden issues and provide long-term solutions that protect your property.

Understanding the risks associated with tree roots is also essential for those planning new construction or landscaping projects. Consulting with arborists and structural engineers during the planning phase can help ensure that trees are planted at safe distances and that underground systems are adequately protected. For more information on how to identify early signs of water damage, visit our guide on how to identify hidden water damage early.

According to a study by the University of California Agriculture and Natural Resources, tree roots can extend up to three times the height of the tree, meaning that even trees planted seemingly far from a structure can pose a risk. This highlights the importance of ongoing maintenance and monitoring, especially in older neighborhoods where trees and infrastructure have coexisted for decades.

In conclusion, tree roots are a silent but significant contributor to water damage in both residential and commercial properties. Their natural tendency to seek out moisture can lead them to infiltrate pipes, foundations, and drainage systems, causing extensive and costly damage. By understanding how tree roots operate and taking proactive steps to manage their growth, property owners can protect their investments and maintain a safe, dry environment. For expert advice and assistance, feel free to explore our about page or reach out through our contact form to learn more about how we can help safeguard your property from water damage.

Identifying Signs of Root-Related Water Issues

Recognizing the early signs of root-related water issues is crucial in preventing long-term damage to your property. Tree roots, while essential for the health of the tree, can become invasive and disrupt underground water lines, sewer systems, and even the foundation of your home. One of the most common indicators of root-related water problems is the presence of unexplained wet spots or pooling water in your yard, especially during dry weather. These soggy areas may suggest that roots have punctured or displaced underground pipes, causing leaks that saturate the surrounding soil. Another telltale sign is a sudden drop in water pressure or recurring clogs in your plumbing system. If you notice that your drains are backing up frequently or your toilets are flushing slowly, it could be due to tree roots infiltrating your sewer lines. Indoors, you might observe water stains on walls, ceilings, or floors, which can indicate hidden leaks caused by root intrusion. These stains often appear yellowish or brown and may be accompanied by a musty odor, signaling the onset of mold growth.

Cracks in your foundation or driveway can also be a red flag. As tree roots grow and expand, they exert pressure on concrete and other hard surfaces, leading to visible structural damage. Over time, this can compromise the integrity of your home’s foundation, resulting in costly repairs. Additionally, if you notice trees leaning or showing signs of stress, such as wilting leaves or exposed roots, it may indicate that the root system is struggling due to interference with underground utilities or excessive moisture from leaking pipes. In some cases, you might even hear gurgling sounds coming from your plumbing fixtures, which can be a sign that roots are obstructing the flow of water through your pipes.

It is also important to pay attention to mold and mildew growth, especially in basements or crawl spaces. Excess moisture from leaking pipes or poor drainage caused by root disruption can create the perfect environment for mold to thrive. If you suspect mold, it is essential to address it promptly to avoid health risks and further property damage. For more information on how to handle such issues, you can explore our mold remediation services. Additionally, reviewing our detailed blog can provide valuable insights into identifying and managing water damage caused by tree roots.

Being proactive in identifying these signs can save you from extensive repairs and help maintain the structural integrity of your home. Regular inspections, especially if you have large trees near your property, are essential. If you observe any of these warning signs, it is advisable to consult with professionals who can assess the situation and recommend appropriate solutions. Early detection and intervention are key to preventing root-related water damage and ensuring the long-term safety and value of your property.

Choosing the Right Trees for Your Landscape

When planning your landscape, selecting the appropriate trees is a critical step in preventing water damage caused by invasive root systems. Tree roots naturally seek out moisture, and if planted too close to your home or underground plumbing, they can infiltrate pipes, crack foundations, and disrupt drainage systems. To avoid these costly issues, it’s essential to choose tree species that are less aggressive in their root growth and to plant them at a safe distance from structures. Trees such as dogwoods, Japanese maples, and crabapples are known for their non-invasive root systems and are ideal for residential landscapes. On the other hand, species like willows, poplars, and silver maples have fast-growing, aggressive roots that can extend far beyond the tree’s canopy and should be avoided near homes or water lines.

Understanding the growth habits of different tree species is key to making informed decisions. Consider the mature size of the tree, both above and below ground. A tree that appears small when planted can grow significantly over the years, with roots expanding in search of water. This is particularly problematic in areas with compacted soil or poor drainage, where roots may grow toward the foundation or plumbing systems. Consulting with a landscape professional or arborist can help you assess your property’s specific conditions and recommend suitable tree options. Additionally, incorporating root barriers during planting can provide an extra layer of protection by directing root growth away from vulnerable areas.

Soil type and drainage also play a significant role in how tree roots develop. Trees planted in well-drained soil are less likely to send roots toward foundations or pipes in search of water. Improving soil conditions and ensuring proper grading around your home can reduce the risk of water damage. It’s also wise to consider native tree species, as they are better adapted to the local climate and soil, requiring less water and maintenance. Native trees typically have root systems that are more compatible with the surrounding environment, reducing the likelihood of structural interference.

Another important factor is the proximity of trees to your home and other structures. As a general rule, trees should be planted at a distance equal to at least half of their expected mature height. For example, a tree that will grow to 40 feet tall should be planted at least 20 feet away from your house. This spacing helps ensure that the roots have ample room to grow without encroaching on foundations, driveways, or underground utilities. Regular maintenance, including pruning and root inspection, can also help manage root spread and identify potential issues before they become serious problems.

Incorporating trees into your landscape can enhance curb appeal, provide shade, and improve air quality, but it must be done thoughtfully to avoid unintended consequences. Homeowners should also be aware of the signs of root-related water damage, such as unexplained dampness in basements, cracked foundations, or slow-draining pipes. If you notice any of these issues, it may be time to consult a professional for an assessment. At Projekt Restoration, we offer a range of services to help you address and prevent water damage, including expert evaluations and remediation solutions.

For those looking to learn more about how tree roots can impact your home’s water systems, our blog provides valuable insights and tips. We also encourage homeowners to explore our resources on how to identify early signs of hidden water damage and take proactive steps to protect their property. By choosing the right trees and planting them strategically, you can enjoy the benefits of a beautiful landscape without compromising the integrity of your home.

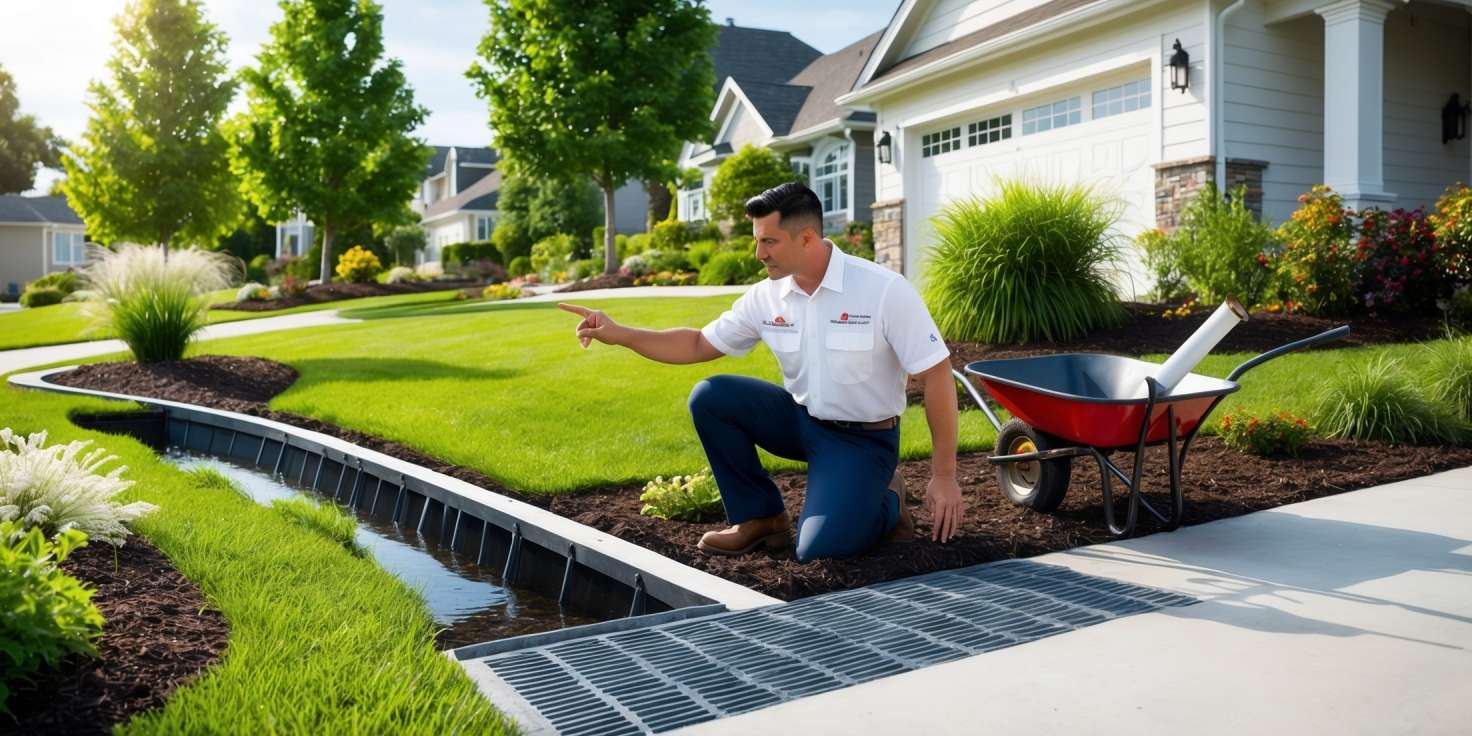
Safe Planting Distance from Foundations and Pipes

When planning your landscape, one of the most critical considerations for preventing water damage caused by tree roots is maintaining a safe planting distance from your home’s foundation and underground pipes. Tree roots naturally seek out moisture and nutrients, which often leads them toward the damp soil surrounding foundations and plumbing systems. If planted too close, trees can cause significant structural damage over time. Roots can infiltrate small cracks in foundations, gradually widening them and allowing water to seep into basements or crawl spaces. Similarly, roots can wrap around or penetrate underground pipes, leading to blockages, leaks, or even pipe bursts. To avoid these costly and disruptive issues, it is essential to understand the growth patterns of different tree species and plant them at a safe distance based on their mature root spread. As a general rule, small trees should be planted at least 10 feet away from foundations, medium trees at least 15 to 20 feet, and large trees no less than 30 feet away. Additionally, consider the depth and type of your foundation and the location of utility lines before planting. Consulting with a professional arborist or landscape designer can help you choose tree species with less invasive root systems and determine the optimal planting locations. For homeowners concerned about existing trees near their property, regular inspections can identify early signs of root intrusion, such as cracks in walls, uneven flooring, or unexplained dampness. If you suspect water damage or need expert advice, explore our services to learn how we can help protect your home. You can also visit our about page to understand our commitment to safeguarding properties from environmental threats. Taking proactive steps in your landscaping decisions not only preserves the integrity of your home but also helps you avoid expensive repairs and maintain a safe, dry living environment.

Installing Root Barriers to Protect Infrastructure

One of the most effective strategies for preventing water damage caused by invasive tree roots is the installation of root barriers. These physical or chemical barriers are designed to redirect root growth away from vulnerable infrastructure such as foundations, underground pipes, sidewalks, and driveways. When tree roots grow unchecked, they can infiltrate plumbing systems, crack concrete, and disrupt the structural integrity of buildings, leading to costly repairs and potential safety hazards. Root barriers serve as a proactive solution, creating a protective zone that limits root intrusion and helps maintain the health of both the tree and the surrounding infrastructure.

There are two primary types of root barriers: mechanical and chemical. Mechanical barriers are typically made from durable materials like plastic or metal and are installed vertically in the soil to block root paths. These barriers are often placed between the tree and the structure at risk, extending deep enough to prevent roots from growing underneath. Chemical barriers, on the other hand, involve the use of slow-release herbicides that inhibit root growth in specific directions without harming the tree. Both types can be highly effective when properly installed and maintained, and the choice between them depends on the specific needs of the property and the type of vegetation involved.

The installation process begins with a thorough assessment of the landscape, including the location of trees, the depth and direction of root growth, and the proximity of infrastructure. Professional evaluation is crucial to ensure that the barrier is placed at the correct depth and distance from the tree to avoid damaging the root system while still offering adequate protection. In many cases, it is advisable to consult with a certified arborist or a water damage prevention specialist to develop a customized plan that balances tree health with infrastructure safety.

Root barriers are especially important in areas with expansive clay soils, where tree roots tend to seek out moisture aggressively, often leading to foundation movement and cracking. By installing barriers, property owners can significantly reduce the risk of water damage caused by root intrusion into plumbing systems and foundation walls. This is particularly relevant for older homes and buildings that may not have been constructed with modern root management techniques in mind.

In addition to protecting physical structures, root barriers also contribute to better water management on the property. By controlling the direction of root growth, these barriers help prevent roots from clogging drainage systems and sewer lines, which can lead to backups, flooding, and extensive water damage. This is a critical consideration for homeowners and property managers looking to maintain the long-term value and safety of their investments.

Proper installation of root barriers requires specialized knowledge and tools, making it a task best handled by professionals. Companies that specialize in water damage prevention and restoration often offer root barrier installation as part of their comprehensive services. These experts can assess the unique risks associated with each property and recommend the most effective solutions to mitigate potential damage. Additionally, they can provide ongoing maintenance and monitoring to ensure that the barriers remain effective over time.

For those interested in learning more about the benefits of root barriers and how they fit into a broader water damage prevention strategy, visiting the company’s about page can provide valuable insights into their experience and approach. Understanding the company’s mission and expertise can help property owners make informed decisions about protecting their homes and businesses from the hidden dangers of tree root intrusion.

In conclusion, installing root barriers is a smart and proactive measure for safeguarding infrastructure against the damaging effects of tree roots. By redirecting root growth and preventing intrusion into critical systems, these barriers help maintain the integrity of buildings, reduce the risk of water damage, and support healthier landscapes. Whether you are dealing with existing root problems or planning new landscaping near your property, considering root barriers as part of your overall water damage prevention plan can save time, money, and stress in the long run.

Regular Inspection of Plumbing and Sewer Lines

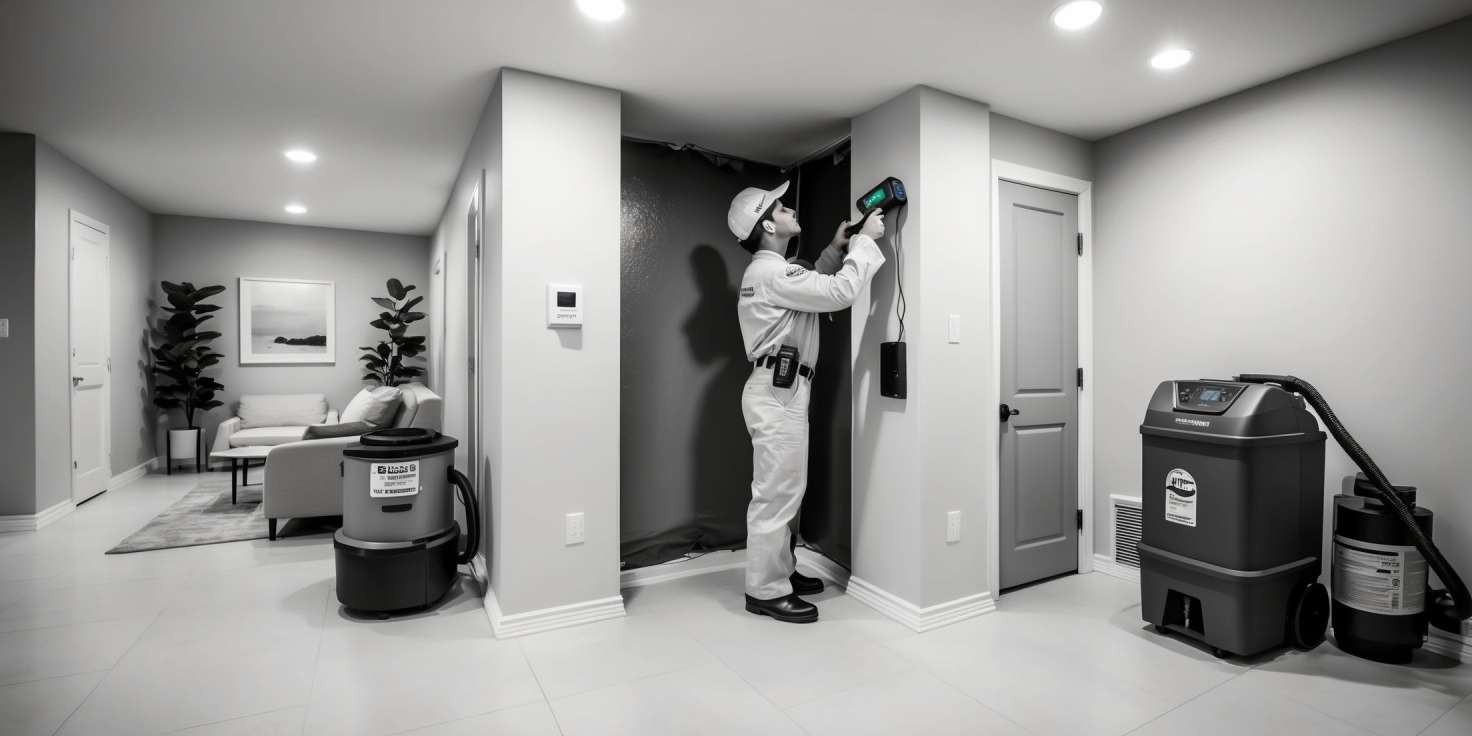
One of the most effective ways to prevent water damage caused by invasive tree roots is through consistent and thorough inspection of your plumbing and sewer lines. Tree roots are naturally drawn to moisture and can infiltrate even the smallest cracks in underground pipes. Over time, these roots can grow extensively within the plumbing system, leading to blockages, pipe bursts, and significant water damage. Regular inspections help identify early signs of root intrusion, such as slow drainage, gurgling noises, or unexplained wet patches in your yard. By catching these issues early, homeowners can take proactive measures to address minor problems before they escalate into costly repairs.

Professional plumbing inspections typically involve the use of advanced tools like video camera inspections, which allow technicians to see inside the pipes without digging. This non-invasive method provides a clear view of any root intrusion, pipe deterioration, or other obstructions. Scheduling these inspections annually, or more frequently if your property has a history of root-related issues, is a smart preventative strategy. It ensures that any potential threats are identified and mitigated before they compromise the integrity of your plumbing system.

In addition to preventing root-related damage, regular inspections also help maintain the overall health of your plumbing infrastructure. They can reveal other issues such as corrosion, mineral buildup, or structural weaknesses that might otherwise go unnoticed. Addressing these problems early not only protects your home from water damage but also extends the lifespan of your plumbing system, saving you money in the long run.

Homeowners should also be aware of the signs that indicate a need for immediate inspection. These include frequent clogs, sewage backups, foul odors, and unusually lush patches of grass, which may suggest a leaking sewer line. If any of these symptoms are present, it is crucial to contact a professional immediately to assess the situation. For those unsure about the process or what to expect, our detailed guide on how it works can provide valuable insights into the inspection and repair procedures.

Moreover, understanding the importance of regular maintenance aligns with our commitment to educating and supporting homeowners. At Projekt Restoration, we offer a range of services designed to protect your property from water damage, including plumbing inspections, root removal, and pipe repair. Our team of experts is trained to identify and resolve issues efficiently, ensuring your home remains safe and secure.

Incorporating routine plumbing inspections into your home maintenance plan is a practical and cost-effective way to safeguard against the destructive impact of tree roots. It not only helps in early detection and prevention but also contributes to the overall resilience of your property. For more information about our approach and values, visit our about page to learn how we prioritize customer satisfaction and long-term solutions.

Managing Soil Moisture to Control Root Growth

One of the most effective strategies for preventing water damage caused by invasive tree roots is the careful management of soil moisture levels around your property. Tree roots naturally seek out moisture to sustain growth, and when the soil near your home is consistently damp or oversaturated, it becomes an attractive target for root systems. These roots can grow aggressively toward the foundation, plumbing lines, and other underground structures, leading to cracks, leaks, and long-term water damage. By maintaining balanced soil moisture, you can discourage roots from encroaching on vulnerable areas and redirect their growth away from critical infrastructure.

To begin with, understanding the natural water needs of the trees on your property is essential. Different species have varying root behaviors and moisture requirements. Overwatering your landscape, especially near the foundation, can create an environment where roots thrive and expand uncontrollably. Instead, adopt a watering schedule that supports healthy tree growth without saturating the soil. Drip irrigation systems are particularly effective because they deliver water directly to the root zone in controlled amounts, minimizing excess moisture that could attract roots toward your home.

Equally important is the grading and drainage of your yard. Poor drainage can lead to water pooling near the foundation, which not only weakens the structural integrity of your home but also encourages root intrusion. Ensure that your yard slopes away from the house and that gutters and downspouts are functioning properly to direct rainwater away. Installing French drains or other drainage solutions can also help manage excess moisture and protect your property from root-related water damage.

Mulching is another valuable technique in soil moisture management. A layer of organic mulch around trees and shrubs helps retain moisture in the soil while reducing the need for frequent watering. However, it’s crucial to avoid placing mulch too close to the foundation or piling it too high, as this can trap moisture against the structure and create ideal conditions for root growth and water infiltration. Instead, maintain a balanced mulch layer that supports plant health without compromising your home’s defenses.

In addition to these landscaping practices, regular monitoring of soil moisture levels can provide early warning signs of potential issues. Using a soil moisture meter, homeowners can assess whether the ground is too wet or too dry and adjust their irrigation practices accordingly. This proactive approach not only supports healthy vegetation but also minimizes the risk of roots seeking out alternative water sources, such as leaking pipes or damp foundation walls.

It’s also worth considering the strategic placement of trees and shrubs during landscaping. Planting large trees too close to the house increases the likelihood of root intrusion and water damage. As a general rule, trees should be planted at a distance equal to at least half of their mature height from any structure. For example, a tree expected to grow 40 feet tall should be planted at least 20 feet away from your home. This spacing helps ensure that roots have ample room to grow without threatening your foundation or underground utilities.

For properties already experiencing signs of water damage or root intrusion, professional assessment and intervention may be necessary. A qualified restoration expert can evaluate the extent of the damage and recommend appropriate solutions, such as root barriers, foundation repairs, or improved drainage systems. If you suspect that tree roots may be contributing to moisture problems in your home, it’s crucial to act quickly to prevent further deterioration. Learn more about our comprehensive services designed to address water damage and protect your property.

In some cases, root barriers can be installed to physically block roots from reaching sensitive areas. These barriers are typically made of durable materials like plastic or metal and are buried vertically in the ground between the tree and the structure. When properly installed, root barriers can redirect root growth downward or away from the foundation, reducing the risk of water damage. However, this solution should be implemented with care and ideally under the guidance of a landscaping or restoration professional to avoid harming the tree or compromising the barrier’s effectiveness.

Homeowners should also be aware of the signs of hidden water damage, which can often be the result of root intrusion. Symptoms such as musty odors, unexplained dampness, or cracks in walls and floors may indicate underlying issues. For more information on identifying these early warning signs, visit our guide on how to identify hidden water damage early. Early detection and intervention are key to preventing costly repairs and maintaining the structural integrity of your home.

Ultimately, managing soil moisture is a critical component of a broader strategy to prevent water damage from tree roots. By combining smart irrigation practices, proper landscaping techniques, and professional support when needed, homeowners can create an environment that supports healthy plant life without compromising their property. For more information about our team and our commitment to protecting homes from water damage, visit our about page. Taking these proactive steps today can save you from significant headaches and expenses in the future.

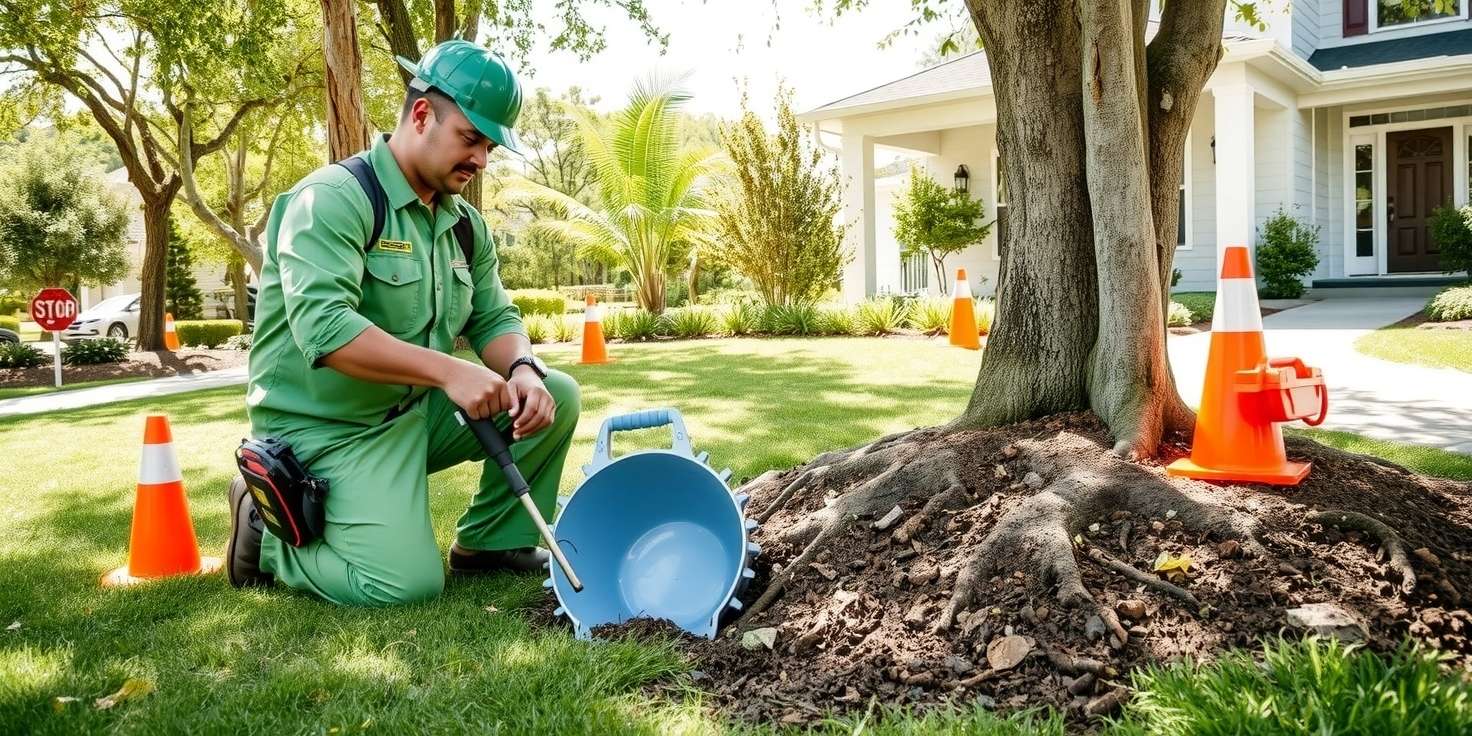
Pruning Tree Roots Without Harming the Tree

When dealing with the challenge of tree roots causing potential water damage to your property, it is essential to approach root pruning with care and precision. Tree roots can extend far beyond the visible canopy, often infiltrating underground plumbing, foundations, and drainage systems. Improper pruning can not only fail to resolve the issue but also severely damage or kill the tree. To prevent this, it is crucial to understand the structure of tree roots and how to manage them responsibly. Begin by identifying which roots are causing the problem. Typically, surface roots or those growing near water lines and foundations are the culprits. Use a root barrier or consult with an arborist to determine the safest way to prune without compromising the tree’s health. Avoid cutting roots that are more than two inches in diameter unless absolutely necessary, as these are often structural roots that provide stability and essential nutrients to the tree.

Timing is another key factor. The best time to prune roots is during the tree’s dormant season, usually in late fall or early spring, when the tree is less likely to experience stress. Always use clean, sharp tools to make precise cuts, and avoid tearing or crushing the roots. After pruning, monitor the tree for signs of stress such as wilting leaves, early leaf drop, or dieback. Applying mulch and watering the tree adequately can help it recover more quickly. In some cases, installing a root barrier after pruning can prevent future encroachment into vulnerable areas like basements or sewer lines. If the damage is already significant, it may be necessary to consult a professional restoration company to assess and repair any existing water damage. You can learn more about the types of services available by visiting our services page.

Additionally, understanding the long-term impact of root pruning is vital. Trees rely on a complex root system not only for stability but also for nutrient and water absorption. Removing too many roots can lead to instability, making the tree more susceptible to falling during storms or high winds. It can also reduce the tree’s ability to absorb water, ironically increasing the risk of water stress and disease. Therefore, it is often beneficial to work with a certified arborist who can assess the tree’s health and recommend the most effective and least invasive root management techniques. For homeowners concerned about the broader implications of water damage caused by tree roots, our blog offers valuable insights and preventative strategies. Taking proactive steps not only protects your property but also ensures the longevity and health of your trees.

Using Non-Invasive Root Control Methods

One of the most effective strategies for preventing water damage caused by tree roots is the use of non-invasive root control methods. These techniques are designed to manage root growth without harming the tree or disrupting the surrounding landscape. Unlike traditional methods that may involve cutting or removing roots, non-invasive approaches focus on guiding root development away from vulnerable structures such as underground pipes, foundations, and drainage systems. This is particularly important in urban and suburban environments where trees often coexist with critical infrastructure. By implementing these methods, homeowners can maintain the health of their trees while protecting their property from potential water damage.

Root barriers are one of the most commonly used non-invasive tools. These physical barriers are installed underground to redirect root growth away from sensitive areas. Made from materials like plastic or metal, root barriers are strategically placed between the tree and the structure at risk. They do not harm the tree but instead encourage roots to grow in a different direction. This technique is especially useful for preventing roots from infiltrating sewer lines or cracking foundation walls, which can lead to significant water intrusion issues. When installed correctly, root barriers offer a long-term solution that requires minimal maintenance.

Another effective method is the use of air excavation tools to expose and manage roots without damaging them. This technique involves using compressed air to remove soil around the roots, allowing arborists to inspect and prune them safely. Air excavation is particularly beneficial when roots are located near water lines or other utilities, as it minimizes the risk of accidental damage. Once exposed, roots can be carefully redirected or pruned to prevent future interference with plumbing or drainage systems. This method is both precise and environmentally friendly, making it a preferred choice for many property owners.

Chemical root inhibitors also offer a non-invasive way to control root growth. These substances are applied to the soil or directly to the roots to slow down or alter their growth patterns. When used properly, they can prevent roots from encroaching on areas where they could cause water damage. It is important to use environmentally safe products and to follow manufacturer guidelines to avoid harming the tree or surrounding vegetation. Consulting with a certified arborist or landscape professional can ensure that chemical treatments are applied effectively and responsibly.

Regular tree maintenance is another key component of non-invasive root control. Pruning branches and managing the overall health of the tree can influence root behavior. A healthy tree is less likely to send out aggressive roots in search of water and nutrients. Additionally, proper watering and fertilization practices can encourage roots to grow deeper into the soil rather than spreading out near the surface where they are more likely to interfere with structures. Scheduling routine inspections with a professional arborist can help identify potential issues early and implement corrective measures before damage occurs.

Mulching is a simple yet effective technique that supports non-invasive root control. Applying mulch around the base of a tree helps retain soil moisture, regulate temperature, and reduce soil compaction. This creates a more favorable environment for root growth, encouraging roots to stay within the mulched area rather than spreading toward foundations or water lines. Organic mulches such as wood chips or bark are particularly beneficial, as they decompose over time and enrich the soil. However, it is important to avoid piling mulch against the tree trunk, as this can lead to rot and other health issues.

Incorporating proper landscaping design can also play a significant role in managing root growth. When planting new trees, it is essential to consider their mature size and root spread. Choosing tree species with less aggressive root systems and planting them at a safe distance from buildings and underground utilities can prevent future problems. Additionally, using raised beds or root-friendly paving materials can help guide root growth in a controlled manner. Thoughtful landscape planning not only enhances the aesthetic appeal of a property but also reduces the risk of water damage caused by invasive roots.

For homeowners who are unsure about the best approach to root control, consulting with professionals is highly recommended. Experts in tree care and property maintenance can assess the specific conditions of your landscape and recommend tailored solutions. At Projekt Restoration, we offer a range of services designed to protect your home from water damage, including expert advice on root management and preventative measures. Our team is committed to helping you maintain a safe and healthy environment around your property.

Understanding the potential risks associated with tree roots and taking proactive steps to manage them can save homeowners from costly repairs and structural damage. Non-invasive root control methods provide a sustainable and effective way to balance the benefits of trees with the need to protect your home. Whether through the use of root barriers, air excavation, chemical treatments, or strategic landscaping, these techniques offer practical solutions that preserve both your property and the natural beauty of your surroundings.

If you are interested in learning more about how to safeguard your home from water damage, visit our about page to discover our mission and commitment to quality service. You can also explore our blog for additional tips and insights on property maintenance and damage prevention. Taking the time to implement non-invasive root control methods today can help ensure a safer, more resilient home for years to come.

Consulting with an Arborist for Tree Management

When it comes to preventing water damage caused by invasive tree roots, seeking the expertise of a certified arborist is one of the most effective steps a homeowner can take. Arborists are trained professionals who specialize in the care and management of trees, and their knowledge is invaluable in identifying potential risks before they escalate into costly problems. Tree roots naturally seek out moisture, and in doing so, they can infiltrate plumbing systems, crack foundations, and disrupt underground drainage lines. An arborist can assess the health and placement of trees on your property, determine which species pose a higher risk of root intrusion, and recommend appropriate management strategies to mitigate these threats. This might include root pruning, installing root barriers, or even relocating trees that are too close to structures. In addition to evaluating existing trees, arborists can guide homeowners in selecting and planting new trees in locations that are less likely to interfere with water lines or building foundations. Their insights are especially valuable in urban environments where space is limited and underground infrastructure is dense. Moreover, arborists can work in collaboration with water damage restoration professionals to ensure that any existing damage is addressed while preventing future occurrences. If you are dealing with water issues or suspect that tree roots may be the cause, it is crucial to act quickly. You can learn more about the types of services available to address such concerns or explore our detailed guide on how to identify hidden water damage early. Consulting with an arborist not only protects your property but also promotes the long-term health of your landscape, ensuring that your trees remain assets rather than liabilities.

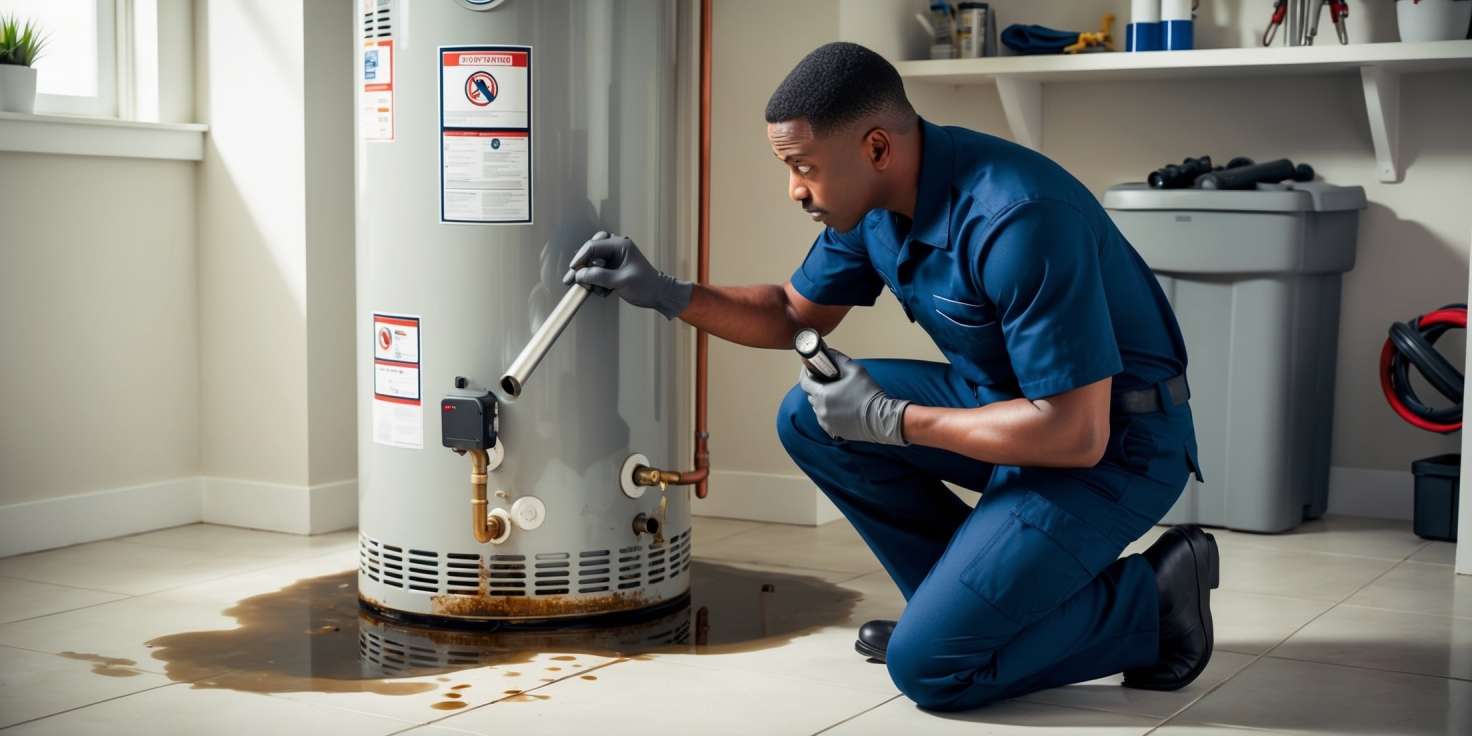
Repairing Cracks and Leaks Promptly

One of the most effective ways to prevent water damage caused by invasive tree roots is to address any existing cracks and leaks in your plumbing or foundation as soon as they are discovered. Tree roots are naturally drawn to moisture, and even the smallest leak can attract them, encouraging growth toward and eventually into your pipes or foundation. Once roots infiltrate these vulnerable areas, they can cause significant structural damage, leading to costly repairs and extensive water damage. Timely repair of cracks in your foundation, walls, or plumbing not only prevents root intrusion but also helps maintain the integrity of your home’s infrastructure. Regular inspections by professionals can help identify early signs of damage that may not be visible to the untrained eye. If you notice signs such as damp spots, mold growth, or an unexplained increase in your water bill, it could indicate a hidden leak that needs immediate attention. Taking proactive steps to seal these entry points can significantly reduce the risk of water damage. For homeowners seeking expert assistance, exploring the range of services offered by restoration professionals can provide peace of mind and long-term protection. Additionally, understanding the broader impact of water damage and how it can be mitigated is crucial. You can learn more about identifying early signs of hidden issues by visiting our guide on how to identify hidden water damage early. By staying vigilant and addressing minor issues before they escalate, you can safeguard your property from the destructive effects of tree root intrusion and maintain a safe, dry living environment.

Replacing Old or Vulnerable Pipes

One of the most effective ways to prevent water damage caused by invasive tree roots is to proactively replace old or vulnerable pipes. Aging plumbing systems, especially those made from clay, cast iron, or other outdated materials, are significantly more susceptible to root intrusion. Over time, these materials can crack, corrode, or develop small leaks, which attract tree roots seeking moisture. Once roots infiltrate the pipe, they can grow rapidly, causing blockages, backups, and even complete pipe collapse. Replacing these older pipes with modern, durable materials such as PVC or HDPE can dramatically reduce the risk of root intrusion and the resulting water damage. These newer materials are not only more resistant to cracking and corrosion but also have fewer joints, which minimizes potential entry points for roots.

Before initiating a pipe replacement project, it is essential to conduct a thorough inspection of your plumbing system. Professional plumbers often use video camera inspections to identify areas of concern, such as cracks, misalignments, or existing root infiltration. Based on the findings, they can recommend whether a full replacement or a targeted repair is necessary. In some cases, trenchless pipe replacement methods can be used, which are less invasive and more cost-effective than traditional excavation. These methods include pipe bursting and pipe lining, both of which can restore the integrity of your plumbing system without the need to dig up your yard.

Homeowners should also consider the age of their plumbing system when evaluating the need for replacement. Pipes that are more than 40 to 50 years old are generally at higher risk for failure and should be assessed regularly. Additionally, if you have experienced frequent clogs, slow drains, or unexplained wet spots in your yard, these could be signs of root intrusion or pipe deterioration. Addressing these issues early can prevent more severe damage and costly repairs in the future.

Another important factor to consider is the proximity of large trees to your plumbing lines. Trees with aggressive root systems, such as willows, maples, and oaks, can extend their roots far beyond the canopy in search of water. If these trees are located near your underground pipes, the risk of root intrusion increases significantly. In such cases, replacing vulnerable pipes with root-resistant materials and rerouting them away from high-risk areas can provide long-term protection. Consulting with a professional who understands both plumbing and landscaping can help you develop a comprehensive strategy to safeguard your property.

In addition to replacing old pipes, it is wise to implement preventive maintenance practices. Regular inspections, root barrier installations, and the use of root-killing chemicals can help manage root growth and protect your plumbing system. However, these measures are most effective when combined with the structural integrity provided by modern piping materials. Investing in pipe replacement not only prevents water damage but also enhances the overall value and safety of your home.

If you are unsure about the condition of your pipes or need guidance on the best course of action, consider reaching out to a professional restoration company. At Projekt Restoration, we offer a wide range of services designed to protect your home from water damage, including expert assessments and pipe replacement solutions. Our team is experienced in identifying vulnerabilities and implementing effective strategies to prevent future issues. You can learn more about our approach and commitment to quality by visiting our about page.

Ultimately, replacing old or vulnerable pipes is a proactive step that can save you from the stress and expense of water damage caused by tree roots. By upgrading your plumbing system with durable, root-resistant materials and working with trusted professionals, you can ensure the long-term health and safety of your property.

Monitoring Tree Growth Over Time

One of the most effective strategies to prevent water damage caused by tree roots is to consistently observe and track the growth of trees on your property. Trees are living organisms that grow and change over time, and their root systems can expand significantly, often without visible signs above ground. By regularly monitoring tree growth, homeowners can detect early warning signs of potential root intrusion into plumbing systems, foundations, or underground drainage lines. This proactive approach allows for timely intervention before roots cause structural damage or lead to costly water-related issues. Start by documenting the size and location of trees near your home and updating this information annually. Pay close attention to fast-growing species or those planted close to the foundation. If you notice cracks in the soil, uneven pavement, or slow-draining water near trees, these could be indicators of root interference. Consulting with an arborist or landscape professional can provide valuable insights into the health and behavior of your trees. Additionally, integrating this monitoring process with routine home maintenance can help you stay ahead of potential problems. For example, combining tree growth assessments with seasonal inspections of your plumbing and foundation can create a comprehensive prevention plan. If you suspect water damage has already occurred, it is crucial to act quickly. You can learn more about identifying early signs of hidden water damage by visiting our detailed guide on how to identify hidden water damage early. For those seeking professional assistance, our team offers a range of specialized services designed to address and prevent water damage, including root-related issues. Staying informed and vigilant about tree growth not only protects your home but also preserves the health of your landscape, ensuring a safe and damage-free environment for years to come.

When to Consider Tree Removal for Safety

Tree removal is a significant decision that should not be taken lightly, especially when it comes to preventing water damage caused by invasive tree roots. While trees offer numerous environmental and aesthetic benefits, there are situations where their presence can pose serious risks to your property’s safety and structural integrity. One of the most critical times to consider tree removal is when roots begin to interfere with underground plumbing, foundation systems, or drainage infrastructure. Tree roots naturally seek out moisture, and if your property has leaking pipes or poorly sealed foundations, roots can infiltrate these areas, leading to blockages, cracks, and eventual water intrusion. Over time, this can result in extensive water damage that may require costly repairs and professional restoration services.

Another key indicator that tree removal may be necessary is visible damage to your home’s foundation or hardscape. Cracks in driveways, sidewalks, or basement walls can be early signs that roots are exerting pressure on these structures. If left unaddressed, this pressure can compromise the stability of your home, making it vulnerable to flooding and long-term water damage. In such cases, removing the problematic tree can prevent further deterioration and protect your investment. Additionally, trees that are leaning dangerously close to your home or have large, overhanging branches can pose a threat during storms. High winds or heavy rainfall can cause these trees to fall or drop limbs, potentially damaging your roof, gutters, or siding, and allowing water to seep into your home.

It is also important to assess the health of the tree itself. Diseased, dying, or dead trees are more likely to fall or shed limbs unexpectedly, especially during adverse weather conditions. These trees often have weakened root systems that can no longer support their weight, increasing the risk of collapse. If a tree is showing signs of decay, such as hollow trunks, fungal growth, or excessive leaf loss, it may be time to consult a certified arborist or a professional restoration company to evaluate the potential hazards. In many cases, proactive tree removal can prevent a minor issue from escalating into a major water damage emergency.

Homeowners should also be aware of the proximity of trees to essential infrastructure. Trees planted too close to sewer lines, water mains, or storm drains can cause significant disruptions. Root intrusion into these systems can lead to clogs, backups, and even pipe bursts, all of which contribute to water damage. If you notice slow drains, foul odors, or soggy patches in your yard, it could be a sign that tree roots are affecting your plumbing. In such scenarios, removing the tree may be the most effective solution to prevent further damage and restore proper function to your drainage systems.

In some cases, local building codes or insurance policies may require the removal of trees that pose a safety hazard. It is advisable to check with your municipality or insurance provider to understand any regulations or coverage limitations related to tree-related damage. Taking a proactive approach not only ensures compliance but also minimizes the risk of denied claims or legal liabilities in the event of property damage. For those seeking professional guidance, companies like Projekt Restoration offer a range of services designed to help homeowners identify and mitigate risks associated with tree roots and water damage.

Furthermore, if you are planning a home renovation or landscaping project, it is wise to evaluate the location and health of nearby trees. Construction activities can disturb root systems, making trees unstable and more likely to fall. Additionally, changes in soil grade or drainage patterns can affect how water flows around your property, potentially increasing the risk of water damage. In such instances, removing certain trees may be necessary to ensure the long-term safety and functionality of your property. Consulting with experts can help you make informed decisions that balance aesthetics, safety, and environmental considerations.

Preventative maintenance is always more cost-effective than emergency repairs. Regularly inspecting your property for signs of root intrusion, foundation cracks, or drainage issues can help you catch problems early. If you suspect that a tree may be contributing to water damage, it is crucial to act quickly. Delaying removal can lead to more extensive damage, higher repair costs, and potential health hazards such as mold growth. For more information on how to detect early signs of water damage, you can visit our detailed guide on how to identify hidden water damage early.

Ultimately, the decision to remove a tree should be based on a thorough assessment of the risks and benefits. While trees are valuable assets, their potential to cause water damage through aggressive root systems cannot be overlooked. By staying vigilant and seeking professional advice when necessary, homeowners can protect their properties from costly and disruptive water damage. If you have concerns about trees on your property or need assistance with water damage prevention, do not hesitate to reach out through our contact page to speak with a knowledgeable specialist. Taking timely action can make all the difference in maintaining a safe and secure home environment.

Sure! Here’s a suitable FAQ section for a blog post titled “How to Prevent Water Damage from Tree Roots,” incorporating relevant information:

Frequently Asked Questions (FAQ)

  1. How can tree roots cause water damage?

Tree roots naturally seek out moisture and can grow toward underground water lines, sewer pipes, or foundation walls. Over time, they may infiltrate or damage these structures, leading to leaks, blockages, or cracks that result in water damage to your home or property.

  1. What are the signs that tree roots may be causing water damage?

Common signs include slow-draining sinks or toilets, gurgling pipes, unexplained wet spots in your yard, foundation cracks, or a sudden increase in your water bill. If you notice any of these, it’s important to investigate further.

  1. How can I prevent tree roots from damaging my pipes or foundation?

To prevent damage:

  • Plant trees away from water lines and foundations.
  • Choose tree species with less aggressive root systems.
  • Install root barriers between trees and structures.
  • Regularly inspect and maintain your plumbing and foundation.
  • Consult with a professional arborist or plumber for preventive strategies.
  1. What are root barriers and how do they work?

Root barriers are physical or chemical barriers installed underground to redirect root growth away from sensitive areas like foundations or pipes. They help prevent roots from infiltrating or damaging these structures while allowing the tree to grow safely.

  1. Can I remove tree roots myself if they’re causing problems?

It’s not recommended to remove tree roots on your own, especially if they’re near utility lines or structural elements. Improper removal can damage the tree or worsen the problem. Always consult with a certified arborist or a professional plumber for safe and effective solutions.

  1. Are there tree species that are safer to plant near my home?

Yes, some trees have less invasive root systems and are better suited for planting near homes. Examples include dogwoods, Japanese maples, and certain ornamental trees. Avoid fast-growing species like willows, poplars, and silver maples, which tend to have aggressive roots.

  1. How often should I inspect my property for potential root-related water damage?

It’s a good idea to inspect your property at least once a year, especially if you have large or mature trees nearby. Look for signs of water damage, foundation issues, or changes in your plumbing system. Early detection can save you from costly repairs.

  1. Who should I contact if I suspect tree roots are causing water damage?

Contact a licensed plumber to inspect your pipes and a certified arborist to assess the tree’s root system. In some cases, you may also need a foundation specialist or landscaper to help implement long-term solutions.

By staying proactive and informed, you can effectively prevent water damage caused by tree roots and protect your home for years to come.

How to Prevent Water Damage from Landscaping

Water damage from landscaping is a common yet often overlooked issue that can lead to costly repairs and long-term structural problems if not addressed properly. Whether it’s improper drainage, overwatering, or poorly graded soil, your yard’s design can significantly impact your home’s foundation and overall safety. At COMMITTED TO QUALITY SERVICE, we understand the importance of protecting your property from preventable damage. Our team offers fast, friendly, and professional service to help homeowners avoid the pitfalls of water intrusion. With our specialized water damage restoration equipment and expertise, we ensure your home stays dry and secure. If you’re looking to prevent water damage from landscaping, it’s essential to understand the causes and implement effective solutions. Call us now at 855-933-7935 to learn more about how we can help safeguard your home. Don’t wait until it’s too late—protect your investment with expert advice and reliable service.

Understanding the Link Between Landscaping and Water Damage

Landscaping plays a crucial role in enhancing the aesthetic appeal and functionality of a property, but it can also be a hidden contributor to water damage if not properly planned and maintained. Many homeowners overlook the connection between their yard’s design and the structural integrity of their home. However, improper landscaping can lead to significant water intrusion issues, especially during heavy rainfall or snowmelt. Understanding how landscaping affects water flow and drainage is essential to preventing costly damage to your home’s foundation, basement, and other vulnerable areas.

One of the most common ways landscaping contributes to water damage is through poor grading. When the ground around a home slopes toward the structure instead of away from it, water naturally flows toward the foundation. Over time, this can lead to foundation cracks, basement flooding, and even structural instability. According to the Federal Emergency Management Agency (FEMA), “Improper grading is one of the leading causes of water damage in residential properties.”

Another critical factor is the placement of plants, trees, and shrubs. While greenery adds beauty and shade, planting too close to the home can cause problems. Tree roots can disrupt underground drainage systems and even crack foundations. Additionally, dense vegetation can trap moisture against the exterior walls, promoting mold growth and wood rot. This is particularly concerning in regions with high humidity or frequent rainfall.

“The key to preventing water damage from landscaping is to manage water flow effectively and ensure proper drainage away from the home.”

Hardscaping elements like patios, walkways, and driveways can also contribute to water issues if they are not designed with drainage in mind. Impermeable surfaces prevent water from soaking into the ground, leading to runoff that can pool near the foundation. Installing permeable pavers or incorporating drainage channels can help mitigate this risk.

Here are some common landscaping mistakes that often lead to water damage:

  1. Improper grading that directs water toward the home
  2. Planting trees or shrubs too close to the foundation
  3. Using non-permeable materials for walkways and patios without adequate drainage
  4. Neglecting to clean and maintain gutters and downspouts
  5. Failing to install or maintain a proper drainage system

To avoid these issues, it’s important to work with professionals who understand both landscaping and water management. Regular inspections and maintenance can also help identify potential problems before they escalate. For example, checking for pooling water after a storm or inspecting the slope of your yard can reveal early warning signs of drainage issues.

If you suspect water damage or want to learn more about how to protect your home, consider exploring our detailed guide on how to identify hidden water damage early. This resource provides valuable insights into spotting subtle signs of moisture problems before they become major repairs.

Additionally, our team at Projekt Restoration offers a range of services designed to help homeowners address and prevent water damage. From professional assessments to full-scale restoration, we are committed to protecting your property from the inside out.

According to the Environmental Protection Agency (EPA), “Proper landscaping can reduce runoff and erosion, improve water quality, and protect your home’s foundation.” This highlights the importance of integrating sustainable landscaping practices that not only beautify your property but also safeguard it from water-related issues.

For more expert advice and practical tips, visit our regularly updated blog, where we cover a wide range of topics related to home maintenance, water damage prevention, and restoration solutions.

In conclusion, landscaping is more than just an aesthetic choice—it’s a functional component of your home’s defense against water damage. By understanding the link between your yard’s design and potential moisture issues, you can take proactive steps to protect your investment and maintain a safe, dry living environment.

Grading Your Yard for Proper Drainage

One of the most effective ways to prevent water damage from landscaping is to ensure your yard is properly graded. Yard grading refers to the process of shaping the land around your home to direct water away from the foundation. When done correctly, it helps prevent water from pooling near your house, which can lead to serious issues such as foundation cracks, basement flooding, and mold growth. A properly graded yard should slope away from your home at a minimum of 5 percent, or about six inches over the first ten feet. This subtle incline is enough to guide rainwater and runoff away from your structure, reducing the risk of water infiltration. Poor grading, on the other hand, can cause water to collect near your foundation, eventually seeping into your home and causing costly damage. If you notice standing water after a rainstorm or damp spots near your foundation, it may be time to evaluate your yard’s grading.

To assess your yard’s slope, you can use a long level and a measuring tape or consult a landscaping professional. If regrading is necessary, soil may need to be added or removed to create the proper slope. In some cases, installing a French drain or swale can help redirect water more effectively. These drainage solutions work in tandem with grading to ensure water flows away from your home, not toward it. Additionally, it’s important to maintain your yard’s grading over time. Natural erosion, heavy rainfall, and landscaping changes can alter the slope, so regular inspections are essential. Keeping your gutters and downspouts clear and directing them away from the foundation also supports proper drainage. For homeowners looking to protect their property from water damage, understanding the importance of yard grading is a crucial first step. It not only safeguards your home’s structural integrity but also enhances the overall health of your landscape.

If you’re unsure about how to properly grade your yard or suspect existing drainage issues, it’s wise to seek professional assistance. At Projekt Restoration, we offer a range of services designed to help homeowners prevent and address water damage effectively. Our team can evaluate your property and recommend the best solutions tailored to your specific needs. You can also learn more about our approach and values by visiting our mission page. Taking proactive steps now can save you from costly repairs and ensure your home remains safe and dry for years to come.

Choosing the Right Plants to Prevent Soil Erosion

Selecting the appropriate vegetation for your landscape plays a crucial role in preventing soil erosion, which is a major contributor to water damage around homes and buildings. Plants with deep, fibrous root systems help anchor the soil, reducing runoff and keeping moisture levels balanced. Ground covers like creeping juniper, periwinkle, and native grasses are excellent choices for sloped areas, as they spread quickly and form a dense mat that holds the soil in place. Shrubs and trees such as willow, dogwood, and red osier are also effective, especially near water-prone zones, because their roots stabilize the ground and absorb excess water. When planning your landscaping, it is essential to consider the local climate, soil type, and sun exposure to ensure the plants you choose will thrive and provide long-term erosion control. Native plants are often the best option, as they are adapted to the local environment and require less maintenance and water. In addition to their functional benefits, these plants can enhance the aesthetic appeal of your yard while supporting local biodiversity. Incorporating mulch and organic matter around plant bases can further improve soil structure and water retention, reducing the risk of erosion. For homeowners looking to protect their property from water damage, understanding the importance of plant selection is a proactive step. If you’re unsure where to begin, consulting with a landscaping or restoration expert can help you make informed decisions tailored to your specific needs. To learn more about how landscaping choices impact water damage prevention, visit our blog or explore our wide range of services. By integrating the right plants into your landscape design, you not only safeguard your property but also contribute to a healthier and more sustainable environment.

Installing Drainage Systems to Redirect Water Flow

One of the most effective ways to prevent water damage caused by landscaping is by installing proper drainage systems that redirect water flow away from your home’s foundation. Without adequate drainage, excess rainwater or irrigation runoff can accumulate around your property, leading to soil erosion, basement flooding, and long-term structural damage. A well-designed drainage system ensures that water is channeled safely away from vulnerable areas, protecting both your landscape and your home. There are several types of drainage solutions available, including French drains, surface drains, and dry wells, each tailored to specific property needs. French drains, for example, are ideal for areas with poor soil drainage and work by collecting water through a perforated pipe surrounded by gravel. Surface drains, on the other hand, are effective in quickly removing water from hardscaped areas like patios and driveways. When planning a drainage system, it is crucial to assess the slope and grading of your yard. The ground should naturally slope away from your home to encourage water to flow outward rather than pooling near the foundation. If your yard is flat or slopes toward the house, regrading may be necessary to correct the issue. Additionally, integrating gutters and downspouts with extensions can help direct roof runoff away from the base of your home. For homeowners unsure about the best drainage solution, consulting with a professional can provide valuable insights and customized recommendations. At Projekt Restoration, we offer a range of services designed to protect your property from water-related issues. Our team can assess your landscape and implement the most effective drainage system to suit your needs. Proper drainage not only prevents water damage but also enhances the health of your plants and lawn by preventing root rot and soil compaction. For more information on how we can help safeguard your home, visit our about page to learn more about our expertise and commitment to quality. Taking proactive steps to manage water flow through strategic drainage installation is a smart investment in the longevity and safety of your property.

Maintaining Gutters and Downspouts Around Landscaping

Proper maintenance of gutters and downspouts is essential in preventing water damage that can stem from landscaping. These components play a critical role in directing rainwater away from your home’s foundation, which is especially important when landscaping features like flower beds, mulch, or decorative stones are placed near the perimeter of your house. When gutters become clogged with leaves, twigs, or debris, water can overflow and saturate the soil around your foundation. This excess moisture can lead to structural issues, basement flooding, or even mold growth. Regularly cleaning your gutters, especially during the fall and spring seasons, ensures that water flows freely through the system and is directed safely away from your home.

In addition to cleaning, it’s important to inspect your gutters and downspouts for any signs of damage or misalignment. Cracks, rust, or sagging sections can compromise the system’s effectiveness, allowing water to leak directly into your landscaping and potentially seep into your home. Downspouts should extend at least five to ten feet away from the foundation to prevent pooling water. If your landscaping design includes slopes or retaining walls, make sure the water is being directed downhill and away from these structures to avoid erosion or water buildup. Installing gutter guards can also help reduce the frequency of clogs and make maintenance easier over time.

Another key aspect is integrating your gutter system with your landscaping design. For example, using splash blocks or downspout extenders can help channel water into designated drainage areas or rain gardens, which not only protect your foundation but also enhance the aesthetic and ecological value of your yard. French drains or dry wells can also be incorporated to manage runoff more effectively. These solutions are particularly useful in areas with heavy rainfall or clay-rich soil that retains water. Ensuring that your landscaping supports proper drainage will significantly reduce the risk of water damage.

Homeowners should also be aware of the signs of water damage that may result from poor gutter maintenance. These can include water stains on exterior walls, peeling paint, or damp spots in basements and crawl spaces. If you notice any of these issues, it may be time to consult a professional. At Projekt Restoration, we offer a range of services designed to help homeowners identify and address water damage before it becomes a major problem. Our team can assess your gutter system and recommend improvements that align with your landscaping layout.

For those interested in learning more about how water damage can affect your home and what steps to take, our detailed blog provides valuable insights and practical tips. We also encourage homeowners to explore our about page to understand our commitment to quality and customer satisfaction. By staying proactive with gutter and downspout maintenance, you can protect your home from costly repairs and maintain the beauty and functionality of your landscaping.

Using Mulch and Ground Cover Wisely

Mulch and ground cover are essential components of a well-maintained landscape, but when used improperly, they can contribute to water damage around your home. Understanding how to use these materials wisely can help you protect your property from excess moisture and the costly repairs that often follow. One of the most important considerations when applying mulch is its placement. Mulch should never be piled directly against the foundation of your home. Doing so can trap moisture against the structure, leading to potential seepage into basements or crawl spaces. Instead, leave a gap of at least six inches between the mulch and your home’s exterior walls. This allows for proper air circulation and reduces the risk of water infiltration.

The type of mulch you choose also plays a significant role in water management. Organic mulches like wood chips, bark, or straw are popular for their aesthetic appeal and soil-enhancing properties. However, they can retain a significant amount of moisture, which may be problematic if drainage is poor. In areas prone to heavy rainfall or where the soil does not drain well, consider using inorganic mulches such as gravel or rubber. These materials do not absorb water and can help direct runoff away from your home’s foundation.

Ground cover plants are another effective way to manage water in your landscape. These low-growing plants help stabilize soil, reduce erosion, and absorb excess rainwater. However, it’s important to choose the right species for your climate and soil type. Native ground covers are typically the best choice, as they are adapted to local conditions and require less maintenance. When planting ground cover near your home, ensure that the soil slopes away from the foundation. This simple grading technique encourages water to flow away from the structure, minimizing the risk of water damage.

Proper installation and maintenance of mulch and ground cover are crucial. Over time, mulch can decompose and compact, reducing its effectiveness. Refreshing mulch annually and checking for signs of water pooling can help maintain its protective benefits. Similarly, ground cover should be trimmed and managed to prevent overgrowth, which can block drainage paths and trap moisture.

Incorporating these landscaping practices into your overall water damage prevention strategy can make a significant difference. If you suspect that your current landscaping may be contributing to moisture issues, it may be time to consult with professionals. At Projekt Restoration, we offer a range of services designed to help homeowners identify and address potential water damage risks. Our team can assess your property and recommend solutions tailored to your specific needs.

For those interested in learning more about how landscaping choices impact home safety, our blog provides valuable insights and practical tips. Whether you’re dealing with existing water damage or looking to prevent future issues, understanding the role of mulch and ground cover is a key step in protecting your investment. By using these materials wisely, you can enhance your landscape’s beauty while safeguarding your home from the hidden dangers of water intrusion.

Regular Landscaping Maintenance to Avoid Water Issues

Maintaining your landscape regularly is one of the most effective ways to prevent water damage around your property. Over time, even the most well-designed landscaping can contribute to water issues if not properly cared for. For instance, clogged drains, overgrown vegetation, and compacted soil can all disrupt the natural flow of water, leading to pooling, erosion, and eventually, damage to your home’s foundation or basement. Regular upkeep ensures that water is directed away from your home, reducing the risk of leaks, mold growth, and structural deterioration.

One of the key aspects of landscape maintenance is ensuring that your drainage systems remain clear and functional. Gutters and downspouts should be inspected and cleaned frequently to prevent blockages that can cause water to overflow and seep into your home. Similarly, French drains, swales, and other drainage features must be kept free of debris and sediment. When these systems are neglected, water can accumulate in unwanted areas, increasing the likelihood of water intrusion and long-term damage.

Another important factor is the condition of your soil. Over time, soil can become compacted, especially in high-traffic areas, reducing its ability to absorb water. This can lead to surface runoff and erosion, which may direct water toward your home instead of away from it. Aerating the soil and adding organic matter can improve its permeability, allowing water to soak in gradually rather than pooling on the surface. Additionally, maintaining a healthy lawn and garden with proper grading helps ensure that water flows in the right direction.

Vegetation management also plays a crucial role in preventing water damage. Trees and shrubs planted too close to your home can cause issues in multiple ways. Their roots may interfere with underground drainage systems or even the foundation itself, while overhanging branches can clog gutters with leaves and debris. Regular pruning and strategic planting help mitigate these risks. Choosing native or drought-resistant plants can also reduce the need for excessive watering, which can contribute to water accumulation if not properly managed.

Mulching is another simple yet effective maintenance practice. A well-applied layer of mulch helps retain soil moisture, reduce erosion, and prevent the growth of weeds that can disrupt the landscape. However, it’s important not to over-mulch or pile it too close to the foundation, as this can trap moisture and lead to water damage. Keeping mulch at a safe distance from your home’s exterior walls allows for proper air circulation and drainage.

Incorporating regular inspections into your landscaping routine can help identify potential issues before they become serious problems. Look for signs of poor drainage, such as standing water, soggy soil, or water stains on your foundation. Addressing these early can save you from costly repairs down the line. If you’re unsure about what to look for, consider consulting a professional who specializes in water damage prevention. You can learn more about our services and how we help homeowners protect their properties from water-related issues.

It’s also beneficial to stay informed about the best practices for landscape maintenance and water damage prevention. Our blog offers valuable insights and tips to help you maintain a safe and efficient outdoor environment. Whether you’re dealing with heavy rainfall, irrigation challenges, or seasonal changes, consistent care and attention to your landscape can make a significant difference in protecting your home.

Ultimately, regular landscaping maintenance is not just about aesthetics—it’s a proactive approach to safeguarding your property. By keeping your yard in good condition, ensuring proper drainage, and managing vegetation wisely, you can significantly reduce the risk of water damage. Taking the time to maintain your landscape today can prevent major headaches and expenses in the future.

In conclusion, preventing water damage from landscaping requires thoughtful planning, regular maintenance, and a proactive approach to managing water flow around your property. By grading your yard properly, installing effective drainage systems, choosing the right plants, and maintaining gutters and downspouts, you can significantly reduce the risk of water-related issues. Remember, a well-designed landscape not only enhances your home’s curb appeal but also protects its structural integrity. Taking the time to implement these preventative measures today can save you from costly repairs and headaches in the future.

Fire Damage Risks During Holiday Decorations


Ah, the holidays! That magical time of year when homes sparkle with twinkling lights, the scent of pine fills the air, and fireplaces crackle with warmth. But amidst the joy and glitter, there’s a hidden danger lurking in the shadows—Fire Damage Risks. From overloaded outlets to dry Christmas trees, the festive season can quickly turn from merry to mayhem if safety isn’t top of mind.

In this comprehensive guide, we’ll dive deep into the most common fire hazards during the holidays, how to prevent them, and what to do if disaster strikes. Whether you’re decking the halls or lighting the menorah, understanding these risks can save your home—and your holiday spirit.

COMMITTED TO QUALITY SERVICE Call Us Now! 855-933-7935 Fast, Friendly and Professional Service.


Fire Damage Risks: The Hidden Dangers of Holiday Cheer

Let’s face it—holiday decorations are beautiful, but they can also be dangerous. According to the National Fire Protection Association (NFPA), nearly 160 home fires start each year due to Christmas trees alone. That’s just the tip of the iceberg.

From candles to cooking mishaps, the season is filled with potential fire hazards. Understanding these fire damage risks is the first step toward a safer celebration.


1. Christmas Tree Combustion: A Real and Present Danger

Why Dry Trees Are a Fire Waiting to Happen

Live Christmas trees are festive, but once they dry out, they become tinderboxes. A single spark can ignite a tree in seconds, engulfing a room in flames. Always keep your tree watered and away from heat sources like fireplaces and radiators.

  • Choose a fresh tree with green needles.
  • Water it daily.
  • Keep it at least three feet from heat sources.

Need help after a fire? Our fire damage restoration experts are just a call away.


2. Electrical Overload: The Silent Spark

How Too Many Lights Can Lead to Disaster

We all love a house that glows like a winter wonderland, but overloading electrical circuits is a major fire damage risk. Plugging too many lights into one outlet can cause overheating and sparks.

Use surge protectors, inspect cords for frays, and never daisy-chain extension cords. If you’re unsure, consult a licensed electrician or call our emergency service team for a safety inspection.


3. Candle Catastrophes: Festive but Fatal

Open Flames and Flammable Decor Don’t Mix

Candles are cozy, but they’re also one of the leading causes of holiday fires. Keep them away from curtains, garlands, and anything else that can catch fire. Better yet, switch to flameless LED candles for the same ambiance without the risk.

In case of a fire, our fire damage restoration team is trained to handle even the most severe damage.


4. Kitchen Fires: Cooking Up Trouble

Why the Holidays Are Prime Time for Kitchen Blazes

With all the holiday feasting, it’s no surprise that kitchen fires spike during this season. Unattended cooking, grease fires, and faulty appliances are common culprits.

Never leave the stove unattended, keep a fire extinguisher nearby, and avoid wearing loose clothing while cooking. If a fire does occur, our restoration services can help you recover quickly.


5. Fireplace Faux Pas: Cozy or Catastrophic?

How Improper Fireplace Use Can Spark Disaster

Fireplaces are a holiday staple, but they can be dangerous if not used properly. Always use a screen to catch embers, and never burn wrapping paper—it ignites quickly and can cause a chimney fire.

Schedule a chimney inspection before the season starts. If you’ve already experienced damage, our reconstruction services can restore your home to its former glory.


6. Outdoor Lighting Hazards: Deck the Halls, Not the Fire Department

How to Safely Illuminate Your Home’s Exterior

Outdoor lights are beautiful, but they come with their own set of fire damage risks. Use lights rated for outdoor use, avoid stapling cords, and keep them away from dry leaves and gutters filled with debris.

Need help after an outdoor fire? Our property restoration team is available 24/7.


7. Extension Cord Overuse: A Common Culprit

Why More Isn’t Always Merrier

Extension cords are handy, but overusing them can lead to overheating and fires. Don’t plug multiple cords into one another, and always use cords rated for the intended load.

For safe decorating tips, check out our blog or contact our emergency service team.


8. Flammable Decorations: Pretty but Perilous

Why Some Holiday Decor Should Come with a Warning Label

Many decorations are made from flammable materials like paper, plastic, or fabric. Keep them away from open flames and heat sources. Opt for flame-retardant options whenever possible.

In the event of a fire, our fire damage restoration experts are here to help.


9. Space Heater Safety: Warmth Without Worry

How to Use Space Heaters Without Starting a Fire

Space heaters are a quick way to warm up a room, but they’re also a leading cause of winter fires. Keep them at least three feet from anything flammable and never leave them unattended.

Need help after a heater mishap? Our restoration services cover everything from cleanup to reconstruction.


10. Smoking Indoors: A Dangerous Holiday Habit

Why Smoking and Celebrating Don’t Mix

Smoking indoors increases the risk of fire, especially when combined with alcohol and flammable decorations. Always smoke outside and use deep, sturdy ashtrays.

If a fire does occur, our fire damage restoration team can help you recover.


11. Fireworks and Sparklers: Festive but Flammable

Why Fireworks Should Stay Outside

Fireworks and sparklers are often used during New Year’s celebrations, but they’re a major fire hazard. Use them outdoors, away from buildings, and always have water nearby.

For post-fire cleanup, our biohazard clean up and restoration services are available around the clock.


12. Pet Hazards: Furry Friends and Fire Risks

How Pets Can Accidentally Start Fires

Pets are curious creatures. They can knock over candles, chew on wires, or jump onto hot stovetops. Keep decorations and hazards out of their reach.

Need help after a pet-related fire? Our professional restoration team is here to assist.


13. Children and Fire Safety: Teaching the Basics

Why Education Is the Best Prevention

Kids love the magic of the holidays, but they may not understand the dangers. Teach them about fire safety, and keep matches and lighters out of reach.

Check out our FAQ for more safety tips.


14. Restoration Services: Your Lifeline After a Fire

How We Help You Rebuild and Recover

When disaster strikes, you need more than just cleanup—you need a partner in recovery. Our restoration services include everything from soot removal to full-scale reconstruction. We’re COMMITTED TO QUALITY SERVICE and ready to help 24/7.

Call us now at 855-933-7935 for fast, friendly, and professional service.


15. Water Damage Restoration: A Hidden Consequence of Firefighting

Why Water Damage Often Follows Fire

Firefighting efforts often leave behind significant water damage. Our water damage restoration services use specialized equipment to dry and restore your property.

Learn more about how we handle water damage here.


16. Fire Damage Restoration: The Road to Recovery

What to Expect from Our Professional Restoration Team

The most crucial step in the fire restoration process is to quickly mitigate the affected area and recover as much as possible. Our fire damage restoration team is trained to handle everything from smoke odor removal to structural repairs.

We’re here to help you every step of the way.


17. Mold Remediation: The Aftermath of Water Damage

Why Mold Is a Silent Threat Post-Fire

Where there’s water, there’s mold. After a fire, lingering moisture can lead to mold growth. Our mold remediation services ensure your home is safe and healthy.

Don’t wait—mold spreads fast.


18. Emergency Service: When Every Second Counts

Why Immediate Response Is Critical

Time is of the essence after a fire. Our emergency service team is available 24/7 to respond to your call and begin the restoration process immediately.

Call 855-933-7935 for immediate assistance.


19. Property Restoration: Bringing Your Home Back to Life

How We Restore More Than Just Structures

Our property restoration services go beyond repairs—we restore your peace of mind. From drywall to décor, we handle it all.

See our work in the gallery.


20. Biohazard Clean Up: Handling the Unthinkable

Why Some Fires Require Specialized Cleanup

Fires involving chemicals or biological materials require expert handling. Our biohazard clean up team is trained to manage these situations safely and effectively.

We’re here when you need us most.


21. Reconstruction Services: Rebuilding from the Ground Up

How We Turn Tragedy into Triumph

Sometimes, restoration isn’t enough. Our reconstruction services can rebuild your home from the ground up, better than before.

Let us help you start fresh.


22. Customer Satisfaction: Our Top Priority

Why We Go the Extra Mile

At Projekt Restoration, we’re not just about

Mold Prevention Tips for Newly Purchased Homes

Buying a new home is an exciting milestone, but it also comes with a host of responsibilities—one of the most critical being mold prevention. Mold can silently invade your home, causing structural damage and posing serious health risks. For homeowners, especially those who have just invested in a new property, understanding how to prevent mold is essential to maintaining a safe and healthy living environment.

Projekt Property Restoration, a trusted name in restoration services, emphasizes the importance of proactive mold prevention. With a mission to provide fast, friendly, and professional restoration services, Projekt Property Restoration is committed to helping homeowners protect their investments. Whether it’s through water damage restoration, fire damage restoration, or mold remediation, their team of highly-trained professionals ensures customer satisfaction and peace of mind.

Mold thrives in moist, warm environments, and newly purchased homes—especially those that have been vacant—can be particularly vulnerable. From hidden leaks to poor ventilation, several factors can contribute to mold growth. Fortunately, there are effective strategies to prevent mold before it becomes a costly problem.

  1. Inspect the Home Thoroughly Before Moving In
    Before you even unpack your boxes, conduct a comprehensive inspection of your new home. Look for signs of water damage, such as stains on ceilings or walls, musty odors, or warped flooring. Pay special attention to basements, attics, and crawl spaces—areas that are often overlooked but prone to moisture buildup. If you notice any red flags, consider hiring a professional to assess the situation. Early detection can save you from extensive mold remediation down the line.
  2. Ensure Proper Ventilation
    Good airflow is crucial for mold prevention. Make sure your home is well-ventilated, especially in moisture-prone areas like bathrooms, kitchens, and laundry rooms. Use exhaust fans during and after activities that produce moisture, such as cooking or showering. If your home lacks adequate ventilation, consider installing additional fans or vents to improve air circulation.
  3. Control Indoor Humidity Levels
    Mold thrives in environments with humidity levels above 60%. Use a hygrometer to monitor indoor humidity and keep it between 30% and 50%. Dehumidifiers can be particularly useful in damp areas like basements. Air conditioners also help reduce humidity, so ensure they are functioning efficiently. Regular maintenance of HVAC systems is essential for optimal performance and mold prevention.
  4. Fix Leaks Immediately
    Even a small leak can lead to significant mold growth if left unaddressed. Inspect plumbing fixtures, pipes, and appliances regularly for signs of leaks. Don’t forget to check under sinks, behind toilets, and around washing machines and dishwashers. If you discover a leak, repair it promptly and dry the affected area thoroughly. For severe water issues, professional water damage restoration may be necessary to prevent mold from taking hold.
  5. Waterproof Your Basement
    Basements are notorious for moisture problems, making them a prime location for mold growth. Waterproofing your basement is a smart investment for mold prevention. This may include sealing cracks in the foundation, installing a sump pump, or applying waterproof coatings to walls and floors. Proper drainage around your home’s foundation is also crucial to keep water from seeping into the basement.
  6. Maintain Your Roof and Gutters
    A leaky roof can introduce moisture into your attic and walls, creating ideal conditions for mold. Inspect your roof regularly for missing or damaged shingles, and ensure that flashing is intact. Clean your gutters and downspouts to prevent water from pooling near the foundation. If your roof has sustained damage, consider temporary solutions like roof tarp installation until permanent repairs can be made.
  7. Use Mold-Resistant Building Materials
    If you’re planning renovations or repairs, opt for mold-resistant materials such as drywall, insulation, and paint. These products are designed to resist moisture and inhibit mold growth, making them ideal for areas prone to dampness. Mold-resistant drywall, for example, contains fiberglass instead of paper, which is less hospitable to mold spores.
  8. Clean and Dry Wet Areas Promptly
    Whether it’s a spilled drink or a flooded basement, it’s essential to clean and dry wet areas within 24 to 48 hours. Mold can begin to grow quickly in moist environments, so time is of the essence. Use fans, dehumidifiers, and wet/dry vacuums to remove moisture efficiently. For extensive water damage, professional restoration services can ensure thorough drying and prevent mold development.
  9. Monitor and Maintain HVAC Systems
    Your heating, ventilation, and air conditioning (HVAC) system plays a significant role in controlling indoor humidity and air quality. Change filters regularly, clean ducts, and schedule annual maintenance to keep the system running efficiently. A well-maintained HVAC system can help prevent mold spores from circulating throughout your home.
  10. Store Items Properly
    Avoid storing items directly on basement or attic floors, where they can absorb moisture. Use plastic bins with tight-fitting lids instead of cardboard boxes, which are susceptible to mold. Keep storage areas organized and allow for air circulation around stored items to reduce the risk of mold growth.
  11. Be Cautious with Houseplants
    While houseplants can improve indoor air quality, overwatering them can increase humidity and promote mold growth. Use a moisture meter to avoid overwatering, and place a layer of gravel in the pot to improve drainage. Regularly check the soil for mold and remove any affected plants promptly.
  12. Install a Vapor Barrier
    In crawl spaces and basements, installing a vapor barrier can help prevent moisture from entering your home. These barriers are typically made of plastic or foil sheeting and are placed over the ground or walls to block moisture. This is especially important in areas with high groundwater levels or poor drainage.
  13. Educate Yourself About Mold
    Understanding the causes and signs of mold can help you take proactive steps to prevent it. Familiarize yourself with common mold types, health symptoms associated with mold exposure, and effective remediation techniques. Knowledge is your best defense against mold-related issues.
  14. Schedule Regular Inspections
    Even if you don’t notice any visible signs of mold, it’s wise to schedule regular inspections—especially in older homes or those with a history of water damage. Professional inspectors can identify hidden moisture issues and recommend appropriate solutions. Early detection is key to avoiding costly mold remediation.
  15. Know When to Call the Professionals
    Sometimes, despite your best efforts, mold can still find its way into your home. When that happens, it’s crucial to act quickly and enlist the help of professionals. Projekt Property Restoration offers expert mold remediation services designed to eliminate mold at its source and prevent future outbreaks. Their team uses advanced equipment and proven techniques to restore your home safely and effectively.

According to the Environmental Protection Agency (EPA), “Mold can begin growing within 24 to 48 hours of water exposure.” This highlights the importance of immediate action when dealing with moisture issues.

In addition to mold prevention, Projekt Property Restoration provides a full suite of property restoration solutions. Whether you’re dealing with the aftermath of a flood, fire, or biohazard incident, their team is equipped to handle it all. Their services include:

  • Water Damage Restoration: Utilizing state-of-the-art equipment to dry structures and prevent mold growth.
  • Fire Damage Restoration: Recovering property and mitigating damage after fire incidents.
  • Mold Remediation: Assessing and eliminating mold infestations safely and thoroughly.
  • Roof Tarp Installation: Providing temporary protection to prevent further damage.
  • Biohazard Clean Up: Addressing hazardous materials with care and compliance.
  • Reconstruction Services: Offering complete remodeling and rebuilding solutions.

Projekt Property Restoration stands out for its commitment to customer satisfaction, transparency, and efficiency. They offer 24/7 emergency service, free onsite estimates, and special financing options to make the restoration process as stress-free as possible. Their team works directly with insurance companies, streamlining the claims process and ensuring that clients receive the support they need.

“Projekt Property Restoration helped us recover from a major water leak. Their team was professional, responsive, and incredibly thorough. We couldn’t be happier with the results.” – Satisfied Customer

If you’re a new homeowner, don’t wait until mold becomes a problem. Take proactive steps today to protect your investment and your health. From controlling humidity to scheduling regular inspections, these mold prevention tips can help you maintain a clean, safe, and mold-free home.

For more expert advice and restoration solutions, visit our blog or explore our gallery to see our work in action. If you have questions, our FAQ section is a great resource, or you can contact us directly for personalized assistance.

Ready to Protect Your New Home?

Don’t let mold compromise your comfort and safety. Call Projekt Property Restoration at 855-933-7935 for immediate assistance or visit us at 20572 Hatteras Street, Woodland Hills, CA 91367. Our team is available 24/7 to provide professional restoration services that get things back to normal. Whether you need mold remediation, water damage restoration, or reconstruction services, we’re here to help. Trust the experts who prioritize your peace of mind and deliver results with integrity.

How to Handle Water Damage from Broken Windows

When a window breaks during a storm or due to an accident, the consequences can be more severe than just a shattered pane. Water can quickly seep into your home, damaging walls, flooring, furniture, and even the structural integrity of your property. If not addressed promptly, this water intrusion can lead to mold growth, electrical hazards, and costly repairs. Understanding how to handle water damage from broken windows is essential for homeowners and property managers alike. This comprehensive guide will walk you through the steps to mitigate damage, restore your property, and prevent future issues.

At Projekt Restoration, we are committed to quality service. Our team offers fast, friendly, and professional service to help you recover from water damage and restore your home to its original condition. Whether you’re dealing with a minor leak or a major flood, our restoration services are designed to provide peace of mind and lasting results.

Understanding the Impact of Water Damage from Broken Windows

Water damage from broken windows can be deceptively destructive. While the initial concern may be the broken glass, the real danger lies in the water that enters your home. Rainwater can soak into drywall, insulation, and flooring, leading to swelling, warping, and deterioration. If left untreated, this moisture can foster mold growth, which poses serious health risks and requires professional mold remediation.

Moreover, water can infiltrate electrical systems, creating fire hazards and damaging appliances. The longer the water sits, the more extensive the damage becomes. That’s why immediate action is crucial. Water damage restoration is not just about drying out the area; it involves a comprehensive approach that includes assessment, water extraction, drying, dehumidification, sanitization, and reconstruction.

At Projekt Restoration, we understand the urgency of these situations. Our emergency service team is available 24/7 to respond quickly and begin the restoration process. We use advanced equipment and proven techniques to ensure thorough drying and prevent secondary damage. Our goal is to restore your property efficiently while ensuring customer satisfaction every step of the way.

Immediate Steps to Take After a Window Breaks

When a window breaks and water begins to enter your home, your first priority should be safety. Broken glass and slippery surfaces can pose immediate hazards. Once you’ve ensured that everyone is safe, follow these steps to minimize damage:

  • Secure the Area: Carefully remove any broken glass and cover the window with plastic sheeting or plywood to prevent further water intrusion.
  • Stop the Water: If the rain is still coming in, use towels, buckets, or a wet/dry vacuum to control the spread of water.
  • Move Belongings: Relocate furniture, electronics, and valuables away from the affected area to prevent further damage.
  • Document the Damage: Take photos and videos of the damage for insurance purposes. This documentation will be helpful when filing a claim.
  • Call for Professional Help: Contact a water damage restoration company like Projekt Restoration to assess the situation and begin the recovery process.

Time is of the essence when dealing with water damage. The sooner you act, the better your chances of minimizing damage and avoiding costly repairs. Our team is trained to handle all aspects of property restoration, from water extraction to full reconstruction services.

The Water Damage Restoration Process

Effective water damage restoration involves a multi-step process that ensures all moisture is removed and your property is fully restored. At Projekt Restoration, we follow industry best practices to deliver high-quality results. Here’s what you can expect during the restoration process:

  1. Inspection and Assessment: Our technicians conduct a thorough inspection to determine the extent of the damage and develop a customized restoration plan.
  2. Water Extraction: Using powerful pumps and vacuums, we remove standing water from the affected areas.
  3. Drying and Dehumidification: We use industrial-grade air movers and dehumidifiers to dry out walls, floors, and other materials.
  4. Cleaning and Sanitizing: All affected surfaces are cleaned and sanitized to prevent mold growth and eliminate contaminants.
  5. Restoration and Repairs: We repair or replace damaged materials, including drywall, flooring, and windows, to restore your home to its pre-loss condition.

Throughout the process, we prioritize customer satisfaction by keeping you informed and involved. Our team is trained in biohazard clean up and fire damage restoration, ensuring that we can handle even the most complex restoration projects. Learn more about our approach on our How It Works page.

Preventing Future Water Damage from Windows

While it’s impossible to prevent all accidents, there are steps you can take to reduce the risk of water damage from broken windows in the future. Regular maintenance and proactive measures can go a long way in protecting your home.

  • Inspect Windows Regularly: Check for cracks, gaps, or signs of wear that could compromise the integrity of your windows.
  • Upgrade to Impact-Resistant Glass: Consider installing windows designed to withstand storms and impacts.
  • Seal Gaps and Cracks: Use caulk or weatherstripping to seal any openings around your windows.
  • Install Storm Shutters: These can provide an extra layer of protection during severe weather.
  • Maintain Gutters and Downspouts: Ensure that water is directed away from your home to prevent pooling near windows.

In addition to these measures, it’s important to be vigilant for signs of hidden water damage. Early detection can prevent minor issues from becoming major problems. Visit our guide on how to identify hidden water damage early for more tips.

By taking these precautions and working with a trusted restoration partner, you can protect your home and ensure a swift recovery in the event of an emergency. At Projekt Restoration, we’re here to help you every step of the way.

Conclusion

Water damage from broken windows can be a daunting challenge, but with the right knowledge and support, it’s entirely manageable. From immediate response to long-term prevention, every step you take plays a crucial role in protecting your property and ensuring a safe living environment. Whether you’re dealing with a sudden storm or an unexpected accident, acting quickly and enlisting professional help is key to minimizing damage and restoring your home.

Projekt Restoration is your trusted partner in water damage restoration, fire damage restoration, mold remediation, and more. Our comprehensive restoration services are designed to deliver fast, effective results with a focus on customer satisfaction. We offer 24/7 emergency service and a full range of reconstruction services to help you recover quickly and confidently.

Don’t wait until it’s too late. If you’re facing water damage from a broken window or want to prepare for future incidents, contact us today. Explore our contact page to speak with a restoration expert, or browse our blog for more helpful tips and insights. Your home deserves the best—trust Projekt Restoration to deliver it.

Fire Safety Tips for Home Office Setups

In today’s digital age, more people than ever are working from home. While this shift offers flexibility and convenience, it also introduces new safety concerns—particularly when it comes to fire hazards. Home offices are often filled with electronic devices, extension cords, and paper documents, all of which can become fire risks if not managed properly. Whether you’re a remote worker, freelancer, or entrepreneur, understanding fire safety in your home office is essential for protecting your property and ensuring your well-being.

At Projekt Restoration, we understand the devastating impact that fire can have on your home and livelihood. That’s why we’re committed to helping you prevent disasters before they happen. With our professional restoration services, including fire damage restoration, water damage restoration, and mold remediation, we’re here to support you every step of the way. Our team is dedicated to customer satisfaction, offering 24/7 emergency service and comprehensive property restoration solutions.

This comprehensive guide will walk you through essential fire safety tips tailored specifically for home office setups. From electrical safety to emergency preparedness, we’ll cover everything you need to know to keep your workspace safe and secure.

1. Electrical Safety: The Foundation of Fire Prevention

Electrical issues are one of the leading causes of home fires, especially in spaces like home offices that rely heavily on electronic devices. Computers, printers, monitors, chargers, and other equipment can overload circuits or overheat if not used properly. Ensuring electrical safety is the first and most crucial step in fire prevention.

Start by inspecting all cords and plugs for signs of wear or damage. Frayed wires or loose connections can easily spark and ignite nearby materials. Replace any damaged cords immediately and avoid using extension cords as permanent solutions. Instead, invest in surge protectors and power strips with built-in circuit breakers to reduce the risk of electrical fires.

Never daisy-chain multiple power strips together, as this can overload your electrical system. Make sure your home office is equipped with grounded outlets and that your electrical panel is up to code. If you’re unsure about your wiring, consult a licensed electrician to perform a safety inspection.

Additionally, unplug devices when they’re not in use. Not only does this reduce the risk of overheating, but it also conserves energy. Keep your workspace free of clutter, especially around outlets and power strips, to allow for proper ventilation and reduce fire hazards.

Should an electrical fire occur, it’s critical to act fast. Never use water to extinguish an electrical fire, as it can cause electrocution. Instead, use a Class C fire extinguisher or cut the power at the breaker box if it’s safe to do so. After the fire is contained, contact a fire damage restoration expert to assess and repair the damage.

2. Fire-Safe Office Design and Layout

Designing your home office with fire safety in mind can significantly reduce the risk of accidents. Start by selecting a location that’s well-ventilated and away from high-risk areas like kitchens or utility rooms. Avoid placing your office in basements or attics unless they are properly finished and meet building codes.

Arrange furniture and equipment to allow for clear pathways and easy access to exits. In the event of a fire, you should be able to evacuate quickly without tripping over cords or furniture. Keep fire exits unobstructed and make sure windows can be opened easily if needed.

Use fire-resistant materials whenever possible. Opt for metal filing cabinets instead of wooden ones, and choose office chairs and curtains made from flame-retardant fabrics. Store important documents in fireproof safes to protect them from heat and smoke damage.

Install smoke detectors in or near your home office and test them monthly. Replace batteries at least once a year and replace the entire unit every 10 years. Consider adding a carbon monoxide detector if your home uses gas appliances or has an attached garage.

Keep a fire extinguisher within reach and ensure it’s rated for Class A, B, and C fires. Learn how to use it properly and teach other household members as well. In addition, create a fire escape plan that includes your home office and practice it regularly.

For added protection, consider installing a home sprinkler system or fire suppression system. While these may require a larger investment, they can save lives and minimize damage in the event of a fire. After any fire incident, rely on professional restoration services to restore your home office to its original condition.

3. Managing Flammable Materials and Heat Sources

Many home offices contain flammable materials such as paper, cardboard, ink cartridges, and cleaning supplies. When combined with heat sources like space heaters, lamps, or electronics, these materials can become a serious fire hazard. Proper storage and usage are key to minimizing risk.

Store flammable items in closed cabinets away from heat sources. Avoid stacking papers near electrical outlets or placing them on top of electronic devices. Dispose of waste paper and packaging materials regularly to prevent buildup.

If you use a space heater, choose one with an automatic shut-off feature and place it at least three feet away from anything flammable. Never leave it unattended or use it while sleeping. Similarly, avoid placing lamps or lighting fixtures near curtains or paper stacks.

Be cautious with candles and incense. While they may create a calming atmosphere, they also pose a significant fire risk. Opt for battery-operated alternatives or ensure candles are placed in sturdy holders and never left unattended.

Keep liquids like cleaning agents and aerosol sprays in a cool, dry place. Make sure they’re tightly sealed and stored according to manufacturer instructions. Avoid using them near open flames or heat-producing equipment.

Regularly inspect your office for potential fire hazards and address them promptly. If a fire does occur, it’s essential to act quickly and contact emergency service providers who specialize in fire damage restoration and biohazard clean up. Their expertise can help you recover safely and efficiently.

4. Emergency Preparedness and Response

Being prepared for a fire emergency can make all the difference in protecting your home, office, and loved ones. Start by creating a comprehensive emergency plan that includes evacuation routes, emergency contacts, and a designated meeting point outside the home.

Ensure that all household members are familiar with the plan and practice fire drills at least twice a year. Include scenarios where the fire starts in the home office and discuss how to respond safely. Keep emergency numbers, including your local fire department and restoration services, posted in a visible location.

Assemble an emergency kit that includes a flashlight, batteries, first aid supplies, bottled water, and copies of important documents. Store the kit in an easily accessible location and check its contents regularly.

Install fire alarms and smoke detectors throughout your home, especially near sleeping areas and the home office. Consider investing in a monitored alarm system that alerts emergency responders automatically in case of fire.

In the event of a fire, remain calm and evacuate immediately. Do not attempt to retrieve belongings or extinguish large fires on your own. Once you’re safe, contact emergency services and a professional restoration company to begin the recovery process.

At Projekt Restoration, we offer comprehensive reconstruction services to help you rebuild after a fire. From initial assessment to final repairs, our team is dedicated to restoring your home and ensuring your complete customer satisfaction.

For more information on how to prepare for emergencies, visit our FAQ page or explore our blog for expert tips and insights.

5. Post-Fire Recovery and Restoration

Even with the best precautions, fires can still happen. When they do, the aftermath can be overwhelming. Smoke, soot, and water from firefighting efforts can cause extensive damage to your home office and personal belongings. That’s where professional restoration services come in.

At Projekt Restoration, we specialize in fire damage restoration, water damage restoration, and mold remediation. Our team uses advanced equipment and techniques to clean, sanitize, and restore your property to its pre-loss condition. We also offer biohazard clean up and reconstruction services to address any structural damage.

The first step in the recovery process is a thorough assessment of the damage. Our experts will inspect your home office, identify affected areas, and develop a customized restoration plan. We’ll remove debris, extract water, and use industrial-grade dehumidifiers to prevent mold growth.

Next, we’ll clean and deodorize surfaces to eliminate smoke odors and contaminants. Our team will also repair or replace damaged materials, including drywall, flooring, and electrical systems. Throughout the process, we prioritize customer satisfaction and work closely with your insurance provider to streamline claims.

Recovering from a fire is never easy, but with the right support, it’s possible to rebuild and move forward. Trust Projekt Restoration to handle every aspect of the restoration process with care, professionalism, and efficiency.

To learn more about our services, visit our About page or explore our How It Works guide.

Conclusion

Fire safety in a home office setup is not just a precaution—it’s a necessity. From electrical safety and smart office design to managing flammable materials and preparing for emergencies, every step you take can make a significant difference in protecting your home and livelihood.

By implementing the tips outlined in this guide, you can create a safer, more secure workspace that minimizes fire risks and ensures peace of mind. And if the unexpected does happen, know that Projekt Restoration is here to help. Our team is committed to quality service, offering fast, friendly, and professional support when you need it most.

Don’t wait until it’s too late. Take proactive steps today to safeguard your home office and ensure a swift recovery in case of fire. For expert assistance and reliable restoration services, call us now at 855-933-7935 or visit our contact page to get started.

How to Prevent Mold in Basement Storage Areas

Basement storage areas are particularly vulnerable to mold growth due to their typically damp, dark, and poorly ventilated conditions. Learning how to prevent mold in basement storage areas is essential for protecting your belongings and maintaining a healthy home environment. Mold not only damages stored items but can also pose serious health risks if left unchecked. At COMMITTED TO QUALITY SERVICE, we understand the importance of keeping your home safe and mold-free. Our team offers fast, friendly, and professional service to help you tackle water damage and prevent mold before it starts. Whether you’re dealing with a recent leak or want to ensure your basement stays dry year-round, our water damage restoration experts use specialized equipment to dry out affected areas and stop mold in its tracks. Don’t wait until mold becomes a costly problem—call us now at 855-933-7935 for expert assistance. With our commitment to quality and years of experience in water and fire damage restoration, we’re here to help you protect your home from the ground up.

Understand the Causes of Basement Mold

Basement mold is a common issue that can lead to serious health risks and structural damage if not addressed promptly. To effectively prevent mold in basement storage areas, it’s essential to first understand what causes it. Mold thrives in damp, dark, and poorly ventilated environments—conditions often found in basements.

One of the primary causes of mold growth is excess moisture. This can result from water leaks, high humidity, or condensation. According to the Environmental Protection Agency (EPA), indoor humidity levels should be kept below 60% to prevent mold growth. Poor drainage around the foundation and inadequate waterproofing can also contribute to moisture buildup.

“Mold can begin to grow within 24 to 48 hours in the right conditions,” warns the Centers for Disease Control and Prevention (CDC).

Common sources of basement moisture include:

  1. Cracks in the foundation walls or floors
  2. Leaky pipes or appliances
  3. Improperly sealed windows or vents
  4. Flooding or water intrusion from outside

To learn more about how to detect early signs of water issues, visit our guide on how to identify hidden water damage early.

Additionally, mold can be exacerbated by organic materials stored in basements, such as cardboard boxes, wood, or fabric, which provide a food source for mold spores.

For comprehensive solutions, explore our services or learn more about our mission to protect your home from mold and water damage.

For further reading, the EPA offers detailed guidance on mold prevention: EPA Mold Resources.

Improve Ventilation and Airflow

Proper ventilation and airflow are essential in preventing mold growth in basement storage areas. Basements are naturally prone to dampness due to their location below ground level, which can lead to stagnant air and increased humidity—ideal conditions for mold to thrive. To combat this, ensure your basement is equipped with adequate ventilation systems, such as exhaust fans or dehumidifiers, to maintain a consistent flow of fresh air and reduce moisture levels.

Opening windows regularly, when weather permits, and using fans to circulate air can also help keep the environment dry. Additionally, avoid overcrowding storage spaces, as tightly packed items can restrict airflow and trap humidity. Consider using open shelving units and leaving space between stored items and walls to promote better circulation.

If your basement has experienced previous water issues, it’s crucial to address the root cause to prevent recurring mold problems. You can learn more about identifying potential issues by visiting our guide on hidden water damage. For professional assistance, explore our comprehensive services designed to protect your property from mold and moisture damage.

By improving airflow and maintaining a dry environment, you can significantly reduce the risk of mold in your basement storage areas, ensuring your belongings remain safe and your home stays healthy.

Control Humidity Levels Effectively

Maintaining proper humidity levels is essential to preventing mold growth in basement storage areas. Mold thrives in damp, humid environments, making basements particularly vulnerable. To keep humidity under control, use a dehumidifier to maintain indoor humidity between 30% and 50%. Regularly monitor humidity levels with a hygrometer, especially during warmer months or after heavy rainfall. Ensuring proper ventilation is also crucial—install exhaust fans or open windows periodically to allow fresh air circulation.

Sealing cracks in walls and floors can prevent moisture from seeping in, which is a common cause of elevated humidity. Additionally, avoid storing items directly on the floor; instead, use shelving units to improve air circulation around stored belongings. Waterproof storage containers are also a smart choice to protect sensitive items from moisture damage.

For homeowners dealing with persistent dampness, it may be necessary to inspect for hidden leaks or water intrusion. Learn more about spotting early signs of damage by visiting our guide on how to identify hidden water damage early. If you suspect mold or water issues, professional help is recommended. Explore our full range of services to find the right solution for your home. Taking proactive steps to manage humidity will not only protect your belongings but also improve the overall air quality and safety of your basement space.

Use Mold-Resistant Storage Solutions

One of the most effective ways to prevent mold growth in basement storage areas is by choosing the right storage solutions. Traditional cardboard boxes and fabric containers can easily absorb moisture, creating the perfect environment for mold to thrive. Instead, opt for airtight plastic bins or containers made from mold-resistant materials. These options not only keep moisture out but also protect your belongings from potential water damage.

Properly sealing your storage containers is equally important. Ensure lids fit tightly and consider using vacuum-sealed bags for items like clothing or linens. Elevating storage off the floor using shelves or pallets can also help prevent contact with damp surfaces, especially in basements prone to humidity or flooding.

Additionally, it’s a good idea to regularly inspect your storage area for signs of moisture or mold. If you notice any issues, addressing them promptly can prevent further damage. For more tips on safeguarding your home, visit our blog or learn about our expert mold remediation services.

By investing in mold-resistant storage and maintaining a dry environment, you can significantly reduce the risk of mold in your basement. These proactive steps not only protect your possessions but also contribute to a healthier home environment.

Regularly Inspect and Maintain the Area

To effectively prevent mold in basement storage areas, it’s essential to conduct regular inspections and ongoing maintenance. Mold thrives in dark, damp environments, making basements particularly vulnerable. By routinely checking for signs of moisture, leaks, or water damage, you can catch potential issues before they escalate. Pay close attention to corners, behind stored items, and around pipes or windows where condensation may form.

Ensure that your basement remains clean and clutter-free to allow proper air circulation. Items stored directly on the floor can trap moisture, so use shelving units to elevate boxes and containers. Additionally, inspect your HVAC systems and dehumidifiers to confirm they are functioning properly. These systems play a crucial role in maintaining optimal humidity levels and preventing mold growth.

If you notice any signs of mold or persistent dampness, it’s best to consult professionals for thorough mold remediation. Regular maintenance not only protects your belongings but also preserves the structural integrity of your home. For more information on how to safeguard your property, explore our detailed blog or learn about our comprehensive services designed to address moisture and mold issues. Staying proactive with inspections and maintenance is a key step in ensuring your basement remains a safe, dry, and mold-free environment.

Seal Cracks and Waterproof the Basement

One of the most effective ways to prevent mold growth in basement storage areas is by addressing moisture at its source. Cracks in basement walls and floors can allow water to seep in, creating the damp environment mold needs to thrive. Sealing these cracks with high-quality epoxy or polyurethane injections can help block water intrusion and maintain a dry space. Additionally, applying a waterproof coating to basement walls and floors adds an extra layer of protection against moisture.

Waterproofing your basement not only prevents mold but also protects your belongings and the structural integrity of your home. It’s essential to inspect your basement regularly for signs of water damage, such as discoloration, musty odors, or peeling paint. If you notice any of these indicators, it may be time to consult a professional. Learn more about our expert services designed to keep your home safe and dry.

Proper drainage around your home is also crucial. Ensure gutters and downspouts direct water away from the foundation, and consider installing a sump pump if your basement is prone to flooding. For more tips on protecting your home from moisture and mold, visit our blog. Taking these preventive steps can save you time, money, and stress in the long run while keeping your basement storage mold-free.

Clean and Dry Items Before Storing

Before placing any items into your basement storage area, it’s crucial to ensure they are both clean and completely dry. Mold thrives in damp, organic materials, so storing wet or dirty belongings significantly increases the risk of mold growth. Items such as clothing, books, cardboard boxes, and upholstered furniture are especially vulnerable. Always wash and thoroughly dry fabrics, and wipe down hard surfaces to remove any dirt or moisture. For added protection, consider using plastic bins with tight-fitting lids instead of cardboard boxes, which can absorb moisture and become breeding grounds for mold.

Humidity in basements can fluctuate, making it essential to monitor and control moisture levels. Even slightly damp items can contribute to mold development over time. Using a dehumidifier and proper ventilation can help maintain a dry environment. If you suspect your basement has experienced water intrusion in the past, it’s wise to inspect for hidden moisture. Learn more about identifying early signs of water damage by visiting our guide on how to identify hidden water damage.

For professional help in maintaining a mold-free basement, explore our comprehensive services. Taking these preventive steps not only protects your stored items but also contributes to a healthier home environment.

In conclusion, preventing mold in basement storage areas requires a proactive and consistent approach. By controlling moisture levels, ensuring proper ventilation, using mold-resistant materials, and regularly inspecting your storage space, you can significantly reduce the risk of mold growth. Remember to store items in airtight containers and keep the area clean and dry. With these simple yet effective strategies, you can protect your belongings and maintain a healthy, mold-free environment in your basement.

Water Damage Risks from Faulty Water Heaters

Understanding the Hidden Dangers of Faulty Water Heaters

Let’s face it—your water heater is one of those household appliances you rarely think about until something goes wrong. But when it does, it can cause more than just a cold shower. A faulty water heater can lead to serious water damage, mold growth, and even structural issues in your home. And if left unchecked, the damage can be extensive, requiring professional restoration services to bring your property back to life.

So, what makes a water heater such a potential hazard? Well, it’s a combination of pressure, heat, and water—three elements that, when not properly managed, can wreak havoc. A small leak might seem harmless at first, but over time, it can seep into walls, floors, and insulation, leading to costly water damage restoration. Worse yet, if the tank bursts, you could be looking at gallons of water flooding your home in minutes.

Understanding these risks is the first step in prevention. Whether your water heater is gas or electric, tank or tankless, regular maintenance and early detection are key. In this guide, we’ll walk you through how to spot the warning signs, what to do if things go south, and how to protect your home from future disasters. And if you ever find yourself knee-deep in water, remember: COMMITTED TO QUALITY SERVICE — Call Us Now! 855-933-7935 for emergency service that’s fast, friendly, and professional.

Common Causes of Water Heater Failures

So, what causes a water heater to fail in the first place? It’s not always age—although that’s a big one. There are several culprits behind a malfunctioning unit, and knowing them can help you stay ahead of the game.

1. Sediment Buildup: Over time, minerals from hard water settle at the bottom of your tank. This sediment can cause the heater to overheat, leading to cracks and leaks. It also reduces efficiency, making your unit work harder and wear out faster.

2. Corrosion: Water heaters are made of metal, and metal plus water equals rust. Most tanks have an anode rod to prevent corrosion, but once that rod is depleted, the tank becomes vulnerable. If you notice rusty water or a metallic smell, it’s time to check your unit.

3. High Water Pressure: Excessive pressure can stress your water heater and plumbing system. If the pressure relief valve is constantly leaking, it’s a sign that the pressure is too high—and that’s a recipe for disaster.

4. Poor Installation: A water heater that’s not installed correctly can lead to leaks, electrical issues, or even gas leaks. Always hire a licensed professional for installation and repairs.

5. Age: Most water heaters last between 8–12 years. If yours is pushing that limit, it’s time to start thinking about a replacement before it fails catastrophically.

Understanding these causes can help you take proactive steps. If you suspect any of these issues, don’t wait. Reach out to a professional restoration team to assess the situation and prevent further damage.

Signs Your Water Heater May Be Failing

Wouldn’t it be great if your water heater could just send you a text when it’s about to fail? Unfortunately, it’s not that advanced—yet. But it does give off warning signs. You just need to know what to look for.

1. Strange Noises: If your water heater sounds like it’s boiling or popping popcorn, that’s sediment buildup. The noise comes from water trapped under the sediment layer, which overheats and causes mini explosions.

2. Leaks Around the Base: This is a big red flag. Even a small puddle can indicate a crack in the tank or a loose connection. Don’t ignore it—leaks can quickly escalate into full-blown floods.

3. Inconsistent Water Temperature: If your hot water runs out quickly or fluctuates in temperature, your heater may be struggling to keep up. This could be due to a faulty thermostat or heating element.

4. Discolored Water: Rusty or cloudy water is often a sign of corrosion inside the tank. This not only affects water quality but also signals that your unit is deteriorating from the inside out.

5. High Utility Bills: An inefficient water heater uses more energy to do the same job. If your bills are creeping up, your unit might be working overtime due to internal issues.

Spotting these signs early can save you from a major headache later. If you notice any of these symptoms, it’s time to call in the pros for an inspection. Our mission is to ensure customer satisfaction through reliable and timely reconstruction services and repairs.

Immediate Steps to Take When a Water Heater Leaks

Okay, so your water heater is leaking—now what? First, don’t panic. Quick action can minimize the damage and save you thousands in repairs. Here’s what you should do, step by step:

1. Turn Off the Power: If you have an electric water heater, switch off the breaker. For gas units, turn the gas valve to the off position. Safety first, always.

2. Shut Off the Water Supply: Locate the cold water shut-off valve at the top of the heater and turn it clockwise. This stops more water from entering the tank and worsening the leak.

3. Drain the Tank: Attach a garden hose to the drain valve at the bottom of the tank and direct it to a safe drainage area. Open the valve and let the water flow out. Be careful—it may still be hot!

4. Call for Emergency Service: Once the immediate danger is under control, call a professional restoration company. Our team at Projekt Restoration offers 24/7 emergency service to handle water damage, mold remediation, and even fire damage restoration if needed.

5. Document the Damage: Take photos and videos of the affected areas. This will be helpful for insurance claims and for your restoration team to assess the extent of the damage.

Acting fast can mean the difference between a simple repair and a full-blown property restoration project. Don’t wait—get help immediately and protect your home from further harm.

How Water Heater Leaks Lead to Mold and Structural Damage

Here’s the thing about water—it’s sneaky. A small leak from your water heater might not seem like a big deal, but over time, it can lead to serious problems like mold growth and structural damage. And once mold sets in, you’re not just dealing with a plumbing issue—you’re facing a health hazard.

Mold Remediation: Mold thrives in damp, dark environments, making the area around a leaking water heater the perfect breeding ground. Spores can spread through your HVAC system, affecting indoor air quality and triggering allergies or respiratory issues. That’s why mold remediation is a critical part of the restoration process.

Structural Damage: Water can seep into walls, floors, and even the foundation of your home. Over time, this weakens the structure, leading to warped wood, crumbling drywall, and even foundational cracks. If left untreated, you might need extensive reconstruction services to restore your home’s integrity.

Biohazard Clean Up: In some cases, stagnant water can become a breeding ground for bacteria and other harmful pathogens. This turns a simple leak into a biohazard situation, requiring specialized biohazard clean up to ensure your home is safe again.

Don’t underestimate the ripple effect of a faulty water heater. What starts as a drip can quickly spiral into a full-blown disaster. If you suspect hidden water damage, check out our guide on how to identify hidden water damage early.

When to Call in the Professionals

Let’s be honest—some things are better left to the pros. While DIY fixes might work for minor issues, a leaking or failing water heater is not one of them. Here’s when you should definitely pick up the phone and call for professional restoration help:

  • The leak is extensive or ongoing
  • You notice signs of mold or mildew
  • There’s visible structural damage
  • You’re unsure how to safely shut off the unit
  • You need help with insurance documentation

At Projekt Restoration, we’re COMMITTED TO QUALITY SERVICE. Our team is trained in all aspects of water damage restoration, fire damage restoration, and mold remediation. We also offer reconstruction services and biohazard clean up to fully restore your property.

Need help now? Call us at 855-933-7935 for fast, friendly, and professional emergency service. Your home deserves the best—and so do you.

Conclusion

Water heaters are essential, but when they fail, the consequences can be severe. From mold growth to structural damage, a faulty unit can turn your home into a disaster zone. But with early detection, regular maintenance, and the right professional help, you can prevent most of these issues before they start.

Remember, Projekt Restoration is here to help with all your property restoration needs. Whether it’s water damage restoration, fire damage restoration, or mold remediation, we’re just a phone call away. Don’t wait until it’s too late—protect your home, your health, and your peace of mind today.

What should I do first if my water heater starts leaking?

First, turn off the power supply and shut off the water valve to prevent further leakage. Then, call a professional restoration service like Projekt Restoration for immediate assistance.

Can a small leak really cause mold?

Absolutely. Even a small, slow leak can create the perfect environment for mold to grow, especially in hidden areas like behind walls or under flooring.

How often should I inspect my water heater?

It’s a good idea to inspect your water heater at least once every six months. Look for signs of rust, leaks, or unusual noises, and schedule professional maintenance annually.

Is water damage from a heater covered by insurance?

In many cases, yes—especially if the damage was sudden and accidental. However, gradual damage due to neglect may not be covered. Always check with your insurance provider.

Why choose Projekt Restoration for water damage repair?

We offer fast, friendly, and professional service with a focus on customer satisfaction. Our team is trained in water damage restoration, mold remediation, fire damage restoration, and more. Call us at 855-933-7935 for expert help.

How to Handle Fire Damage from Kitchen Appliances

Kitchen appliances are essential to our daily routines, but when they malfunction or are misused, they can quickly become a major fire hazard. Knowing how to handle fire damage from kitchen appliances is crucial for protecting your home, your loved ones, and your peace of mind. At Projekt Property Restoration, we specialize in fire damage restoration and understand the urgency and complexity that comes with kitchen fires. Whether it’s a stove, microwave, or toaster that caused the damage, our team of highly-trained professionals is ready to respond 24/7 with fast, friendly, and expert service. We work closely with homeowners, property managers, and insurance companies to ensure a smooth and stress-free restoration process. From smoke and soot removal to full reconstruction services, we’re here to help you recover quickly and safely. If you’re dealing with fire damage from kitchen appliances, trust Projekt Property Restoration — “A Restoration Company That Gets Things Back to Normal.”

Immediate Steps to Take After a Kitchen Appliance Fire

In the aftermath of a kitchen appliance fire, taking immediate and informed action is crucial to ensure safety, minimize further damage, and begin the recovery process. Kitchen fires, often caused by malfunctioning appliances or human error, are among the most common types of residential fires. According to the National Fire Protection Association (NFPA), cooking equipment is the leading cause of home fires and home fire injuries, accounting for nearly 49% of all reported home fires. Understanding what to do in the critical moments following such an incident can make a significant difference in protecting your property and health.

The first priority after a kitchen appliance fire is to ensure that everyone in the household is safe. If the fire is still active, evacuate the premises immediately and call 911. Do not attempt to extinguish a large or spreading fire on your own. Once the fire is out and the property has been deemed safe to re-enter by emergency personnel, you can begin taking the following essential steps:

  1. Assess the Safety of the Environment: Before re-entering your home, confirm with the fire department that it is safe to do so. Structural damage, lingering smoke, and potential electrical hazards can pose serious risks. Wear protective gear such as gloves and masks to avoid exposure to soot and toxic residues.
  2. Document the Damage: Take clear photographs and videos of all affected areas and appliances. This documentation will be vital for insurance claims and for any restoration services you may require. Be thorough in capturing both visible and hidden damage, including walls, ceilings, and cabinetry.
  3. Contact Your Insurance Provider: Notify your homeowner’s insurance company as soon as possible. Provide them with the documentation you’ve gathered and follow their instructions for filing a claim. An adjuster may be sent to assess the damage in person.
  4. Avoid Using Damaged Appliances: Do not attempt to use any kitchen appliances that were involved in the fire until they have been inspected and cleared by a professional. Even if an appliance appears intact, internal components may be compromised, posing a risk of another fire or electrical hazard.
  5. Ventilate the Area: Open windows and doors to allow fresh air to circulate and help dissipate smoke and odors. Use fans if available, but only if the electrical system has been deemed safe. Smoke particles can linger in the air and settle on surfaces, contributing to long-term odor and health issues.
  6. Remove Soot and Debris Carefully: Soot can be toxic and abrasive. Use a vacuum with a HEPA filter to remove loose particles, and avoid wiping surfaces with water or regular cleaning products, as this can smear the soot and make cleanup more difficult. Professional fire damage restoration services are often necessary to properly clean and restore affected areas.
  7. Check for Water Damage: Firefighting efforts often involve large amounts of water, which can lead to secondary damage such as mold growth and structural weakening. Inspect the area for signs of water damage, and consider consulting a specialist. Learn more about identifying hidden water damage by visiting this guide.
  8. Consult Fire Damage Restoration Experts: Professional restoration companies have the tools and expertise to handle fire, smoke, and water damage effectively. They can assess the extent of the damage, remove hazardous materials, and begin the process of restoring your home to its pre-fire condition. For more information on available services, visit our services page.
  9. Secure the Property: If windows or doors have been damaged, secure them to prevent unauthorized entry and additional weather-related damage. Temporary boarding or tarping may be necessary until permanent repairs can be made.
  10. Seek Emotional Support: Experiencing a fire can be traumatic. Don’t hesitate to reach out to support groups, counselors, or community resources to help cope with the emotional aftermath. Recovery involves not just physical restoration but mental and emotional healing as well.

“In 2021, U.S. fire departments responded to an estimated average of 172,900 home structure fires per year started by cooking activities, resulting in 550 civilian deaths and $1.2 billion in direct property damage.” — National Fire Protection Association (NFPA)

Taking these immediate steps can significantly reduce the long-term impact of a kitchen appliance fire. Acting quickly and responsibly not only protects your property but also ensures the health and safety of your household. For ongoing support and expert guidance, consider reaching out to a trusted restoration company. Learn more about our approach and commitment to quality by visiting our mission page.

For further reading and helpful tips on fire and water damage recovery, explore our regularly updated blog.

  1. National Fire Protection Association. “Home Cooking Fires.” https://www.nfpa.org/News-and-Research/Data-research-and-tools/US-Fire-Problem/Home-Cooking-Fires
  2. U.S. Fire Administration. “Residential Building Fire Trends.” https://www.usfa.fema.gov/statistics/residential-fires/
  3. Insurance Information Institute. “Facts + Statistics: Homeowners and Renters Insurance.” https://www.iii.org/fact-statistic/facts-statistics-homeowners-and-renters-insurance

Assessing and Repairing Fire Damage Safely

After a kitchen appliance fire, it is crucial to assess and repair the resulting damage with safety and precision. The first step is to ensure the area is secure and that all fire hazards have been eliminated. This includes turning off electricity and gas lines connected to the affected appliances. Once the area is safe, a thorough inspection should be conducted to evaluate the extent of the fire, smoke, and heat damage. This assessment should cover not only visible damage to walls, ceilings, and cabinetry but also hidden structural issues that may have been compromised by the fire. Professional fire damage restoration teams use specialized equipment to detect damage that may not be immediately apparent, such as weakened support beams or lingering smoke particles embedded in porous materials. It is also essential to assess for secondary issues like water damage from firefighting efforts, which can lead to mold growth if not properly addressed. For comprehensive restoration, homeowners should consider working with a certified restoration company that offers a full range of services tailored to fire recovery. These professionals follow industry-standard safety protocols and use advanced cleaning techniques to remove soot, deodorize the space, and restore structural integrity. Additionally, they can help navigate insurance claims and ensure compliance with local building codes during the repair process. If you are unsure about the next steps or need guidance, visiting the company’s FAQ page can provide helpful insights into the restoration process. Ultimately, addressing fire damage promptly and safely not only protects your home but also ensures the health and well-being of everyone living in it.

In conclusion, handling fire damage from kitchen appliances requires swift action, careful assessment, and preventive measures to ensure your home remains safe and functional. By understanding the common causes of kitchen fires, knowing how to respond in an emergency, and taking steps to prevent future incidents—such as regular maintenance and proper usage of appliances—you can significantly reduce the risk of fire damage. If a fire does occur, always prioritize safety, contact professionals for cleanup and restoration, and consult with your insurance provider to manage any losses. With the right knowledge and preparation, you can protect your home and loved ones from the dangers of kitchen appliance fires.

Schedule Your Mold Inspection Today!

Privacy Policy

Projekt Restoration we respects your privacy and is committed to protecting your personal information. This Privacy Policy outlines how we collect, use, and protect the information you provide when you visit our website, contact us, or use our services related to Mold Remediation, Mold Inspection & Testing, Mold Removal / Cleanup, and Black Mold Removal.


1. Information We Collect

We may collect the following types of personal and non-personal information:

  • Personal Information: Name, email address, phone number, physical address, and any other information you provide when contacting us or requesting services.

  • Usage Data: IP address, browser type, operating system, pages visited, and time/date of your visit.

  • Cookies: We may use cookies to enhance your website experience. You can disable cookies in your browser settings.


2. How We Use Your Information

We use your information to:

  • Respond to your inquiries or service requests

  • Schedule and deliver mold-related services

  • Improve our website and customer service

  • Send service updates, promotions, or important notices (if you opt-in)

  • Comply with legal obligations


3. Information Sharing and Disclosure

We do not sell, trade, or rent your personal information. We may share your data with:

  • Trusted third-party service providers (e.g., payment processors, contractors) to perform services on our behalf

  • Law enforcement or government agencies if required by law


4. Data Security

We implement reasonable safeguards (physical, electronic, and managerial) to protect your information from unauthorized access, alteration, disclosure, or destruction.


5. Your Privacy Rights (California Residents)

Under the California Consumer Privacy Act (CCPA), California residents have the right to:

  • Request disclosure of the personal information we collect and how we use it

  • Request deletion of your personal information

  • Opt-out of the sale of personal information (note: we do not sell your data)

To exercise any of these rights, please contact us at:
📞 Phone: (855) 933-7935


6. Third-Party Links

Our website may contain links to third-party sites. We are not responsible for their privacy practices. Please review their privacy policies separately.


7. Children’s Privacy

Our services are not directed to children under 13. We do not knowingly collect personal information from minors.


8. Changes to This Privacy Policy

We may update this Privacy Policy from time to time. Changes will be posted on this page with the updated effective date.


9. Contact Us

If you have any questions or concerns about this Privacy Policy, please contact:
Projekt Restoration

📞 (855) 933-7935