24 / 7 / 365 Emergency Service

How to Prevent Mold in Garage Spaces

Understanding the Mold Menace in Your Garage

Let’s face it—your garage isn’t just a place to park your car or stash your holiday decorations. It’s a vital part of your home, and when mold creeps in, it can turn into a real headache. Mold in garage spaces is more common than you think, and it’s not just an eyesore—it’s a health hazard and a threat to your property’s integrity.

So, why does mold love garages so much? Well, garages are often poorly ventilated, prone to moisture buildup, and filled with organic materials like cardboard boxes, wood, and even drywall. These are all mold’s favorite snacks. Add in a leaky roof or a damp floor, and you’ve got the perfect recipe for a mold infestation.

But don’t worry—we’re here to help you stop mold in its tracks. Whether you’re dealing with a small patch or trying to prevent a full-blown invasion, this guide will walk you through everything you need to know. From understanding the causes to implementing long-term solutions, we’ve got you covered.

And if things get out of hand, remember that professional restoration is just a call away. COMMITTED TO QUALITY SERVICE Call Us Now! 855-933-7935 for fast, friendly and professional service. We specialize in mold remediation, water damage restoration, and more.

Identifying the Causes of Mold in Garage Spaces

Before you can prevent mold, you need to know what causes it. Mold spores are everywhere, but they only grow when the conditions are right—namely, moisture, warmth, and a food source. In garages, these conditions often come together in sneaky ways.

Let’s break it down:

  • Humidity: Garages often lack proper ventilation, which means humidity can build up quickly, especially in warmer months.
  • Leaks: Roof leaks, wall cracks, or even a poorly sealed garage door can let water in, creating damp spots perfect for mold growth.
  • Condensation: Cold concrete floors and warm air can lead to condensation, especially if your garage isn’t insulated.
  • Stored Items: Cardboard boxes, old furniture, and paper goods are mold magnets when exposed to moisture.

Understanding these causes is your first step toward prevention. If you suspect hidden moisture, check out our guide on how to identify hidden water damage early. And if you’re already seeing signs of mold, don’t wait—our mold remediation experts can help you tackle the problem before it spreads.

Ventilation: The Unsung Hero of Mold Prevention

Think of ventilation as your garage’s lungs. Without it, moisture lingers, air becomes stale, and mold spores settle in like unwanted guests. Improving airflow is one of the simplest yet most effective ways to prevent mold in garage spaces.

Here’s how you can boost ventilation:

  • Install Vents: Wall vents or soffit vents can help circulate air and reduce humidity.
  • Use Exhaust Fans: Especially useful if your garage doubles as a workshop or laundry area.
  • Open Doors and Windows: When weather permits, let fresh air in to dry out damp areas.
  • Dehumidifiers: These are lifesavers in humid climates. Set one up and watch the moisture levels drop.

Proper ventilation not only keeps mold at bay but also improves air quality and makes your garage a more pleasant space. Want to learn more about our property restoration solutions? Visit our About page to see how we’re committed to customer satisfaction.

Moisture Control: Your First Line of Defense

If ventilation is the lungs, moisture control is the immune system. Keeping your garage dry is absolutely essential for mold prevention. Even a small puddle or a damp corner can become a breeding ground for spores.

Here are some practical tips:

  • Seal Cracks and Gaps: Use waterproof sealants on floors and walls to block water intrusion.
  • Fix Leaks Immediately: Whether it’s a roof leak or a dripping pipe, address it before it becomes a mold issue.
  • Use Moisture Barriers: Install vapor barriers under flooring or behind drywall to prevent moisture seepage.
  • Elevate Stored Items: Keep boxes and furniture off the floor using pallets or shelving.

Still unsure if your garage is at risk? Our how it works page explains how we assess and treat moisture issues during water damage restoration. We also offer emergency service for urgent situations.

Cleaning and Maintenance: A Mold-Free Routine

Let’s be honest—garages often become the “junk drawers” of our homes. But clutter and neglect are mold’s best friends. Regular cleaning and maintenance can go a long way in keeping your garage mold-free.

Here’s your mold-fighting checklist:

  • Declutter: Get rid of old newspapers, cardboard, and anything else that can absorb moisture.
  • Clean Regularly: Sweep floors, wipe down surfaces, and vacuum corners where dust and spores can accumulate.
  • Inspect Monthly: Look for signs of leaks, condensation, or discoloration on walls and ceilings.
  • Use Mold-Resistant Products: Paints and sealants with anti-microbial properties add an extra layer of protection.

Need help with a deep clean or suspect a biohazard? We also offer biohazard clean up as part of our comprehensive restoration services. Check out our gallery to see the transformations we’ve achieved for other homeowners.

Insulation and Temperature Control

Temperature swings can cause condensation, and condensation leads to—you guessed it—mold. Insulating your garage helps maintain a stable environment, reducing the risk of moisture buildup.

Here’s what you can do:

  • Insulate Walls and Ceilings: Use moisture-resistant insulation materials like foam board or spray foam.
  • Weatherproof the Garage Door: Install weather stripping and door sweeps to keep out rain and humidity.
  • Install a Heater or AC Unit: Climate control can be a game-changer, especially in extreme weather areas.

Insulation doesn’t just prevent mold—it also makes your garage more energy-efficient and comfortable. If you’re planning a full overhaul, our reconstruction services can help you build a mold-resistant space from the ground up.

When to Call the Pros

Sometimes, despite your best efforts, mold still finds a way in. If you notice a musty smell, discoloration on walls, or persistent dampness, it’s time to call in the experts. Mold can spread quickly and compromise your health and property.

At Projekt Restoration, we offer a full suite of professional restoration services, including:

We’re COMMITTED TO QUALITY SERVICE and customer satisfaction. Call us now at 855-933-7935 for fast, friendly and professional service. Learn more about our mission on our Our Mission page.

Conclusion

Preventing mold in your garage isn’t rocket science, but it does take a bit of effort and consistency. From improving ventilation and controlling moisture to regular cleaning and insulation, each step plays a crucial role in keeping your space safe and mold-free.

And remember, if mold does make an appearance, don’t panic. The team at Projekt Restoration is here to help with restoration services that include everything from water damage restoration to fire damage restoration and mold remediation. We’re just a phone call away—855-933-7935.

Want to explore more tips and tricks? Visit our blog or check out our FAQ section for answers to common questions.

What are the first signs of mold in a garage?

Early signs include a musty odor, visible black or green spots on walls or ceilings, and increased humidity. If you notice any of these, it’s time to investigate further or call in a professional.

Can mold in the garage affect my health?

Absolutely. Mold spores can trigger allergies, asthma, and other respiratory issues. Long-term exposure can be especially harmful to children, the elderly, and those with weakened immune systems.

How often should I inspect my garage for mold?

It’s a good idea to do a thorough inspection at least once a month. Look for leaks, condensation, and any signs of discoloration or dampness.

Is DIY mold removal safe?

For small patches, yes. Use mold-killing cleaners and wear protective gear. But for larger infestations, it’s best to call a professional restoration company to ensure safe and thorough removal.

What should I do if I find mold during the rainy season?

Act fast. Increase ventilation, use a dehumidifier, and remove any wet materials. If the problem persists, contact us for emergency service and mold remediation.

Fire Safety Tips for Vacation Homes

When it comes to enjoying your time away, peace of mind is just as important as relaxation—especially when it involves your vacation property. Ensuring fire safety in vacation homes is essential to protect your investment and the well-being of your guests. Whether your property is nestled in the mountains, near the beach, or in a quiet suburban neighborhood, taking proactive steps to prevent fire hazards can make all the difference. From installing smoke detectors to maintaining electrical systems, these fire safety tips for vacation homes are designed to help you minimize risks and respond quickly in case of an emergency.

At COMMITTED TO QUALITY SERVICE, we understand how devastating fire damage can be. That’s why our team offers fast, friendly, and professional fire damage restoration services to help you recover quickly. Our experts are available at 855-933-7935 to assist with everything from fire mitigation to complete restoration. In addition to fire damage, we also specialize in water damage restoration, using advanced equipment to dry and restore affected structures efficiently. Protect your vacation home with these essential fire prevention strategies and know that help is just a call away.

Install Smoke Alarms in Key Areas

One of the most critical steps in ensuring fire safety in your vacation home is the proper installation of smoke alarms in strategic locations. These devices serve as the first line of defense against fire-related incidents, offering early warnings that can save lives and minimize property damage. According to the National Fire Protection Association (NFPA), three out of five home fire deaths occur in properties without working smoke alarms or with none installed at all. This alarming statistic underscores the importance of not only having smoke alarms but also placing them in the right areas.

To maximize the effectiveness of smoke alarms, it is essential to understand where they should be installed. The NFPA recommends placing smoke alarms inside every bedroom, outside each sleeping area, and on every level of the home, including the basement. For vacation homes, which may be unoccupied for extended periods, this becomes even more crucial. Fires can start from electrical faults, unattended appliances, or even lightning strikes, and without someone present to respond immediately, early detection through smoke alarms becomes vital.

When installing smoke alarms, consider the layout and unique features of your vacation property. For example, if your home has a fireplace, wood stove, or other heat-producing appliances, ensure that alarms are installed nearby but not so close that false alarms become a frequent issue. Similarly, kitchens should have alarms installed at a safe distance to avoid nuisance triggers from cooking smoke. Hallways, stairwells, and utility rooms are also key areas that should not be overlooked.

“Working smoke alarms cut the risk of dying in a home fire in half.” – National Fire Protection Association

In addition to placement, the type of smoke alarm matters. There are two main types: ionization and photoelectric. Ionization alarms are quicker at detecting flaming fires, while photoelectric alarms are more responsive to smoldering fires. For comprehensive protection, it is advisable to use a combination of both or opt for dual-sensor alarms that incorporate both technologies.

Another critical aspect is the power source. Battery-operated alarms are easy to install and ideal for remote vacation homes without consistent electrical service. However, hardwired alarms with battery backup offer more reliability, especially in homes with stable power supply. Regardless of the type, it is essential to test smoke alarms monthly and replace batteries at least once a year. Additionally, the entire unit should be replaced every 10 years, as sensors degrade over time.

For vacation homes that are rented out or shared among family members, it is important to educate all occupants on the location and function of smoke alarms. Clear instructions should be provided, and regular checks should be part of the property maintenance routine. If your vacation home is part of a rental platform like Airbnb or Vrbo, having a well-maintained fire safety system, including smoke alarms, can also enhance your property’s credibility and attract more guests.

Here are some key areas where smoke alarms should be installed:

  1. Inside each bedroom or sleeping area
  2. Outside each sleeping area, such as in hallways
  3. On every level of the home, including basements and attics
  4. Near stairways and exits
  5. In living rooms or dens, especially if they contain fireplaces
  6. In utility rooms or near major appliances

It is also advisable to interconnect smoke alarms so that when one sounds, they all do. This feature is especially beneficial in larger vacation homes where a fire in one part of the house may not be immediately noticed in another. Interconnected alarms can be hardwired or wireless, depending on the structure and age of the property.

For those looking to enhance their fire safety measures further, consider integrating your smoke alarm system with a smart home setup. Many modern alarms can send alerts to your smartphone, allowing you to monitor your property remotely. This is particularly useful for vacation homes that are not occupied year-round. Smart alarms can also be connected to other safety systems, such as carbon monoxide detectors and security cameras, for a more comprehensive safety network.

Maintenance is another crucial factor. Dust, insects, and humidity can affect the performance of smoke alarms. Regular cleaning and inspection should be part of your home maintenance checklist. If you are unsure about the condition of your alarms or need help with installation, consider hiring a professional. At Projekt Restoration, we offer a range of services that include fire damage prevention and safety consultations to help you safeguard your vacation property.

In the unfortunate event of a fire, having a reliable smoke alarm system can significantly reduce the extent of damage. Early detection allows for quicker response times, whether by occupants or emergency services. If your property has suffered from fire damage, our expert team is equipped to handle complete fire damage restoration, ensuring your home is safe and habitable once again.

For more information on how to protect your vacation home from fire hazards, visit our blog or check out our FAQ section. You can also explore our gallery to see examples of our restoration work and learn more about our commitment to safety and quality.

In conclusion, installing smoke alarms in key areas of your vacation home is not just a recommendation—it is a necessity. These devices provide essential early warnings that can save lives and protect property. By understanding where to place them, choosing the right types, and maintaining them properly, you can ensure that your vacation home remains a safe and enjoyable retreat for years to come.

For additional guidance on fire safety and property protection, consider reviewing resources from the NFPA at https://www.nfpa.org and the U.S. Fire Administration at https://www.usfa.fema.gov. These organizations offer valuable insights and up-to-date recommendations to help homeowners stay informed and prepared.

Test and Maintain Fire Detection Devices Regularly

Ensuring the safety of your vacation home involves more than just locking the doors and turning off the lights before you leave. One of the most critical yet often overlooked aspects of fire safety is the regular testing and maintenance of fire detection devices. Smoke detectors and fire alarms serve as the first line of defense in alerting occupants to potential fire hazards, giving them the precious time needed to evacuate or take action. In a vacation home, where you may not be present year-round, the importance of these devices functioning properly becomes even more significant. A malfunctioning smoke detector can mean the difference between a minor incident and a devastating loss.

To begin with, it is essential to install high-quality smoke detectors and fire alarms in all key areas of your vacation home. This includes bedrooms, hallways, kitchens, and any other rooms where fires are likely to start. Once installed, these devices should be tested at least once a month. Testing is a simple process that usually involves pressing a button on the unit to ensure the alarm sounds. If the alarm does not go off, it may indicate a dead battery or a faulty device, both of which require immediate attention. For battery-operated detectors, replacing the batteries twice a year is a good rule of thumb. Many homeowners find it convenient to do this when adjusting clocks for daylight saving time.

In addition to monthly testing, a more thorough inspection should be conducted at least once a year. This includes checking for dust or debris that may have accumulated on the sensors, which can impair their ability to detect smoke. Use a vacuum cleaner or a soft brush to gently clean the units. Also, verify that the devices are securely mounted and have not been tampered with or damaged. If your vacation home is located in a humid or coastal area, corrosion can be an issue, so be sure to inspect the battery terminals and other metal components for signs of rust or wear.

Another important aspect of maintaining fire detection systems is staying updated with the latest technology. Modern smoke detectors come with features such as carbon monoxide detection, voice alerts, and even smart home integration. These advanced models can send alerts to your smartphone, allowing you to monitor your vacation home remotely. This is particularly useful if your property is unoccupied for extended periods. If your current devices are more than ten years old, consider upgrading to newer models to ensure optimal performance and safety.

It is also advisable to keep a maintenance log for your fire detection devices. This log should include the dates of battery replacements, testing, and any repairs or replacements made. Having a documented history not only helps you stay on top of maintenance but can also be useful for insurance purposes or when renting out the property. If you are unsure about how to properly test or maintain your devices, consider hiring a professional service. Many companies offer comprehensive fire safety inspections as part of their services, ensuring that all safety equipment is in working order.

Moreover, integrating your fire detection maintenance with other home safety checks can streamline the process. For instance, when inspecting for potential water damage or mold issues, take the opportunity to test your smoke detectors as well. This holistic approach not only saves time but also ensures that your vacation home remains a safe and healthy environment for you and your guests.

Communication is another key element, especially if you rent out your vacation home. Make sure that guests are aware of the location of all fire detection devices and understand how to use them. Include this information in your welcome packet or post it clearly in the home. Encourage guests to notify you immediately if they notice any issues with the alarms. This proactive approach can help you address problems before they escalate.

In some cases, local regulations may require specific types of fire detection systems or periodic inspections. Be sure to familiarize yourself with the fire safety codes applicable to your vacation home’s location. Compliance not only ensures safety but can also protect you from legal liabilities. If you are unsure about the requirements, consult with local fire authorities or a professional restoration company that understands regional safety standards. You can learn more about such services and compliance by visiting the about page of a trusted provider.

Finally, remember that fire safety is an ongoing responsibility. Regularly testing and maintaining your fire detection devices is not a one-time task but a continuous commitment to protecting your property and the lives of those who use it. By incorporating these practices into your routine, you can enjoy peace of mind knowing that your vacation home is well-prepared to handle potential fire emergencies. Whether you are staying there yourself or hosting guests, a well-maintained fire detection system is a crucial component of a comprehensive fire safety strategy.

Keep Fire Extinguishers Accessible and Up to Date

One of the most crucial aspects of fire safety in vacation homes is ensuring that fire extinguishers are both easily accessible and properly maintained. A fire extinguisher can be the first line of defense in preventing a small fire from turning into a devastating blaze. For vacation properties, which may be unoccupied for extended periods, the importance of having a working fire extinguisher in key areas cannot be overstated. It is essential to place extinguishers in high-risk zones such as the kitchen, near fireplaces, and in garages or utility rooms. These are areas where fires are most likely to start, and having an extinguisher within reach can make a significant difference in emergency response time. Additionally, it is important to ensure that all guests and property managers know the locations of these extinguishers and understand how to use them correctly. Regular checks should be performed to confirm that the extinguishers are fully charged, not expired, and free from any damage or corrosion. This includes checking the pressure gauge, ensuring the safety pin is intact, and verifying that the instructions are legible. Fire extinguishers typically have a lifespan of 5 to 15 years, depending on the type and manufacturer, so keeping track of their expiration dates is vital. Property owners should also consider scheduling annual inspections by certified professionals to maintain compliance with local fire safety regulations. In addition to physical maintenance, it is wise to include fire extinguisher usage instructions in the welcome packet or house manual provided to guests. This proactive approach not only enhances safety but also demonstrates a commitment to responsible property management. For those who manage multiple vacation homes or are unsure about fire safety protocols, consulting with a professional restoration and safety service can be invaluable. Companies like Projekt Restoration offer a range of services that include fire damage prevention and recovery, ensuring your property is well-protected. You can also learn more about their mission and dedication to safety by visiting their our mission page. By taking these steps, vacation homeowners can significantly reduce the risk of fire-related incidents and provide a safer environment for all occupants.

Create a Fire Escape Plan for Guests

When managing a vacation rental property, ensuring the safety of your guests should be a top priority, especially when it comes to fire emergencies. One of the most critical components of fire safety is having a clear and well-communicated fire escape plan. Many guests are unfamiliar with the layout of the property, which can lead to confusion and panic in the event of a fire. To mitigate this risk, property owners should develop a comprehensive fire escape strategy tailored to their specific vacation home and make it easily accessible to all guests.

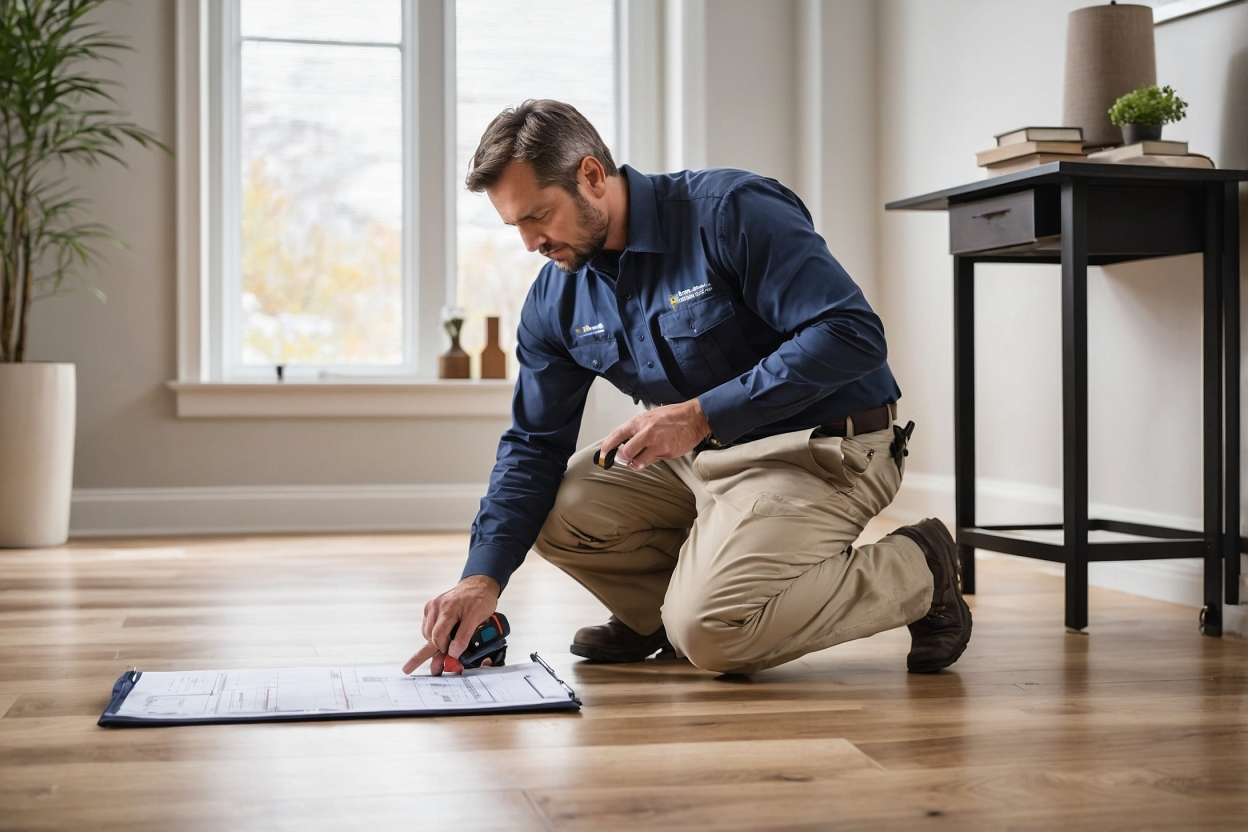
Start by evaluating the layout of your vacation home. Identify all possible exits, including doors and windows, and ensure they are easily operable and not obstructed. Each sleeping area should have at least two ways to escape in case one route is blocked by fire or smoke. Once you have identified the escape routes, create a detailed floor plan that clearly marks all exits, fire extinguishers, smoke detectors, and the location of the main electrical panel. This plan should be displayed prominently in common areas such as the kitchen, living room, and near each bedroom.

In addition to visual aids, provide written instructions that outline the steps guests should take during a fire emergency. These instructions should include how to safely exit the building, where to find fire safety equipment, and the designated meeting point outside the home. Make sure to include emergency contact numbers, including local fire departments and your own contact information, so guests can quickly reach out for help if needed.

To further enhance safety, consider conducting a walkthrough of the escape plan with guests upon their arrival. While this may not always be feasible, especially for self-check-in properties, you can offer a digital version of the fire escape plan via email or through a welcome packet. This ensures that guests have access to the information even if they do not see the physical copy in the home.

Regular maintenance and inspection of fire safety equipment are also essential. Test smoke alarms and carbon monoxide detectors before each guest’s arrival to ensure they are functioning properly. Fire extinguishers should be fully charged and placed in easily accessible locations, such as the kitchen and near exits. If your vacation home has multiple floors, consider installing escape ladders in upper-level bedrooms and provide clear instructions on how to use them.

Educating guests on fire prevention is another proactive step. Include a section in your welcome guide that outlines basic fire safety tips, such as not leaving cooking unattended, properly extinguishing candles, and avoiding the use of space heaters near flammable materials. Encourage guests to report any safety concerns immediately so they can be addressed without delay.

For vacation homes located in areas prone to wildfires, it is especially important to include evacuation procedures specific to those scenarios. Provide information on local emergency alert systems, evacuation routes, and the location of nearby shelters. Keeping guests informed about the risks and how to respond appropriately can make a significant difference in their safety and peace of mind.

Incorporating fire safety into your vacation rental management not only protects your guests but also helps preserve your property and reputation. A well-prepared fire escape plan demonstrates your commitment to guest safety and can set your rental apart from others. It also aligns with best practices recommended by fire safety professionals and local regulations.

If you are unsure about how to create an effective fire escape plan, consider consulting with fire safety experts or property management professionals. They can provide valuable insights and help you implement the necessary measures to ensure your vacation home is as safe as possible. Additionally, you can explore resources and services offered by restoration and safety companies. For example, you can learn more about fire safety and property protection by visiting the services page or reading informative articles on the blog section of our website.

Ultimately, taking the time to develop and communicate a thorough fire escape plan is a crucial step in creating a safe and enjoyable environment for your guests. It not only prepares them for emergencies but also reinforces your role as a responsible and attentive host. By prioritizing fire safety, you contribute to a positive guest experience and help ensure that your vacation home remains a secure and welcoming destination for all.

Use Fire-Resistant Materials in Furnishings and Decor

When it comes to ensuring fire safety in vacation homes, one of the most effective yet often overlooked strategies is the use of fire-resistant materials in furnishings and decor. Vacation properties, especially those located in remote or wooded areas, are particularly vulnerable to fire hazards. Whether the risk stems from wildfires, electrical faults, or unattended cooking, the materials used in your home’s interior can significantly influence how quickly a fire spreads and how much damage it causes. Opting for fire-resistant furnishings not only enhances the safety of the property but also provides peace of mind to homeowners and guests alike.

Fire-resistant materials are specifically designed to withstand high temperatures and slow the spread of flames. These materials are treated with chemicals or manufactured using fire-retardant fibers that resist ignition and reduce the rate at which fire spreads. Common examples include wool, leather, and certain synthetic fibers like modacrylic and aramid. When selecting furniture such as sofas, chairs, mattresses, and curtains, it is wise to choose items labeled as fire-retardant or compliant with fire safety standards. These items are often tested under rigorous conditions to ensure they meet safety regulations, making them a reliable choice for vacation homes.

In addition to upholstered furniture, consider the fire resistance of other decorative elements such as rugs, wall hangings, and window treatments. Curtains and drapes, in particular, can act as a conduit for fire if made from flammable materials. Fire-resistant window coverings can help contain a fire to a single room, giving occupants more time to evacuate and emergency responders more time to arrive. Similarly, area rugs made from wool or treated synthetic fibers can help prevent flames from spreading across floors, especially in open-concept living spaces.

Another important aspect is the use of fire-resistant paint and wall coverings. These products are designed to provide an extra layer of protection by slowing down the combustion process. Fire-retardant paints are especially useful in wooden vacation homes, where untreated wood can act as a significant fire accelerant. Applying these coatings to walls, ceilings, and even furniture can make a substantial difference in the event of a fire. Additionally, decorative wall panels made from non-combustible materials such as metal, glass, or treated gypsum can enhance both the aesthetic and safety profile of your vacation home.

When outfitting your vacation property, it is also essential to consider the fire resistance of outdoor furnishings. Decks, patios, and outdoor kitchens are common features in vacation homes and can be vulnerable to fire, especially in dry climates. Opt for outdoor furniture made from metal, treated wood, or fire-resistant synthetic materials. Avoid using highly flammable items like plastic chairs or untreated wooden tables, which can ignite quickly and contribute to the spread of fire. Fire-resistant cushions and covers are also available and can be a valuable addition to your outdoor setup.

Incorporating fire-resistant materials into your vacation home does not mean sacrificing style or comfort. Many modern fire-retardant products are designed with aesthetics in mind, offering a wide range of colors, textures, and styles to suit any interior design preference. Whether you prefer a rustic cabin feel or a sleek, contemporary look, there are fire-resistant options available that align with your vision while enhancing safety.

Beyond furnishings and decor, it is crucial to maintain a comprehensive fire safety plan. This includes installing smoke detectors, keeping fire extinguishers accessible, and ensuring that all guests are aware of emergency exits and procedures. Regular maintenance and inspections can also help identify potential fire hazards before they become serious threats. For more information on how to protect your property, visit our services page, where you can explore a range of solutions tailored to vacation home safety.

If your vacation home has previously experienced fire damage or you are concerned about potential risks, professional assessment and restoration services can provide valuable insights. Our team specializes in identifying vulnerabilities and implementing effective safety measures. Learn more about our approach and commitment to safety by visiting our our mission page.

Ultimately, investing in fire-resistant materials for your vacation home is a proactive step toward safeguarding your property and the people who enjoy it. It not only minimizes the risk of extensive damage but also contributes to a safer, more resilient living environment. By making informed choices in furnishings and decor, you can enjoy your vacation home with greater confidence and security.

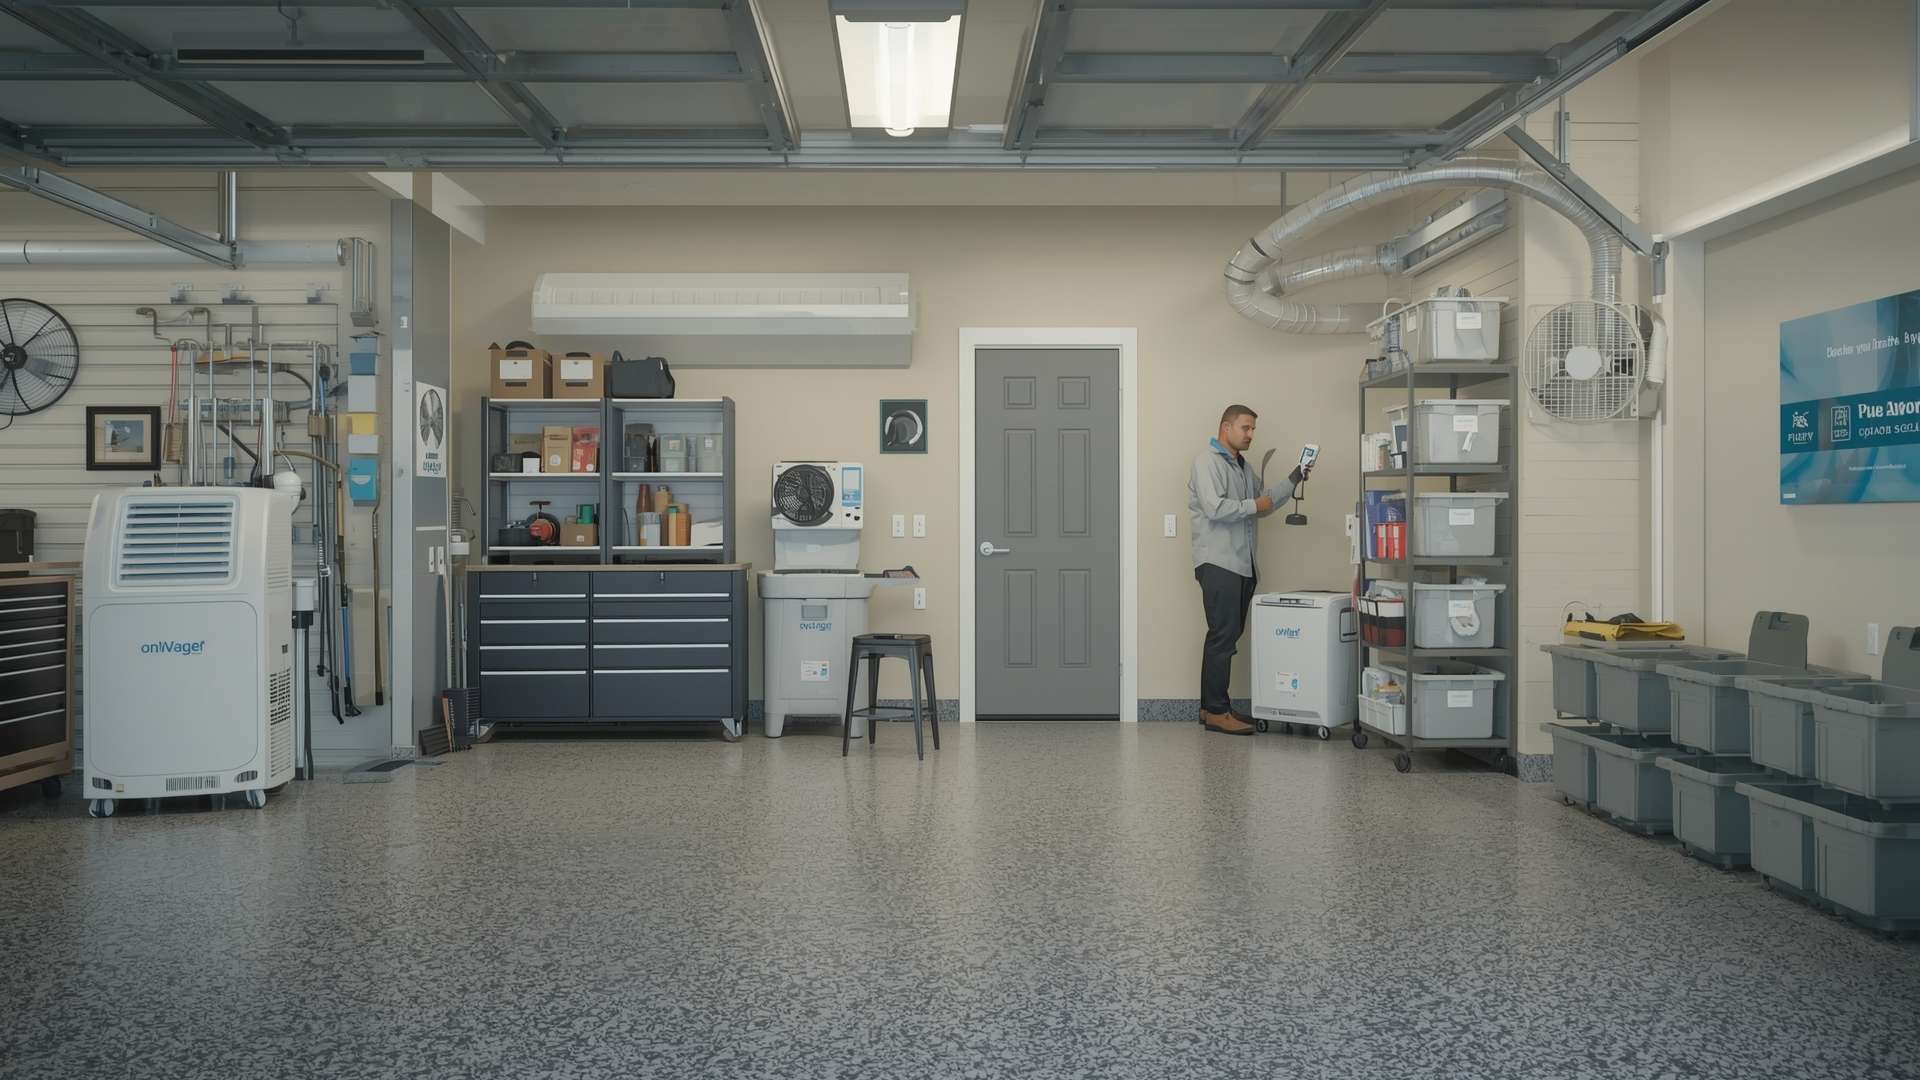
Inspect Electrical Systems and Appliances

One of the most critical aspects of fire safety in vacation homes is ensuring that all electrical systems and appliances are in proper working condition. Faulty wiring, outdated electrical panels, and malfunctioning appliances are among the leading causes of residential fires. Vacation homes, especially those that are not occupied year-round, are particularly vulnerable to electrical issues due to prolonged periods of inactivity, exposure to varying weather conditions, and lack of regular maintenance. Before renting out or staying in a vacation property, it is essential to conduct a thorough inspection of the entire electrical infrastructure.

Start by checking the main electrical panel for any signs of wear, corrosion, or outdated components. If the panel is older or shows signs of damage, it may not be equipped to handle modern electrical loads safely. In such cases, it is advisable to consult a licensed electrician to assess whether an upgrade is necessary. Additionally, inspect all visible wiring throughout the home. Look for frayed wires, exposed conductors, or any signs of overheating, such as discoloration or a burning smell. These are clear indicators of potential fire hazards that should be addressed immediately.

Appliances, both large and small, should also be evaluated for safety. Ensure that kitchen appliances like ovens, microwaves, and toasters are clean, functioning properly, and plugged into grounded outlets. Avoid using extension cords as permanent solutions, especially for high-wattage devices. Instead, ensure that each appliance has a dedicated outlet that meets its power requirements. Portable heaters, air conditioners, and other seasonal appliances should be tested before use and stored properly when not in operation. If any appliance sparks, emits a burning odor, or operates inconsistently, it should be repaired or replaced without delay.

Another important step is to verify that all outlets and switches are in good condition. Loose or warm outlets can be a sign of internal damage or overloading. Ground Fault Circuit Interrupters (GFCIs) should be installed in areas prone to moisture, such as bathrooms, kitchens, and outdoor spaces. These devices are designed to shut off power if an electrical fault is detected, significantly reducing the risk of electrical fires and shocks. Test GFCIs regularly to ensure they are functioning correctly.

Lighting fixtures also deserve attention. Replace any burnt-out bulbs with the correct wattage and ensure that fixtures are securely mounted. Avoid using bulbs that exceed the recommended wattage for a fixture, as this can lead to overheating. If the vacation home includes outdoor lighting, inspect the fixtures for weather damage and ensure that all wiring is rated for exterior use.

For those managing multiple vacation properties or frequently renting out their homes, it may be beneficial to schedule regular professional inspections. Licensed electricians can identify hidden issues that may not be visible during a casual inspection. They can also ensure that the property complies with local electrical codes and safety standards, which is especially important for short-term rental compliance.

Incorporating smart home technology can also enhance electrical safety. Devices such as smart plugs, surge protectors, and circuit monitors can help detect unusual power usage patterns and alert homeowners to potential problems. These tools are particularly useful for vacation homes that are not always occupied, as they provide real-time monitoring and remote control capabilities.

In addition to electrical inspections, it is wise to consider the overall condition of the home. Issues like water damage can compromise electrical systems and increase the risk of fire. Moisture can corrode wiring and create short circuits, especially in basements, attics, and crawl spaces. Regular maintenance and prompt repairs are essential to prevent such hazards. For more information on how to maintain a safe and functional vacation property, visit our services page.

Ultimately, taking the time to inspect and maintain electrical systems and appliances is a crucial step in ensuring fire safety in vacation homes. By addressing potential hazards proactively, homeowners can protect their property, guests, and peace of mind.

Practice Safe Cooking Habits in the Kitchen

Cooking is one of the most common activities in any home, including vacation properties, but it also poses a significant fire risk if not handled with care. When staying in a vacation home, especially one that may be unfamiliar or equipped with different appliances, it is crucial to adopt safe cooking habits to prevent accidental fires. One of the first steps is to never leave cooking food unattended. Whether using a stove, oven, or even a grill, always stay in the kitchen while food is being prepared. Unattended cooking is a leading cause of kitchen fires, and a few moments of distraction can lead to dangerous consequences. Make sure to keep flammable items such as paper towels, dishcloths, and wooden utensils away from heat sources. These items can easily catch fire if placed too close to burners or open flames.

Before starting to cook, take a moment to familiarize yourself with the kitchen layout and the location of fire safety equipment such as fire extinguishers and smoke detectors. Ensure that smoke alarms are functional and not disabled. If the vacation home does not have a fire extinguisher, consider purchasing a small one for your stay or requesting one from the property owner. It is also wise to keep a lid nearby when cooking with oil or grease. In the event of a grease fire, never use water to extinguish it. Instead, cover the pan with a lid to smother the flames and turn off the heat source immediately.

Proper maintenance and cleanliness of cooking appliances are also essential. Grease buildup in ovens, stovetops, and range hoods can ignite and cause a fire. Always clean up spills and food debris promptly and ensure that appliances are in good working condition. If you notice any unusual smells, sparks, or malfunctioning equipment, stop using it immediately and report it to the property manager. Additionally, avoid wearing loose clothing or dangling sleeves while cooking, as these can easily catch fire when exposed to open flames or hot surfaces.

For those using outdoor grills, make sure they are placed at a safe distance from the house, deck railings, and overhanging branches. Never use a grill indoors or in enclosed spaces such as garages or covered patios, as this can lead to both fire hazards and carbon monoxide poisoning. Always follow the manufacturer’s instructions for lighting and operating the grill, and keep a spray bottle of water or a fire extinguisher nearby in case of flare-ups.

Children and pets should be kept at least three feet away from cooking areas to prevent accidental burns or tipping of hot pots and pans. Establishing a kid-free zone around the stove and other cooking appliances can significantly reduce the risk of accidents. It is also important to use the correct cookware for the type of stove in the vacation home. For example, induction cooktops require specific types of pots and pans, and using the wrong ones can lead to overheating or malfunction.

When using electrical appliances such as toasters, coffee makers, or microwaves, ensure that cords are not frayed and that outlets are not overloaded. Unplug appliances when not in use to prevent electrical fires. If the vacation home has older wiring or outlets, be extra cautious and avoid using multiple high-wattage appliances simultaneously.

In case of a fire emergency, having a clear evacuation plan is essential. Know the exits and ensure that all guests are aware of the plan. Practicing a quick evacuation drill can be especially helpful for families with children or elderly members. Keep emergency contact numbers readily available and know the address of the vacation home in case you need to call for help.

Vacation homes located in remote or wooded areas may face additional fire risks, especially during dry seasons. Be mindful of local fire regulations and advisories, and avoid outdoor cooking or campfires during high-risk periods. Always fully extinguish any flames before leaving the area or going to bed.

For more information on how to protect your vacation home from fire hazards and other potential risks, visit our services page. You can also learn more about our commitment to safety and restoration by exploring our our mission section. Practicing safe cooking habits not only ensures a pleasant and worry-free vacation but also helps preserve the property and the well-being of everyone staying there.

Avoid Overloading Power Outlets and Extension Cords

One of the most common yet often overlooked fire hazards in vacation homes is the overloading of power outlets and extension cords. While it may seem convenient to plug multiple devices into a single outlet, especially in older properties with limited electrical infrastructure, doing so can significantly increase the risk of electrical fires. Vacation homes are frequently equipped with various electronic devices such as space heaters, portable air conditioners, kitchen appliances, and entertainment systems. When too many of these high-wattage devices are connected to a single outlet or extension cord, it can cause the circuit to overheat, potentially leading to sparks, short circuits, or even full-blown fires.

To maintain a safe environment in your vacation home, it is crucial to understand the capacity of your electrical system and use it responsibly. Avoid daisy-chaining multiple extension cords or power strips together, as this practice can easily exceed the safe load limit. Instead, use surge protectors with built-in circuit breakers and ensure that all cords and outlets are in good condition, free from fraying or visible damage. If you notice flickering lights, buzzing sounds, or warm outlets, these are warning signs that your electrical system may be under stress and needs immediate attention.

It is also wise to have a licensed electrician inspect the electrical system of your vacation property, especially if it is an older home or has undergone recent renovations. An inspection can identify outdated wiring, insufficient circuit breakers, or other potential hazards that could compromise fire safety. Additionally, consider upgrading your electrical panel to accommodate modern energy demands, particularly if you plan to rent out the property or host large groups.

For those managing vacation homes remotely, smart plugs and energy monitoring devices can offer real-time insights into electricity usage and alert you to potential issues before they escalate. These tools can help you maintain control over your property’s electrical safety, even when you are not physically present.

Proper storage and use of extension cords are equally important. Never run cords under rugs, carpets, or furniture, as this can trap heat and lead to overheating. Always use cords that are rated for the specific devices you are powering and ensure they are certified by recognized safety organizations. When not in use, unplug extension cords to reduce the risk of accidental fires.

Fire safety in vacation homes is not just about preventing flames but also about creating a secure and worry-free environment for you and your guests. Taking proactive steps to manage your electrical load can significantly reduce the risk of fire and protect your investment. For more information on maintaining a safe property, visit our about page to learn about our team’s commitment to safety and excellence. You can also explore our wide range of services designed to help homeowners safeguard their properties against fire, water, and mold damage.

Store Flammable Items Safely

Proper storage of flammable items is a critical aspect of maintaining fire safety in vacation homes. Whether your property is occupied year-round or only during certain seasons, ensuring that combustible materials are stored correctly can significantly reduce the risk of accidental fires. Many vacation homes are stocked with items like cleaning supplies, lighter fluids, paints, and even outdoor grilling equipment, all of which can pose serious fire hazards if not handled with care. These materials should always be stored in cool, dry, and well-ventilated areas, away from direct sunlight and heat sources. Avoid placing them near appliances such as water heaters, stoves, or electrical panels, as these can ignite vapors or cause spontaneous combustion under the right conditions.

It is also essential to use proper containers for storing flammable liquids. Original containers are usually designed to safely contain volatile substances, but if you must transfer them, use approved safety cans that are clearly labeled. Never use glass jars or unmarked bottles, as these can break easily and create confusion about the contents. Keeping these items in a locked cabinet or a dedicated storage shed that is separate from the main living area adds an extra layer of protection, especially if children or guests unfamiliar with the property are present.

In addition to physical storage, it is wise to educate all occupants about the dangers of flammable materials. Clear labeling and easy-to-understand instructions can go a long way in preventing misuse. If your vacation home is rented out to guests, consider including a safety manual that outlines where hazardous items are stored and how to handle them responsibly. This proactive approach not only enhances safety but also demonstrates your commitment to responsible property management.

Regular inspections are another key component of safe storage practices. Periodically check for leaks, corrosion, or expired products, and dispose of any questionable items according to local hazardous waste guidelines. This is especially important in vacation homes that may sit unoccupied for extended periods, as unnoticed deterioration can lead to dangerous situations. If you are unsure about how to properly dispose of certain chemicals or materials, consult your local fire department or environmental agency for guidance.

Fire safety also involves understanding how flammable items interact with other elements in the home. For instance, combining certain cleaning agents can produce toxic fumes or even cause explosions. Always read labels and avoid mixing products unless the manufacturer explicitly states it is safe to do so. Additionally, keep flammable items away from moisture-prone areas, as water can sometimes react with chemicals and create hazardous conditions. For more information on how water can impact your property, visit our page on water damage.

If your vacation home has a garage or workshop, these areas often become catch-alls for various flammable substances. Implementing a clear organizational system can help you keep track of what is stored and where. Use shelving units that are made of non-combustible materials and avoid stacking items in a way that could lead to spills or falls. Installing a smoke detector and a fire extinguisher in these areas can provide an added layer of security. Make sure that extinguishers are rated for chemical fires and that everyone knows how to use them.

For homeowners who are unsure about the best practices for storing flammable items, professional consultation can be invaluable. Fire safety experts can assess your property and recommend tailored solutions to minimize risk. At Projekt Restoration, we offer a range of services designed to help you maintain a safe and secure environment in your vacation home. From fire damage restoration to preventative assessments, our team is equipped to support your safety goals.

Moreover, understanding the broader implications of fire safety can help you make more informed decisions. For example, a fire that starts due to improper storage can quickly escalate and cause extensive damage, not just to your property but also to neighboring homes. This is particularly concerning in vacation communities where homes are often built close together. Taking the time to store flammable items correctly is a small investment that can yield significant benefits in terms of safety and peace of mind.

In conclusion, the safe storage of flammable items is a fundamental component of fire safety in vacation homes. By using appropriate containers, maintaining clear labeling, conducting regular inspections, and educating all occupants, you can significantly reduce the risk of fire-related incidents. For additional resources and expert advice, feel free to explore our about page to learn more about our commitment to safety and excellence in property restoration.

Maintain Outdoor Fire Pits and Grills Properly

Outdoor fire pits and grills are popular features in many vacation homes, offering a cozy ambiance and a great way to enjoy meals with family and friends. However, without proper maintenance and usage, they can pose serious fire hazards. To ensure safety, always place fire pits and grills on non-flammable surfaces such as concrete or gravel, and keep them at least ten feet away from any structures, trees, or flammable materials. Regularly inspect these appliances for signs of wear, rust, or damage, and clean them thoroughly to prevent grease buildup, which can easily ignite. Use only approved fuels like dry wood or charcoal, and never use gasoline or other accelerants to start a fire. When using a gas grill, check the gas lines and connections for leaks before each use. It is also essential to have a fire extinguisher or a bucket of sand or water nearby in case of emergencies. After use, ensure the fire is completely extinguished and the grill is turned off and cooled down before covering or storing it. Educating guests on proper fire pit and grill usage is also a proactive step in preventing accidents. For vacation homeowners, it is wise to include clear safety instructions and signage near these areas. Additionally, consider scheduling regular inspections and maintenance, especially if the property is rented out frequently. For more comprehensive safety solutions and property care, explore our range of services designed to protect your investment. If you are curious about our commitment to safety and excellence, learn more on our our mission page. Taking these precautions not only enhances the enjoyment of your outdoor spaces but also ensures the safety of everyone who visits your vacation home.

Clear Brush and Debris from Around the Property

One of the most effective ways to reduce the risk of fire around your vacation home is by maintaining a defensible space through the removal of brush, dry vegetation, and debris. Overgrown grass, fallen leaves, dead branches, and other flammable materials can act as fuel for wildfires, especially during the dry season. These materials can easily ignite from a stray ember or spark, rapidly spreading flames toward your property. Creating a buffer zone by clearing at least 30 feet around your home helps to slow or stop the spread of fire, giving firefighters a better chance to defend your property and increasing the safety of anyone staying there.

Start by regularly mowing the lawn and trimming tree branches that hang close to the house or touch other trees. Remove any dead plants, dry leaves, and pine needles from your yard, roof, and gutters. These areas are often overlooked but can be highly flammable. If your vacation home is located in a wooded or rural area, consider removing or thinning out dense shrubs and underbrush that can serve as fire ladders, allowing flames to climb from the ground to tree canopies. It is also wise to stack firewood and store propane tanks at least 30 feet away from any structures, ideally in a cleared area.

In addition to vegetation management, be mindful of man-made debris such as old furniture, construction materials, or unused equipment that may be stored around the property. These items can also catch fire and contribute to the spread of flames. Keeping the area clean and organized not only enhances fire safety but also improves the overall appearance and usability of your vacation home.

For homeowners who may not visit their vacation property frequently, hiring a local maintenance service to perform seasonal cleanups can be a practical solution. These professionals can ensure that the property remains in compliance with local fire safety regulations and is prepared for wildfire season. You can also consult with fire safety experts to assess your property and recommend specific actions tailored to your location and landscape.

Understanding the importance of proactive property maintenance is essential for long-term fire prevention. If you are unsure where to begin, consider exploring our services page to learn more about how we can assist with fire damage prevention and recovery. Additionally, our about section provides insight into our mission and commitment to helping homeowners protect their investments.

By taking the time to clear brush and debris from around your vacation home, you are not only reducing fire hazards but also creating a safer and more enjoyable environment for your family and guests. Regular upkeep and awareness are key components of a comprehensive fire safety strategy, ensuring that your property remains secure throughout the year.

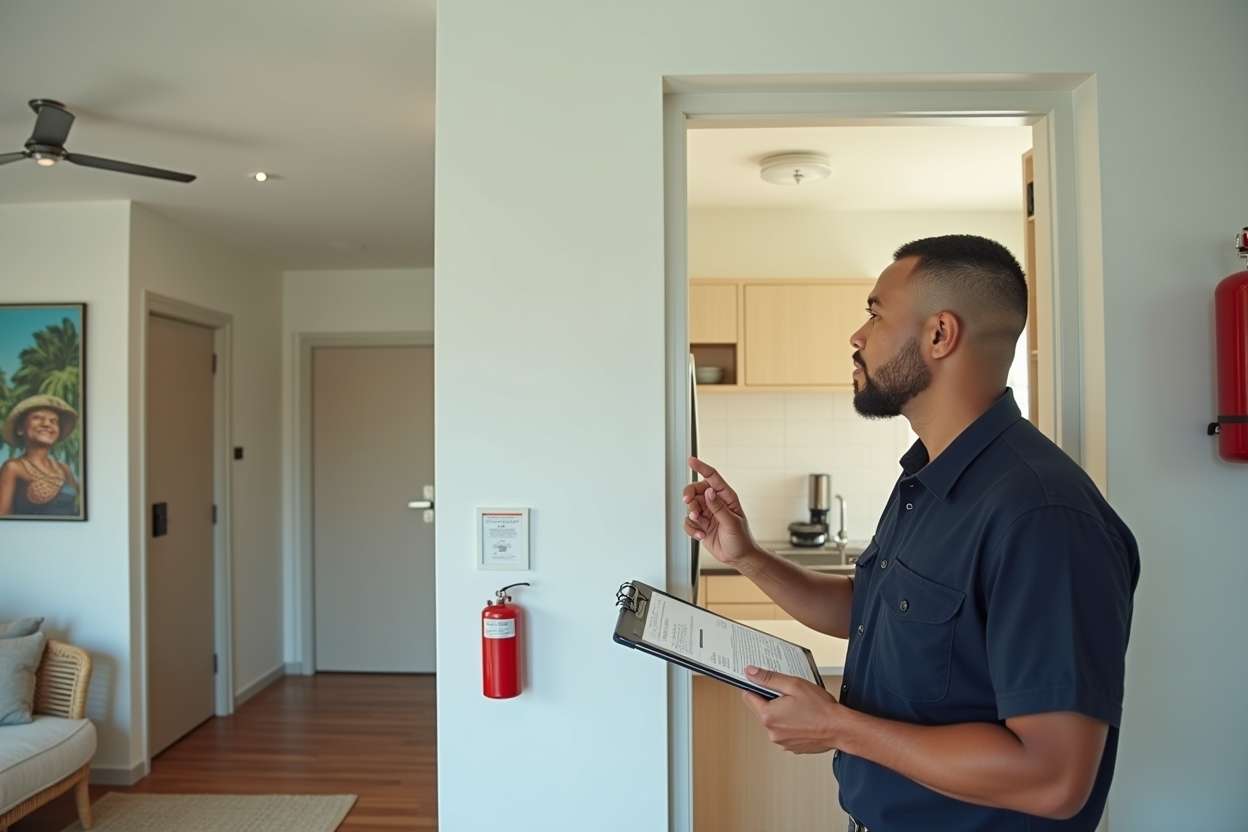
Provide Fire Safety Instructions for Renters

When renting out a vacation home, it is crucial to ensure that guests are well-informed about fire safety procedures. Clear and concise fire safety instructions can significantly reduce the risk of accidents and help renters respond effectively in case of an emergency. Begin by placing visible fire safety signage throughout the property, especially near exits, kitchens, and sleeping areas. These signs should include evacuation routes, emergency contact numbers, and the location of fire extinguishers and smoke detectors. Providing a printed fire safety guide in a welcome packet or guest manual is also highly recommended. This guide should outline the steps to take in the event of a fire, such as staying low to avoid smoke inhalation, using the nearest exit, and calling emergency services immediately. Renters should also be informed about the importance of not using elevators during a fire and the need to gather at a designated safe meeting point outside the property.

Educating renters on how to use fire safety equipment is another essential step. Include instructions on how to operate fire extinguishers, and ensure that extinguishers are placed in accessible and visible locations, particularly in the kitchen and near any fireplaces or heating equipment. Smoke detectors and carbon monoxide alarms should be tested regularly and renters should be made aware of their locations and what to do if they hear an alarm. If your vacation home includes amenities like a grill, fireplace, or fire pit, provide specific safety guidelines for their use. For example, renters should never leave a fire unattended, always keep flammable materials away, and fully extinguish flames before leaving the area.

In addition to physical safety measures, communication plays a key role in fire prevention. Encourage renters to report any fire hazards they notice, such as faulty wiring, blocked exits, or malfunctioning smoke detectors. Providing a direct line of communication, such as a property manager’s phone number or a 24-hour emergency contact, ensures that issues can be addressed promptly. It is also beneficial to include a section in the rental agreement that outlines the fire safety rules and expectations for guests. This not only reinforces the importance of fire safety but also holds renters accountable for following the guidelines.

Digital resources can further enhance renter awareness. Consider sending a pre-arrival email that includes a digital copy of the fire safety guide, along with a short video demonstrating how to use fire extinguishers and locate emergency exits. This proactive approach helps guests familiarize themselves with safety procedures before they even step foot on the property. Additionally, you can include links to helpful resources on your website, such as your blog or FAQ page, where renters can learn more about fire safety and emergency preparedness.

Vacation homes located in areas prone to wildfires require extra precautions. Renters should be informed about local fire danger levels and evacuation protocols. Provide a list of emergency supplies, such as flashlights, batteries, bottled water, and a first-aid kit, and ensure these items are easily accessible. If your property is in a wildfire-prone region, include information on how to monitor local news and weather alerts, and advise guests to keep their phones charged and ready to receive emergency notifications.

Finally, maintaining a fire-safe environment is a shared responsibility between property owners and renters. Regular maintenance checks, such as inspecting electrical systems, cleaning dryer vents, and trimming vegetation around the home, contribute to overall safety. By taking the time to educate renters and provide them with the tools they need to respond to emergencies, you create a safer and more enjoyable experience for everyone. For more information on how to protect your vacation home from fire and other hazards, visit our services page or learn more about our commitment to safety and restoration.

Install Carbon Monoxide Detectors

One of the most critical yet often overlooked aspects of fire safety in vacation homes is the installation of carbon monoxide detectors. Carbon monoxide is a colorless, odorless gas that can be deadly if inhaled in large quantities. It is commonly produced by fuel-burning appliances such as gas stoves, fireplaces, furnaces, and water heaters. In vacation homes, especially those that may not be used year-round, the risk of carbon monoxide buildup can be higher due to infrequent maintenance or unnoticed malfunctions in these appliances. Installing carbon monoxide detectors is a simple yet highly effective way to protect your property and the lives of your guests or family members.

Carbon monoxide poisoning can occur without warning, making it essential to have detectors installed in key areas of the home. These include near sleeping areas, in the kitchen, and close to any fuel-burning appliances. For multi-level homes, it is recommended to have at least one detector on each floor. Modern carbon monoxide detectors are easy to install and often come with features such as digital displays, battery backup, and combination smoke and CO detection. These features ensure that the device remains functional even during power outages, which are not uncommon in remote vacation areas.

Regular maintenance of carbon monoxide detectors is just as important as the initial installation. Batteries should be checked and replaced at least twice a year, and the units themselves should be tested monthly to ensure they are working correctly. Most detectors have a lifespan of five to seven years, after which they should be replaced. Keeping a maintenance schedule can help ensure that your detectors are always in optimal condition, providing continuous protection.

In addition to installing detectors, it is crucial to educate all occupants of the vacation home about the dangers of carbon monoxide and what to do if an alarm sounds. Everyone should know how to recognize the symptoms of carbon monoxide poisoning, which include headaches, dizziness, nausea, and confusion. If the alarm goes off, the home should be evacuated immediately, and emergency services should be contacted. Having a clear emergency plan in place can make a significant difference in ensuring everyone’s safety.

Vacation homeowners should also consider having their fuel-burning appliances inspected annually by certified professionals. These inspections can identify potential issues such as blocked vents, cracked heat exchangers, or faulty pilot lights that could lead to carbon monoxide leaks. Preventative maintenance not only enhances safety but also extends the lifespan of your appliances, making it a worthwhile investment.

For those managing vacation rentals, installing carbon monoxide detectors is not just a safety measure but also a legal requirement in many regions. Compliance with local building codes and safety regulations can protect you from liability and enhance the reputation of your rental property. Guests are more likely to choose accommodations that prioritize their safety, and having visible safety features like carbon monoxide detectors can be a strong selling point.

Moreover, integrating carbon monoxide detectors into a broader home safety and monitoring system can provide added peace of mind. Many modern detectors can be connected to smart home systems, allowing remote monitoring and alerts. This is particularly useful for vacation homes that are not occupied year-round, as it enables homeowners to respond quickly to any issues even when they are not on-site.

At Projekt Restoration, we understand the importance of comprehensive safety measures for vacation homes. Our team offers a range of services designed to protect your property from various hazards, including fire and water damage. We also provide expert advice on maintaining a safe and secure environment for your guests. If you are unsure about the safety features in your vacation home, our professionals can conduct a thorough assessment and recommend the necessary upgrades.

In addition to fire safety, we also specialize in identifying and mitigating other risks that can compromise your property. For example, hidden water damage can lead to mold growth, which poses serious health risks. Learn more about how to detect these issues early by visiting our guide on how to identify hidden water damage early. By addressing all potential hazards, you can ensure that your vacation home remains a safe and enjoyable retreat for years to come.

Ultimately, the installation of carbon monoxide detectors is a small step that can have a profound impact on the safety of your vacation home. It is a proactive measure that demonstrates your commitment to the well-being of your guests and the integrity of your property. Whether you are a homeowner or a property manager, taking the time to install and maintain these devices is a crucial part of responsible homeownership.

Know Local Emergency Numbers and Procedures

When staying in a vacation home, especially in an unfamiliar area, being prepared for emergencies is crucial for ensuring your safety and that of your loved ones. One of the most important fire safety tips is to familiarize yourself with the local emergency numbers and procedures. Unlike your permanent residence, where emergency contacts and protocols are second nature, a vacation home requires a bit of extra preparation. Start by identifying the local emergency services number, which may differ from the standard 911 used in the United States. In some countries, different numbers are used for fire, police, and medical emergencies, so it is essential to know which number to call in case of a fire. Post these numbers in a visible location within the vacation home, such as on the refrigerator or near the main entrance, so everyone in your group can access them quickly if needed.

In addition to knowing the emergency contact numbers, take time to understand the local fire safety procedures. This includes identifying the nearest fire station, understanding the local fire department’s response time, and learning about any regional fire risks, such as wildfire-prone areas. If the vacation home is located in a region susceptible to wildfires, familiarize yourself with evacuation routes and community alert systems. Many local governments offer text or email alerts for emergency situations, and signing up for these notifications can provide real-time updates that are vital during a fire emergency.

It is also wise to speak with the property owner or rental agency about the fire safety features of the home. Ask whether the home is equipped with smoke detectors, fire extinguishers, and fire blankets, and ensure that these devices are in working order. Inquire about the layout of the home and the best escape routes in case of a fire. If the home has multiple floors, make sure everyone knows how to safely exit from each level. Practicing a quick fire drill upon arrival can help everyone become familiar with the escape plan and reduce panic in an actual emergency.

Another important aspect of fire safety in a vacation home is understanding how to communicate with local emergency responders. Language barriers can be a challenge in foreign countries, so consider learning a few key phrases in the local language or keeping a translation app handy. This can be especially helpful when providing your location or describing the nature of the emergency. Additionally, keep a written note of the vacation home’s address and any nearby landmarks to help emergency services locate you quickly.

Vacation homes often come with unique risks that differ from your primary residence. For instance, older properties may have outdated electrical systems or heating equipment that could pose a fire hazard. If you notice any potential safety concerns, such as exposed wiring or malfunctioning appliances, report them immediately to the property manager. For more information on how to handle such issues and protect your vacation home, visit our services page, where we offer comprehensive solutions for fire damage prevention and restoration.

Additionally, understanding the local building codes and fire regulations can provide insight into the safety standards of the property. Some regions may have stricter fire safety requirements than others, and being aware of these can help you assess the overall safety of your vacation rental. If you are unsure about the compliance of the property, consider reaching out to local authorities or consulting with professionals who specialize in fire safety. Our team at Projekt Restoration is dedicated to helping homeowners and renters stay safe, and you can learn more about our mission and values by visiting our our mission page.

Finally, always have a backup plan in case of an emergency. Keep a list of nearby hospitals, urgent care centers, and pharmacies, and know the fastest route to each. Make sure your mobile phone is fully charged and has access to local networks, and consider carrying a portable charger. If you are traveling with children or elderly family members, take extra precautions to ensure they understand what to do in case of a fire. By taking these proactive steps, you can enjoy your vacation with peace of mind, knowing that you are well-prepared to handle any fire-related emergency that may arise.

Sure! Here’s a suitable FAQ section for a blog post titled "Fire Safety Tips for Vacation Homes," incorporating key information and common concerns:

Frequently Asked Questions (FAQ) – Fire Safety Tips for Vacation Homes

  1. Why is fire safety important in vacation homes?
    Vacation homes are often unoccupied for extended periods, which can increase the risk of unnoticed fire hazards. Ensuring proper fire safety measures helps protect your property, belongings, and the safety of guests or renters.

  2. What are the most common fire hazards in vacation homes?
    Common fire hazards include unattended cooking appliances, faulty electrical wiring, heating equipment, candles, and outdoor fire pits or grills. Seasonal decorations and overgrown vegetation can also pose fire risks.

  3. How can I prepare my vacation home for fire safety before leaving it unoccupied?
    Before leaving your vacation home:

    • Unplug non-essential appliances.
    • Ensure smoke and carbon monoxide detectors are working.
    • Clean out dryer vents and chimneys.
    • Store flammable materials safely.
    • Trim vegetation around the home to create a defensible space.
  4. What fire safety equipment should I have in my vacation home?
    Every vacation home should be equipped with:

    • Working smoke and carbon monoxide detectors on every level.
    • Fire extinguishers in the kitchen, garage, and near fireplaces.
    • A fire blanket in the kitchen.
    • Flashlights and emergency exit plans posted in visible areas.
  5. How often should I test smoke detectors and fire extinguishers?
    Test smoke and carbon monoxide detectors monthly and replace batteries at least once a year. Fire extinguishers should be inspected annually and replaced or recharged as needed.

  6. What should I tell guests or renters about fire safety?
    Provide guests with:

    • A clear fire escape plan.
    • Instructions on using fire extinguishers.
    • Emergency contact numbers.
    • Rules about using fireplaces, grills, or candles.
    • A reminder to never leave cooking unattended.
  7. Are there any outdoor fire safety tips I should follow?
    Yes. Keep grills and fire pits at least 10 feet away from the home and flammable materials. Always extinguish fires completely before leaving them unattended. Follow local fire regulations, especially during dry seasons.

  8. What should I do if a fire breaks out while the home is occupied?
    Ensure everyone evacuates immediately and call emergency services. Do not attempt to fight large fires yourself. Have a designated meeting point outside and never re-enter the home until it is declared safe.

  9. Can smart home technology help with fire safety?
    Yes. Smart smoke detectors, remote monitoring systems, and smart plugs can alert you to potential fire hazards even when you’re away. These tools can enhance safety and provide peace of mind.

  10. Where can I find more resources on fire safety?
    Check with your local fire department, the National Fire Protection Association (NFPA), or the U.S. Fire Administration for up-to-date fire safety guidelines and resources.

By following these tips and staying informed, you can help ensure your vacation home remains safe and secure year-round.

How to Detect Water Damage Under Flooring

Water damage can be a silent destroyer, especially when it occurs beneath your flooring. Left undetected, it can lead to structural issues, mold growth, and costly repairs. At Projekt Property Restoration, we understand how crucial early detection is. Whether you’re a homeowner, business owner, or property manager, knowing how to detect water damage under flooring can save you time, money, and stress.

Why Early Detection Matters

Hidden water damage can compromise the integrity of your floors and subfloors. It often results from plumbing leaks, appliance malfunctions, or flooding. If not addressed promptly, it can escalate into more severe issues requiring extensive reconstruction services or even mold remediation. Early detection helps mitigate damage and ensures faster recovery through professional restoration services.

Common Signs of Water Damage Under Flooring

  • Warping or Buckling: Floors that appear uneven or have lifted edges may indicate moisture beneath the surface.
  • Discoloration: Dark spots or stains on hardwood or laminate flooring can be a red flag.
  • Soft or Spongy Feel: If your floor feels soft when you walk on it, water may have compromised the subfloor.
  • Mold or Mildew Smell: A musty odor is often a sign of hidden moisture and potential mold growth.
  • Peeling or Cracking: Vinyl and tile flooring may peel or crack when water seeps underneath.

How to Confirm Hidden Water Damage

While visual cues are helpful, confirming water damage often requires professional tools and expertise. Moisture meters, infrared cameras, and thermal imaging can detect moisture levels without removing the flooring. At Projekt Property Restoration, our team uses advanced equipment to assess and address hidden damage efficiently.

What to Do If You Suspect Water Damage

Acting quickly is essential. Contact a trusted provider of water damage restoration like Projekt Property Restoration. Our licensed professionals offer 24/7 emergency service and same-day response to minimize damage and restore your property promptly.

We also provide comprehensive property restoration solutions, including fire damage restoration, biohazard clean up, and full reconstruction services. Our mission is to deliver fast, friendly, and professional restoration services with a focus on customer satisfaction.

Preventing Future Water Damage

Prevention is just as important as detection. Regular inspections, proper maintenance of plumbing systems, and immediate attention to leaks can help avoid future issues. Learn more about early detection in our guide on how to identify hidden water damage early.

Conclusion

Knowing how to detect water damage under flooring is vital for protecting your property. From subtle signs like discoloration to advanced detection tools, early action can prevent extensive damage and costly repairs. Trust the experts at Projekt Property Restoration to handle your restoration needs with care, speed, and professionalism.

If you suspect hidden water damage or need immediate assistance, don’t wait. Call us at 855-933-7935 or contact us today to restore your peace of mind and get your property back to normal—fast.

Mold Prevention in Homes with Poor Ventilation

Mold prevention in homes with poor ventilation is a critical concern for homeowners aiming to maintain a healthy indoor environment. Poor airflow can trap moisture, creating the perfect breeding ground for mold growth, which can lead to serious health issues and costly structural damage. At COMMITTED TO QUALITY SERVICE, we understand the urgency of addressing mold problems before they escalate. Our fast, friendly, and professional team is equipped with advanced tools and techniques to help you combat mold, especially in areas affected by water damage or fire damage. Whether you’re dealing with damp basements, musty odors, or visible mold patches, our water damage restoration services are designed to dry and restore your home efficiently. Don’t wait until mold becomes a bigger problem—call us now at 855-933-7935 to protect your home and your health.

Understanding the Link Between Poor Ventilation and Mold Growth

Poor ventilation is one of the most significant contributors to mold growth in residential environments. When airflow is restricted or stagnant, it creates the perfect breeding ground for mold spores to thrive. Mold requires three main elements to grow: moisture, organic material, and a lack of airflow. In homes with inadequate ventilation, moisture from daily activities such as cooking, showering, and even breathing accumulates in the air and settles on surfaces. Without proper air circulation to disperse this moisture, humidity levels rise, and condensation forms, especially in cooler areas like walls, ceilings, and windows. This persistent dampness provides the ideal conditions for mold colonies to develop and spread.

According to the Environmental Protection Agency (EPA), indoor humidity levels should be kept below 60 percent to prevent mold growth, ideally between 30 and 50 percent. However, in poorly ventilated homes, maintaining these levels becomes challenging. Areas such as basements, attics, bathrooms, and kitchens are particularly vulnerable due to their frequent exposure to moisture and often limited airflow. When these spaces lack exhaust fans, open windows, or mechanical ventilation systems, moisture becomes trapped, leading to the proliferation of mold.

"Mold can begin to grow within 24 to 48 hours in damp, poorly ventilated environments," warns the Centers for Disease Control and Prevention (CDC).

This rapid growth underscores the importance of addressing ventilation issues promptly. Mold not only damages the structural integrity of a home but also poses serious health risks. Prolonged exposure to mold spores can lead to respiratory problems, allergic reactions, and in severe cases, chronic illnesses. Individuals with asthma, allergies, or weakened immune systems are particularly susceptible to the adverse effects of mold exposure.

The link between poor ventilation and mold growth is further reinforced by numerous studies and real-world examples. For instance:

  1. A study published in the Journal of Environmental Health found that homes with inadequate ventilation had significantly higher mold spore counts compared to well-ventilated homes.
  2. In a case study conducted by the National Institute for Occupational Safety and Health (NIOSH), a family experienced recurring mold issues in their home due to blocked air vents and a malfunctioning HVAC system. Once the ventilation was improved, mold growth was significantly reduced.
  3. According to the World Health Organization (WHO), damp and moldy indoor environments increase the risk of respiratory infections and exacerbate asthma symptoms, particularly in children and the elderly.

In addition to health concerns, mold growth can lead to costly repairs. Mold can deteriorate drywall, wood, insulation, and even compromise the foundation of a home if left unchecked. Homeowners may find themselves facing extensive remediation efforts, which can be both time-consuming and expensive. Preventing mold through proper ventilation is not only a health imperative but also a financially sound decision.

To mitigate the risk of mold in poorly ventilated homes, it is essential to implement effective ventilation strategies. This includes installing exhaust fans in high-moisture areas, using dehumidifiers to control humidity levels, and ensuring that HVAC systems are functioning properly. Regular maintenance and inspections can help identify potential ventilation issues before they escalate into serious mold problems.

For homeowners dealing with existing mold issues, professional intervention is often necessary. Services like mold remediation are designed to safely and effectively remove mold while addressing the underlying causes, such as poor ventilation. At Projekt Restoration, our team of experts provides comprehensive solutions tailored to each home’s unique needs, ensuring long-term protection against mold recurrence.

Understanding the role of ventilation in mold prevention also involves recognizing the signs of inadequate airflow. These may include persistent musty odors, condensation on windows, peeling paint, and visible mold growth. If you notice any of these indicators, it may be time to consult with a professional. Learn more about our services to see how we can help improve your home’s air quality and prevent mold.

Moreover, homeowners can benefit from educational resources that provide guidance on identifying and addressing hidden moisture issues. For example, our guide on how to identify hidden water damage early offers practical tips for spotting moisture problems before they lead to mold growth.

For further reading and authoritative information on mold and ventilation, consider the following external resources:

  1. EPA – Mold Resources: Offers comprehensive information on mold prevention, cleanup, and health effects.
  2. CDC – Mold: Provides health-related information and guidelines for mold exposure and prevention.
  3. WHO – Household Air Pollution and Health: Discusses the impact of indoor air quality on health, including mold-related issues.

In conclusion, the connection between poor ventilation and mold growth is undeniable. Without adequate airflow, moisture accumulates, creating an environment where mold can flourish. By understanding this relationship and taking proactive steps to improve ventilation, homeowners can protect their health, preserve their property, and avoid the costly consequences of mold infestation. Whether through DIY improvements or professional assistance, addressing ventilation issues is a critical component of effective mold prevention. For more information about our approach and commitment to healthy homes, visit our about page or reach out via our contact form.

Common Signs of Mold in Poorly Ventilated Homes

Mold growth in homes with poor ventilation is a common yet often overlooked issue that can lead to serious health and structural problems. Recognizing the early signs of mold is crucial for homeowners to take timely action and prevent further damage. One of the most noticeable indicators is a persistent musty or earthy odor, especially in areas like basements, bathrooms, or closets where airflow is limited. This smell is often the first sign of mold, even before any visible growth appears. Another common symptom is the appearance of dark spots or discoloration on walls, ceilings, or around windows. These patches may be black, green, or brown and can spread quickly if not addressed. In poorly ventilated homes, condensation on windows and walls is frequent, creating a moist environment that encourages mold development.

Peeling paint or wallpaper is another red flag. When moisture gets trapped behind surfaces, it can cause adhesives to fail, leading to bubbling or flaking. This is particularly common in bathrooms and kitchens where steam and humidity are prevalent. Additionally, warped or buckling walls and floors may indicate hidden mold growth due to prolonged exposure to moisture. In some cases, mold can grow behind drywall or under flooring, making it difficult to detect without professional inspection. If you notice any of these signs, it is advisable to consult experts in mold remediation to assess the extent of the problem and recommend appropriate solutions.

Health symptoms among residents can also signal mold presence. Individuals may experience unexplained allergic reactions such as sneezing, coughing, skin rashes, or eye irritation. Those with asthma or respiratory conditions might notice worsening symptoms when at home. Children, the elderly, and individuals with compromised immune systems are particularly vulnerable to mold-related health issues. If multiple household members are experiencing similar symptoms that improve when they leave the house, mold could be the underlying cause. In such cases, it is essential to investigate further and consider professional evaluation.

Another subtle yet telling sign is the presence of water stains or discoloration on ceilings and walls. These stains often indicate a history of water intrusion, which, combined with poor ventilation, creates an ideal breeding ground for mold. Leaky roofs, plumbing issues, or past flooding incidents can leave behind moisture that lingers in hidden areas. Over time, this moisture can lead to mold colonies that compromise the structural integrity of your home. For more information on how water damage contributes to mold growth, visit our page on water damage.

In addition to visible and olfactory signs, mold can also affect your home’s indoor air quality. If you notice an increase in dust or a general feeling of stuffiness, it could be due to mold spores circulating through your HVAC system. These spores can settle in ducts and vents, spreading throughout the house and exacerbating health issues. Regular maintenance of your ventilation system and the use of air purifiers can help mitigate this risk. However, if the problem persists, it may be necessary to seek professional help to identify and eliminate the source of contamination.

Furniture and fabrics are also susceptible to mold in poorly ventilated homes. Upholstered furniture, curtains, and carpets can absorb moisture and become breeding grounds for mold. You might notice a damp feeling, discoloration, or a musty smell coming from these items. In severe cases, mold can cause irreversible damage, requiring replacement of affected materials. Regular cleaning and ensuring proper airflow can help prevent mold from taking hold in these areas.

It is also important to monitor areas that are often overlooked, such as attics, crawl spaces, and behind large appliances. These spaces are typically poorly ventilated and can harbor mold without immediate detection. Periodic inspections and the use of moisture meters can help identify potential issues before they escalate. If you are unsure about how to conduct these inspections, our team at Projekt Restoration offers a range of services designed to help homeowners maintain a healthy living environment.

Understanding the common signs of mold in poorly ventilated homes is the first step toward effective prevention and remediation. By staying vigilant and addressing issues promptly, you can protect your home and your health from the damaging effects of mold. For more insights and expert advice, explore our blog, where we share tips and solutions for maintaining a mold-free home.

Health Risks Associated with Indoor Mold

Exposure to indoor mold, especially in homes with poor ventilation, can pose significant health risks to occupants. Mold thrives in damp, humid environments, and when ventilation is inadequate, moisture accumulates, creating the perfect breeding ground for mold spores. These spores can become airborne and easily inhaled, leading to a range of health issues that vary in severity depending on the individual’s sensitivity, the type of mold present, and the duration of exposure. For many people, mold exposure can trigger allergic reactions such as sneezing, runny nose, red eyes, and skin rashes. Individuals with asthma or other respiratory conditions may experience worsened symptoms, including coughing, wheezing, and shortness of breath. In more severe cases, prolonged exposure to mold can lead to chronic respiratory illnesses and even lung infections, particularly in individuals with weakened immune systems.

Children, the elderly, and those with pre-existing health conditions are especially vulnerable to the effects of indoor mold. In children, mold exposure has been linked to the development of asthma and other respiratory conditions. For the elderly, whose immune systems may not be as robust, mold can exacerbate existing health problems and lead to more serious complications. People with compromised immune systems, such as those undergoing chemotherapy or living with autoimmune diseases, are at an increased risk of developing fungal infections from mold exposure. These infections can be difficult to treat and may require medical intervention.

One of the most concerning aspects of indoor mold is that it often goes unnoticed until health symptoms become apparent. Mold can grow behind walls, under flooring, and in other hidden areas, making it difficult to detect without a thorough inspection. This is particularly problematic in homes with poor ventilation, where moisture can accumulate in concealed spaces. As a result, residents may suffer from unexplained health issues for extended periods before realizing that mold is the underlying cause. Understanding how to identify the signs of mold and taking proactive steps to improve ventilation and reduce moisture levels is crucial in preventing these health risks.

In addition to respiratory problems, mold exposure can also affect mental health and cognitive function. Some studies have suggested a link between mold exposure and symptoms such as fatigue, difficulty concentrating, and mood swings. These symptoms can significantly impact daily life and overall well-being, especially when the source of the problem remains unidentified. The presence of mold in a home can also contribute to stress and anxiety, particularly when it affects the health of loved ones or leads to costly repairs.

To mitigate the health risks associated with indoor mold, it is essential to address the root causes of moisture buildup and poor ventilation. Regular maintenance, prompt repair of leaks, and the use of dehumidifiers can help control humidity levels and prevent mold growth. In cases where mold is already present, professional remediation may be necessary to ensure that it is thoroughly removed and does not return. Homeowners can learn more about effective solutions by exploring the range of services offered by mold remediation experts.

Education is also a key component in preventing mold-related health issues. By understanding the conditions that promote mold growth and recognizing the early signs of contamination, homeowners can take swift action to protect their health and property. Resources such as the blog provide valuable insights and tips on maintaining a mold-free home, especially in environments where ventilation is a challenge. Additionally, consulting with professionals who specialize in mold remediation can provide peace of mind and ensure that the problem is handled safely and effectively.

Ultimately, the health risks associated with indoor mold underscore the importance of proactive prevention and timely intervention. Poor ventilation not only contributes to mold growth but also exacerbates its impact on indoor air quality and occupant health. By prioritizing ventilation improvements and staying informed about mold prevention strategies, homeowners can create a safer, healthier living environment for themselves and their families.

Areas Most Vulnerable to Mold in Low-Airflow Homes

In homes with poor ventilation, certain areas are significantly more prone to mold growth due to the accumulation of moisture and lack of adequate air circulation. Understanding these vulnerable zones is essential for effective mold prevention and maintaining a healthy indoor environment. One of the most common areas where mold thrives is the bathroom. Due to frequent water usage, steam from hot showers, and often inadequate exhaust systems, bathrooms can become a breeding ground for mold, especially around tiles, ceilings, and behind toilets. Without proper airflow, the humidity lingers, creating an ideal environment for mold spores to settle and grow. Similarly, kitchens are another hotspot, particularly around sinks, under cabinets, and behind appliances like refrigerators and dishwashers. Cooking and washing dishes generate moisture, and if this moisture is not properly ventilated, it can lead to mold development in hidden crevices.

Basements are also highly susceptible to mold in homes with limited airflow. These areas are typically cooler and more humid, and they often lack windows or sufficient ventilation systems. Water intrusion from the foundation or plumbing leaks can go unnoticed, allowing mold to flourish behind walls, under carpets, or on stored items. Attics, though less frequently used, are another critical area to monitor. Poor ventilation in attics can trap heat and moisture, especially during seasonal changes, leading to condensation on wooden beams and insulation materials. Over time, this moisture buildup can result in significant mold infestations that may go undetected until they cause structural damage or health issues.

Closets and storage spaces, particularly those located on exterior walls or near plumbing lines, are also at risk. These areas often remain closed for long periods, limiting airflow and allowing humidity to accumulate. Mold can grow on clothing, shoes, and cardboard boxes, especially if these items are stored while damp or in contact with moisture-prone surfaces. Laundry rooms, due to the presence of washing machines and dryers, are another area where mold can easily develop. Leaks, spills, and steam from drying clothes can contribute to high humidity levels, and without proper ventilation, mold can form behind machines, on walls, and even in the machines themselves.

Windowsills and the areas around windows are also vulnerable, particularly in homes with single-pane windows or poor insulation. Condensation can form on the glass and drip onto the surrounding surfaces, creating a damp environment conducive to mold growth. Over time, this moisture can seep into the window frames and walls, leading to hidden mold problems. HVAC systems, including air ducts and vents, can also harbor mold if not properly maintained. In low-airflow homes, these systems may not effectively circulate air, allowing moisture to build up within the ducts. This not only spreads mold spores throughout the home but also compromises indoor air quality.

Understanding these high-risk areas is crucial for homeowners looking to prevent mold in poorly ventilated environments. Regular inspections, moisture control, and prompt repairs are key strategies for mitigating mold risks. For those seeking professional assistance, exploring restoration services can provide comprehensive solutions tailored to your home’s specific needs. Additionally, learning more about the company’s background through their about page can help homeowners choose a trusted partner in mold prevention and remediation. By staying informed and proactive, homeowners can protect their living spaces from the damaging effects of mold and ensure a healthier indoor environment.

How Humidity Contributes to Mold Problems

Humidity plays a critical role in the development and persistence of mold, especially in homes with poor ventilation. When indoor air retains excessive moisture, it creates an ideal environment for mold spores to thrive. Mold spores are naturally present in the air, but they only become problematic when they find the right conditions to grow—namely, moisture, warmth, and organic material. In homes where ventilation is limited, humidity levels can rise quickly due to everyday activities such as cooking, showering, and even breathing. Without proper airflow to carry the moisture out, it accumulates on surfaces like walls, ceilings, and floors, particularly in corners and hidden spaces. Over time, this trapped moisture seeps into porous materials such as drywall, wood, and insulation, creating a breeding ground for mold colonies.

The problem is exacerbated in areas like bathrooms, kitchens, basements, and laundry rooms, where water usage is high and ventilation is often inadequate. In these spaces, condensation can form on windows, tiles, and pipes, further increasing the risk of mold growth. High humidity not only accelerates mold development but also makes it more difficult to eliminate once it takes hold. Mold can begin to grow within 24 to 48 hours of moisture exposure, and without intervention, it can spread rapidly, compromising indoor air quality and posing health risks to occupants. Symptoms such as allergies, respiratory issues, and skin irritation are common in mold-affected homes, particularly for individuals with pre-existing conditions or weakened immune systems.

To prevent mold in poorly ventilated homes, it is essential to monitor and control indoor humidity levels. The ideal indoor humidity should be kept between 30 and 50 percent. This can be achieved through the use of dehumidifiers, exhaust fans, and air conditioning systems. Additionally, identifying and addressing sources of excess moisture—such as leaky pipes, roof leaks, or foundation cracks—is crucial. Homeowners should also be vigilant about signs of hidden water damage, which often go unnoticed until mold has already begun to grow. For more information on detecting these issues early, visit our guide on how to identify hidden water damage early.

In cases where mold has already developed, professional intervention may be necessary to ensure thorough removal and prevent recurrence. DIY methods often fail to address the root cause, allowing mold to return. A certified mold remediation service can assess the extent of the problem, remove contaminated materials, and implement strategies to reduce humidity and improve ventilation. Learn more about our expert solutions by exploring our services page. Understanding the relationship between humidity and mold is key to maintaining a healthy living environment, especially in homes where airflow is limited. By taking proactive steps to manage moisture and improve air circulation, homeowners can significantly reduce the risk of mold and protect their property and well-being.

The Role of Air Circulation in Mold Prevention

Air circulation plays a critical role in preventing mold growth, especially in homes with poor ventilation. Mold thrives in environments where moisture accumulates and air remains stagnant. Without proper airflow, areas such as basements, bathrooms, attics, and even closets can become breeding grounds for mold spores. These spores are microscopic and can settle on damp surfaces, leading to the development of mold colonies that not only damage property but also pose serious health risks. Ensuring consistent air movement throughout a home helps to regulate humidity levels, dry out damp areas, and disperse moisture that would otherwise linger and contribute to mold formation.

In homes with limited ventilation, the lack of fresh air exchange can cause indoor humidity to rise, particularly in regions with high external humidity or during activities like cooking, showering, or drying clothes indoors. When this moisture is not effectively removed, it settles on walls, ceilings, and other surfaces, creating ideal conditions for mold. Air circulation helps mitigate this by promoting evaporation and reducing the overall moisture content in the air. This is particularly important in enclosed spaces where natural airflow is minimal. Using fans, opening windows when possible, and installing exhaust systems in high-moisture areas are practical ways to enhance air movement and reduce the risk of mold.

Moreover, air circulation contributes to maintaining a balanced indoor climate. When air is allowed to flow freely, it helps distribute heat and moisture evenly, preventing the formation of cold spots where condensation can occur. These cold, damp areas are often the first places where mold begins to grow. In contrast, well-circulated air keeps surfaces dry and less hospitable to mold spores. This is especially vital in homes that have experienced water damage, as lingering moisture can remain hidden behind walls or under flooring. In such cases, professional assessment and intervention may be necessary. For more information on dealing with moisture-related issues, you can explore our water damage services.

In addition to mechanical solutions like dehumidifiers and HVAC systems, homeowners should also consider the layout and design of their living spaces. Furniture placed too close to walls can restrict airflow, trapping moisture and encouraging mold growth. Ensuring that air can circulate behind and around furniture, as well as keeping vents unblocked, can make a significant difference. Regular maintenance of ventilation systems is also crucial. Filters should be cleaned or replaced as needed to ensure optimal performance and air quality. In homes where mold has already taken hold, professional mold remediation may be required to fully eliminate the problem and prevent recurrence.

Understanding the importance of air circulation is a key step in maintaining a healthy indoor environment. It not only helps in mold prevention but also improves overall air quality, which is beneficial for individuals with allergies, asthma, or other respiratory conditions. By taking proactive measures to enhance airflow, homeowners can protect their property and the well-being of their families. For those seeking expert guidance or services related to mold and moisture control, our team is here to help. Learn more about our approach and commitment to quality by visiting our mission page.

Simple Ventilation Improvements to Reduce Mold Risk

Improving ventilation is one of the most effective and straightforward ways to reduce the risk of mold growth in homes with poor air circulation. Mold thrives in environments with excess moisture and limited airflow, making poorly ventilated spaces ideal breeding grounds. By implementing a few simple ventilation strategies, homeowners can significantly decrease humidity levels and create an environment that is less hospitable to mold. One of the first steps is to ensure that exhaust fans are installed and functioning properly in high-moisture areas such as bathrooms, kitchens, and laundry rooms. These fans help remove steam and moisture from the air, preventing it from settling on surfaces where mold can grow. It is also important to run these fans during and after activities that generate moisture, such as showering or cooking.

Another effective method is to open windows and doors when weather permits, allowing fresh air to circulate and stale, humid air to escape. Cross-ventilation, where air flows from one side of the home to the other, can be particularly beneficial. In homes where opening windows is not always feasible, using portable fans or installing trickle vents in window frames can help maintain airflow. Additionally, keeping interior doors open can promote better air movement throughout the house, reducing the chances of moisture buildup in isolated areas.

For homes with HVAC systems, regular maintenance is crucial. Dirty filters and blocked vents can restrict airflow, contributing to higher humidity levels. Replacing filters regularly and ensuring that vents are unobstructed can enhance the efficiency of the system and improve indoor air quality. In some cases, it may be beneficial to install a whole-house ventilation system or a heat recovery ventilator (HRV), which can provide continuous fresh air while conserving energy. These systems are especially useful in tightly sealed homes where natural ventilation is limited.

Basements and crawl spaces are particularly vulnerable to poor ventilation and mold growth. Installing vent fans or dehumidifiers in these areas can help control moisture levels. It is also advisable to check for any signs of water intrusion, such as damp walls or musty odors, and address them promptly. If water damage is suspected, professional inspection and repair may be necessary. Homeowners can learn more about identifying early signs of moisture issues by visiting our guide on how to identify hidden water damage early.

In addition to mechanical solutions, adopting good habits can also make a difference. Avoid drying clothes indoors, as this releases a significant amount of moisture into the air. Use lids when cooking to reduce steam, and wipe down wet surfaces promptly. Houseplants, while beneficial for air quality, can contribute to indoor humidity if overwatered, so it is important to manage them carefully.

For those seeking professional assistance, our team offers a range of services designed to address mold and moisture issues comprehensively. Whether you need an assessment of your current ventilation system or full-scale mold remediation, we are here to help. You can also learn more about our commitment to quality and customer satisfaction by visiting our about page.

By taking these simple yet effective steps to improve ventilation, homeowners can significantly reduce the risk of mold growth and create a healthier living environment. Consistent airflow not only helps control humidity but also enhances overall indoor air quality, making it a key component in long-term mold prevention strategies.

Using Dehumidifiers to Control Indoor Moisture

One of the most effective tools for managing indoor moisture in homes with poor ventilation is the use of dehumidifiers. These devices work by drawing in humid air, removing excess moisture, and releasing drier air back into the room. This process helps maintain a balanced humidity level, ideally between 30 to 50 percent, which is crucial for preventing mold growth. Mold thrives in damp environments, and without proper ventilation, moisture can accumulate quickly from everyday activities such as cooking, bathing, and even breathing. In such settings, dehumidifiers serve as a practical solution to reduce the risk of mold infestation by creating an environment that is less hospitable to mold spores.

Dehumidifiers come in various sizes and capacities, making them suitable for different areas of the home, from small bathrooms to large basements. For homes with persistent moisture problems, especially those located in humid climates or with structural issues that trap moisture, investing in a high-capacity dehumidifier can make a significant difference. These units can operate continuously and are often equipped with features like automatic shut-off, humidity sensors, and drainage options, which make them convenient and user-friendly. By consistently removing excess moisture from the air, dehumidifiers help protect not only the structural integrity of the home but also the health of its occupants, as mold exposure can lead to respiratory issues, allergies, and other health concerns.

In addition to using dehumidifiers, it is essential to identify and address the root causes of moisture buildup. This may include checking for leaks, improving insulation, and ensuring that appliances like dryers and exhaust fans are properly vented. For homeowners unsure about the extent of their moisture issues or the presence of mold, professional assessment and remediation services can provide peace of mind. Companies that specialize in mold remediation can evaluate the home, recommend appropriate solutions, and carry out necessary treatments to eliminate mold and prevent its return.

Moreover, integrating dehumidifiers into a broader moisture control strategy can enhance their effectiveness. This includes regular maintenance such as cleaning filters, emptying water tanks, and monitoring humidity levels with a hygrometer. Homeowners should also be aware of the signs of hidden water damage, such as musty odors, discoloration on walls or ceilings, and warped flooring. Early detection is key to preventing mold from spreading and causing extensive damage. For more information on identifying hidden issues, visit our guide on how to identify hidden water damage early.

Ultimately, while poor ventilation poses a significant challenge in mold prevention, the strategic use of dehumidifiers offers a reliable and efficient way to manage indoor humidity. When combined with proactive maintenance and professional support, dehumidifiers can play a vital role in maintaining a healthy, mold-free living environment. For those seeking expert advice or services tailored to their specific needs, exploring available services can be an excellent first step toward a safer and more comfortable home.

Importance of Regular Home Inspections for Mold

Regular home inspections play a critical role in preventing mold growth, especially in homes with poor ventilation. When airflow is restricted, moisture tends to accumulate in hidden corners, behind walls, under flooring, and in attics or basements. These damp environments create the perfect breeding ground for mold spores, which can spread rapidly and compromise both the structural integrity of a home and the health of its occupants. Conducting routine inspections allows homeowners to identify early signs of moisture buildup, leaks, or condensation issues before they escalate into serious mold infestations. This proactive approach is essential because mold often develops in areas that are not immediately visible, such as behind drywall or under carpets, making it difficult to detect without a thorough examination. Regular inspections can also help pinpoint the root causes of poor ventilation, such as blocked vents, malfunctioning HVAC systems, or inadequate exhaust fans in high-moisture areas like bathrooms and kitchens.

In addition to spotting early signs of mold, inspections can uncover other related issues like water damage, which often precedes mold growth. For example, a small leak in the roof or plumbing system might go unnoticed until it causes significant damage. By identifying these problems early, homeowners can take corrective action, such as improving ventilation or repairing leaks, to prevent mold from taking hold. This not only protects the home but also saves money in the long run by avoiding costly mold remediation and structural repairs. For those unsure about what to look for during an inspection, professional services are available to assist. Companies like Projekt Restoration offer comprehensive services that include mold assessments and moisture detection, ensuring that no area is overlooked.

Moreover, regular inspections are particularly important for individuals with allergies, asthma, or other respiratory conditions, as mold can significantly worsen these health issues. Mold spores can become airborne and circulate through the home, leading to symptoms such as coughing, sneezing, skin irritation, and even more severe respiratory problems. By identifying and addressing mold early, homeowners can maintain a healthier indoor environment. Additionally, inspections can serve as a valuable educational tool, helping homeowners understand the importance of proper ventilation and moisture control. This knowledge empowers them to make informed decisions about home maintenance and improvements that reduce the risk of mold growth.

For those living in areas prone to high humidity or frequent rainfall, the need for regular inspections becomes even more critical. Moisture from the outside can easily seep into homes with poor sealing or drainage, compounding the risk of mold. In such cases, it is advisable to schedule inspections seasonally or after major weather events to ensure that no water intrusion has occurred. Homeowners can also benefit from reviewing resources like the blog section of trusted restoration companies, which often provide tips and insights on maintaining a mold-free home. These resources can guide homeowners on best practices for ventilation, moisture control, and early detection techniques.

Ultimately, regular home inspections are a cornerstone of effective mold prevention in poorly ventilated homes. They provide a systematic way to monitor the condition of the property, identify potential risks, and implement timely solutions. Whether conducted by the homeowner or a professional, these inspections are an investment in the long-term health and safety of the household. By staying vigilant and informed, homeowners can significantly reduce the likelihood of mold problems and ensure a cleaner, safer living environment for themselves and their families.

Mold-Resistant Materials for Damp-Prone Areas

When dealing with homes that suffer from poor ventilation, one of the most effective strategies for mold prevention is the use of mold-resistant materials, especially in areas prone to dampness such as bathrooms, basements, kitchens, and laundry rooms. These materials are specifically designed to resist moisture absorption and inhibit mold growth, making them an essential component in maintaining a healthy indoor environment. Mold-resistant drywall, for example, is a popular choice for moisture-prone spaces. Unlike traditional drywall, it features a fiberglass mat instead of a paper facing, which significantly reduces the chances of mold colonization. Similarly, mold-resistant paints contain antimicrobial agents that create a protective barrier on walls and ceilings, preventing mold spores from taking hold even in high-humidity conditions.

Flooring options also play a critical role in mold prevention. Materials such as ceramic tile, vinyl, and sealed concrete are excellent choices because they do not absorb moisture and are easy to clean. In contrast, carpets and untreated wood can trap moisture and provide an ideal breeding ground for mold. For homeowners looking to renovate or build in areas with limited airflow, investing in mold-resistant insulation like closed-cell spray foam can further enhance protection. This type of insulation not only resists water but also acts as an air barrier, reducing the chances of condensation and mold growth within walls.

In addition to selecting the right materials, proper installation is crucial. Even the most mold-resistant products can fail if they are not installed correctly or if underlying moisture issues are not addressed. It is important to ensure that all joints are sealed, leaks are repaired, and vapor barriers are properly placed to prevent moisture intrusion. For those unsure about the best materials or installation practices, consulting with professionals who specialize in mold remediation can provide valuable guidance and peace of mind.

Moreover, integrating mold-resistant materials into your home is not just about immediate protection; it is also a long-term investment in the structural integrity and health of your living space. These materials help reduce the need for frequent repairs, lower the risk of health issues related to mold exposure, and can even enhance property value. Homeowners can explore more about the benefits and options available by visiting the services page, where detailed information on mold prevention and restoration solutions is provided.

Ultimately, the use of mold-resistant materials is a proactive step toward creating a safer, cleaner, and more resilient home environment. When combined with other preventive measures such as improving ventilation, controlling indoor humidity, and regular maintenance, these materials form a comprehensive defense against mold, especially in homes where airflow is limited.

Cleaning and Maintenance Tips to Prevent Mold

Maintaining a clean and well-kept home is one of the most effective strategies for preventing mold growth, especially in properties with poor ventilation. Mold thrives in damp, dark, and undisturbed areas, making regular cleaning and maintenance essential to keeping it at bay. One of the first steps in mold prevention is to establish a consistent cleaning routine. Focus on high-risk areas such as bathrooms, kitchens, basements, and laundry rooms, where moisture tends to accumulate. Use mold-inhibiting cleaners or natural alternatives like vinegar and baking soda to clean surfaces prone to dampness. Pay special attention to grout lines, tile surfaces, and corners where water may linger unnoticed. Regularly wiping down these areas can prevent mold spores from settling and multiplying.

In addition to surface cleaning, it is crucial to manage indoor humidity levels. Homes with poor ventilation often suffer from excess moisture, which creates an ideal environment for mold. Use dehumidifiers in areas where humidity is consistently high, and consider installing exhaust fans in bathrooms and kitchens to help expel moist air. If these options are not feasible, simply opening windows when weather permits can significantly improve air circulation. It is also helpful to keep furniture slightly away from walls to allow air to flow freely and prevent condensation buildup behind large items.

Routine maintenance of household systems plays a vital role in mold prevention. Check for leaks in plumbing, roofs, and windows, as even minor water intrusion can lead to significant mold problems over time. Inspect under sinks, around bathtubs, and behind appliances like washing machines and dishwashers. If you discover any signs of water damage, such as discoloration, warping, or a musty odor, address the issue immediately. For more detailed guidance on identifying hidden water issues, visit our page on how to identify hidden water damage early.

Another key aspect of mold prevention is the proper maintenance of HVAC systems. Air conditioning units and heating systems can harbor mold if not cleaned regularly. Replace filters as recommended by the manufacturer and schedule professional inspections to ensure the system is functioning efficiently. Clean air ducts and vents periodically to prevent mold spores from circulating throughout your home. Additionally, make sure that drip pans are emptied and cleaned to avoid standing water.

Clutter can also contribute to mold growth by restricting airflow and providing hidden spots for moisture to accumulate. Keep storage areas organized and avoid stacking items directly against walls. Use plastic bins instead of cardboard boxes, as cardboard can absorb moisture and become a breeding ground for mold. In closets and storage rooms, consider using moisture absorbers or silica gel packs to help control humidity.

When cleaning fabrics and upholstery, be mindful of moisture retention. Wash curtains, rugs, and bedding regularly, and ensure they are completely dry before placing them back in use. If carpets become wet, dry them thoroughly within 24 to 48 hours to prevent mold from developing. In cases where fabrics have been exposed to prolonged moisture, it may be necessary to replace them to avoid ongoing mold issues.

Outdoor maintenance is equally important in preventing indoor mold. Ensure that gutters and downspouts are clear of debris and direct water away from the foundation of your home. Poor drainage can lead to water seeping into basements or crawl spaces, which are particularly vulnerable to mold. Landscaping should also be designed to slope away from the house to prevent water accumulation near the structure.

In homes that have already experienced water damage, it is essential to take immediate action to prevent mold from taking hold. Dry affected areas as quickly as possible and consider professional help if the damage is extensive. For more information on how we can assist with such situations, explore our services page. Our team is equipped to handle water damage restoration and mold remediation with efficiency and care.

Education and awareness are also powerful tools in mold prevention. Homeowners should familiarize themselves with the signs of mold and understand the conditions that promote its growth. Regularly inspecting your home and staying proactive with cleaning and maintenance can make a significant difference. If you have questions or need expert advice, our FAQ section provides helpful insights into common concerns about mold and home maintenance.

By integrating these cleaning and maintenance practices into your routine, you can create a healthier living environment and significantly reduce the risk of mold in homes with poor ventilation. Prevention is always more cost-effective and less stressful than remediation, making it well worth the effort to stay vigilant and proactive.

DIY Mold Prevention Strategies for Homeowners

Homeowners dealing with poor ventilation often face the persistent challenge of mold growth, which can compromise both the structural integrity of a home and the health of its occupants. Fortunately, there are several effective do-it-yourself strategies that can help prevent mold from taking hold, even in environments where airflow is limited. The first step in mold prevention is understanding the conditions that allow it to thrive. Mold typically grows in damp, dark, and humid areas, making poorly ventilated spaces like basements, bathrooms, and attics especially vulnerable. To combat this, homeowners should focus on reducing indoor humidity levels. Using a dehumidifier is one of the most effective ways to maintain optimal humidity, ideally between 30 to 50 percent. These devices are especially useful in areas where natural ventilation is insufficient.

Another important strategy is to ensure that all areas of the home are kept clean and dry. Regularly inspect and clean areas prone to moisture, such as under sinks, around windows, and behind appliances. Any spills or leaks should be addressed immediately to prevent moisture from seeping into porous materials like drywall or wood. For homes with poor ventilation, it is also essential to improve air circulation wherever possible. This can be achieved by using fans, opening windows when weather permits, and keeping interior doors open to allow air to flow freely between rooms. In addition, installing exhaust fans in high-moisture areas such as bathrooms and kitchens can significantly reduce the risk of mold buildup.

Homeowners should also pay close attention to their HVAC systems. Dirty or clogged filters can restrict airflow and contribute to moisture accumulation. Replacing filters regularly and scheduling routine maintenance can help ensure that the system is functioning efficiently. Additionally, consider using mold-resistant products during home renovations or repairs. Mold-resistant drywall, paint, and insulation can provide an added layer of protection in areas that are difficult to ventilate properly.

Monitoring for signs of hidden water damage is another crucial aspect of mold prevention. Water stains, peeling paint, and musty odors can all indicate the presence of moisture behind walls or under flooring. Early detection is key to preventing mold from spreading. For more information on identifying these issues, homeowners can refer to resources like this guide on how to identify hidden water damage early. In addition to visual inspections, using moisture meters can help detect dampness in walls and floors that may not be visible to the naked eye.

Proper insulation is another DIY measure that can help regulate indoor temperatures and reduce condensation, which often leads to mold growth. Insulating pipes, walls, and windows can prevent warm, moist air from coming into contact with cooler surfaces, thereby minimizing the risk of condensation. Moreover, sealing gaps and cracks around windows, doors, and foundations can prevent moisture from entering the home, especially during rainy or humid weather.

It is also important to manage outdoor factors that can contribute to indoor mold problems. Ensure that gutters and downspouts are clean and functioning properly to direct water away from the foundation. Landscaping should slope away from the house to prevent water from pooling near the base. Additionally, avoid placing firewood or other organic materials too close to the home, as these can retain moisture and promote mold growth.

For homeowners who are unsure about the effectiveness of their DIY efforts or who suspect a more serious mold issue, consulting with professionals can provide peace of mind. Services like mold remediation are designed to thoroughly assess and address mold problems, ensuring that the home remains safe and healthy. Understanding when to seek professional help is just as important as implementing preventive measures.

Staying informed is a key part of successful mold prevention. Homeowners can benefit from exploring educational resources and expert advice available through platforms like the blog, which offers tips, insights, and updates on best practices for maintaining a mold-free home. By combining proactive DIY strategies with ongoing education and, when necessary, professional support, homeowners can effectively manage mold risks even in homes with poor ventilation. Taking these steps not only protects the property but also promotes a healthier living environment for everyone inside.

When to Call a Professional for Mold Remediation

In homes with poor ventilation, mold growth can escalate quickly from a minor nuisance to a serious health and structural concern. While small patches of mold on non-porous surfaces can often be handled with household cleaning solutions and improved airflow, there are situations where calling a professional for mold remediation becomes not just advisable but essential. One of the most critical indicators is the size of the affected area. According to environmental health guidelines, if mold covers an area larger than ten square feet, professional intervention is strongly recommended. This is because larger infestations often signal deeper issues such as hidden moisture sources or structural damage that require specialized equipment and expertise to address effectively. Additionally, if mold returns repeatedly after cleaning, it may indicate an unresolved moisture problem or hidden mold colonies behind walls, under flooring, or within HVAC systems. In such cases, professionals can conduct a thorough inspection using advanced tools like moisture meters and infrared cameras to locate and eliminate the root cause.

Another key reason to seek professional help is when mold is found in areas that are difficult to access or clean thoroughly, such as inside walls, attics, crawl spaces, or ductwork. These locations often require containment procedures to prevent spores from spreading during removal, as well as the use of HEPA filtration systems to ensure air quality is maintained. Moreover, if anyone in the household is experiencing persistent allergy symptoms, respiratory issues, or other health problems that may be linked to mold exposure, it is crucial to involve experts who can safely remove the contamination and restore a healthy living environment. Professionals not only remove visible mold but also treat affected areas with antimicrobial solutions to prevent regrowth and provide guidance on how to maintain proper ventilation and humidity levels moving forward.

In homes that have experienced water damage due to leaks, flooding, or high humidity, mold can develop within 24 to 48 hours. If you suspect mold following such an event, especially in a poorly ventilated home, it is wise to consult a remediation specialist. These experts can assess the extent of the damage and determine whether structural drying or material replacement is necessary. For more information on how water issues contribute to mold growth, you can explore our detailed guide on how to identify hidden water damage early. Additionally, if you are unsure about the severity of your mold problem or what steps to take next, visiting our FAQ page can provide helpful insights and answers to common questions.

Ultimately, professional mold remediation ensures that the problem is addressed comprehensively and safely, reducing the risk of recurrence and protecting both your property and your health. Whether you are dealing with a recent water incident or ongoing ventilation issues, timely intervention by trained specialists can make all the difference in maintaining a mold-free home.

Long-Term Solutions for Improving Home Ventilation

Improving home ventilation is a critical step in preventing mold growth, especially in properties that have historically suffered from poor air circulation. Long-term solutions focus on creating a consistent and balanced airflow throughout the home, which helps control humidity levels and reduces the likelihood of mold spores settling and multiplying. One of the most effective strategies is the installation of a whole-house ventilation system. These systems, such as heat recovery ventilators (HRVs) or energy recovery ventilators (ERVs), work by exchanging stale indoor air with fresh outdoor air while maintaining energy efficiency. This not only improves air quality but also helps regulate moisture levels, making it harder for mold to thrive. Another long-term approach involves upgrading insulation and sealing air leaks. Proper insulation prevents condensation from forming on walls and ceilings, while sealing leaks around windows, doors, and ductwork ensures that conditioned air stays inside and moisture-laden air stays out. Homeowners should also consider installing exhaust fans in high-moisture areas like bathrooms, kitchens, and laundry rooms. These fans should be vented to the outside, not just into the attic or crawlspace, to effectively remove humid air from the home.

Additionally, maintaining HVAC systems is essential for long-term ventilation improvement. Regularly changing filters, cleaning ducts, and scheduling professional inspections can keep the system running efficiently and prevent the buildup of dust and moisture that can contribute to mold growth. Smart home technology can also play a role in long-term ventilation solutions. Humidity sensors and automated ventilation controls can monitor indoor conditions and adjust airflow as needed, ensuring that the home remains within a safe humidity range. For homes that have already experienced mold issues, it is crucial to address the root causes through professional assessment and remediation. Services like mold remediation not only remove existing mold but also identify areas where ventilation improvements are necessary to prevent recurrence.

Incorporating natural ventilation strategies can also be beneficial. This includes using operable windows, vents, and skylights to promote cross-ventilation, especially during mild weather. Landscaping can even play a role; planting trees or shrubs strategically can help shade the home and reduce indoor humidity levels. For those unsure where to start, consulting with experts who specialize in home restoration and environmental control is a wise step. Companies that offer comprehensive services can evaluate the specific needs of a property and recommend tailored solutions that address both immediate concerns and long-term air quality goals. Understanding the science behind airflow and moisture control is key to making informed decisions. Resources such as the company’s blog can provide valuable insights into best practices and emerging technologies in home ventilation.

Ultimately, investing in long-term ventilation improvements not only protects against mold but also enhances overall indoor air quality, energy efficiency, and occupant comfort. These upgrades can increase property value and reduce the risk of costly repairs down the line. By taking a proactive approach and implementing sustainable solutions, homeowners can create a healthier living environment that stands the test of time.

Sure! Here’s a suitable FAQ section for a blog topic on "Mold Prevention in Homes with Poor Ventilation," incorporating relevant information:

Frequently Asked Questions (FAQ)

  1. Why is poor ventilation a problem for mold growth?
    Poor ventilation traps moisture and humid air inside your home, creating the perfect environment for mold to thrive. Without proper airflow, damp areas like bathrooms, kitchens, and basements can stay wet for extended periods, encouraging mold spores to grow and spread.

  2. What are the signs of mold in a poorly ventilated home?
    Common signs include a musty odor, visible mold spots on walls or ceilings, condensation on windows, peeling paint or wallpaper, and increased allergy symptoms like sneezing, coughing, or itchy eyes.

  3. How can I prevent mold if my home has poor ventilation?
    To prevent mold in poorly ventilated areas:

    • Use exhaust fans in bathrooms and kitchens.
    • Open windows when weather permits to improve airflow.
    • Use dehumidifiers to reduce indoor humidity levels.
    • Fix leaks and water damage promptly.
    • Clean and dry damp areas regularly.
  4. What humidity level should I maintain to prevent mold?
    Keep indoor humidity levels between 30% and 50%. You can use a hygrometer to monitor humidity and run a dehumidifier if levels are too high.

  5. Can houseplants contribute to mold in poorly ventilated homes?
    Yes, overwatering houseplants or placing too many in a small, poorly ventilated space can increase humidity and promote mold growth. Make sure to water plants appropriately and ensure good air circulation around them.

  6. Is it safe to clean mold myself?
    Small areas of mold (less than 10 square feet) can usually be cleaned safely using soap and water or a mixture of vinegar and water. Always wear gloves and a mask. For larger infestations or if you have health concerns, it’s best to consult a professional mold remediation service.

  7. What are the best materials to use in mold-prone areas?
    Use mold-resistant paint, drywall, and insulation in areas prone to moisture. Avoid carpeting in bathrooms or basements, and opt for tile or vinyl flooring instead.

  8. How often should I check for mold in a poorly ventilated home?
    Inspect high-risk areas like bathrooms, basements, and around windows at least once a month. Regular maintenance and early detection are key to preventing serious mold problems.

  9. Can improving ventilation alone eliminate mold?
    Improving ventilation helps reduce moisture, which is a major factor in mold growth. However, existing mold must be cleaned and any underlying moisture issues (like leaks) must be addressed to fully eliminate the problem.

  10. When should I call a professional for mold issues?
    Call a professional if:

    • The mold covers a large area (more than 10 square feet).
    • You have recurring mold despite cleaning.
    • You or your family experience health symptoms related to mold exposure.
    • You’re unsure of the mold’s source or how to safely remove it.

This FAQ section can help readers better understand how to manage and prevent mold in homes with poor ventilation.

How to Prevent Fire Damage from Candles

Candles can create a cozy atmosphere, but did you know they’re also one of the leading causes of house fires in the U.S.? Learning how to prevent fire damage from candles is essential for every homeowner. At Projekt Property Restoration, we’ve seen firsthand how quickly a small flame can turn into a devastating loss. So, what steps can you take today to protect your home and loved ones from candle-related fire damage?

The answer is simple: awareness, placement, and proper extinguishing. This article covers the most effective ways to use candles safely, from choosing the right holders to keeping flammable items at a distance. We also share expert-backed tips from fire safety professionals and restoration specialists to help you avoid costly damage.

But that’s just the beginning. Fire safety expert John Hall, formerly of the National Fire Protection Association, emphasized that “candle fires are preventable with just a few smart habits.” Want to know what those habits are? Let’s dive into the essential guide to preventing fire damage from candles—before it’s too late.

Understanding the Risks of Candle Use

Candles may seem harmless, but they pose serious fire hazards when misused. Unattended flames top the list of causes. Placing candles near curtains, bedding, or paper increases the risk dramatically. Using unstable holders or placing candles on uneven surfaces can lead to tipping and ignition.

According to the National Fire Protection Association (NFPA), candles cause an average of 7,400 home fires annually. These incidents result in roughly 90 deaths, 670 injuries, and $291 million in property damage each year. Most of these fires occur during the evening hours when visibility is low and distractions are high.

The aftermath of a candle fire can be devastating. Beyond structural damage, families often face smoke contamination and water damage from firefighting efforts. Injuries from burns and smoke inhalation are common. In the worst cases, lives are lost.

To reduce your risk, always monitor open flames and keep them away from flammable items. For more tips on protecting your home, explore our blog or learn about our fire damage restoration services. Prevention starts with awareness and responsible use.

Choosing the Right Candles

Not all candles are created equal when it comes to fire safety. Paraffin candles, made from petroleum byproducts, burn hotter and produce more soot. Soy and beeswax candles, on the other hand, burn cleaner and at lower temperatures, reducing fire hazards. Choose candles with self-extinguishing wicks or those housed in sturdy glass containers. These features help prevent accidental fires if left unattended briefly.

Avoid candles with multiple wicks, as they generate excessive heat and increase the risk of container breakage. Steer clear of decorative elements like glitter, dried flowers, or plastic embellishments. These can ignite quickly and spread flames beyond control. Always place candles on heat-resistant surfaces away from flammable items.

For added safety, consider flameless LED alternatives that mimic real candlelight without the risk. If you’re unsure about safe usage, visit our FAQ page for expert guidance. You can also explore our services to learn how we handle fire prevention and restoration. Making informed choices today can help you avoid costly damage tomorrow.

Safe Candle Placement

Place candles on stable, heat-resistant surfaces that won’t tip or catch fire. Avoid setting them near curtains, bedding, or paper. These materials ignite quickly and can spread flames fast. Always keep a clear zone of at least 12 inches around any burning candle. This buffer helps prevent accidental fires from nearby objects.

Use sturdy candle holders designed to contain melted wax and resist heat. Flimsy holders can break or overheat, increasing fire risk. Never place candles on uneven or flammable surfaces like carpets or wooden shelves. Choose locations out of reach of pets and children to avoid accidental knocks.

Avoid placing candles near windows or vents where drafts can blow flames toward flammable items. For added safety, consider using hurricane lamps or glass enclosures. These barriers help contain the flame and reduce exposure to surrounding materials.

For more safety tips and expert advice, visit our blog. If you need help after a fire incident, explore our fire damage services. Prioritize safety and enjoy candles without the risk.

Candle Usage Best Practices

Always keep an eye on burning candles. Never leave them unattended, even for a short moment. Before leaving a room or heading to bed, extinguish all flames completely. Use long matches or lighters to light candles safely and avoid accidental burns. Keep candle wicks trimmed to ¼ inch before each use. This simple step helps reduce soot and prevents dangerously high flames.

Place candles on stable, heat-resistant surfaces away from flammable items. Avoid placing them near curtains, bedding, or paper. Ensure children and pets stay clear of lit candles at all times. For added safety, consider using candle holders that catch dripping wax and prevent tipping.

Practicing these habits significantly lowers the risk of fire damage. If you’re concerned about fire safety or past incidents, explore our fire damage solutions. Learn more about our expert restoration services designed to protect your home. Stay proactive and safe with every candle you light.

Alternatives to Traditional Candles

Flameless LED candles offer a safe, stylish alternative to traditional wax candles. They eliminate open flames, reducing fire risks significantly. These battery-powered options mimic the flicker of real flames without the danger. Many models include timers and remote controls for added convenience.

Electric diffusers also enhance ambiance while promoting relaxation. They disperse essential oils into the air, creating a soothing environment without heat or flame. Battery-operated string lights or lanterns can further elevate your space with soft, warm lighting.

While real candles provide a natural glow and scent, flameless versions offer peace of mind. They’re ideal for homes with pets, children, or elderly residents. Unlike wax candles, they don’t produce soot or require constant supervision.

Functionally, flameless options last longer and are reusable. Aesthetically, they now come in realistic designs that closely resemble traditional candles. For more safety tips, explore our blog or learn about our services to protect your home.

Choosing safer lighting alternatives doesn’t mean sacrificing style. It means prioritizing safety without compromising comfort.

Fire Safety Equipment and Preparedness

Install smoke detectors in every room where candles are used. Test them monthly and replace batteries twice a year. These devices offer early warnings that can save lives. Keep a fire extinguisher or fire blanket within easy reach. Store them in accessible locations, especially near living areas and bedrooms.

If a candle fire starts, act fast. Do not use water on wax fires. Instead, smother the flames with a fire blanket or a damp towel. If the fire spreads, evacuate immediately and call emergency services. Never try to fight a large fire alone.

Stay informed about fire safety by visiting our blog. You’ll find helpful tips and expert advice. For more details on how we can help after a fire, explore our fire damage services.

Preparedness is key. Equip your home with the right tools and knowledge. A few simple steps can prevent disaster.

Candle Safety Around Children and Pets

Children and pets are naturally curious, which makes open flames a serious hazard. A single moment of distraction can lead to disaster. Candles placed within reach can be knocked over easily, causing burns or fires. Pets may jump onto surfaces, while toddlers might grab anything that glows.

To reduce risks, always place candles on high, stable surfaces. Use sturdy holders that won’t tip over. Consider installing protective glass covers or hurricane lanterns to shield the flame. Never leave a candle unattended, especially in rooms where kids or animals play.

Safer alternatives can still create a cozy atmosphere. Battery-operated LED candles mimic real flames without the danger. Wax warmers and essential oil diffusers offer scent without fire. These options are ideal for homes with active children or curious pets.

For more fire prevention tips, explore our blog. If you’re dealing with past fire-related issues, our expert fire damage team can help restore your space safely. Prioritize safety without sacrificing comfort.

Seasonal and Holiday Candle Safety

The holiday season brings warmth, joy, and a noticeable spike in candle usage. Unfortunately, it also increases the risk of fire hazards. Decorative candles placed near flammable items like pine garlands or curtains can quickly turn festive scenes into dangerous situations. Always keep candles at least 12 inches away from anything that can burn. Never leave them unattended, especially during gatherings or while entertaining guests.

Place candles on stable, heat-resistant surfaces to prevent tipping. Avoid placing them near walkways or where children and pets can reach. Instead of traditional candles, consider using battery-operated alternatives. They offer the same cozy glow without the fire risk.

For added safety, install smoke detectors in rooms where candles are used. Regularly check their batteries. If you’re unsure about fire safety in your home, explore our services for professional guidance. You can also learn more about our commitment to safety on our mission page.

Stay safe this season by making smart choices. A little caution goes a long way in protecting your home and loved ones.

Creating a Candle Safety Plan

Start by creating a detailed checklist tailored to your home’s layout and candle usage habits. Include safe distances from flammable items, stable surfaces, and never leaving candles unattended. Review this list monthly to ensure consistency and safety.

Conduct regular audits of candle placement in each room. Look for hazards like curtains, paper, or clutter nearby. Adjust as needed to maintain a fire-safe environment. Use flameless alternatives in high-risk areas for added protection.

Involve every household member in safety discussions. Teach children and guests the importance of proper candle use. Assign responsibilities, such as checking extinguished flames before bedtime.

Keep your checklist visible in a common area. This reinforces habits and keeps safety top of mind. For more fire prevention tips, explore our blog or learn about our services designed to protect your home.

A proactive approach reduces risks and builds a culture of awareness. Don’t wait for an emergency to act. Make candle safety a shared priority in your household today.

Frequently Asked Questions (FAQs)

The safest candles for home use are flameless LED candles. They eliminate open flames, reducing fire risks significantly. In contrast, traditional wax candles—especially those with multiple wicks—pose higher hazards. Soy and beeswax candles burn cleaner and cooler than paraffin, making them slightly safer. Always choose candles in sturdy containers to prevent tipping.

Keep candles at least 12 inches away from anything flammable. This includes curtains, paper, bedding, and furniture. Never place candles near windows or vents where airflow can spread flames.

Never sleep with a candle burning. Unattended flames can quickly ignite nearby materials. Instead, use battery-powered lights or flashlights for nighttime ambiance.

If a candle tips and starts a fire, act fast. First, smother the flame with a metal lid or baking soda. Never use water—it can spread wax fires. Evacuate immediately if the fire grows, and call emergency services.

Scented candles may release harmful chemicals when burned. Fragrances and dyes can increase soot and respiratory irritation. Opt for unscented or naturally scented options.

Inspect candle holders regularly. Replace them if cracked, warped, or heat-damaged. Clean wax buildup to prevent instability.

During power outages, candles are risky. Use flashlights or lanterns instead. For more safety tips, visit our blog or explore our services.

Water Damage Risks from Clogged Drains

Ever walked into your bathroom or kitchen only to find water pooling where it shouldn’t be? That’s the silent scream of a clogged drain begging for attention. While it might seem like a minor inconvenience, clogged drains can lead to some serious water damage risks that could cost you thousands in repairs. In this article, we’ll dive deep into how clogged drains can wreak havoc on your property, and how professional restoration and restoration services can save the day.

COMMITTED TO QUALITY SERVICE

Call Us Now! 855-933-7935

Fast, Friendly and Professional Service.

Outline

  • How Clogged Drains Lead to Water Damage
  • Hidden Dangers of Water Damage
  • Why Professional Restoration Matters
  • Preventing Clogged Drains and Water Damage
  • Choosing the Right Restoration Partner

How Clogged Drains Lead to Water Damage

Let’s start with the basics. A clogged drain doesn’t just slow down your sink or shower—it can cause water to back up and overflow. This overflow can seep into your floors, walls, and even your foundation. Over time, this leads to structural damage, mold growth, and a whole lot of headaches.

When water has nowhere to go, it finds the path of least resistance—often into places it shouldn’t be. Think of it like a traffic jam in your plumbing system. The pressure builds, and eventually, something gives. That’s when you end up needing water damage restoration.

Clogged drains can be caused by a variety of things: hair, grease, food particles, or even tree roots invading your pipes. And once the damage starts, it doesn’t stop there. You might also need mold remediation or even reconstruction services if the damage is extensive.

So, what’s the takeaway? Don’t ignore a slow drain. It’s not just annoying—it’s a warning sign.

Hidden Dangers of Water Damage

Water damage is like an iceberg—what you see on the surface is only a fraction of the problem. Beneath your floors and behind your walls, water can be silently destroying your home. And the longer it goes unnoticed, the worse it gets.

One of the biggest risks? Mold. Mold thrives in damp, dark environments, and a clogged drain that causes water to pool is the perfect breeding ground. Once mold takes hold, it spreads quickly and can cause serious health issues, especially for those with allergies or respiratory problems. That’s why mold remediation is often a necessary step in the property restoration process.

But it doesn’t stop there. Water damage can also compromise the structural integrity of your home. Wooden beams can rot, drywall can crumble, and electrical systems can short-circuit. In some cases, you might even need reconstruction services to restore your home to its former glory.

And let’s not forget about the smell. Stagnant water and mold can create a musty odor that’s hard to get rid of. It’s like your house is crying for help—and trust me, your nose will notice.

Why Professional Restoration Matters

When disaster strikes, you don’t want to rely on DIY fixes or unqualified contractors. You need a team that knows what they’re doing. That’s where professional restoration comes in.

At Projekt Restoration, we specialize in water damage restoration, fire damage restoration, and biohazard clean up. Our team is trained to assess the damage, remove the water, dry the area, and restore your property to its original condition—or better.

We use state-of-the-art equipment designed specifically for drying structures that have suffered severe water damage. And because emergencies don’t wait for business hours, we offer emergency service 24/7. Whether it’s a burst pipe at midnight or a flooded basement on a Sunday, we’re just a phone call away.

Our goal? Customer satisfaction. We’re not just fixing your home—we’re restoring your peace of mind. And we do it all with a smile, because we know how stressful these situations can be.

Need help now? Call Us: 855-933-7935

Preventing Clogged Drains and Water Damage

They say an ounce of prevention is worth a pound of cure, and when it comes to clogged drains, that couldn’t be more true. The best way to avoid water damage is to stop it before it starts.

Here are a few simple tips:

  • Don’t pour grease down the drain—it solidifies and causes blockages.
  • Use drain screens to catch hair and food particles.
  • Flush your drains regularly with hot water and baking soda.
  • Schedule routine plumbing inspections to catch issues early.

And if you suspect hidden water damage, don’t wait. Check out our guide on how to identify hidden water damage early. It’s packed with tips to help you spot the signs before they become serious problems.

Remember, prevention isn’t just about protecting your home—it’s about protecting your health, your wallet, and your sanity.

Choosing the Right Restoration Partner

Not all restoration companies are created equal. When your home is on the line, you want a team that’s experienced, reliable, and committed to quality. That’s where we come in.

At Projekt Restoration, we’re more than just a service provider—we’re your partner in recovery. From the moment you call us, we’re with you every step of the way. We’ll walk you through how it works, answer all your questions, and make sure you’re comfortable with every decision.

Our services include:

We serve a wide range of areas—check out our serving areas to see if we’re in your neighborhood. And don’t forget to browse our gallery to see the transformations we’ve made for other happy clients.

Conclusion

Clogged drains might seem like a small issue, but they can lead to massive water damage if left unchecked. From mold growth to structural damage, the risks are real—and expensive. But with the right prevention strategies and a trusted professional restoration team by your side, you can protect your home and your peace of mind.

So next time your sink starts draining a little slower than usual, don’t brush it off. Take action, and if things get out of hand, remember—we’re just a phone call away.

COMMITTED TO QUALITY SERVICE

Call Us Now! 855-933-7935

Fast, Friendly and Professional Service.

Frequently Asked Questions

What are the first signs of water damage from a clogged drain?

Look out for slow drainage, water stains on walls or ceilings, musty odors, and warped flooring. These are early indicators that water is seeping into areas it shouldn’t be.

Can I fix water damage myself?

Minor issues might be manageable, but for significant damage, it’s best to call in professional restoration experts. DIY fixes often miss hidden problems that can worsen over time.

How quickly should I respond to water damage?

Immediately. The longer water sits, the more damage it causes. Fast action can prevent mold growth and reduce the need for reconstruction services.

Does insurance cover water damage from clogged drains?

It depends on your policy. Some cover sudden and accidental damage, but not gradual issues. It’s best to check with your provider and document everything.

Why choose Projekt Restoration for water damage restoration?

We offer 24/7 emergency service, use advanced equipment, and are committed to customer satisfaction. Plus, we handle everything from water damage to fire damage restoration and mold remediation.

How to Prevent Mold in Window Wells

Window wells are a great way to bring natural light into your basement and provide emergency exits. But when they’re not properly maintained, they can become a breeding ground for mold. And let’s be honest—mold is the last thing you want creeping into your home. It’s not just gross; it’s a health hazard that can lead to costly mold remediation and even structural damage.

In this article, we’ll walk you through everything you need to know about preventing mold in your window wells. From understanding the causes to implementing long-term solutions, we’ve got you covered. Plus, we’ll show you how Projekt Restoration can help with professional restoration services when things go sideways.

Table of Contents

  • Why Mold Grows in Window Wells
  • Early Signs of Mold Invasion
  • How to Prevent Mold in Window Wells
  • When to Call the Pros
  • Why Choose Projekt Restoration

Why Mold Grows in Window Wells

Let’s start with the basics. Mold loves moisture, darkness, and organic material. Guess what? Your window well checks all those boxes. When rainwater collects in the well and doesn’t drain properly, it creates a damp environment. Add in leaves, dirt, and other debris, and you’ve got a five-star resort for mold spores.

Improper drainage is the number one culprit. If your window well doesn’t have a functioning drain or if it’s clogged, water will sit there like a stagnant pond. Over time, that moisture can seep into your basement walls, leading to water damage and—you guessed it—mold.

Other contributing factors include:

  • Poorly sealed windows
  • Cracks in the foundation
  • High humidity levels in the basement

Once mold takes hold, it can spread quickly. That’s why it’s crucial to address the issue early with water damage restoration and mold remediation services.

Early Signs of Mold Invasion

So, how do you know if mold is starting to move in? The signs can be subtle at first, but they’re there if you know what to look for. Catching mold early can save you a ton of money and stress down the line.

Here are some red flags:

  • Musty Odor: That earthy, damp smell is a dead giveaway.
  • Discoloration: Look for black, green, or white spots on the window frame or walls.
  • Condensation: Excess moisture on the inside of the window can indicate poor ventilation.
  • Peeling Paint or Wallpaper: Moisture behind the walls can cause finishes to bubble and peel.

If you notice any of these signs, it’s time to take action. Don’t wait until it becomes a full-blown infestation. Reach out to a professional restoration company like Projekt Restoration for an inspection.

They offer emergency service and specialize in property restoration, including fire damage restoration and biohazard clean up.

How to Prevent Mold in Window Wells

Now that we know what causes mold and how to spot it, let’s talk prevention. Because let’s face it—an ounce of prevention is worth a pound of cure, especially when it comes to mold.

1. Install a Window Well Cover

This is your first line of defense. A clear, domed cover keeps out rain, snow, and debris while still letting in light. Make sure it’s securely fastened and fits snugly over the well.

2. Ensure Proper Drainage

Your window well should have a drain that connects to your home’s perimeter drainage system. If it doesn’t, consider installing one. And don’t forget to clean it regularly—leaves and dirt can clog it up fast.

3. Seal the Window Frame

Use waterproof caulk to seal any gaps around the window. This prevents water from sneaking in and causing damage. It’s a small step that can make a big difference.

4. Keep the Area Clean

Remove leaves, sticks, and other debris from the well regularly. Organic material is mold’s favorite snack, so don’t give it a buffet to feast on.

5. Monitor Humidity Levels

Use a dehumidifier in your basement to keep humidity below 50%. Mold thrives in moist environments, so keeping things dry is key.

Need help implementing these steps? Check out our blog for more DIY tips or contact us for reconstruction services if your window well needs a serious upgrade.

When to Call the Pros

Sometimes, despite your best efforts, mold still finds a way in. When that happens, it’s time to bring in the experts. DIY solutions can only go so far, especially if the mold has spread behind walls or into insulation.

Here’s when you should call a professional restoration company:

  • You see visible mold growth inside your home
  • You smell a persistent musty odor
  • Your basement has experienced flooding or leaks
  • You or your family members are experiencing allergy-like symptoms

At Projekt Restoration, we offer comprehensive mold remediation and water damage restoration services. Our team is trained to handle everything from minor mold issues to full-scale property restoration. We even offer emergency service for those unexpected disasters.

Why Choose Projekt Restoration

When it comes to mold, water, or fire damage, you don’t want to mess around. You need a team that’s fast, reliable, and knows what they’re doing. That’s where we come in.

COMMITTED TO QUALITY SERVICE

Call Us Now! 855-933-7935

Fast, Friendly and Professional Service.

Our Services:

  • Water Damage: Water Damage Restoration requires special equipment designed specifically for drying structures that have suffered severe water damage.
  • Fire Damage: The most crucial step in the fire restoration process is to quickly mitigate the affected area and recover as much as possible.
  • Mold Remediation: We use advanced techniques to safely remove mold and prevent it from coming back.
  • Biohazard Clean Up: Our team is trained to handle hazardous materials with care and professionalism.
  • Reconstruction Services: From drywall to flooring, we’ll restore your home to its original condition—or better.

We’re proud to serve communities across California. Check out our serving areas to see if we’re in your neighborhood. And don’t forget to read our mission statement—we’re all about customer satisfaction.

Conclusion

Mold in window wells might seem like a small issue, but it can quickly spiral into a major headache. The good news? With a little maintenance and the right know-how, you can keep mold at bay and your basement dry and healthy. And if things do go wrong, you’ve got a trusted partner in Projekt Restoration.

Remember, prevention is key—but when disaster strikes, we’re just a phone call away. Don’t wait until it’s too late. Protect your home, your health, and your peace of mind today.

Frequently Asked Questions

What causes mold to grow in window wells?

Mold thrives in damp, dark environments. Window wells often collect rainwater and debris, creating the perfect conditions for mold growth. Poor drainage and lack of maintenance are usually to blame.

How can I tell if there’s mold in my window well?

Look for signs like a musty odor, visible mold spots, condensation on windows, and peeling paint. If you notice any of these, it’s time to investigate further or call in the pros.

Can I remove mold from a window well myself?

Small patches of surface mold can sometimes be cleaned with household products, but deeper infestations require professional mold remediation to ensure it’s completely removed and doesn’t return.

How often should I clean my window wells?

It’s a good idea to check and clean your window wells at least twice a year—once in the spring and once in the fall. More often if you live in an area with heavy rainfall or lots of trees.

Why should I choose Projekt Restoration?

We offer fast, friendly, and professional restoration services backed by years of experience. From water and fire damage to mold and biohazard clean up, we’re committed to customer satisfaction and quality service every step of the way.

Fire Damage Hazards in Attic Wiring

When it comes to home safety, one of the most overlooked yet dangerous threats is fire damage hazards in attic wiring. Faulty or outdated electrical wiring in the attic can easily become a fire hazard, especially when exposed to insulation, dust, or pests. At COMMITTED TO QUALITY SERVICE, we understand the importance of protecting your home from potential fire risks. Our team offers fast, friendly, and professional fire damage restoration services designed to quickly mitigate affected areas and recover as much of your property as possible. Whether you’re dealing with the aftermath of a fire or want to prevent one, our experts are here to help. Call us now at 855-933-7935 for a thorough inspection and peace of mind. Don’t wait until it’s too late—ensure your attic wiring is safe and up to code with our trusted fire damage solutions.

Understanding the Risks of Attic Wiring

Attic wiring, while often overlooked, poses significant fire hazards that can lead to devastating consequences if not properly managed. The attic is a unique environment within a home or building—typically unconditioned, poorly ventilated, and often used for storage. These factors create a perfect storm for electrical issues to escalate into serious fire risks. Understanding the potential dangers associated with attic wiring is essential for homeowners, property managers, and restoration professionals alike.

One of the primary concerns with attic wiring is the age and condition of the electrical system. Many older homes still rely on outdated wiring methods such as knob-and-tube or aluminum wiring, which are not only inefficient but also prone to overheating and degradation over time. According to the National Fire Protection Association (NFPA), electrical failures or malfunctions were the second leading cause of U.S. home fires in 2022, accounting for approximately 13 percent of all reported home fires. These statistics underscore the importance of inspecting and updating attic wiring systems to meet modern safety standards.

Another significant risk factor is the presence of insulation materials in close proximity to electrical wiring. While insulation is essential for energy efficiency, it can also act as a fuel source in the event of an electrical short or spark. If wires are improperly installed or damaged—whether by rodents, moisture, or physical wear—the combination of heat and flammable insulation can quickly ignite a fire. This is particularly concerning in attics, where fires can spread rapidly and go undetected until significant damage has occurred.

“Electrical fires in attics are especially dangerous because they often start unnoticed and can spread quickly through the structure of the home,” warns the U.S. Fire Administration.

In addition to outdated wiring and insulation hazards, attics often house a variety of electrical components such as junction boxes, HVAC systems, and lighting fixtures. These components must be properly installed and maintained to prevent overheating and electrical arcing. Unfortunately, DIY electrical work or unlicensed installations are common in attics, increasing the likelihood of code violations and unsafe conditions. The Electrical Safety Foundation International (ESFI) emphasizes that all electrical work should be performed by licensed professionals to ensure compliance with local building codes and safety regulations.

Moisture is another hidden threat that can compromise attic wiring. Leaks from the roof or condensation from poor ventilation can corrode wires and connectors, leading to short circuits and increased fire risk. Homeowners should regularly inspect their attics for signs of water damage, such as discoloration, mold growth, or a musty odor. For more information on identifying moisture-related issues, visit our guide on how to identify hidden water damage early.

Rodent infestations also pose a serious threat to attic wiring. Mice, rats, and squirrels are known to chew through electrical wires, stripping away insulation and exposing live conductors. This not only increases the risk of fire but also creates potential shock hazards. Regular pest control and attic inspections can help mitigate this risk and ensure the integrity of your electrical system.

To illustrate the various risks associated with attic wiring, consider the following examples:

  1. A homeowner in California experienced a devastating attic fire caused by outdated knob-and-tube wiring that had deteriorated over decades. The fire spread rapidly through the insulation, resulting in extensive structural damage and costly repairs.
  2. In another case, a rodent infestation in a suburban home led to chewed electrical wires in the attic. The exposed wiring caused a short circuit, igniting nearby insulation and triggering a fire that required emergency restoration services.
  3. A poorly installed junction box in an attic HVAC system overheated due to loose connections. The resulting fire damaged the roof structure and required a full attic restoration, including electrical rewiring and insulation replacement.

These real-world scenarios highlight the importance of proactive maintenance and professional inspections. Homeowners should schedule regular electrical assessments, especially if their home is more than 20 years old or if they notice warning signs such as flickering lights, burning odors, or tripped circuit breakers.

Preventative measures can significantly reduce the risk of attic fires caused by faulty wiring. These include:

  • Replacing outdated wiring systems with modern, code-compliant alternatives
  • Ensuring all electrical work is performed by licensed electricians
  • Keeping insulation materials away from electrical components
  • Installing smoke detectors in attic spaces
  • Conducting routine inspections for signs of moisture, pests, or wear and tear

In the event of fire damage, it is crucial to act quickly to minimize further loss and begin the restoration process. Our team at Projekt Restoration specializes in comprehensive fire damage restoration services, including electrical system evaluations, structural repairs, and smoke odor removal. We understand the complexities of attic fires and are equipped to restore your property safely and efficiently.

For those seeking more information about our full range of services, including water damage restoration and mold remediation, please visit our services page. You can also learn more about our mission and commitment to safety and quality by exploring our our mission page.

In conclusion, attic wiring presents a unique set of fire hazards that demand attention and care. From outdated systems and insulation risks to moisture and rodent damage, the potential for disaster is real and often hidden from plain sight. By understanding these risks and taking proactive steps to address them, homeowners can protect their properties and loved ones from the devastating effects of attic fires. Regular inspections, professional electrical work, and timely restoration services are key components of a comprehensive fire prevention strategy.

Common Causes of Electrical Fires in Attics

Electrical fires in attics are a serious concern for homeowners, often resulting from a combination of aging infrastructure, improper installation, and environmental factors. One of the most common causes is outdated or deteriorating wiring. Many older homes still rely on knob-and-tube or aluminum wiring, which can degrade over time and become a significant fire hazard. These older systems were not designed to handle the electrical loads of modern appliances and electronics, leading to overheating and potential ignition. Another frequent issue is overloaded circuits. When too many devices or appliances draw power from a single circuit, it can cause the wiring to overheat, especially in areas like attics where heat tends to accumulate and ventilation is often poor.

Rodent activity is another hidden danger in attic spaces. Mice, rats, and squirrels often chew through electrical wires, stripping away the protective insulation and exposing live wires. This creates a high risk of short circuits and sparks, which can easily ignite surrounding insulation or wood framing. Additionally, improperly installed or DIY electrical work is a major contributor to attic fires. Homeowners or unlicensed contractors may attempt to install lighting, fans, or other electrical components without adhering to code requirements, resulting in loose connections, exposed wires, or inadequate grounding. These mistakes can go unnoticed for years until they trigger a fire.

Moisture intrusion is also a significant factor in attic electrical fires. Leaky roofs or condensation can lead to water exposure in electrical junction boxes or wiring, increasing the risk of short circuits. This is particularly dangerous because water and electricity are a volatile combination. If your attic has experienced any form of water damage, it is crucial to have it inspected by professionals. You can learn more about the risks and solutions related to this issue by visiting our page on water damage.

Another overlooked cause is the use of extension cords and temporary wiring in attic spaces. These are often used during renovations or to power equipment like fans or heaters. However, extension cords are not designed for permanent use and can easily overheat if covered by insulation or other materials. Furthermore, attic spaces are often used for storage, and placing boxes or other items on top of electrical wiring can damage the insulation and increase fire risk. The accumulation of flammable materials like cardboard, paper, and old clothing in close proximity to faulty wiring only exacerbates the danger.

Poor ventilation and high temperatures in attics can also contribute to electrical fires. Heat naturally rises, and without proper airflow, attic temperatures can soar, especially during summer months. This excessive heat can cause electrical components to degrade faster, increasing the likelihood of failure. In some cases, thermal expansion and contraction can loosen wire connections over time, creating arcing faults that may go undetected until a fire starts.

To mitigate these risks, it is essential to have your attic wiring inspected regularly by licensed professionals. Routine maintenance and timely upgrades can prevent many of the common issues that lead to electrical fires. If you are unsure about the condition of your attic wiring or have recently experienced any electrical issues, consider reaching out to a trusted restoration company. Learn more about our comprehensive services designed to address fire hazards and restore safety to your home.

Understanding the root causes of attic electrical fires is the first step in prevention. Whether it is aging wiring, rodent damage, moisture intrusion, or improper installations, each factor plays a critical role in the overall safety of your home. For more information on how we help homeowners protect their properties and recover from fire-related incidents, visit our about page to learn about our experience and commitment to safety. Taking proactive steps today can help you avoid the devastating consequences of an attic fire tomorrow.

How Overloaded Circuits Lead to Fire Hazards

One of the most common yet often overlooked causes of attic fires is overloaded electrical circuits. In many homes, the attic serves as a hub for electrical wiring that powers lighting, HVAC systems, and other essential components. Over time, as homeowners add more devices or upgrade their systems, the demand on these circuits can exceed their designed capacity. When a circuit is overloaded, it generates excessive heat, which can cause the insulation around wires to melt or degrade. This deterioration exposes the conductive metal inside, increasing the risk of sparks or electrical arcing. In the confined and often poorly ventilated space of an attic, these sparks can easily ignite surrounding materials such as wooden beams, insulation, or stored items, leading to a potentially devastating fire.

The risk is further compounded by the fact that attic wiring is frequently out of sight and out of mind. Homeowners may not realize that their electrical system is under strain until it is too late. Warning signs like flickering lights, tripped breakers, or a burning smell are often ignored or misattributed to less serious issues. Additionally, older homes may still rely on outdated wiring systems that are not equipped to handle modern electrical loads. These systems lack the safety features of newer installations, such as circuit breakers that automatically shut off power when an overload is detected. Without these safeguards, the chances of a fire increase significantly.

Another contributing factor is the improper use of extension cords and power strips in attics. These temporary solutions are often used to accommodate additional devices without upgrading the existing wiring. However, they are not designed for permanent use and can easily become overloaded themselves. When multiple high-wattage appliances are plugged into a single outlet or extension cord, the risk of overheating and fire escalates. Moreover, the heat generated by overloaded cords can go unnoticed in an attic, where regular inspections are rare.

Professional inspection and maintenance of attic wiring are essential to prevent these hazards. Licensed electricians can assess the load capacity of existing circuits and recommend upgrades or redistributions to balance the electrical load safely. They can also identify signs of wear and tear, corrosion, or rodent damage that may compromise the integrity of the wiring. For homeowners seeking comprehensive solutions, companies like Projekt Restoration offer a range of services that include fire damage restoration and preventative assessments to ensure your home remains safe.

In the unfortunate event that a fire does occur due to overloaded circuits, the aftermath can be both emotionally and financially draining. Fire damage in the attic can compromise the structural integrity of the entire home, destroy valuable possessions, and lead to costly repairs. Prompt and professional intervention is crucial. Understanding the root causes of such incidents can help homeowners take proactive steps to mitigate risks. For more information about how to protect your home and what to do in case of fire damage, visit our about page to learn more about our expertise and commitment to safety.

Regular maintenance, awareness of electrical load limits, and timely upgrades are key strategies in preventing attic fires caused by overloaded circuits. By staying informed and vigilant, homeowners can significantly reduce the risk of fire hazards and ensure the safety of their families and properties.

The Role of Rodents in Damaging Attic Wiring

Rodents are one of the most underestimated threats to attic wiring, yet their presence can significantly increase the risk of fire damage in residential and commercial properties. These small mammals, including rats, mice, and squirrels, are notorious for their gnawing behavior, which stems from their need to keep their constantly growing incisors in check. Unfortunately, this natural instinct often leads them to chew through electrical wires, insulation, and other critical components hidden within attic spaces. When rodents chew through wiring, they strip away the protective insulation, exposing the conductive metal underneath. This can result in short circuits, sparks, and even electrical fires, especially in older homes where wiring may already be outdated or compromised. The combination of exposed wires and the dry, often flammable materials found in attics—such as insulation, wood framing, and stored items—creates a perfect storm for fire hazards.

Rodents are particularly drawn to attics because these spaces provide warmth, shelter, and easy access to food sources. Once inside, they can quickly establish nests and reproduce, exacerbating the problem. Their nesting materials, which often include shredded paper, fabric, and insulation, are highly flammable and can easily ignite if placed near damaged wiring. Moreover, rodents are nocturnal creatures, meaning their destructive activities often go unnoticed until significant damage has already occurred. Homeowners may not realize there’s a problem until they experience flickering lights, power outages, or, in the worst-case scenario, a fire. Regular inspections and proactive maintenance are essential to detect early signs of rodent activity and prevent potential fire hazards. Telltale signs include droppings, gnawed materials, strange noises in the attic, and the smell of urine or nesting materials.

In addition to the physical damage they cause, rodents can also compromise the integrity of a home’s electrical system. Chewed wires can disrupt the flow of electricity, leading to overloaded circuits and increased resistance, both of which are common precursors to electrical fires. Furthermore, the presence of rodents can complicate insurance claims related to fire damage, as some policies may not cover damage caused by pests. This makes it even more critical for property owners to take preventive measures, such as sealing entry points, setting traps, and scheduling regular pest control services. For those who have already experienced fire damage due to rodent activity, professional restoration services are crucial for safely repairing and restoring the affected areas. Companies like Projekt Restoration offer comprehensive services that include fire damage restoration, electrical repairs, and attic cleanup to ensure your home is safe and secure.

Understanding the role of rodents in attic wiring damage also highlights the importance of integrated home maintenance. Addressing rodent infestations is not just a pest control issue—it is a critical component of fire prevention. Homeowners should consider working with professionals who can assess both the structural and electrical integrity of their attics. This includes evaluating the extent of rodent damage, replacing compromised wiring, and implementing long-term solutions to prevent future infestations. Additionally, educating oneself about the risks and solutions is vital. Resources such as the blog section on restoration websites can provide valuable insights into identifying early warning signs and taking proactive steps to protect your home.

In conclusion, rodents pose a serious and often overlooked threat to attic wiring, significantly increasing the risk of fire damage. Their gnawing habits can lead to exposed wires, short circuits, and ultimately, devastating fires. By recognizing the signs of rodent activity and taking swift action, homeowners can mitigate these risks and ensure the safety of their property. Regular inspections, professional pest control, and timely restoration services are key strategies in preventing rodent-related fire hazards. For more information on how to protect your home and address existing damage, consider exploring the about page of trusted restoration experts who specialize in comprehensive fire damage solutions.

Identifying Signs of Faulty Electrical Connections

Recognizing the early warning signs of faulty electrical connections in your attic is crucial for preventing fire damage hazards. Attics often contain a complex network of wires that may go unnoticed for years, especially in older homes or buildings with outdated electrical systems. One of the most common indicators of a problem is a persistent burning smell, often described as plastic or rubber overheating. This odor may be faint but should never be ignored, as it can signal that wires are overheating due to poor connections or overloading. Another red flag is flickering or dimming lights, which can occur when electrical current is interrupted or unstable. This inconsistency often points to loose wiring or corroded connections, both of which can generate heat and potentially ignite surrounding insulation or wood structures.

Discoloration around outlets or switches is another telltale sign. If you notice brown or black marks, it could mean that the wiring behind the wall is overheating. Similarly, outlets or switches that feel warm to the touch may indicate that the electrical load is too high or that the connection is deteriorating. In some cases, you might hear buzzing or crackling sounds coming from the attic or walls. These noises are often caused by arcing, a dangerous condition where electricity jumps between gaps in a connection, generating intense heat that can lead to fires. Tripped circuit breakers or blown fuses are also warning signs. While these safety features are designed to protect your home, frequent occurrences suggest that your electrical system is under stress and may have underlying issues that need immediate attention.

In addition to these physical signs, it’s important to consider the age and condition of your electrical wiring. Homes built several decades ago may still have aluminum wiring or knob-and-tube systems, both of which are more prone to faults and overheating. If your home falls into this category, a professional inspection is highly recommended. Regular maintenance and timely upgrades can significantly reduce the risk of fire damage in your attic. For those unsure about the condition of their attic wiring, consulting with a licensed electrician or a restoration expert can provide peace of mind and ensure your home is safe. You can learn more about the importance of professional assessments by visiting our services page.

Environmental factors can also contribute to faulty connections. Moisture from roof leaks or high humidity levels can corrode wires and connectors, increasing resistance and heat generation. This is especially concerning in attics, where ventilation may be limited. If your home has experienced water intrusion in the past, it’s essential to inspect the attic wiring for signs of corrosion or damage. For more information on how water can affect your home’s infrastructure, check out our guide on how to identify hidden water damage early. Rodents are another common issue in attics and can chew through insulation and wiring, creating exposed conductors that are highly flammable. If you notice droppings, nests, or gnawed materials, it’s wise to have your wiring inspected for safety.

Being proactive in identifying these signs can prevent devastating fire damage and costly repairs. Regular inspections, especially after severe weather events or renovations, can help detect issues before they escalate. Homeowners should also consider installing smoke detectors in attic spaces and using thermal imaging tools to detect hot spots in wiring. These preventive measures, combined with professional evaluations, can go a long way in safeguarding your home from the hidden dangers of faulty attic wiring.

The Dangers of DIY Electrical Work in Attics

Attempting electrical work in your attic without professional training can pose serious risks, especially when it comes to fire hazards. While DIY projects may seem like a cost-effective solution, the attic is one of the most dangerous places to handle electrical wiring due to its confined space, limited ventilation, and proximity to flammable materials such as insulation and wooden beams. Many homeowners underestimate the complexity of attic wiring, which often involves navigating outdated systems, overloaded circuits, and hidden junction boxes. Mistakes like improper wire splicing, using incorrect wire gauges, or failing to secure connections can easily lead to overheating and, ultimately, electrical fires. Moreover, attics often lack sufficient lighting and stable flooring, increasing the risk of physical injury while working. These unsafe conditions can lead to rushed or poorly executed repairs that may not meet local building codes or safety standards. Even a small error, such as leaving exposed wires or bypassing a ground connection, can have catastrophic consequences over time. In addition, many insurance policies may not cover damages caused by unlicensed electrical work, leaving homeowners financially vulnerable in the event of a fire. It is always advisable to consult a licensed electrician or a professional restoration company to assess and repair attic wiring safely. For those dealing with the aftermath of electrical issues, professional services like fire damage restoration are essential to ensure the safety and integrity of your home. If you are unsure about the condition of your attic wiring or need expert advice, consider reaching out through the contact page to schedule an inspection. Taking the proper precautions and relying on trained professionals can prevent devastating outcomes and protect your home from avoidable fire hazards.

Importance of Proper Insulation Around Wiring

Proper insulation around attic wiring plays a critical role in preventing fire damage and ensuring the overall safety of a home. In many cases, attic fires are caused by faulty or deteriorated wiring that has been left exposed or improperly insulated. The attic is often one of the most overlooked areas in a house when it comes to electrical safety, yet it contains a complex network of wires that power lighting, ventilation systems, and other essential components. When these wires are not adequately insulated, they become vulnerable to overheating, arcing, and short circuits, all of which are major contributors to electrical fires. The combination of high temperatures, flammable materials like insulation and wood framing, and poor ventilation in attics creates a perfect storm for fire hazards if wiring is not properly managed.

Insulation around wiring serves as a protective barrier that prevents electrical currents from coming into contact with combustible materials. It also helps maintain the integrity of the electrical system by reducing the risk of wear and tear caused by environmental factors such as moisture, pests, and temperature fluctuations. Inadequate or damaged insulation can lead to exposed wires, which may spark and ignite surrounding materials. This is especially dangerous in older homes where outdated wiring systems may not meet current safety standards. Homeowners should be aware that even minor issues, such as a small nick in the insulation or a loose connection, can escalate into a serious fire risk if not addressed promptly.

Another important aspect of proper insulation is its role in energy efficiency and system performance. Well-insulated wiring reduces energy loss and helps electrical systems operate more efficiently. This not only lowers utility bills but also minimizes the strain on electrical components, reducing the likelihood of overheating. In contrast, poorly insulated wiring can cause circuits to work harder, generating excess heat and increasing the risk of fire. For homeowners looking to enhance the safety and efficiency of their homes, investing in professional inspection and insulation of attic wiring is a wise decision.

In addition to preventing fire hazards, proper insulation also supports compliance with local building codes and safety regulations. Electrical codes are designed to ensure that wiring systems are installed and maintained in a way that minimizes risk. Failure to adhere to these codes can result in fines, insurance issues, and increased liability in the event of a fire. Professional electricians are trained to identify and correct insulation deficiencies, ensuring that all wiring meets the necessary safety standards. This is particularly important during renovations or when adding new electrical components to the attic, as improper modifications can compromise the entire system.

Homeowners should also be aware of the signs that indicate potential insulation problems in attic wiring. These include flickering lights, burning smells, discolored outlets, and frequent circuit breaker trips. If any of these symptoms are present, it is crucial to seek professional assistance immediately. Ignoring these warning signs can lead to devastating consequences, including total property loss and personal injury. Regular maintenance and inspections are key to identifying and resolving issues before they escalate. For those unsure about the condition of their attic wiring, consulting a trusted restoration and electrical service provider is essential.

At Projekt Restoration, we understand the importance of safeguarding your home from fire hazards associated with attic wiring. Our team of experienced professionals is equipped to assess, repair, and upgrade your electrical systems to ensure maximum safety and efficiency. Whether you are dealing with outdated wiring or planning a home renovation, we offer comprehensive services tailored to meet your specific needs. We also provide valuable resources and guidance through our blog, helping homeowners stay informed about best practices in home safety and maintenance.

In conclusion, proper insulation around attic wiring is not just a matter of energy efficiency or code compliance—it is a critical component of fire prevention and home safety. By ensuring that all wiring is adequately insulated and maintained, homeowners can significantly reduce the risk of electrical fires and protect their property and loved ones. Regular inspections, professional upgrades, and a proactive approach to electrical safety are essential steps in maintaining a secure and resilient home environment.

How Moisture and Heat Affect Electrical Safety

In attic spaces, the combination of moisture and heat poses a significant threat to electrical safety, especially when it comes to wiring systems. These environmental factors can accelerate the deterioration of electrical components, increasing the risk of short circuits, electrical fires, and long-term structural damage. Attics are often poorly ventilated and subject to extreme temperature fluctuations, particularly in warmer climates or during summer months. When heat builds up in these confined spaces, it can cause the insulation around electrical wires to degrade over time. This degradation reduces the insulation’s effectiveness, exposing the conductive metal inside and making it more susceptible to sparking or arcing, which can ignite surrounding materials such as wood, insulation, or stored items.

Moisture, whether from roof leaks, condensation, or high humidity, further compounds the risk. Water is a conductor of electricity, and when it infiltrates an attic, it can come into contact with exposed or damaged wiring. This interaction not only increases the likelihood of electrical shorts but also promotes corrosion of metal components. Corroded wires and connectors can lead to poor electrical conductivity, overheating, and eventual failure of the electrical system. In some cases, moisture can also lead to the growth of mold and mildew, which may not directly cause electrical fires but can compromise the integrity of insulation materials and wooden structures, creating an environment where fire can spread more easily.

The combination of heat and moisture can also affect junction boxes, circuit breakers, and other critical electrical components housed in the attic. These elements are designed to function within specific environmental parameters. When those parameters are exceeded due to excessive heat or moisture, the components may malfunction or fail entirely. For example, a circuit breaker exposed to high humidity might not trip properly during an overload, allowing excessive current to flow through the system unchecked. This failure can result in overheating and potentially ignite a fire.

Homeowners often overlook the attic when considering routine maintenance, yet it is one of the most vulnerable areas in terms of fire hazards due to electrical issues. Regular inspections and maintenance of attic wiring are essential to identify early signs of wear, corrosion, or moisture intrusion. Proper ventilation and insulation can help regulate temperature and humidity levels, reducing the stress on electrical systems. Additionally, ensuring that all electrical work is performed by licensed professionals can prevent the use of substandard materials or improper installation techniques that may not withstand the harsh attic environment.

In the event of water intrusion, whether from a storm or plumbing issue, it is crucial to address the problem promptly to prevent long-term damage. Water damage can be deceptive, often seeping into hidden areas and affecting wiring behind walls or under insulation. For more information on how to detect and manage such issues, visit our guide on how to identify hidden water damage early. If fire damage has already occurred, professional restoration services are necessary to ensure the safety and integrity of the home’s electrical system. Our team at Projekt Restoration specializes in comprehensive fire damage recovery, including electrical assessments and repairs.

Understanding the relationship between environmental conditions and electrical safety is key to preventing attic fires. By taking proactive steps to control moisture and heat, homeowners can significantly reduce the risk of electrical hazards. For those seeking more information about our approach and the services we offer, please explore our services page to learn how we can help protect your home from these hidden dangers.

Warning Signs of Electrical Problems in the Attic

Recognizing early warning signs of electrical problems in the attic is essential to preventing potential fire hazards and ensuring the safety of your home. Electrical issues in this often-overlooked space can go unnoticed for long periods, increasing the risk of fire damage due to faulty wiring, overloaded circuits, or deteriorating insulation. One of the most common indicators of trouble is a persistent burning smell, especially if it resembles melting plastic or rubber. This odor often signals overheating wires or electrical components, which can ignite surrounding insulation or wooden structures. Another red flag is flickering or dimming lights in the upper levels of your home, which may suggest unstable electrical connections or overloaded circuits originating in the attic. Additionally, if you hear unusual buzzing or crackling sounds coming from the attic, it could point to arcing wires or loose connections that pose a serious fire risk.

Discolored or scorched outlets and switch plates near the attic or in rooms directly below it can also be signs of underlying electrical issues. These marks often result from heat buildup due to faulty wiring or poor connections. Similarly, if your circuit breakers frequently trip or fuses blow without a clear cause, it may indicate that the electrical system in your attic is under stress or improperly configured. In older homes, outdated wiring such as knob-and-tube or aluminum wiring is particularly susceptible to wear and tear, making it more prone to overheating and sparking. Rodent activity in the attic can further exacerbate these risks, as pests often chew through insulation and wiring, exposing live wires and increasing the likelihood of electrical fires.

Homeowners should also be cautious of visible signs of wear on electrical cables, such as fraying, cracking, or exposed wires. These issues can result from age, environmental conditions, or physical damage and should be addressed immediately by a licensed electrician. Moisture intrusion is another critical factor to consider. If your attic has experienced leaks or high humidity, it can lead to corrosion of electrical components and increase the risk of short circuits. For more information on how moisture can affect your home’s safety, visit our detailed guide on how to identify hidden water damage early.

Regular inspections and maintenance are key to identifying these warning signs before they escalate into serious hazards. If you suspect any electrical issues in your attic, it is crucial to consult professionals who specialize in fire damage prevention and restoration. At Projekt Restoration, we offer comprehensive services designed to detect and resolve potential fire risks in your home’s wiring systems. Our team is trained to handle complex electrical assessments and provide tailored solutions that ensure your attic remains safe and compliant with current safety standards. To learn more about our commitment to safety and excellence, visit our our mission page. Taking proactive steps today can protect your home and loved ones from the devastating consequences of attic electrical fires.

Fire Safety Codes and Regulations for Attic Wiring

Ensuring compliance with fire safety codes and regulations is essential when dealing with attic wiring, as improper installations can significantly increase the risk of fire damage. Attics often house a complex network of electrical systems, including lighting, HVAC components, and sometimes outdated or overloaded circuits. These areas are particularly vulnerable due to limited accessibility, poor ventilation, and the presence of flammable insulation materials. To mitigate these risks, national and local building codes provide strict guidelines for the installation and maintenance of electrical wiring in attic spaces. The National Electrical Code (NEC), for instance, outlines specific requirements such as the use of non-combustible wiring materials, proper securing and support of cables, and the need for junction boxes to be easily accessible. Additionally, wires must be protected from physical damage and should not be in contact with insulation unless rated for such use. Local jurisdictions may impose even stricter rules, so it is crucial for homeowners and contractors to stay informed about regional regulations. Regular inspections by licensed electricians can help ensure that attic wiring meets all safety standards and is not compromised by age, pests, or environmental factors. For those dealing with older homes, rewiring may be necessary to bring the system up to code and reduce the risk of fire. It is also important to consider the role of fire-resistant materials and proper ventilation in enhancing attic safety. Homeowners seeking professional assistance can explore the range of services offered by certified restoration experts who specialize in fire prevention and damage control. Understanding and adhering to fire safety codes not only protects property but also ensures the safety of occupants. For more information about the company’s values and commitment to safety, visit the our mission page. Staying proactive with code compliance and routine maintenance is a key step in preventing attic fires and minimizing potential hazards.

Preventive Maintenance Tips for Attic Electrical Systems

Maintaining the safety and functionality of your attic’s electrical system is essential in preventing fire damage hazards. Attics are often overlooked when it comes to routine electrical inspections, yet they house critical wiring that can deteriorate over time due to heat, moisture, and rodent activity. Preventive maintenance begins with regular visual inspections. Homeowners should look for signs of frayed wires, discoloration around outlets or junction boxes, and any unusual odors that might indicate overheating. These early warning signs can help identify potential issues before they escalate into serious fire risks. Additionally, ensuring that all electrical connections are secure and that no wires are exposed or pinched by insulation or structural elements is crucial. Over time, insulation can shift or settle, potentially covering or compressing wiring, which may lead to overheating.

Another important aspect of attic electrical maintenance is keeping the area clean and free of debris. Dust and insulation particles can accumulate around electrical components, increasing the risk of ignition. It is advisable to keep storage items away from electrical panels and wiring to allow for proper ventilation and easy access during inspections. Homeowners should also be cautious when installing or modifying insulation, as improper installation can lead to contact with electrical wiring. Consulting a licensed electrician before making any changes in the attic is a wise step to ensure compliance with local building codes and safety standards.

Rodent activity is another common issue in attics that can compromise electrical safety. Rodents often chew on wires, stripping away the protective insulation and exposing live conductors. This not only increases the risk of short circuits but also creates a significant fire hazard. Regularly inspecting the attic for signs of rodent infestation, such as droppings or gnawed materials, and taking proactive pest control measures can help mitigate this risk. Sealing entry points and using rodent deterrents can further protect your attic wiring from damage.

Moisture is another hidden threat to attic electrical systems. Leaks from the roof or condensation buildup can lead to corrosion of electrical components and increase the likelihood of short circuits. It is essential to ensure that your attic is well-ventilated and that any signs of water intrusion are addressed promptly. Installing vapor barriers and using dehumidifiers can help control moisture levels. For more information on managing moisture-related issues, you can explore our detailed guide on how to identify hidden water damage early.

In addition to these physical inspections and preventive measures, it is also beneficial to schedule professional electrical evaluations periodically. Licensed electricians can use specialized tools to detect issues that may not be visible to the untrained eye, such as overloaded circuits or faulty connections. These evaluations are particularly important in older homes where wiring may not meet current safety standards. Upgrading outdated wiring and ensuring that the attic’s electrical system is properly grounded can significantly reduce the risk of fire.

Homeowners should also be aware of the electrical load in their attic. Overloading circuits with too many devices or high-wattage equipment can cause overheating and increase the risk of fire. It is important to understand the capacity of your electrical system and avoid plugging in more devices than it can handle. Using surge protectors and circuit breakers that are appropriate for the load can provide an additional layer of safety.

Education and awareness are key components of preventive maintenance. Homeowners should familiarize themselves with the layout and components of their attic’s electrical system. Knowing where the main shutoff switch is located and how to operate it in case of an emergency can be life-saving. Additionally, keeping a record of all electrical work done in the attic, including inspections, repairs, and upgrades, can help track the system’s condition over time and ensure that maintenance is performed regularly.

For those seeking professional assistance, our team at Projekt Restoration offers comprehensive services designed to enhance the safety and efficiency of your home’s electrical systems. We understand the unique challenges posed by attic environments and provide tailored solutions to address them effectively. Whether you need a routine inspection, an upgrade to your wiring, or emergency repairs, our experts are here to help.

Preventive maintenance is not just about avoiding costly repairs; it is about ensuring the safety of your home and loved ones. By taking proactive steps to maintain your attic’s electrical system, you can significantly reduce the risk of fire damage and enjoy greater peace of mind. If you have questions or need more information about our approach and values, please visit our our mission page to learn more about our commitment to safety and excellence.

When to Call a Licensed Electrician for an Inspection

Recognizing the right time to call a licensed electrician for an inspection is crucial when dealing with potential fire damage hazards in attic wiring. Attics are often overlooked spaces, yet they house critical electrical components that, if compromised, can pose serious safety risks. If you notice flickering lights, unusual burning smells, or hear buzzing sounds coming from the attic, these are immediate red flags that warrant professional attention. Additionally, if your home has recently experienced a fire, even a minor one, it is essential to have the attic wiring thoroughly inspected. Fire can cause hidden damage to electrical systems, including melted insulation, exposed wires, or weakened connections that may not be visible to the untrained eye. A licensed electrician has the expertise to identify these issues and ensure that all wiring meets current safety codes.

Another key moment to seek an inspection is after any water intrusion event, such as a roof leak or storm damage. Moisture can corrode electrical components and increase the risk of short circuits or electrical fires. If your attic has been exposed to water, it is wise to consult both a water damage specialist and an electrician to assess the full extent of the damage. You can learn more about how water can affect your home by visiting our page on water damage. Furthermore, if your home is older or you are planning renovations, an inspection can help determine whether the existing wiring can handle increased electrical loads or if it needs to be updated. This is particularly important in older homes where outdated wiring systems, such as knob-and-tube or aluminum wiring, are still in use.

Regular inspections are also recommended as part of routine home maintenance. Scheduling a professional evaluation every few years can help catch potential issues before they escalate into serious hazards. If you are unsure about the condition of your attic wiring or have never had it inspected, it is better to err on the side of caution. Our team at Projekt Restoration is committed to helping homeowners maintain safe and functional living environments. For more information about our range of services, visit our services page or explore our about section to learn more about our expertise and commitment to safety.

Upgrading Old Wiring to Meet Modern Safety Standards

Many older homes still rely on outdated electrical systems that were not designed to handle the demands of modern appliances and technology. This is particularly concerning in attics, where aging wiring can become a serious fire hazard. Over time, insulation on wires can degrade, connections may loosen, and circuits can become overloaded, all of which significantly increase the risk of electrical fires. In attics, where wiring is often hidden and exposed to fluctuating temperatures, these risks are even more pronounced. Upgrading old wiring is not just a matter of improving efficiency; it is a critical safety measure that can protect your home and family from devastating fire damage. Modern electrical codes require safer materials and installation practices that reduce the likelihood of short circuits, overheating, and other fire-starting conditions. For example, replacing knob-and-tube or aluminum wiring with modern copper wiring and installing ground fault circuit interrupters (GFCIs) can drastically reduce fire risks. Additionally, updated wiring systems are better equipped to handle the load from HVAC systems, lighting, and other attic-installed equipment. Homeowners should consider a professional inspection to assess the condition of their attic wiring and determine whether an upgrade is necessary. This proactive step not only enhances safety but can also increase property value and ensure compliance with insurance requirements. At Projekt Restoration, we understand the importance of electrical safety and offer comprehensive solutions tailored to your specific needs. Learn more about our range of services designed to protect your home from fire hazards. If you are unsure about the condition of your attic wiring or have experienced any signs of electrical issues such as flickering lights or burning smells, do not wait for a disaster to strike. Visit our contact page to schedule an inspection or consultation with our experienced team. Taking the initiative to upgrade your wiring today can prevent costly damage and ensure a safer living environment for years to come.

Creating a Fire-Safe Environment in Your Attic

Creating a fire-safe environment in your attic is a crucial step in protecting your home from potential fire damage hazards associated with faulty or outdated wiring. Attics are often overlooked spaces, yet they house critical components such as electrical wiring, insulation, and HVAC systems, all of which can contribute to fire risks if not properly maintained. One of the first steps in ensuring attic safety is conducting a thorough inspection of all electrical systems. This includes checking for frayed wires, overloaded circuits, and outdated electrical panels that may not meet current safety standards. Hiring a licensed electrician to perform these inspections can help identify hidden issues before they escalate into serious problems.

Proper insulation is another key factor in creating a fire-safe attic. Insulation materials should be non-combustible and installed in a way that does not come into direct contact with electrical wiring. Over time, insulation can shift or degrade, potentially exposing wires and increasing the risk of fire. Regularly inspecting and replacing insulation as needed can significantly reduce this hazard. Additionally, ensuring that ventilation systems are functioning correctly helps prevent the buildup of heat and moisture, which can also contribute to electrical malfunctions and fire risks.

Storage practices in the attic also play a role in fire prevention. Avoid storing flammable materials such as paint, gasoline, or old newspapers near electrical components. Clutter can obstruct airflow and make it difficult to detect early signs of electrical issues. Keeping the attic organized and free of unnecessary items not only improves safety but also makes it easier to perform routine inspections and maintenance.

Installing smoke detectors in the attic is a simple yet effective way to enhance fire safety. These devices provide early warnings in case of smoke or fire, allowing for quicker response times and potentially minimizing damage. It is important to test smoke detectors regularly and replace batteries at least once a year to ensure they remain functional.

Another important consideration is the use of surge protectors and circuit breakers. These devices help manage electrical loads and prevent overheating, which is a common cause of attic fires. Make sure that all electrical installations comply with local building codes and are performed by qualified professionals. If your home is older, consider upgrading the electrical system to meet modern safety standards.

Routine maintenance is essential for sustaining a fire-safe attic environment. Schedule annual inspections and keep a checklist of tasks such as checking wiring, testing smoke detectors, and inspecting insulation. Being proactive about maintenance can help you catch potential issues early and avoid costly repairs or dangerous situations.

In the event of fire damage, it is crucial to act quickly and seek professional help. Companies like Projekt Restoration offer comprehensive fire damage restoration services that can help you recover and rebuild safely. Their team of experts can assess the extent of the damage, remove hazardous materials, and restore your attic to a safe and functional condition. For more information about their range of offerings, visit their services page.

Creating a fire-safe attic is not just about preventing damage; it is about ensuring the safety and well-being of everyone in your home. By taking the time to inspect, maintain, and upgrade your attic’s electrical systems and overall environment, you can significantly reduce the risk of fire and enjoy greater peace of mind.

Sure! Here’s a suitable FAQ section for a blog post titled "Fire Damage Hazards in Attic Wiring," incorporating relevant information:

Frequently Asked Questions (FAQ) – Fire Damage Hazards in Attic Wiring

  1. Why is attic wiring a fire hazard?
    Attic wiring can become a fire hazard due to several factors, including aging or damaged insulation, exposure to extreme temperatures, rodent activity, and improper installation. Over time, wires may degrade or become overloaded, increasing the risk of electrical arcing or short circuits that can ignite surrounding insulation or debris.

  2. What are common causes of attic wiring fires?
    Common causes include:

    • Overloaded circuits or outdated wiring systems
    • Damaged wires from rodents or pests
    • Poor ventilation leading to overheating
    • DIY electrical work that doesn’t meet code requirements
    • Accumulated dust and insulation around exposed wires
  3. How can I tell if my attic wiring is unsafe?
    Warning signs of unsafe attic wiring include:

    • Flickering lights or frequent circuit breaker trips
    • A burning smell or visible scorch marks near outlets or wiring
    • Rodent droppings or chewed wires
    • Exposed or frayed wires
    • Outdated wiring types like knob-and-tube or aluminum wiring
  4. What should I do if I suspect a problem with my attic wiring?
    If you suspect an issue, avoid inspecting or handling the wiring yourself. Contact a licensed electrician to perform a thorough inspection. They can identify hazards, recommend repairs or upgrades, and ensure your system complies with current electrical codes.

  5. How can I prevent attic wiring fires?
    Preventative steps include:

    • Scheduling regular electrical inspections, especially in older homes
    • Replacing outdated or damaged wiring
    • Keeping insulation and debris away from electrical components
    • Installing smoke detectors in or near the attic
    • Sealing entry points to prevent rodent access
  6. Is it safe to store items in the attic near electrical wiring?
    It’s best to avoid storing items directly on or near electrical wiring. Boxes and other materials can shift and damage wires, or insulate heat, increasing fire risk. Always maintain clear space around electrical components and avoid overloading attic outlets.

  7. Can attic wiring be upgraded to reduce fire risk?
    Yes. Upgrading to modern wiring systems, such as copper wiring with proper insulation and circuit breakers with arc-fault protection, can significantly reduce fire hazards. A licensed electrician can assess your current setup and recommend safe, code-compliant upgrades.

  8. Are there building codes that regulate attic wiring?
    Yes. Local and national electrical codes, such as the National Electrical Code (NEC), provide guidelines for safe attic wiring installation. These codes cover wire types, insulation, spacing, and protection methods. Ensuring compliance with these codes is essential for safety and insurance purposes.

If you have more questions or need a professional inspection, consult a licensed electrician to ensure your attic wiring is safe and up to code.

How to Detect Water Damage in Cabinets

How to Detect Water Damage in Cabinets: The Ultimate Homeowner’s Guide

COMMITTED TO QUALITY SERVICE

Call Us Now! 855-933-7935

Fast, Friendly and Professional Service.

Our Services:

Water Damage: Water Damage Restoration requires special equipment designed specifically for drying structures that have suffered severe water damage. LEARN MORE

Fire Damage: The most crucial step in the fire restoration process is to quickly mitigate the affected area and recover as much as possible. LEARN MORE


What Does Water Damage in Cabinets Look Like?

Water damage in cabinets can be sneaky. It often hides behind closed doors—literally. You might not notice it until it’s too late. But if you know what to look for, you can catch it early and save yourself a lot of money and stress. Signs include discoloration, warping, musty odors, and mold growth. If you’re seeing any of these, it’s time to act fast.


Why It’s Crucial to Detect Water Damage in Cabinets Early

Early detection of water damage in cabinets can prevent structural issues, mold growth, and costly repairs. Cabinets, especially those in kitchens and bathrooms, are vulnerable due to their proximity to water sources. The longer you wait, the worse it gets. Trust us, you don’t want to deal with a full-blown mold remediation project if you can avoid it.


Common Causes of Cabinet Water Damage

Leaky Pipes and Plumbing Failures

One of the most common culprits behind water damage in cabinets is leaky plumbing. A slow drip under the sink might not seem like a big deal, but over time, it can wreak havoc. Check your pipes regularly and look for signs of corrosion or moisture.

Faulty Appliances and Fixtures

Dishwashers, garbage disposals, and even your fridge can leak water into your cabinets. If you notice puddles or dampness near these appliances, investigate immediately. Don’t wait until the wood starts to rot.


Visual Signs to Detect Water Damage in Cabinets

Discoloration and Staining

Water stains often appear as dark or yellowish spots on the cabinet surface. These are telltale signs that moisture has seeped in. If you spot these, it’s time to call in the pros for restoration services.

Warping and Bubbling

Wood and water don’t mix. When cabinets absorb moisture, they can warp, swell, or bubble. This not only looks bad but also compromises the structural integrity of your cabinetry.


Smell That? Odors That Signal Water Damage

Musty or Mildew Smells

If your cabinets smell like a damp basement, that’s a red flag. Musty odors are often the first sign of hidden water damage and potential mold growth. Don’t ignore your nose—it’s a powerful detection tool.

Rotting or Sour Smells

When wood starts to rot, it emits a sour, unpleasant odor. This usually means the damage has been there for a while. At this point, you’ll likely need reconstruction services to fix the issue.


Touch and Feel: Physical Signs of Moisture

Soft or Spongy Wood

Press gently on the cabinet surfaces. If they feel soft or spongy, water has likely compromised the material. This is a clear sign that you need water damage restoration ASAP.

Peeling Laminate or Veneer

When the adhesive holding your cabinet’s laminate or veneer fails due to moisture, it starts to peel. This is both an aesthetic and functional issue that needs immediate attention.


Using Tools to Detect Water Damage in Cabinets

Moisture Meters

Moisture meters are handy tools that can detect hidden water damage. They measure the moisture content in wood and other materials, giving you a clear picture of what’s going on behind the scenes.

Infrared Cameras

Thermal imaging can reveal temperature differences caused by moisture. These cameras are often used by professional restoration teams to locate hidden water damage without tearing apart your cabinets.


Cabinet Locations Most at Risk

Under the Sink Cabinets

These are ground zero for water damage. With plumbing running through them, under-sink cabinets are the most vulnerable. Regular inspections can help you catch issues early.

Bathroom Vanity Cabinets

Between steamy showers and leaky faucets, bathroom vanities are another hotspot. Keep an eye out for swelling, discoloration, and mold.


How Mold Plays a Role in Cabinet Water Damage

Early Mold Growth Indicators

Mold loves moisture. If your cabinets are damp, mold will likely follow. Look for black, green, or white fuzzy spots. If you see them, it’s time for mold remediation.

Health Risks of Mold in Cabinets

Mold isn’t just ugly—it’s dangerous. It can cause respiratory issues, allergies, and other health problems. Don’t take chances. Get it removed by a professional restoration team.


Emergency Service for Sudden Water Damage

When to Call for Help

If you discover a burst pipe or flooding, don’t wait. Call an emergency service immediately. Time is of the essence when dealing with water damage.

What to Expect from Emergency Restoration Services

Expect fast response, thorough inspection, and immediate mitigation. The goal is to stop the damage in its tracks and begin the drying process as soon as possible.


The Role of Professional Restoration in Cabinet Damage

Why DIY Isn’t Always Enough

Sure, you can mop up a spill. But when it comes to hidden water damage, you need the pros. Professional restoration teams have the tools and expertise to do the job right.

Benefits of Hiring Certified Experts

Certified restoration experts follow industry standards and use specialized equipment. This ensures your cabinets are not only dry but also safe and mold-free.


Restoration Services for Cabinet Water Damage

Comprehensive Property Restoration

From drying and cleaning to rebuilding, property restoration covers it all. It’s not just about fixing what’s broken—it’s about restoring your peace of mind.

Specialized Water Damage Restoration

Water damage restoration involves more than drying. It includes moisture detection, mold prevention, and structural repairs. Trust the experts to bring your cabinets back to life.


Fire Damage Restoration and Its Impact on Cabinets

Water Damage from Firefighting Efforts

Ironically, putting out a fire can cause water damage. Cabinets near the fire zone often suffer from both heat and water exposure. Fire damage restoration teams handle both issues simultaneously.

Smoke and Soot Residue in Cabinets

Even if your cabinets weren’t directly burned, smoke and soot can seep in. This requires specialized cleaning and deodorizing techniques.


Biohazard Clean Up and Cabinet Contamination

When Cabinets Are Exposed to Biohazards

In cases of sewage backup or chemical spills, cabinets can become contaminated. This is where biohazard clean up comes into play. It’s not just cleaning—it’s sanitizing and restoring safety.

Safe Disposal and Decontamination

Biohazard teams follow strict protocols to remove contaminated materials and disinfect the area. Your health and safety are their top priorities.


Reconstruction Services for Severely Damaged Cabinets

When Replacement Is the Only Option

Sometimes, the damage is too severe for repair. That’s when reconstruction services step in. They’ll rebuild your cabinets from the ground up, better than before.

Custom Cabinet Rebuilding

Want to upgrade while you’re at it? Many restoration companies offer custom cabinet solutions during the reconstruction phase.


Customer Satisfaction in Restoration Projects

Why Reviews and Testimonials Matter

When choosing a restoration company, look for customer reviews. High customer satisfaction scores mean you’re in good hands.

What to Expect from a Quality Service Provider

Expect transparency, professionalism, and top-notch results. A good company will walk you through every step of the process and keep you informed.


Preventing Future Water Damage in Cabinets

Routine Maintenance Tips

Check plumbing regularly, seal gaps, and use waterproof liners. Prevention is always cheaper than repair.

Installing Leak Detectors

Smart leak detectors can alert you to moisture before it becomes a problem. They’re a small investment with big returns.


How to Identify Hidden Water Damage Early

Using Technology and Expertise

Hidden water damage can be tricky. That’s why we recommend reading our guide on how to identify hidden water damage early. It’s packed with expert tips and tools.

Partnering with Professionals

Don’t go it alone. Partner with a trusted restoration company like Projekt Restoration to keep your home safe and sound.


FAQs About Detecting Water Damage in Cabinets

1. How can I tell if my cabinet has water damage?

Look for discoloration, warping, musty smells, and soft spots. These are clear indicators of water damage.

2. Can water-damaged cabinets be repaired?

Yes, depending on the extent of the damage. Minor issues can be fixed, but severe damage may require replacement.

3. Is mold always present with water damage?

Not always, but it’s a common side effect. Mold thrives in moist environments, so act quickly to prevent it.

4. How much does cabinet water damage restoration cost?

Costs vary based on severity, but early detection can save you hundreds or even thousands of dollars.

5. Should I replace or restore my cabinets?

If the structure is intact, restoration is usually sufficient. If the wood is rotting or moldy, replacement may be necessary.

6. Who should I call for cabinet water damage?

Call a professional restoration company like Projekt Restoration at 855-933-7935 for fast, friendly, and professional service.


Final Thoughts: Don’t Let Cabinet Water Damage Sneak Up on You

Water damage in cabinets is more than just an eyesore—it’s a serious issue that can lead to mold, structural damage, and costly repairs. But with early detection, the right tools, and help from professional restoration experts, you can nip it in the bud. Whether you need water damage restoration, fire damage restoration, or mold remediation, Projekt Restoration is here to help. We’re COMMITTED TO QUALITY SERVICE—call us now at 855-933-7935.

Explore our full range of services at Projekt Restoration Services and learn how we can help you protect your home from hidden threats.

Schedule Your Mold Inspection Today!

Privacy Policy

Projekt Restoration we respects your privacy and is committed to protecting your personal information. This Privacy Policy outlines how we collect, use, and protect the information you provide when you visit our website, contact us, or use our services related to Mold Remediation, Mold Inspection & Testing, Mold Removal / Cleanup, and Black Mold Removal.


1. Information We Collect

We may collect the following types of personal and non-personal information:

  • Personal Information: Name, email address, phone number, physical address, and any other information you provide when contacting us or requesting services.

  • Usage Data: IP address, browser type, operating system, pages visited, and time/date of your visit.

  • Cookies: We may use cookies to enhance your website experience. You can disable cookies in your browser settings.


2. How We Use Your Information

We use your information to:

  • Respond to your inquiries or service requests

  • Schedule and deliver mold-related services

  • Improve our website and customer service

  • Send service updates, promotions, or important notices (if you opt-in)

  • Comply with legal obligations


3. Information Sharing and Disclosure

We do not sell, trade, or rent your personal information. We may share your data with:

  • Trusted third-party service providers (e.g., payment processors, contractors) to perform services on our behalf

  • Law enforcement or government agencies if required by law


4. Data Security

We implement reasonable safeguards (physical, electronic, and managerial) to protect your information from unauthorized access, alteration, disclosure, or destruction.


5. Your Privacy Rights (California Residents)

Under the California Consumer Privacy Act (CCPA), California residents have the right to:

  • Request disclosure of the personal information we collect and how we use it

  • Request deletion of your personal information

  • Opt-out of the sale of personal information (note: we do not sell your data)

To exercise any of these rights, please contact us at:
📞 Phone: (855) 933-7935


6. Third-Party Links

Our website may contain links to third-party sites. We are not responsible for their privacy practices. Please review their privacy policies separately.


7. Children’s Privacy

Our services are not directed to children under 13. We do not knowingly collect personal information from minors.


8. Changes to This Privacy Policy

We may update this Privacy Policy from time to time. Changes will be posted on this page with the updated effective date.


9. Contact Us

If you have any questions or concerns about this Privacy Policy, please contact:
Projekt Restoration

📞 (855) 933-7935