24 / 7 / 365 Emergency Service

Fire Safety Tips for Detached Structures

COMMITTED TO QUALITY SERVICE

Call Us Now! 855-933-7935

Fast, Friendly and Professional Service.

Our Services:

  • Water Damage – Water Damage Restoration requires special equipment designed specifically for drying structures that have suffered severe water damage.
  • Fire Damage – The most crucial step in the fire restoration process is to quickly mitigate the affected area and recover as much as possible.

Detached structures—like garages, sheds, workshops, and guesthouses—are often overlooked when it comes to fire safety. But these buildings are just as vulnerable to fire hazards as your main home, if not more. In this comprehensive guide, we’ll walk you through everything you need to know about Fire Safety for Detached Structures, from prevention to emergency response and restoration.

1. What Is Fire Safety for Detached Structures?

Fire safety for detached structures refers to the practices, tools, and systems used to prevent, detect, and respond to fires in buildings that are separate from the main residence. These include garages, barns, sheds, and other outbuildings. Because these structures often house flammable materials or are used less frequently, they can become fire hazards if not properly maintained.

2. Why Detached Structures Are at Higher Risk

Detached structures often lack the same level of fire protection as the main home. They may not have smoke detectors, fire extinguishers, or even proper wiring. Plus, they’re frequently used to store gasoline, paint, or other flammable materials. This combination makes them ticking time bombs if not properly managed.

3. Common Fire Hazards in Detached Buildings

Let’s break down the usual suspects:

  • Improper electrical wiring
  • Stored flammable liquids
  • Unattended heating equipment
  • Combustible clutter

Each of these can turn a minor spark into a full-blown blaze. Regular inspections and maintenance are key to minimizing these risks.

4. Installing Smoke Detectors in Detached Structures

Smoke detectors are your first line of defense. Install battery-operated or hardwired smoke alarms in every detached structure. Test them monthly and replace batteries at least once a year. For added safety, consider interconnected alarms that alert you in the main house if smoke is detected in the outbuilding.

5. Fire Extinguishers: Your First Responder

Every detached structure should have at least one fire extinguisher. Choose a multi-purpose (ABC) extinguisher and mount it in an easily accessible location. Make sure everyone in your household knows how to use it—remember the PASS method: Pull, Aim, Squeeze, Sweep.

6. Safe Storage of Flammable Materials

Gasoline, propane, paint thinner—these are common in sheds and garages but extremely dangerous if not stored correctly. Use approved containers and keep them away from heat sources. Better yet, store them in a dedicated flammable storage cabinet.

7. Electrical Safety in Detached Buildings

Faulty wiring is a leading cause of fires in detached structures. Hire a licensed electrician to inspect and upgrade old wiring. Avoid overloading circuits and unplug tools when not in use. If you’re using extension cords as permanent wiring, it’s time for an upgrade.

8. Heating Equipment Precautions

Space heaters and wood stoves are common in workshops and garages. Keep them at least three feet away from anything flammable. Install carbon monoxide detectors and never leave heaters unattended.

9. Fire-Resistant Building Materials

When building or renovating detached structures, opt for fire-resistant materials like metal roofing, fiber-cement siding, and tempered glass. These materials can slow the spread of fire and give firefighters more time to respond.

10. Landscaping for Fire Prevention

Keep a defensible space around your detached structures. Trim trees, remove dead vegetation, and keep grass short. Avoid storing firewood or other combustibles against the building.

11. Creating a Fire Safety Plan

Every household should have a fire safety plan that includes detached structures. Identify escape routes, designate a meeting spot, and practice fire drills regularly. Make sure everyone knows how to call 911 and what to do in case of a fire.

12. Emergency Service Access

Ensure that emergency responders can easily access your detached structures. Keep driveways clear, install visible address markers, and consider adding a Knox Box for key access.

13. Fire Safety for Detached Garages

Garages often house vehicles, tools, and flammable liquids. Install proper ventilation, avoid clutter, and never run engines indoors. Consider installing a sprinkler system for added protection.

14. Fire Safety for Workshops and Studios

Workshops are high-risk due to power tools, sawdust, and chemicals. Keep the area clean, store chemicals properly, and install a fire-rated door between the workshop and any adjoining structure.

15. Fire Safety for Guesthouses and Tiny Homes

These structures often have electrical and plumbing systems. Treat them like a regular home—install smoke and CO detectors, use safe heating methods, and ensure proper egress windows.

16. Restoration Services After a Fire

After a fire, time is of the essence. Fire damage restoration involves removing soot, smoke, and structural damage. Restoration services like those offered by Projekt Restoration include water damage restoration, mold remediation, and reconstruction services to bring your property back to life.

17. Water Damage Restoration After Firefighting

Firefighting efforts often leave behind significant water damage. Water damage restoration is crucial to prevent mold and structural issues. Specialized drying equipment is used to restore the integrity of your detached structure.

18. Mold Remediation in Fire-Damaged Structures

Where there’s water, there’s mold. After a fire, moisture can seep into walls and floors. Mold remediation ensures that your building is safe, healthy, and mold-free.

19. Emergency Service Response Time Matters

Quick response can mean the difference between minor damage and total loss. That’s why emergency service providers like Projekt Restoration are available 24/7. Call 855-933-7935 for fast, friendly, and professional help.

20. Property Restoration: Rebuilding After the Fire

Property restoration includes everything from debris removal to full-scale reconstruction. It’s not just about fixing what’s broken—it’s about restoring your peace of mind.

21. Biohazard Clean Up in Fire-Damaged Areas

Fires can expose hazardous materials like asbestos, lead, or biological waste. Biohazard clean up ensures that your detached structure is safe for re-entry and use.

22. Reconstruction Services: Building Back Better

After the cleanup, it’s time to rebuild. Reconstruction services include framing, drywall, roofing, and finishing. Choose fire-resistant materials and improved layouts to prevent future incidents.

23. Customer Satisfaction in Fire Restoration

At Projekt Restoration, customer satisfaction is our top priority. From the first call to the final walkthrough, we ensure transparency, quality, and compassion every step of the way.

24. Professional Restoration: Why It Matters

DIY might save a buck, but professional restoration ensures safety, compliance, and long-term durability. Trust experts who are trained, certified, and experienced in handling fire-damaged detached structures.

25. Long-Term Fire Safety Maintenance

Fire safety isn’t a one-and-done deal. Schedule annual inspections, update your fire safety plan, and stay informed. Subscribe to our blog for ongoing tips and updates.

FAQs

1. What’s the best fire extinguisher for a detached garage?

Use a multi-purpose (ABC) extinguisher that can handle wood, electrical, and flammable liquid fires. Mount it near the entrance for quick access.

2. How often should I inspect my detached structure for fire hazards?

Conduct a thorough inspection at least twice a year. Look for frayed wires, flammable clutter, and malfunctioning smoke detectors.

3. Can I install a sprinkler system in a shed?

Yes, especially if the shed is used frequently or stores valuable items. Consult a fire safety professional for installation options.

4. What should I do immediately after a fire in my detached structure?

Call emergency services, then contact Projekt Restoration at 855-933-7935 for emergency mitigation and restoration services.

5. Is mold a concern after a fire?

Absolutely. Water used to extinguish the fire can lead to mold growth. Schedule a mold remediation inspection within 48 hours.

6. How do I know if my detached structure is safe to enter after a fire?

Wait for clearance from fire officials or a professional restoration team. Structural damage and toxic fumes can pose serious risks.

Final Thoughts

Fire safety for detached structures is not just about prevention—it’s about preparation, response, and recovery. Whether it’s a backyard shed or a guesthouse, every building on your property deserves the same level of care and protection. Don’t wait for disaster to strike. Take action today to safeguard your property and your peace of mind.

Need help? Contact Projekt Restoration for expert restoration services, including fire damage restoration, water damage restoration, mold remediation, and more. We’re COMMITTED TO QUALITY SERVICE—call us now at 855-933-7935.

Explore more helpful resources:

Stay safe, stay prepared, and remember—when disaster strikes, Projekt Restoration is just a call away.

How to Detect Water Damage in Subfloors

Water damage can be a silent destroyer, especially when it seeps beneath your floors. Subfloor water damage often goes unnoticed until it causes serious structural issues or mold growth. At Projekt Property Restoration, we understand how crucial early detection is to prevent costly repairs and health hazards. In this guide, we’ll walk you through how to detect water damage in subfloors and why professional restoration services are essential for long-term property protection.

Why Subfloor Water Damage Is a Serious Concern

Subfloors are the foundation beneath your flooring materials—wood, tile, or carpet. When water infiltrates this layer, it can compromise the structural integrity of your home or business. Left untreated, it can lead to mold growth, wood rot, and even attract pests. That’s why early detection and prompt water damage restoration are critical.

Signs You May Have Water Damage in Your Subfloors

  • Musty Odors: Persistent damp or moldy smells can indicate hidden moisture beneath the floor.
  • Warped or Buckling Floors: Water causes wood and laminate to swell, leading to uneven or raised flooring.
  • Soft or Spongy Spots: Walking across your floor and feeling soft areas is a red flag for subfloor deterioration.
  • Discoloration: Stains or dark spots on flooring may signal water intrusion below the surface.
  • Mold Growth: Visible mold or mildew near baseboards or corners often originates from subfloor moisture.

How to Confirm Subfloor Water Damage

While surface signs are helpful, confirming subfloor damage often requires professional tools and expertise. Moisture meters, infrared cameras, and thermal imaging can detect hidden water without tearing up your floors. Our licensed technicians at Projekt Property Restoration use advanced equipment to assess and address damage accurately.

What to Do If You Suspect Water Damage

If you notice any of the signs above, don’t wait. Water damage can escalate quickly, leading to mold infestations and structural issues. Contact a company that offers 24/7 emergency service and specializes in professional restoration. At Projekt Property Restoration, we provide comprehensive mold remediation, biohazard clean up, and reconstruction services to restore your property safely and efficiently.

Why Choose Projekt Property Restoration?

We are committed to quality service and customer satisfaction. Our team is available 24/7 to respond to emergencies and provide same-day service. Whether you’re dealing with water, fire, or mold damage, our property restoration experts are trained to handle it all. We also work directly with insurance companies to simplify the claims process for you.

Our mission is simple: to get your property—and your life—back to normal. With transparent pricing, free onsite estimates, and flexible financing options, we make restoration stress-free and affordable.

Conclusion

Knowing how to detect water damage in subfloors can save you time, money, and stress. From musty odors to warped flooring, early signs should never be ignored. Trust the experts at Projekt Property Restoration to assess and restore your property with precision and care. Whether you need water damage restoration, fire damage restoration, or mold remediation, we’re here to help—anytime, day or night.

Don’t let hidden water damage compromise your home or business. Call us now at 855-933-7935 for fast, friendly, and professional service that puts your peace of mind first. Explore our blog for more tips or learn how to identify hidden water damage early.

Mold Risks in Homes with Poor Insulation

When it comes to protecting your home, insulation plays a more critical role than just keeping you warm. Poor insulation can lead to excess moisture buildup, creating the perfect environment for mold growth. Mold risks in poorly insulated homes are not only a threat to your property but also to your health. At Projekt Property Restoration, we understand the urgency of addressing mold issues before they escalate into costly repairs or health hazards.

Why Poor Insulation Leads to Mold Growth

Insufficient insulation allows warm, moist air to seep into cooler areas of your home, especially in attics, basements, and crawl spaces. This condensation creates damp surfaces where mold can thrive. Over time, this can compromise your home’s structural integrity and indoor air quality.

  • Condensation on walls and ceilings
  • Persistent dampness in corners and behind furniture
  • Musty odors and visible mold patches

These signs are often overlooked until the damage becomes severe. That’s why early detection and professional mold remediation are essential.

The Hidden Dangers of Mold

Mold exposure can cause a range of health issues, particularly for individuals with allergies, asthma, or compromised immune systems. Symptoms include coughing, sneezing, skin irritation, and even respiratory infections. Beyond health risks, mold can damage drywall, flooring, and personal belongings, leading to expensive repairs and replacements.

How Projekt Property Restoration Can Help

At Projekt Property Restoration, we specialize in comprehensive restoration services designed to tackle mold at its source. Our team of licensed professionals uses advanced equipment to detect hidden moisture and eliminate mold colonies effectively. We also offer:

  • Water damage restoration to prevent mold from recurring
  • Fire damage restoration to address mold growth following fire suppression efforts
  • Biohazard clean up for contaminated areas
  • Reconstruction services to restore your home to its original condition

Our 24/7 emergency service ensures that help is always just a phone call away. Whether you’re dealing with a sudden leak or long-term moisture issues, we respond quickly to minimize damage and restore your property efficiently.

Preventing Mold with Proper Insulation

Prevention is always better than cure. Ensuring your home is properly insulated can significantly reduce the risk of mold. Regular inspections, especially in older homes, can help identify problem areas before they become serious. For tips on identifying early signs of water damage, visit our detailed guide.

Customer Satisfaction Is Our Priority

At Projekt Property Restoration, we are committed to quality service and customer satisfaction. Our clients consistently praise our fast response times, professional restoration techniques, and transparent pricing. We work directly with insurance companies to streamline the process and offer flexible financing options to ease the burden during stressful times.

Restore Your Peace of Mind

Don’t let poor insulation put your home and health at risk. If you suspect mold or have experienced recent water damage, trust the experts at Projekt Property Restoration. Our professional restoration team is ready to help you reclaim your space with confidence and care. Call us today at 855-933-7935 and let us help you get things back to normal—fast, friendly, and professionally.

How to Prevent Fire Damage from Extension Cords

Extension cords are a convenient solution for powering multiple devices, but when used improperly, they can pose serious fire hazards. Understanding how to prevent fire damage from extension cords is essential for protecting your home or business. Overloaded circuits, damaged cords, and improper usage are just a few of the common causes of electrical fires. At COMMITTED TO QUALITY SERVICE, we prioritize your safety with fast, friendly, and professional service. Whether you’re dealing with fire damage or need expert advice on fire prevention, our team is here to help. Call us now at 855-933-7935 for immediate assistance. Our fire damage restoration services focus on quick mitigation and recovery to minimize loss and restore your property efficiently. Stay informed and take proactive steps to prevent extension cord fires before they start.

Choose the Right Extension Cord for the Job

When it comes to preventing fire damage caused by extension cords, selecting the right type of cord for the specific task is critical. Many household and workplace fires result from the misuse or overloading of extension cords, often due to using the wrong kind of cord for the job. According to the U.S. Consumer Product Safety Commission (CPSC), extension cords are responsible for approximately 3,300 home fires annually, resulting in about 50 deaths and 270 injuries. These alarming statistics highlight the importance of understanding how to choose the appropriate extension cord to ensure safety and reduce fire risks.

One of the first considerations when selecting an extension cord is the power requirement of the device or appliance you intend to use. Extension cords come with different amperage ratings, and using a cord with a lower rating than required can cause overheating and potentially ignite a fire. Always check the wattage of the appliance and ensure the cord can handle the load. For example, a space heater or power tool will require a heavy-duty cord, while a lamp or phone charger can typically use a light-duty cord.

Another crucial factor is the length of the extension cord. Longer cords have more electrical resistance, which can lead to voltage drops and overheating if not properly rated. It’s best to use the shortest cord possible for the task. Additionally, cords used outdoors must be rated for outdoor use, as they are designed to withstand moisture, temperature changes, and UV exposure. Look for cords labeled “W” for outdoor use.

The cord’s wire gauge is also essential. The lower the gauge number, the thicker the wire and the more current it can safely carry. For instance, a 12-gauge cord can handle more power than a 16-gauge cord. Choosing the correct gauge ensures that the cord won’t overheat under load. Here’s a quick reference guide:

  1. 16-gauge: Suitable for light-duty use (lamps, clocks, small fans)
  2. 14-gauge: Medium-duty (computers, TVs, small appliances)
  3. 12-gauge: Heavy-duty (power tools, space heaters, large appliances)

It’s also important to inspect the cord for safety certifications. Look for labels from Underwriters Laboratories (UL) or Intertek (ETL), which indicate the cord has been tested for safety standards. Avoid using cords that are frayed, cracked, or have exposed wires, as these are significant fire hazards.

“Using the wrong extension cord is like using the wrong tool for a job — it not only makes the task harder but can also be dangerous,” says the National Fire Protection Association (NFPA).

Avoid daisy-chaining multiple extension cords together, as this can lead to overheating and increase the risk of fire. Instead, use a single cord that meets the length and power requirements. Additionally, never run extension cords under rugs, carpets, or furniture, as this can trap heat and cause the cord to deteriorate faster.

For those managing multiple devices or appliances, consider using a power strip with built-in surge protection and circuit breakers. These features can help prevent overloads and reduce the risk of electrical fires. However, even power strips must be used correctly and should not be overloaded.

If you’re unsure about the right extension cord for your needs, consult a licensed electrician or refer to manufacturer guidelines. For more tips on fire safety and damage prevention, visit our blog or explore our comprehensive services.

In the unfortunate event of fire damage, knowing how to respond quickly and effectively is crucial. Our team at Projekt Restoration specializes in fire damage restoration and can help you recover safely and efficiently. We also provide resources to help you understand the risks and take preventive measures.

For further reading on electrical safety and extension cord usage, the Electrical Safety Foundation International (ESFI) offers detailed guidelines at https://www.esfi.org. Taking the time to choose the right extension cord not only protects your property but also ensures the safety of everyone in your home or workplace.

Inspect Cords Regularly for Wear and Tear

One of the most effective ways to prevent fire damage caused by extension cords is to routinely examine them for signs of wear and tear. Over time, even the highest-quality cords can degrade due to regular use, environmental exposure, or improper storage. Frayed wires, cracked insulation, exposed conductors, and bent or damaged prongs are all red flags that indicate a cord may no longer be safe to use. These issues can lead to short circuits, overheating, or even electrical fires if not addressed promptly. It is essential to inspect cords before each use, especially if they have been stored for a long period or used in high-traffic areas where they may have been stepped on or pinched. Pay close attention to the areas near the plug and socket ends, as these are the most common points of failure. If any damage is found, the cord should be replaced immediately rather than attempting a DIY repair, which can often make the situation more dangerous.

In addition to visual inspections, feel the cord for any soft spots or areas that seem unusually warm during use, as these can also indicate internal damage. Avoid running cords under rugs or furniture, as this can cause them to overheat and wear out faster. Keeping cords untangled and properly coiled when not in use can also extend their lifespan and reduce the risk of damage. For households or businesses that rely heavily on extension cords, it may be beneficial to schedule regular safety checks as part of a broader fire prevention strategy. This is especially important in environments where cords are used outdoors or in industrial settings, where exposure to moisture, heat, or chemicals can accelerate deterioration. For more information on how to protect your property from fire hazards, visit our fire damage page.

Understanding the importance of cord maintenance is just one aspect of a comprehensive approach to fire safety. At Projekt Restoration, we emphasize proactive measures to safeguard your home or business from potential hazards. Our team is dedicated to educating property owners on best practices and providing professional support when needed. Whether you are dealing with the aftermath of a fire or looking to implement preventative strategies, our wide range of services is designed to meet your specific needs. We also encourage you to explore our blog for more expert tips and insights on maintaining a safe and resilient property.

Avoid Overloading the Extension Cord

One of the most common causes of electrical fires in homes and businesses is the overloading of extension cords. While these cords offer a convenient way to power multiple devices, they are not designed to handle the electrical load of high-wattage appliances or too many devices at once. Overloading an extension cord can cause it to overheat, melt its insulation, and potentially ignite nearby flammable materials. To prevent fire damage, it is essential to understand the limitations of your extension cords and use them responsibly.

Each extension cord has a specific amperage rating, which indicates the maximum amount of electrical current it can safely carry. Before plugging in multiple devices, check the total wattage and ensure it does not exceed the cord’s capacity. For example, plugging in a space heater, microwave, or refrigerator into the same extension cord can quickly surpass its limit, increasing the risk of overheating. Always read the manufacturer’s instructions and labels to determine the appropriate usage.

Another important consideration is the type of extension cord being used. Light-duty cords are suitable for small electronics like lamps or phone chargers, while heavy-duty cords are designed for power tools and larger appliances. Using the wrong type of cord for a high-power device can lead to overheating and fire hazards. Additionally, avoid daisy-chaining multiple extension cords together, as this practice can reduce the overall efficiency and increase the risk of electrical failure.

Proper placement of extension cords also plays a vital role in fire prevention. Avoid running cords under rugs, carpets, or furniture, as this can trap heat and prevent proper ventilation. Heat buildup in these conditions can lead to the deterioration of the cord’s insulation and eventually cause a fire. Instead, place cords in open areas where air can circulate freely and where they are not subject to physical damage from foot traffic or furniture.

It is also crucial to inspect your extension cords regularly for signs of wear and tear. Frayed wires, cracked insulation, or exposed conductors are all indicators that a cord should be replaced immediately. Using damaged cords significantly increases the risk of electrical fires. Investing in high-quality, certified extension cords with built-in safety features like surge protection and circuit breakers can provide an added layer of protection.

In commercial settings or during home renovations, it is advisable to consult a licensed electrician to assess your power needs and recommend safe solutions. If you find yourself frequently relying on extension cords, it may be a sign that your home or office lacks sufficient electrical outlets. In such cases, upgrading your electrical system can be a safer and more permanent solution.

Understanding the risks associated with extension cords and taking proactive steps to use them safely is essential for protecting your property and loved ones from fire damage. At Projekt Restoration, we emphasize the importance of fire prevention and offer a range of services to help you maintain a safe environment. Whether you need assistance after a fire or want to learn more about how to safeguard your home, our team is here to help.

For more information about our company and our commitment to safety and restoration, visit our about page. Taking the time to educate yourself on proper extension cord usage and implementing these safety measures can go a long way in preventing devastating fire incidents. Always prioritize safety and never underestimate the potential hazards of misusing electrical equipment.

Keep Extension Cords Away from Heat and Water

One of the most important safety measures to prevent fire damage from extension cords is to ensure they are kept away from sources of heat and water. Extension cords are not designed to withstand high temperatures or moisture exposure, both of which can significantly increase the risk of electrical fires. When placed near heaters, stoves, or other heat-generating appliances, the insulation around the cord can degrade over time, exposing the wires and creating a potential fire hazard. Similarly, using extension cords in damp or wet environments, such as bathrooms, kitchens, or outdoor areas without proper weatherproofing, can lead to short circuits, electric shocks, or even fires. It is crucial to understand that water and electricity are a dangerous combination, and even a small amount of moisture can compromise the integrity of an extension cord.

To reduce these risks, always inspect the area where you plan to use an extension cord. Make sure it is dry and free from any heat sources. If you must use an extension cord outdoors or in a potentially wet area, opt for cords specifically rated for outdoor or wet conditions. These cords are designed with additional insulation and protective features to withstand environmental stress. Additionally, avoid running extension cords under rugs or carpets, as this can trap heat and prevent proper ventilation, further increasing the risk of overheating. Over time, trapped heat can cause the cord to melt or ignite, especially if it is overloaded or damaged.

Proper storage of extension cords also plays a vital role in fire prevention. After use, unplug the cord and store it in a cool, dry place away from direct sunlight or heat sources. Coiling the cord loosely and avoiding sharp bends can help maintain its integrity and extend its lifespan. Regularly inspect cords for signs of wear, such as fraying, cracking, or exposed wires, and replace any damaged cords immediately. Never attempt to repair a damaged extension cord with tape or makeshift solutions, as this can lead to further hazards.

In homes or businesses where extension cords are used frequently, it may be worth considering a more permanent solution, such as installing additional outlets or using surge protectors with built-in safety features. This not only reduces reliance on extension cords but also enhances overall electrical safety. For more information on how to protect your property from fire hazards, visit our fire damage page, where we provide expert guidance and restoration services.

Understanding the risks associated with improper use of extension cords is essential for maintaining a safe environment. Whether you are a homeowner or a business owner, taking proactive steps to keep cords away from heat and water can significantly reduce the likelihood of fire incidents. If you have questions about fire safety or need professional assistance, our team is here to help. Learn more about our comprehensive services and how we can support your safety and restoration needs.

Use Extension Cords Only as a Temporary Solution

Extension cords are a convenient solution for powering devices when outlets are not within reach, but they should never be considered a permanent fix. Using extension cords as a long-term power source significantly increases the risk of electrical fires. These cords are not designed to handle continuous, heavy loads and can overheat when used improperly or for extended periods. Over time, the insulation around the wires can degrade, especially if the cord is placed under rugs, furniture, or in high-traffic areas where it may be pinched or damaged. This wear and tear can expose the wires, leading to short circuits or sparks that may ignite nearby flammable materials.

To prevent fire damage, it is crucial to understand that extension cords are meant for temporary use only. If you find yourself relying on them regularly, it may be time to consider installing additional outlets or upgrading your electrical system. Hiring a licensed electrician to assess your home’s wiring can help ensure that your electrical infrastructure meets your current power needs safely. This proactive approach not only reduces the risk of fire but also enhances the overall safety and functionality of your living space.

Another important factor to consider is the type of extension cord being used. Always choose cords that are rated for the specific devices you intend to power. For example, high-wattage appliances like space heaters or microwaves require heavy-duty cords with a higher amp rating. Using a lightweight cord for such appliances can cause overheating and potentially start a fire. Additionally, avoid daisy-chaining multiple extension cords together, as this can lead to excessive resistance and heat buildup.

Proper storage and handling of extension cords also play a vital role in fire prevention. When not in use, cords should be coiled loosely and stored in a dry, cool place. Avoid wrapping them tightly or hanging them on nails, which can damage the insulation. Regularly inspect cords for signs of wear, such as fraying, cracking, or exposed wires. If any damage is found, the cord should be discarded immediately and replaced with a new one.

In commercial or high-use environments, the risks associated with improper extension cord use are even greater. Businesses should implement strict safety protocols and provide training to employees on the correct use of electrical equipment. For those managing properties or facilities, it may be beneficial to consult with a professional restoration company to assess potential fire hazards and develop a comprehensive safety plan. You can learn more about such services by visiting our services page.

In the unfortunate event that fire damage does occur due to extension cord misuse, immediate action is essential to minimize further loss and begin the recovery process. Professional fire damage restoration experts can help restore your property to its original condition, addressing not only visible damage but also hidden issues such as smoke odor and structural compromise. For more information on how we handle fire-related incidents, visit our fire damage page.

Ultimately, the key to preventing fire damage from extension cords lies in understanding their limitations and using them responsibly. By treating extension cords as a short-term solution and investing in permanent electrical upgrades when necessary, you can significantly reduce the risk of fire and protect your home or business from devastating damage.

Store Extension Cords Properly When Not in Use

When extension cords are not in use, storing them properly is a crucial step in preventing potential fire hazards. Many people overlook this simple yet essential practice, which can significantly reduce the risk of electrical fires. Extension cords that are left tangled, coiled tightly, or placed in high-traffic areas can suffer from wear and tear, leading to exposed wires or damaged insulation. These issues can cause short circuits or overheating when the cords are used again, especially if they are plugged into high-wattage appliances. To avoid such dangers, always unplug extension cords after use and inspect them for any signs of damage before storing them.

Choose a cool, dry place for storage, away from direct sunlight, moisture, or heat sources. Excessive heat or humidity can degrade the cord’s insulation over time, increasing the risk of fire. Avoid wrapping cords too tightly, as this can strain the internal wires and lead to breakage. Instead, loosely coil the cord and secure it with a Velcro strap or twist tie. Hanging cords on hooks or storing them in designated containers can also help maintain their condition and prevent tangling. Keeping cords off the floor and away from sharp objects or heavy items will further protect them from accidental damage.

It is also important to keep extension cords out of reach of children and pets. Chewing or playing with cords can lead to serious injuries and increase the likelihood of electrical fires. If you use extension cords frequently, consider labeling them for specific uses and storing them in a clearly organized system. This not only improves safety but also makes it easier to locate the right cord when needed, reducing the temptation to use a damaged or inappropriate one.

Proper storage is just one part of a comprehensive fire prevention strategy. Regularly checking your cords and replacing any that show signs of wear is equally important. If you are unsure about the safety of your electrical setup, consider consulting a professional. At Projekt Restoration, we offer a range of services designed to help homeowners maintain a safe living environment. Whether you are dealing with the aftermath of a fire or looking to prevent one, our team is here to assist.

In addition to fire prevention, proper cord storage can also help you avoid other household hazards. For example, cords left on the floor can become tripping hazards, especially in busy areas of the home. By storing them properly, you not only reduce the risk of fire but also create a safer and more organized living space. If you want to learn more about our commitment to safety and quality, visit our our mission page to understand how we prioritize your well-being in every project we undertake.

Taking the time to store extension cords correctly may seem like a small task, but it plays a significant role in preventing fire damage and maintaining a safe home environment. By following these simple guidelines, you can extend the life of your cords, reduce the risk of electrical fires, and ensure your home remains a secure place for you and your family.

Install Smoke Detectors and Fire Extinguishers Nearby

To effectively reduce the risk of fire damage caused by extension cords, it is essential to have proper safety measures in place, including the installation of smoke detectors and fire extinguishers in strategic locations. Extension cords, while convenient, can become serious fire hazards if overloaded, frayed, or used improperly. In the event of an electrical malfunction or overheating, early detection and immediate response can make a significant difference in minimizing property damage and ensuring the safety of occupants. Smoke detectors serve as the first line of defense by providing early warnings of smoke or fire, allowing residents or employees to take swift action before the situation escalates. It is advisable to install smoke detectors in every room where extension cords are in use, especially in high-risk areas such as kitchens, garages, and home offices. Regular testing and maintenance of these devices are crucial to ensure they function correctly when needed most.

Equally important is the presence of fire extinguishers within easy reach of areas where extension cords are frequently used. A small electrical fire can quickly spread if not addressed immediately, but having a fire extinguisher nearby allows for prompt intervention. It is recommended to use a Class C fire extinguisher, which is specifically designed to handle electrical fires. Homeowners and business owners should also educate themselves and others on how to properly use a fire extinguisher, following the PASS technique: Pull the pin, Aim at the base of the fire, Squeeze the handle, and Sweep side to side. This knowledge can be life-saving in an emergency situation.

In addition to installing safety equipment, it is beneficial to conduct regular inspections of extension cords and surrounding areas. Look for signs of wear, exposed wires, or heat damage, and replace any cords that appear compromised. Avoid running cords under carpets or rugs, as this can trap heat and increase the risk of fire. Instead, use cord covers or cable organizers to keep cords secure and visible. For more comprehensive safety strategies and professional support, consider exploring the range of services offered by restoration experts who specialize in fire prevention and damage recovery.

Moreover, integrating fire safety measures into your overall home or business maintenance plan can provide long-term protection. This includes understanding the layout of your electrical system, avoiding daisy-chaining multiple extension cords, and using surge protectors when necessary. If a fire does occur, having reliable smoke detectors and fire extinguishers can significantly reduce the extent of the damage and improve recovery outcomes. For those interested in learning more about fire safety and prevention, visiting the blog section of a trusted restoration company can provide valuable insights and tips.

Ultimately, preventing fire damage from extension cords requires a proactive approach that combines proper usage, regular maintenance, and the installation of essential safety devices. By taking these steps, you can create a safer environment for your family, employees, and property. Whether you are a homeowner or a business operator, investing in fire safety tools and knowledge is a critical component of responsible property management.

In conclusion, preventing fire damage from extension cords comes down to awareness, proper usage, and regular maintenance. By choosing the right cord for the job, avoiding overloading, inspecting cords for damage, and using them only as temporary solutions, you can significantly reduce the risk of fire in your home or workplace. Always follow manufacturer guidelines and never ignore warning signs like overheating or frayed wires. With these simple precautions, you can ensure that your extension cords remain a safe and reliable tool rather than a potential hazard. Stay informed, stay safe, and protect your property from preventable fire risks.

How to Prevent Mold After Water Heater Leaks

A leaking water heater can quickly turn from a minor inconvenience into a major problem if not addressed promptly—especially when it comes to mold growth. Mold thrives in damp, warm environments, making the area around a water heater leak the perfect breeding ground. At Projekt Property Restoration, we know how crucial it is to act fast to prevent mold after water heater leaks. As a trusted name in water damage restoration, we specialize in helping homeowners and property managers protect their properties from long-term damage caused by moisture and mold. With our 24/7 emergency services, advanced drying equipment, and expert mold remediation techniques, we ensure your home or business is restored safely and efficiently. Whether you’re dealing with a small leak or a major water damage incident, our team is here to help you get things back to normal—because at Projekt Property Restoration, we’re more than just a restoration company; we’re your partner in peace of mind.

Identify and Stop the Leak Immediately

When a water heater leak occurs, time is of the essence. The longer water is allowed to pool or seep into surrounding materials, the greater the risk of mold growth, structural damage, and costly repairs. The first and most critical step in preventing mold after a water heater leak is to identify the source of the leak and stop it immediately. This proactive approach not only minimizes water damage but also significantly reduces the chances of mold spores taking hold in your home.

Begin by inspecting the water heater and the area around it. Common signs of a leak include puddles of water near the base, rust or corrosion on the tank, and damp or discolored flooring or walls. If you notice any of these indicators, turn off the power supply to the water heater—electric units should be shut off at the circuit breaker, while gas units require turning off the gas valve. Next, shut off the water supply to the heater to prevent additional water from entering the tank and exacerbating the leak.

Leaks can originate from several components of the water heater. The most frequent culprits include the temperature and pressure relief valve, the drain valve, and the tank itself. If the leak is coming from a valve or pipe connection, it may be possible to tighten the fitting or replace the faulty part. However, if the tank is leaking due to internal corrosion or a crack, the entire unit will likely need to be replaced. In such cases, it is advisable to contact a professional plumber or a certified water damage restoration company to assess the situation and recommend the best course of action.

“According to the Environmental Protection Agency (EPA), mold can begin to grow within 24 to 48 hours of water exposure, making immediate action crucial to prevent long-term damage.”

Once the leak has been stopped, it is essential to remove any standing water and begin drying the affected area as quickly as possible. Use towels, mops, or a wet/dry vacuum to extract water, and deploy fans and dehumidifiers to accelerate the drying process. Pay special attention to hidden or hard-to-reach areas, such as behind walls or under flooring, where moisture can linger and mold can thrive unnoticed.

In some cases, the leak may not be immediately visible, especially if it is slow or hidden behind walls. To detect hidden leaks, look for subtle signs such as musty odors, peeling paint, or warped flooring. You can also refer to our guide on how to identify hidden water damage early for more detailed tips on uncovering concealed moisture issues.

If you are unsure about the extent of the damage or how to proceed, consider reaching out to a professional restoration service. At Projekt Restoration, our team specializes in comprehensive services that include water damage assessment, mold remediation, and structural drying. Our experts use advanced tools such as moisture meters and thermal imaging cameras to detect and address water intrusion before it leads to mold growth.

  1. Inspect the water heater and surrounding area for visible signs of leakage.
  2. Turn off the power and water supply to the unit to prevent further damage.
  3. Identify the source of the leak—valves, connections, or the tank itself.
  4. Remove standing water and begin drying the area immediately.
  5. Use professional tools or services to detect hidden moisture and prevent mold.

Taking swift and decisive action at the first sign of a water heater leak is the most effective way to protect your home from mold. For more information about our approach and commitment to quality, visit our our mission page or explore our blog for expert tips and insights.

“Water damage is the second most common insurance claim in the U.S., with the average claim costing over $10,000, according to the Insurance Information Institute.”

By acting quickly and enlisting professional help when needed, you can stop a water heater leak in its tracks and prevent the costly and hazardous consequences of mold growth.

Dry the Affected Area Thoroughly

After a water heater leak, one of the most critical steps in preventing mold growth is ensuring the affected area is completely dry. Mold thrives in damp, humid environments, and even a small amount of lingering moisture can create the perfect conditions for it to spread. Begin by removing any standing water using a wet-dry vacuum or mop. Once the visible water is gone, focus on drying out the space thoroughly. Open windows and doors to increase ventilation, and use high-powered fans and dehumidifiers to speed up the drying process. Pay special attention to hidden or hard-to-reach areas such as behind baseboards, under flooring, and inside wall cavities, as moisture can easily become trapped in these spaces. If the leak has affected carpets or rugs, it may be necessary to remove and replace them, especially if they remain damp after 24 to 48 hours. Drywall and insulation that have absorbed water should also be inspected and possibly replaced to prevent mold from developing behind walls. For homeowners unsure about the extent of the damage or the best drying techniques, professional help is highly recommended. Companies like Projekt Restoration offer specialized services that include advanced drying equipment and moisture detection tools to ensure every part of your home is properly treated. You can learn more about their approach and commitment to quality by visiting their our mission page. Taking swift and thorough action to dry the area not only prevents mold but also protects the structural integrity of your home and the health of its occupants.

In conclusion, preventing mold after a water heater leak requires swift action and ongoing vigilance. By promptly shutting off the water supply, thoroughly drying the affected area, and using dehumidifiers or fans to reduce moisture, you can significantly lower the risk of mold growth. Regularly inspecting your water heater for signs of wear and addressing leaks immediately will also help maintain a safe and healthy home environment. Remember, when in doubt, don’t hesitate to consult a professional to ensure proper cleanup and mold prevention. Taking these proactive steps can save you time, money, and protect your home from long-term damage.

Fire Damage Risks in Multi-Story Commercial Buildings

Fire Damage Risks in Multi-Story Commercial Buildings are more serious than many realize. What would happen if a fire broke out on the 10th floor of your office building—would your team know what to do? At Projekt Property Restoration, we’ve seen firsthand how quickly fire can spread and how devastating the aftermath can be. Our mission is to help business owners and property managers prepare, respond, and recover with speed and confidence.

Fire in multi-story buildings poses unique challenges—vertical spread, delayed evacuation, and complex suppression systems. According to the NFPA, high-rise fires cause over $50 million in property damage annually. In this article, we’ll explore the top fire risks in commercial high-rises, how to mitigate them, and what steps to take if disaster strikes.

But fire safety isn’t just about alarms and sprinklers. Experts like Dr. James Milke, Chair of Fire Protection Engineering at the University of Maryland, stress the importance of proactive planning and regular inspections. So, let’s dive into the critical fire risks lurking in multi-story commercial buildings—and how you can stay one step ahead.

Understanding Fire Damage in Multi-Story Commercial Buildings

Fire damage in multi-story commercial buildings involves structural destruction, smoke contamination, and system failures caused by uncontrolled flames. These buildings face heightened risks due to complex layouts, shared utilities, and vertical fire spread. Stairwells, elevator shafts, and ventilation systems often accelerate fire movement between floors.

Unlike single-story structures, high-rises require longer evacuation times and pose greater challenges for emergency responders. Fire suppression systems may fail to reach upper levels effectively, increasing the potential for widespread damage. Additionally, older buildings may lack modern fire-resistant materials or updated safety codes.

According to the National Fire Protection Association, high-rise office buildings experience over 3,000 fire incidents annually in the U.S. One notable case is the 2017 Marco Polo condominium fire in Honolulu, which caused $100 million in damages and claimed four lives. These events highlight the urgent need for proactive fire prevention and response strategies.

To learn more about our expert restoration solutions, visit our services page. For insights into our company values and commitment, explore our mission.

Common Causes of Fire in Multi-Story Commercial Buildings

Electrical malfunctions remain a leading cause of fires in multi-story commercial buildings. Overloaded circuits, outdated wiring, and faulty equipment often spark dangerous blazes. HVAC systems also pose significant risks when poorly maintained. Dust buildup, mechanical failure, or overheating components can ignite fires that spread rapidly through ventilation shafts.

In buildings with commercial kitchens, grease fires are a constant threat. Without proper cleaning and ventilation, these fires can escalate quickly. Human error, such as unattended appliances or careless smoking, further increases the danger. Even a small mistake can lead to devastating consequences.

Building usage plays a major role in fire risk. Office spaces typically face electrical hazards, while retail stores may deal with overloaded lighting and display systems. Mixed-use buildings combine these threats, making fire prevention more complex.

A 2021 fire in a Los Angeles mixed-use tower started from a neglected HVAC unit. It caused millions in damage and displaced dozens. Another incident in a San Francisco office building began with a short circuit in a copier, highlighting the need for regular inspections.

To learn more about our fire prevention strategies, visit our services page or explore our blog for expert tips.

Structural and Design Factors That Influence Fire Risk

The choice of construction materials significantly affects how fire behaves in a building. Lightweight steel and wood can accelerate fire spread, while concrete and fire-resistant materials slow it down. Vertical construction, such as stairwells and elevator shafts, often acts as a chimney, drawing flames upward quickly. Poorly planned layouts with open floor designs allow fire to move freely between areas.

Fire-rated walls, floors, and doors are essential in limiting fire expansion. These barriers resist heat and flames for a set period, giving occupants more time to evacuate. They also help protect critical infrastructure and reduce overall damage.

Compartmentalization plays a vital role in fire safety. Dividing a building into fire zones helps isolate incidents and prevents them from spreading across multiple floors. This strategy is especially important in high-occupancy commercial spaces.

Proper design and materials can mean the difference between containment and catastrophe. For more insights into fire prevention strategies, visit our services page. You can also explore our blog for expert tips and updates.

Fire Detection and Suppression Systems

Modern commercial buildings rely on advanced systems to detect and suppress fires quickly. Smoke detectors and heat sensors are the first line of defense. These devices trigger alarms the moment they sense danger, allowing for rapid evacuation. Sprinkler systems activate automatically, releasing water to contain or extinguish flames. In sensitive areas, gas suppression systems use clean agents to avoid water damage. Fire extinguishers provide manual control and are essential for small, localized incidents.

Routine maintenance ensures these systems function when needed most. Dust, corrosion, or faulty wiring can cause critical failures. Regular inspections help identify and fix issues before they escalate. Building managers must schedule professional checks at least twice a year. Compliance with fire safety codes is not optional—it’s a legal and moral responsibility.

Neglecting these systems can lead to devastating losses. For more on our fire safety solutions, visit our services page. You can also explore our fire damage restoration expertise. Investing in reliable detection and suppression systems is not just smart—it’s essential for protecting lives and property.

Human Factors and Fire Safety Protocols

Careless actions and oversight often spark devastating fires in commercial buildings. Smoking in restricted areas, overloaded circuits, and unattended equipment are common triggers. Even a momentary lapse in judgment can escalate into a full-blown emergency. That’s why consistent fire safety training is essential for all occupants.

Regular fire drills reinforce evacuation routes and reduce panic during real incidents. Clear, accessible evacuation plans must be visible throughout the building. Staff should know their roles and responsibilities during emergencies. Without preparation, confusion can cost lives.

Tenant and employee education is equally vital. Hosting quarterly safety workshops keeps fire protocols fresh in everyone’s mind. Encourage open communication about hazards and near-misses. This proactive approach fosters a culture of safety and accountability.

Best practices include installing visible signage, maintaining clear exits, and conducting routine inspections. Partnering with professionals for fire risk assessments ensures compliance and readiness. For more on our safety-focused approach, visit our about page or explore our comprehensive services.

Ultimately, human behavior can either prevent or provoke disaster. Empowering people with knowledge and preparation makes all the difference.

Legal and Regulatory Requirements

Compliance with fire safety regulations is mandatory in multi-story commercial buildings. The National Fire Protection Association (NFPA) sets widely recognized standards, including NFPA 101 and NFPA 1. Local building codes often adopt or expand on these guidelines. Building owners must ensure that all fire prevention systems meet these standards. Property managers are responsible for regular inspections, maintenance, and staff training. Tenants must follow safety protocols and report hazards immediately.

Failure to comply can lead to severe consequences. Legal actions, fines, and even business shutdowns are common outcomes. Insurance claims may also be denied if negligence is proven. Beyond financial loss, non-compliance puts lives at risk. Regular audits and professional assessments help avoid these issues.

For expert support, explore our services tailored to fire safety and restoration. Learn more about our commitment to safety on our mission page. Staying informed and proactive is the best defense against fire-related liabilities.

Emergency Response and Evacuation Challenges

Evacuating multi-story commercial buildings during a fire presents serious logistical hurdles. Stairwells often become congested, slowing down escape efforts. Elevators are typically disabled, leaving those with mobility issues at greater risk. Panic can spread quickly, making orderly evacuation difficult.

Reliable emergency lighting and clear signage are essential. They guide occupants through smoke-filled corridors and unfamiliar layouts. Communication systems must deliver real-time updates to prevent confusion and direct people to safety. Without these tools, delays can become deadly.

Supporting individuals with disabilities requires pre-planned strategies. Assigning evacuation assistants and installing evacuation chairs can save lives. Staff should receive regular training to handle such situations efficiently.

Fire drills tailored to each floor’s layout improve readiness. They also help identify weak points in the evacuation plan. Building managers must ensure all systems are tested and maintained regularly.

For more on how we support safe evacuations, visit our services page. Learn about our commitment to safety on our mission page. Every second counts during a fire—preparation makes the difference.

Fire Risk Assessment and Prevention Strategies

Start by identifying potential ignition sources, combustible materials, and vulnerable areas within the building. Evaluate fire detection systems, emergency exits, and suppression equipment. Interview staff to understand daily operations and any overlooked hazards. Document findings and prioritize risks based on severity and likelihood.

Schedule routine inspections to ensure all fire safety systems function properly. Upgrade outdated alarms, sprinklers, and extinguishers. Train employees on evacuation procedures and proper equipment use. Keep hallways and exits clear at all times. Install smoke detectors in high-risk zones and test them monthly.

Tailor your prevention plan to the building’s layout and occupancy type. For example, a restaurant requires different protocols than an office. Include floor-specific evacuation routes and assign fire wardens. Review and update the plan annually or after any structural changes.

Partner with professionals for expert guidance. Explore our services to enhance your building’s safety. Learn more about our mission to protect properties on our our mission page. A proactive approach today can prevent a devastating loss tomorrow.

Post-Fire Recovery and Damage Mitigation

After a fire, act fast. First, contact emergency services and ensure everyone is safe. Once cleared, secure the property to prevent further damage or theft. Board up broken windows and restrict access to unsafe areas.

Next, initiate a thorough damage assessment. Document everything with photos and detailed notes. This step is crucial for filing accurate insurance claims. Contact your insurance provider immediately and begin the claims process without delay.

Engage a professional restoration team to evaluate structural integrity and begin cleanup. Choose a company experienced in fire damage recovery to ensure proper handling of hazardous materials and soot removal.

To reduce downtime, implement a business continuity plan. Relocate operations temporarily if needed and communicate updates to clients and staff. Quick action helps maintain trust and minimizes financial loss.

For expert help, explore our full range of services tailored to commercial recovery. Planning ahead and acting swiftly can make all the difference in restoring operations efficiently.

Future Trends in Fire Safety for Commercial High-Rises

Advanced fire safety in commercial high-rises is evolving rapidly. Smart sensors now detect smoke and heat with greater accuracy and speed. These systems instantly alert emergency services, reducing response time significantly. Automated suppression systems, including water mist and clean agent technologies, are replacing traditional sprinklers. They minimize property damage while maximizing fire control.

Innovative building materials are also reshaping fire resilience. Fire-resistant glass, insulated panels, and non-combustible composites are becoming standard in modern construction. These materials not only slow fire spread but also enhance structural integrity during emergencies.

Smart building systems integrate fire safety with real-time monitoring. They use AI to predict risks and optimize evacuation routes. This proactive approach ensures safer outcomes during critical moments.

Sustainability is no longer separate from fire safety. Green buildings now incorporate eco-friendly materials that meet strict fire codes. Solar panels, green roofs, and energy-efficient systems are designed with fire resistance in mind.

To see how these innovations align with restoration efforts, explore our services and learn more about our mission. The future of fire safety is smarter, stronger, and more sustainable than ever.

Frequently Asked Questions (FAQs)

Fires in commercial buildings often start from faulty wiring, overloaded circuits, or neglected heating systems. Regular inspections are crucial—experts recommend checking fire safety systems at least twice a year. Property owners must comply with local fire codes and ensure all systems are up to date. Tenants also play a role by reporting hazards and following safety protocols. A proper evacuation plan should include exit routes, assembly points, and emergency contacts.

Older buildings face higher risks due to outdated materials and infrastructure. Fire codes vary by location, so staying informed about local regulations is essential. Fire marshals inspect properties, enforce codes, and educate occupants on fire prevention. While high-rise fire damage can be restored, the process is complex and time-consuming. Insurance typically covers structural damage, contents, and sometimes business interruption, depending on the policy.

For more details on our restoration process, visit our how-it-works page. You can also explore our full range of services to better understand how we protect commercial properties.

Signs of Water Damage in Ceiling Tiles

Understanding the Signs of Water Damage in Ceiling Tiles

Water damage in ceiling tiles is a common yet often overlooked issue that can lead to serious structural and health problems if not addressed promptly. Whether you’re a homeowner, property manager, or business owner, recognizing the early signs of water damage is crucial to preventing costly repairs and ensuring the safety of your property. Water damage in ceiling tiles can result from various sources such as roof leaks, plumbing issues, HVAC malfunctions, or natural disasters. The key to effective mitigation lies in early detection and immediate intervention through professional restoration services.

Projekt Property Restoration, a trusted name in the restoration industry, understands the urgency and complexity of dealing with water damage. With a mission to provide fast, friendly, and professional restoration services, they specialize in water damage restoration, fire damage restoration, mold remediation, biohazard clean up, and reconstruction services. Their team of highly-trained professionals is available 24/7, offering emergency service and free onsite estimates to ensure complete customer satisfaction.

Common Indicators of Water Damage in Ceiling Tiles

  1. Discoloration or Staining: One of the most visible signs of water damage in ceiling tiles is discoloration. These stains often appear as yellow, brown, or copper-colored spots and can spread over time. The presence of such stains usually indicates a persistent leak or moisture problem above the ceiling.
  2. Sagging or Warping: Ceiling tiles that appear to sag or warp are likely saturated with water. This deformation occurs when the tile material absorbs moisture, causing it to lose its structural integrity. Sagging tiles are not only unsightly but also pose a safety risk as they may eventually collapse.
  3. Peeling Paint or Bubbling: Water damage can cause the paint on ceiling tiles or surrounding areas to peel or bubble. This is a clear indication that moisture has penetrated the surface, compromising the adhesion of the paint and the integrity of the tile.
  4. Mold or Mildew Growth: Moist environments are breeding grounds for mold and mildew. If you notice black, green, or white fuzzy patches on your ceiling tiles, it’s a sign of mold growth due to water damage. Mold remediation should be carried out immediately to prevent health hazards.
  5. Musty Odors: A persistent musty smell in a room often points to hidden water damage. This odor is typically caused by mold or mildew growing behind the tiles or within the ceiling structure.
  6. Cracking or Flaking: Water-damaged ceiling tiles may begin to crack or flake as the material deteriorates. This is especially common in older buildings where the tiles are made of materials that are more susceptible to water damage.
  7. Visible Leaks or Drips: Active leaks or dripping water from the ceiling are obvious signs of water damage. These leaks may occur during or after rainfall, indicating a roof issue, or they may be constant, suggesting a plumbing problem.
  8. Increased Humidity Levels: High humidity in a room can be both a cause and a symptom of water damage. If your ceiling tiles feel damp or the room feels unusually humid, it’s worth investigating for potential water damage.
  9. Ceiling Tile Deterioration: Over time, water damage can cause ceiling tiles to deteriorate completely, leading to crumbling or disintegration. This not only affects the aesthetics of the room but also its safety and functionality.
  10. Recurring Issues: If you’ve repaired ceiling tiles before and the same issues keep reappearing, it’s a sign that the underlying water damage has not been properly addressed. In such cases, professional restoration services are essential.

Why Prompt Action is Crucial

“According to the Environmental Protection Agency (EPA), mold can begin to grow within 24 to 48 hours of water exposure, making immediate action critical to preventing long-term damage.” – EPA.gov

Delaying repairs or ignoring the signs of water damage in ceiling tiles can lead to a host of problems, including structural damage, electrical hazards, and health issues related to mold exposure. Water damage restoration is not just about aesthetics; it’s about preserving the integrity of your property and ensuring the safety of its occupants.

Causes of Water Damage in Ceiling Tiles

Understanding the root causes of water damage can help in preventing future occurrences. Common causes include:

  1. Roof Leaks: Damaged or missing shingles, clogged gutters, and poor roof maintenance can lead to water seeping into the ceiling.
  2. Plumbing Issues: Leaky pipes, burst water lines, or faulty plumbing fixtures can cause water to accumulate above the ceiling tiles.
  3. HVAC System Malfunctions: Condensation from air conditioning units or broken HVAC components can result in moisture buildup.
  4. Natural Disasters: Floods, hurricanes, and heavy storms can cause significant water intrusion, especially in poorly sealed buildings.
  5. Improper Insulation: Inadequate insulation can lead to condensation and moisture accumulation in ceiling spaces.

Health Risks Associated with Water Damage

Water damage in ceiling tiles is not just a structural issue; it can also pose serious health risks. Mold spores released into the air can cause respiratory problems, allergic reactions, and other health issues, particularly in individuals with compromised immune systems. Biohazard clean up may be necessary in severe cases where water damage has led to contamination from sewage or other hazardous materials.

“The Centers for Disease Control and Prevention (CDC) warns that exposure to mold can cause nasal stuffiness, throat irritation, coughing, and eye irritation, especially in people with mold allergies.” – CDC.gov

Professional Restoration Services: The Key to Effective Recovery

When dealing with water damage in ceiling tiles, DIY solutions often fall short. Professional restoration services offer a comprehensive approach that includes:

  1. Assessment and Inspection: Experts conduct a thorough inspection to identify the extent of the damage and its source.
  2. Water Extraction: High-powered equipment is used to remove standing water and moisture from affected areas.
  3. Drying and Dehumidification: Industrial-grade dehumidifiers and air movers are employed to dry out the structure completely.
  4. Mold Remediation: If mold is present, certified professionals carry out mold remediation to eliminate spores and prevent recurrence.
  5. Reconstruction Services: Damaged ceiling tiles and other structural components are repaired or replaced to restore the property to its original condition.

Projekt Property Restoration offers all these services and more, ensuring that your property is restored efficiently and effectively. Their comprehensive restoration services are designed to address every aspect of water damage, from initial assessment to final reconstruction.

Preventing Future Water Damage

Prevention is always better than cure. Here are some proactive steps you can take to avoid water damage in ceiling tiles:

  1. Regular Roof Inspections: Schedule periodic inspections to identify and repair any roof issues before they lead to leaks.
  2. Maintain Plumbing Systems: Check for leaks, corrosion, and other signs of wear in your plumbing system.
  3. Install Proper Ventilation: Ensure that your attic and ceiling spaces are well-ventilated to prevent moisture buildup.
  4. Use Dehumidifiers: In humid climates, dehumidifiers can help maintain optimal indoor humidity levels.
  5. Monitor HVAC Systems: Regular maintenance of HVAC units can prevent condensation and leaks.

Customer Satisfaction and Testimonials

At Projekt Property Restoration, customer satisfaction is at the heart of everything they do. Their clients consistently praise the professionalism, efficiency, and thoroughness of their team. Whether it’s a small leak or extensive water damage, their goal is to restore your property and your peace of mind.

“Projekt Property Restoration responded within hours of our call. Their team was professional, courteous, and got the job done right. Highly recommend!” – Satisfied Customer

Why Choose Projekt Property Restoration?

Projekt Property Restoration stands out for its commitment to quality, transparency, and rapid response. Their unique selling points include:

  1. 24/7 Emergency Service: Available every day of the year to handle emergencies.
  2. Highly-Trained Professionals: Licensed and experienced technicians who deliver top-notch service.
  3. Free Onsite Estimates: Transparent pricing with no hidden fees.
  4. Same-Day Service: Quick response times to minimize damage and restore properties promptly.
  5. Financing Options: Flexible payment plans to ease the financial burden of restoration.

Their mission is to get things back to normal as quickly and efficiently as possible. Whether you need water damage restoration, fire damage restoration, or mold remediation, you can count on Projekt Property Restoration to deliver exceptional results.

When to Call for Help

If you notice any of the signs mentioned above, it’s time to call in the professionals. Ignoring water damage in ceiling tiles can lead to more severe problems down the line, including structural failure and health hazards. Projekt Property Restoration offers expert water damage restoration services tailored to your specific needs.

Conclusion

Water damage in ceiling tiles is a serious issue that requires immediate attention. From discoloration and sagging to mold growth and musty odors, the signs are often visible and should never be ignored. Early detection and professional intervention are key to preventing further damage and ensuring the safety of your property.

Projekt Property Restoration is your trusted partner in property restoration. With a full suite of services including water damage restoration, fire damage restoration, mold remediation, biohazard clean up, and reconstruction services, they are equipped to handle any emergency. Their commitment to customer satisfaction, transparency, and quality service makes them the go-to choice for homeowners, business owners, and property managers alike.

Don’t wait until it’s too late. If you suspect water damage in your ceiling tiles, contact Projekt Property Restoration today. Their team of experts is ready to restore your property and your peace of mind.

Call 855-933-7935 or click here to schedule your free onsite estimate now. Let Projekt Property Restoration help you get things back to normal—fast, friendly, and professionally.

How to Prevent Mold in Wall Insulation

Mold in wall insulation is a hidden threat that can compromise your home’s structural integrity and indoor air quality. Knowing how to prevent mold in wall insulation is essential for homeowners and property managers looking to protect their investment and ensure a healthy living environment. At Projekt Property Restoration, we specialize in mold remediation and understand the importance of proactive measures to stop mold before it starts. Moisture buildup, poor ventilation, and undetected water damage are common culprits behind mold growth in insulation. By addressing these issues early, you can avoid costly repairs and potential health risks. With our 24/7 emergency response, highly trained professionals, and commitment to quality service, Projekt Property Restoration is here to help you safeguard your property. Whether you’re dealing with water damage, need mold inspection, or are looking for expert advice on moisture control, our team is ready to assist. Let us help you keep your walls dry, your insulation mold-free, and your property in top condition.

Identify Common Causes of Mold in Wall Insulation

Mold growth within wall insulation is a common yet often overlooked issue that can lead to serious health risks and structural damage if not addressed promptly. Understanding the root causes of mold in insulation is essential for effective prevention and long-term home maintenance. Mold thrives in environments that are damp, dark, and poorly ventilated—conditions that are often found inside wall cavities. Identifying the common causes of mold in wall insulation can help homeowners take proactive steps to mitigate the risk and maintain a healthy indoor environment.

One of the primary causes of mold in wall insulation is moisture intrusion. This can occur due to a variety of reasons, including roof leaks, plumbing failures, or cracks in the building envelope. When water seeps into the walls and becomes trapped within the insulation, it creates an ideal breeding ground for mold spores. According to the Environmental Protection Agency (EPA), mold can begin to grow within 24 to 48 hours in moist conditions, making timely detection and repair crucial.

Another significant contributor is poor ventilation. Inadequate airflow in wall cavities prevents moisture from evaporating, allowing humidity levels to rise and mold to flourish. This is especially common in older homes or buildings that lack modern ventilation systems. Areas like bathrooms, kitchens, and basements are particularly vulnerable due to the high levels of moisture generated during daily activities.

Condensation is also a frequent culprit. When warm, humid indoor air comes into contact with cooler wall surfaces, it can condense into water droplets that soak into the insulation. This is often seen in homes with poor insulation or thermal bridging, where heat escapes through the walls, creating cold spots that attract condensation. Over time, this moisture accumulation can lead to mold growth if not properly managed.

Improper construction practices and the use of substandard materials can further exacerbate the problem. For instance, using insulation that is not moisture-resistant or failing to install vapor barriers can allow water to penetrate and remain trapped within the walls. Additionally, construction defects such as unsealed gaps or improperly installed flashing can allow rainwater to infiltrate the building envelope.

Flooding and water damage events are also major triggers for mold in insulation. Whether caused by natural disasters or plumbing mishaps, any significant water intrusion can saturate wall insulation and create a high-risk environment for mold. In such cases, professional intervention is often required to assess the extent of the damage and carry out effective mold remediation.

It is also important to consider the role of high indoor humidity levels. Homes with consistently high humidity—typically above 60 percent—are more likely to experience mold issues. This can be due to climate conditions, inadequate dehumidification, or lifestyle factors such as drying clothes indoors or using humidifiers excessively. According to the Centers for Disease Control and Prevention (CDC), maintaining indoor humidity between 30 and 50 percent can significantly reduce the risk of mold growth.

To summarize, the most common causes of mold in wall insulation include:

  1. Water leaks from roofs, plumbing, or exterior walls
  2. Poor ventilation and airflow in wall cavities
  3. Condensation due to thermal bridging or inadequate insulation
  4. Improper construction techniques and lack of vapor barriers
  5. Flooding or significant water damage events
  6. High indoor humidity levels

“Mold can begin growing within 24 to 48 hours of water exposure, making early detection and moisture control essential.” — Environmental Protection Agency (EPA)

Homeowners should be vigilant in monitoring for signs of moisture and mold, such as musty odors, discoloration on walls, or increased allergy symptoms. Regular inspections and maintenance can help detect issues early before they escalate into more serious problems. For those unsure about the condition of their insulation or who suspect hidden mold, consulting a professional restoration service is highly recommended. You can learn more about the process by visiting our how it works page.

In addition to professional assessments, homeowners can benefit from educational resources and expert advice. Our blog offers valuable insights into mold prevention, water damage restoration, and other related topics to help you protect your home and family.

For further reading and reliable information, consider these external resources:

  1. EPA Mold Course: Chapter 1 – Why and Where Mold Grows
  2. CDC – Mold FAQs
  3. InterNACHI – Mold Inspection and Prevention

By understanding these common causes and taking proactive measures, homeowners can significantly reduce the risk of mold in wall insulation and ensure a safer, healthier living environment.

Implement Effective Moisture Control Strategies

Controlling moisture is one of the most critical steps in preventing mold growth within wall insulation. Moisture provides the perfect environment for mold spores to thrive, especially in enclosed spaces where air circulation is limited. To effectively manage moisture, it is essential to identify and eliminate sources of water intrusion. This includes addressing roof leaks, plumbing issues, and foundation cracks that may allow water to seep into walls. Proper ventilation is also key, particularly in high-humidity areas such as bathrooms, kitchens, and basements. Installing exhaust fans and ensuring that vents are not blocked can significantly reduce the buildup of moisture-laden air. Additionally, using vapor barriers during construction or renovation can prevent moisture from penetrating insulation materials. These barriers are typically installed on the warm side of the insulation to stop condensation from forming within the wall cavity.

Another effective strategy involves maintaining indoor humidity levels between 30 and 50 percent. This can be achieved with the use of dehumidifiers, especially in climates with high ambient humidity. Regularly inspecting and maintaining HVAC systems ensures that they are functioning efficiently and not contributing to excess moisture. It is also advisable to use moisture-resistant insulation materials, such as closed-cell spray foam or rigid foam boards, which are less susceptible to mold growth compared to traditional fiberglass insulation. These materials not only resist moisture but also provide a tighter seal against air leaks.

Homeowners and property managers should also be proactive in monitoring for signs of hidden moisture. Discoloration on walls, musty odors, and peeling paint can all indicate the presence of water behind the surface. Early detection is crucial, and resources like this guide on how to identify hidden water damage early can be invaluable in preventing mold before it becomes a serious issue. In cases where moisture problems are already present, professional intervention may be necessary. Companies that specialize in mold remediation can assess the extent of the damage and implement targeted solutions to restore a healthy indoor environment.

Incorporating these moisture control strategies into your home maintenance routine not only helps prevent mold in wall insulation but also contributes to better indoor air quality and structural integrity. For those seeking expert assistance, exploring available services or learning more about trusted restoration professionals can provide peace of mind and long-term protection against mold-related issues.

In conclusion, preventing mold in wall insulation is essential for maintaining a healthy and energy-efficient home. By addressing moisture issues promptly, ensuring proper ventilation, using mold-resistant materials, and conducting regular inspections, you can significantly reduce the risk of mold growth. Taking these proactive steps not only protects your property but also safeguards the well-being of everyone living in your home. Stay vigilant, and your walls will remain dry, clean, and mold-free for years to come.

Fire Safety Tips for Property Renovation Crews

Renovating a property can be an exciting yet challenging task, especially when it comes to maintaining safety on the job site. One of the most critical aspects that renovation crews must prioritize is fire safety. Whether you’re working on a residential remodel or a commercial upgrade, understanding and implementing effective fire safety tips for property renovation crews can prevent costly damage and protect lives. At COMMITTED TO QUALITY SERVICE, we emphasize the importance of proactive fire damage prevention and restoration. Our team offers fast, friendly, and professional service, specializing in both water damage and fire damage restoration. With the right fire safety measures in place—such as proper handling of flammable materials, regular equipment checks, and clear evacuation plans—your renovation project can proceed smoothly and safely. For expert assistance in fire damage mitigation, call us now at 855-933-7935. Let us help you safeguard your property and crew with our trusted restoration services.

Understanding Fire Hazards During Renovation

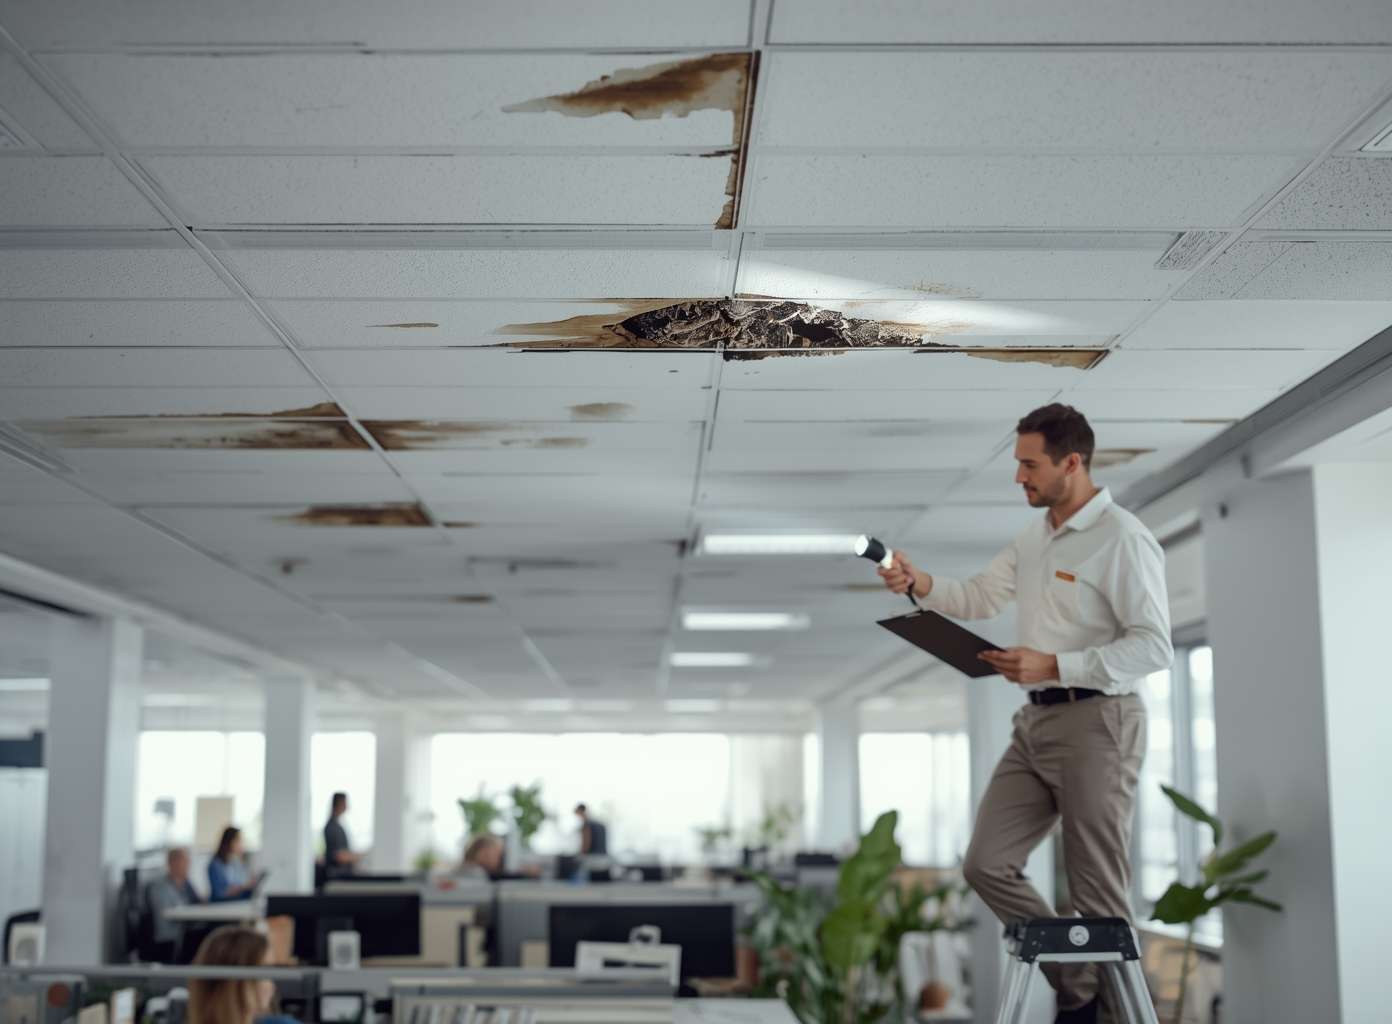
Renovating a property is an exciting yet complex process that involves multiple trades, tools, and materials. However, amidst the hustle of construction and upgrades, fire hazards often go unnoticed until it’s too late. Understanding the potential fire risks during renovation is crucial for ensuring the safety of both the crew and the property. Renovation activities frequently introduce new ignition sources, disrupt existing fire protection systems, and accumulate flammable materials, all of which significantly increase the risk of fire.

One of the most common causes of fire during renovation is the use of heat-producing tools such as soldering irons, welding equipment, and heat guns. These tools can easily ignite nearby combustible materials like insulation, wood, or dust. According to the National Fire Protection Association (NFPA), “hot work” is responsible for an estimated 4,580 structure fires annually, resulting in $484 million in direct property damage. This highlights the importance of implementing strict safety protocols when using such equipment.

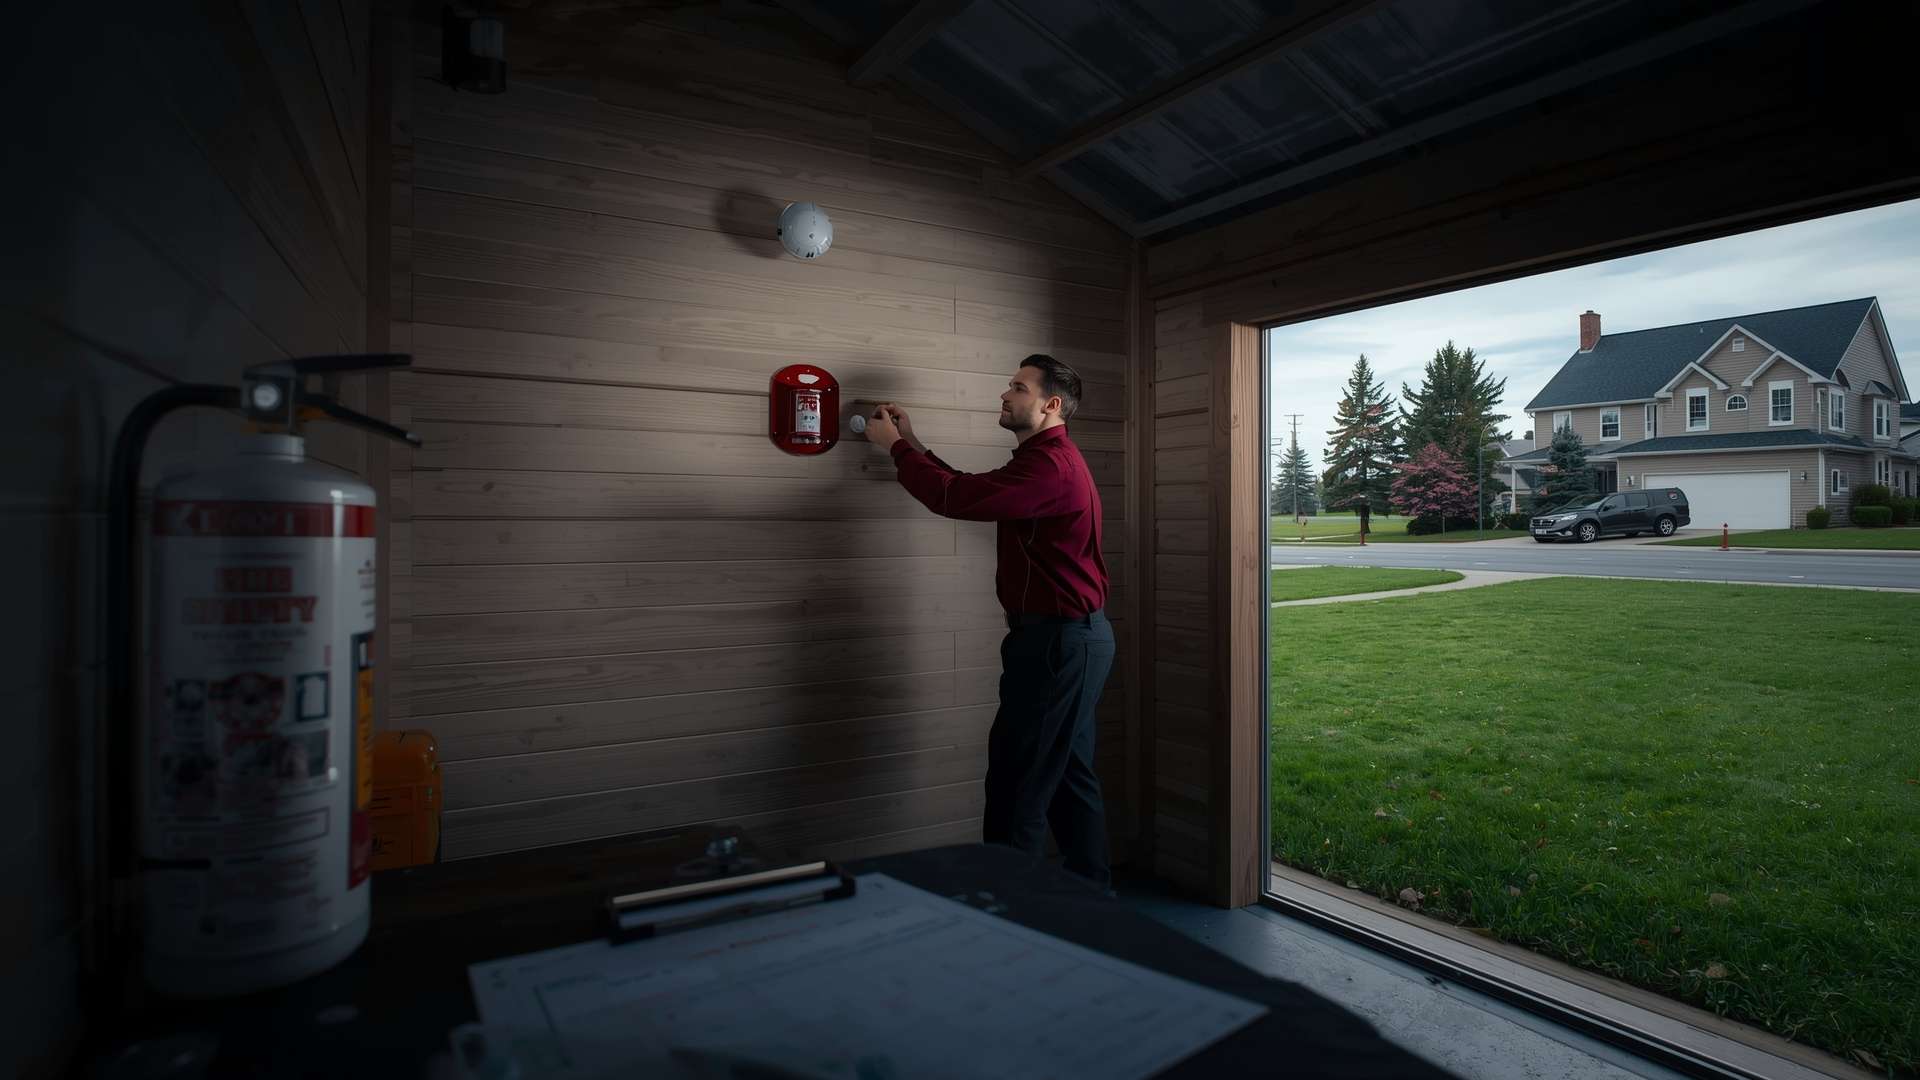
Another major hazard is the temporary disabling of fire protection systems. During renovations, fire alarms and sprinkler systems are often turned off to prevent false alarms or to accommodate structural changes. Unfortunately, this leaves the property vulnerable in the event of an actual fire. It is essential to coordinate with fire safety professionals to ensure that alternative fire watch measures are in place when these systems are offline.

Renovation sites also tend to accumulate large amounts of combustible debris, including sawdust, paint, solvents, and packaging materials. These items can easily catch fire if not properly stored or disposed of. Proper housekeeping and waste management are critical to minimizing this risk. Additionally, electrical hazards are prevalent during renovations. Exposed wiring, overloaded circuits, and temporary power setups can all lead to electrical fires if not handled correctly.

To better understand the types of fire hazards that can arise during renovation, consider the following examples:

  1. A contractor using a blowtorch to remove old paint accidentally ignites dry wood framing behind a wall.
  2. Renovation work disables the building’s sprinkler system, and a small electrical fire goes undetected until it causes significant damage.
  3. Improper storage of flammable chemicals in a poorly ventilated area leads to a fire sparked by a nearby power tool.

“Fire safety during renovation is not just about compliance; it’s about protecting lives and investments,” says the NFPA.

To mitigate these risks, renovation crews should conduct a thorough fire risk assessment before beginning any work. This includes identifying potential ignition sources, evaluating the condition of existing fire protection systems, and ensuring that all workers are trained in fire safety protocols. It’s also advisable to have fire extinguishers readily available and to establish clear evacuation routes.

For more detailed guidance on fire safety practices during renovation, the Occupational Safety and Health Administration (OSHA) provides comprehensive resources at https://www.osha.gov/fire-safety. Additionally, the NFPA offers a variety of tools and checklists tailored to construction and renovation environments at https://www.nfpa.org.

At Projekt Restoration, we prioritize safety in every aspect of our work. Whether you’re dealing with fire damage or planning a major renovation, our team is equipped to help you navigate the complexities of fire prevention. Learn more about our comprehensive services and how we integrate safety into every project.

Understanding fire hazards during renovation is not just a regulatory requirement—it’s a critical component of responsible project management. By recognizing the risks and implementing proactive measures, renovation crews can ensure a safer work environment and protect the long-term value of the property.

Proper Storage and Handling of Flammable Materials

During property renovation projects, the presence of flammable materials such as paints, solvents, adhesives, and fuel-based tools is common. These substances pose a significant fire risk if not stored and handled properly. Ensuring the safe management of these materials is essential to protect both workers and the property itself. One of the first steps in minimizing fire hazards is to store flammable items in clearly labeled, approved containers that are specifically designed to prevent leaks and reduce vapor emissions. These containers should be kept in well-ventilated areas away from direct sunlight, heat sources, and ignition points. It is also crucial to maintain a clean and organized storage space, free from clutter and combustible debris, to prevent accidental ignition.

Renovation crews should be trained to recognize the risks associated with flammable materials and follow established safety protocols. This includes reading and understanding the safety data sheets (SDS) for each product, which provide detailed information on proper handling, storage, and emergency procedures. Workers should wear appropriate personal protective equipment (PPE) such as gloves, goggles, and flame-resistant clothing when dealing with hazardous substances. Additionally, it is important to avoid smoking or using open flames near storage areas, and to ensure that fire extinguishers are readily accessible and regularly maintained.

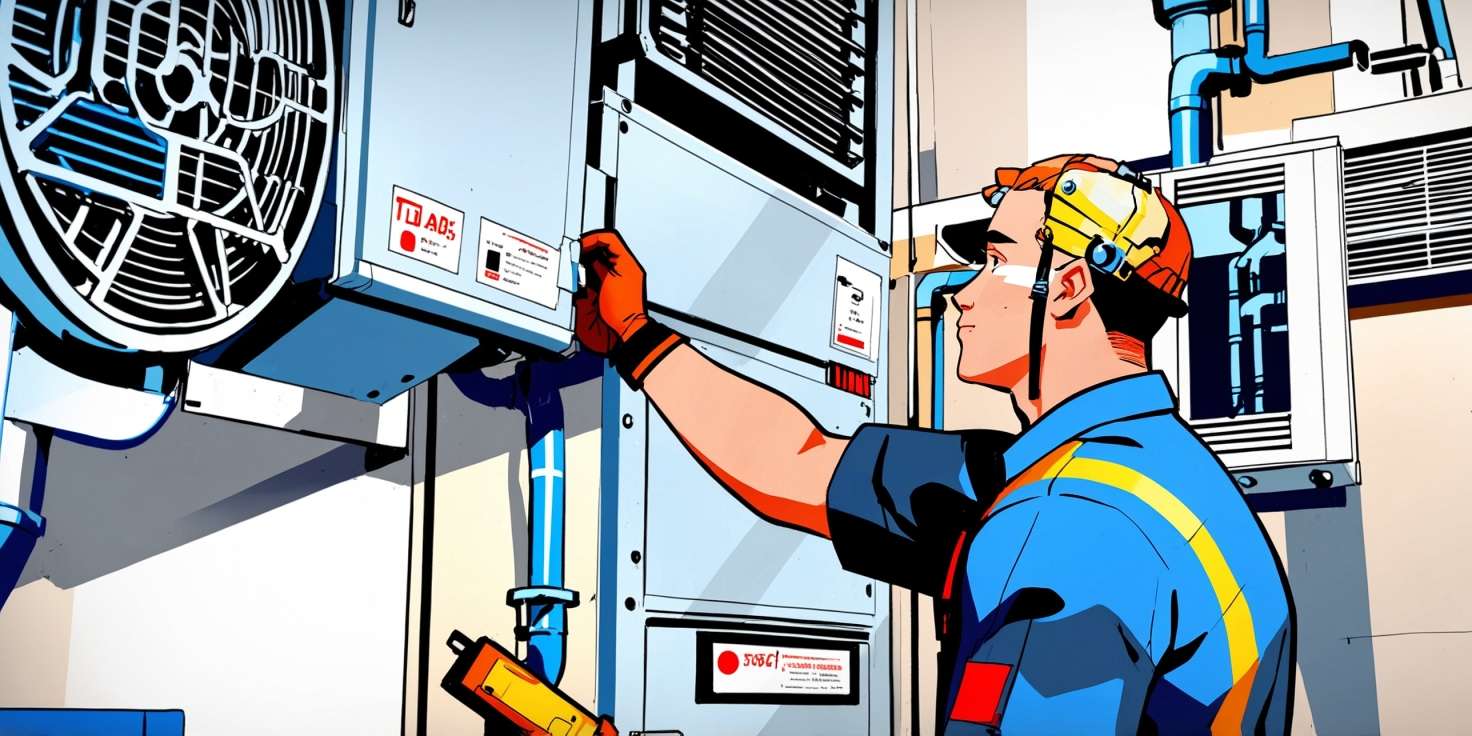
Proper ventilation is another key factor in reducing the risk of fire. When using flammable liquids indoors, ensure that the space is adequately ventilated to disperse potentially explosive vapors. Mechanical ventilation systems or exhaust fans can be used to maintain airflow and prevent the buildup of fumes. In cases where ventilation is limited, consider using less volatile alternatives or scheduling work during times when the area can be safely ventilated.

Segregating incompatible materials is also essential. For example, oxidizers should not be stored near flammable liquids, as their interaction can lead to dangerous chemical reactions. Use designated storage cabinets or rooms that comply with local fire codes and regulations. These storage units should be equipped with spill containment features and be located away from high-traffic areas to minimize the risk of accidental damage.

Regular inspections and maintenance of storage areas are vital to ensure ongoing safety. Check for signs of leaks, corrosion, or damage to containers, and replace any compromised items immediately. Keep an up-to-date inventory of all flammable materials on-site and ensure that all containers are clearly labeled with their contents and hazard warnings. This not only helps in maintaining safety but also assists emergency responders in case of an incident.

Incorporating fire safety into your renovation planning can significantly reduce the risk of accidents. Consider consulting with fire safety professionals or reviewing resources available on our services page to better understand how to integrate safety measures into your workflow. Additionally, our blog offers valuable insights and updates on best practices for handling hazardous materials during property restoration projects.

By prioritizing the safe storage and handling of flammable materials, renovation crews can create a safer work environment, protect property investments, and ensure compliance with safety regulations. Taking these precautions not only helps prevent fires but also demonstrates a commitment to professional standards and responsible renovation practices.

Safe Use of Electrical Tools and Equipment

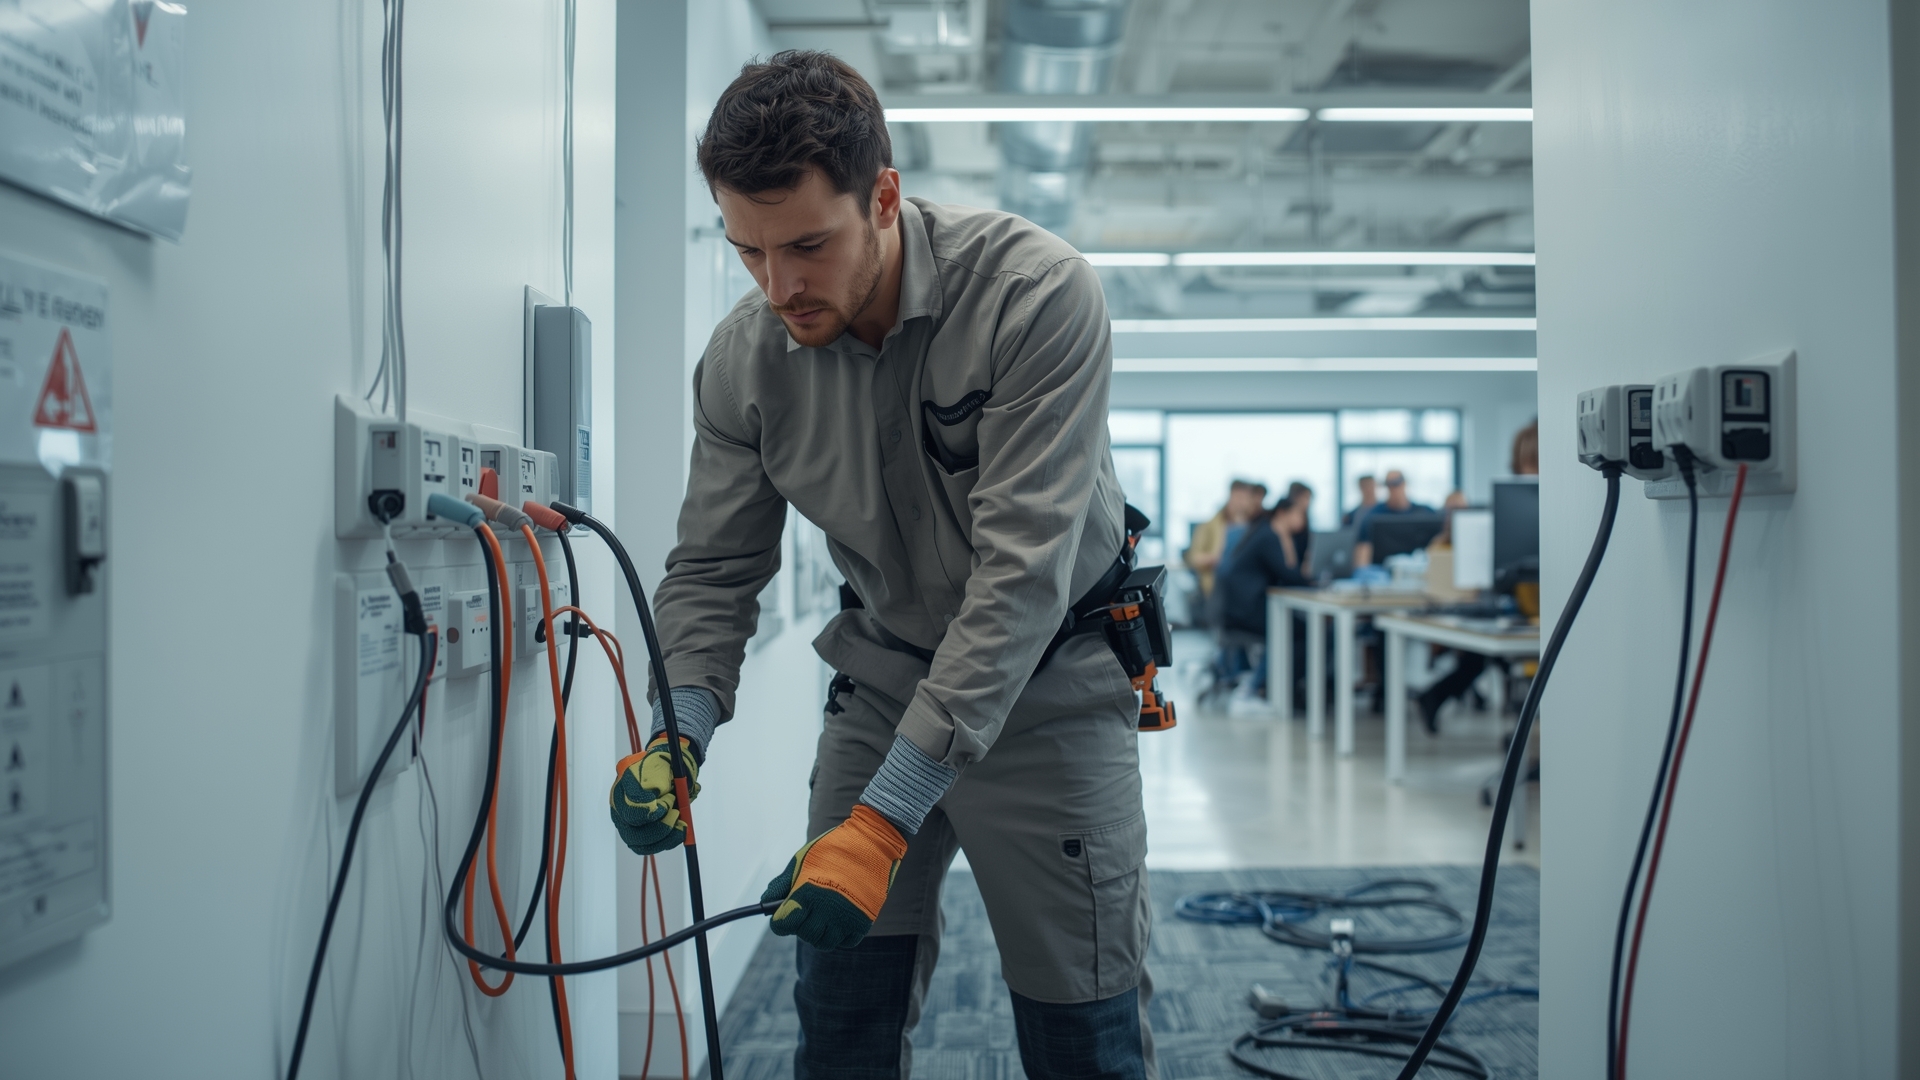
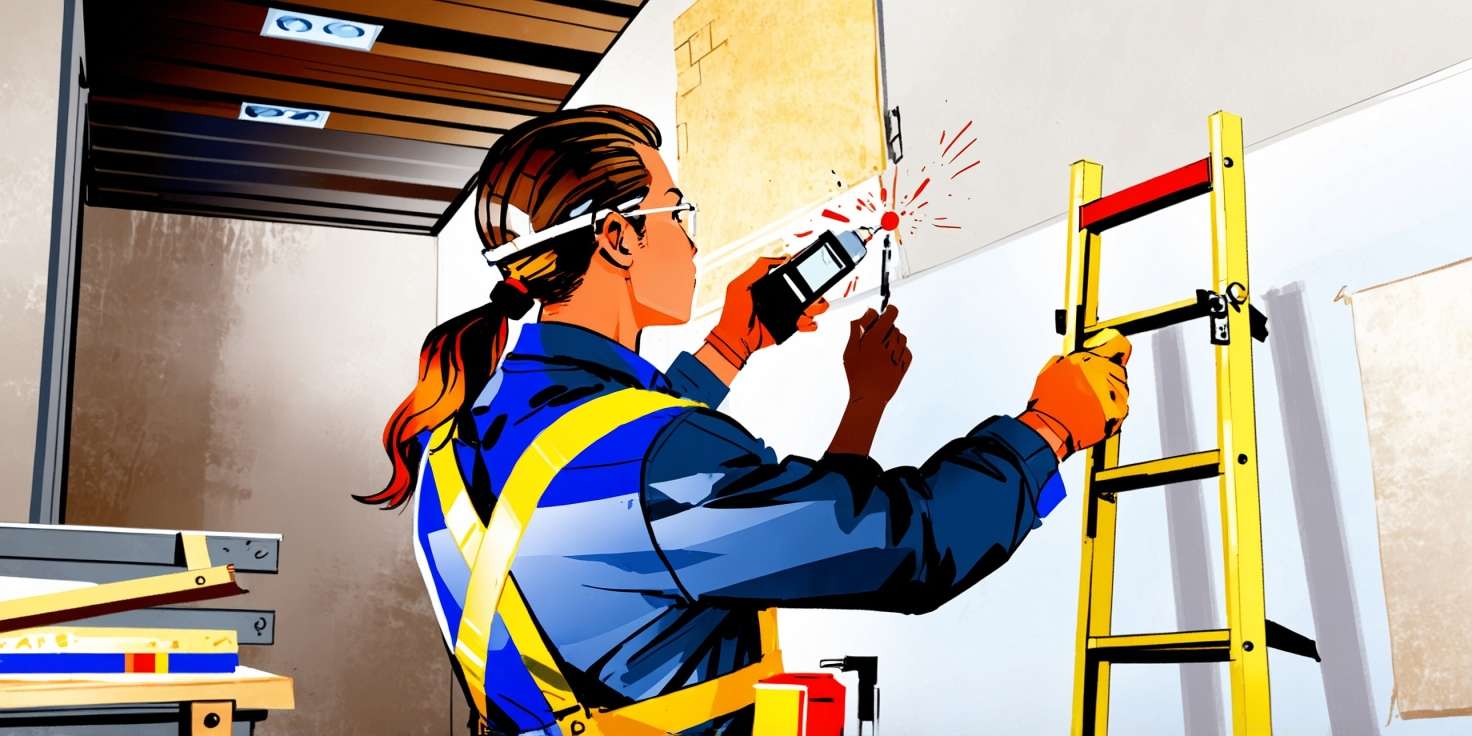
When working on property renovations, the use of electrical tools and equipment is often unavoidable. However, improper handling or faulty equipment can pose serious fire hazards. To ensure fire safety during renovation projects, it is essential for crews to follow best practices when using electrical tools. Start by inspecting all tools and cords before use. Look for frayed wires, exposed conductors, or damaged plugs, and immediately remove any compromised equipment from service. Using damaged tools can lead to short circuits or sparks that may ignite nearby flammable materials such as insulation, wood, or paint fumes.

Always use tools that are rated for the specific job and environment. For example, if working in damp or wet areas, ensure the tools are designed for such conditions to prevent electrical shock or fire. Ground Fault Circuit Interrupters (GFCIs) should be used with all power tools, especially in areas where moisture is present. These devices can detect imbalances in electrical current and shut off power before a fire or injury occurs. Additionally, avoid overloading circuits by plugging too many tools into a single outlet or extension cord. Overloaded circuits can overheat and become a significant fire risk.

Proper storage and maintenance of electrical tools are equally important. After use, tools should be unplugged and stored in a dry, secure location. Cords should be coiled neatly without sharp bends or pressure points that could damage the insulation. Regular maintenance, such as cleaning vents and checking for wear, helps extend the life of the equipment and ensures safe operation. It is also advisable to follow the manufacturer’s instructions for each tool, including recommended usage and maintenance schedules.

Training is a critical component of fire safety when using electrical tools. All renovation crew members should be trained in the correct operation of each tool they are expected to use. They should also be familiar with the location and proper use of fire extinguishers and know how to respond in case of an electrical fire. Unlike other types of fires, electrical fires should never be extinguished with water, as this can cause electrocution. Instead, a Class C fire extinguisher should be used, which is specifically designed for electrical fires.

Worksite organization also plays a role in minimizing fire risks. Keep the workspace clean and free of clutter, especially around electrical outlets and power strips. Avoid running cords through doorways or under carpets, as this can cause wear and increase the risk of sparks. If extension cords are necessary, use heavy-duty cords that are rated for the power load and length required. Never daisy-chain multiple extension cords together, as this can lead to overheating.

In addition to these precautions, it’s important to have a clear emergency plan in place. This includes knowing how to shut off power quickly in the event of an emergency and having a designated evacuation route. Regular safety drills can help ensure that all team members are prepared to act swiftly and safely if a fire does occur.

For renovation crews looking to enhance their fire safety protocols, partnering with experienced professionals can make a significant difference. At Projekt Restoration, we offer a range of services designed to support safe and efficient property restoration. Our team is committed to educating clients and contractors alike on best practices for fire prevention and response. You can learn more about our mission and values by visiting our Our Mission page.

By taking these steps, renovation crews can significantly reduce the risk of fire caused by electrical tools and equipment. Prioritizing safety not only protects the property being renovated but also ensures the well-being of every team member on site.

Implementing a Fire Watch During High-Risk Activities

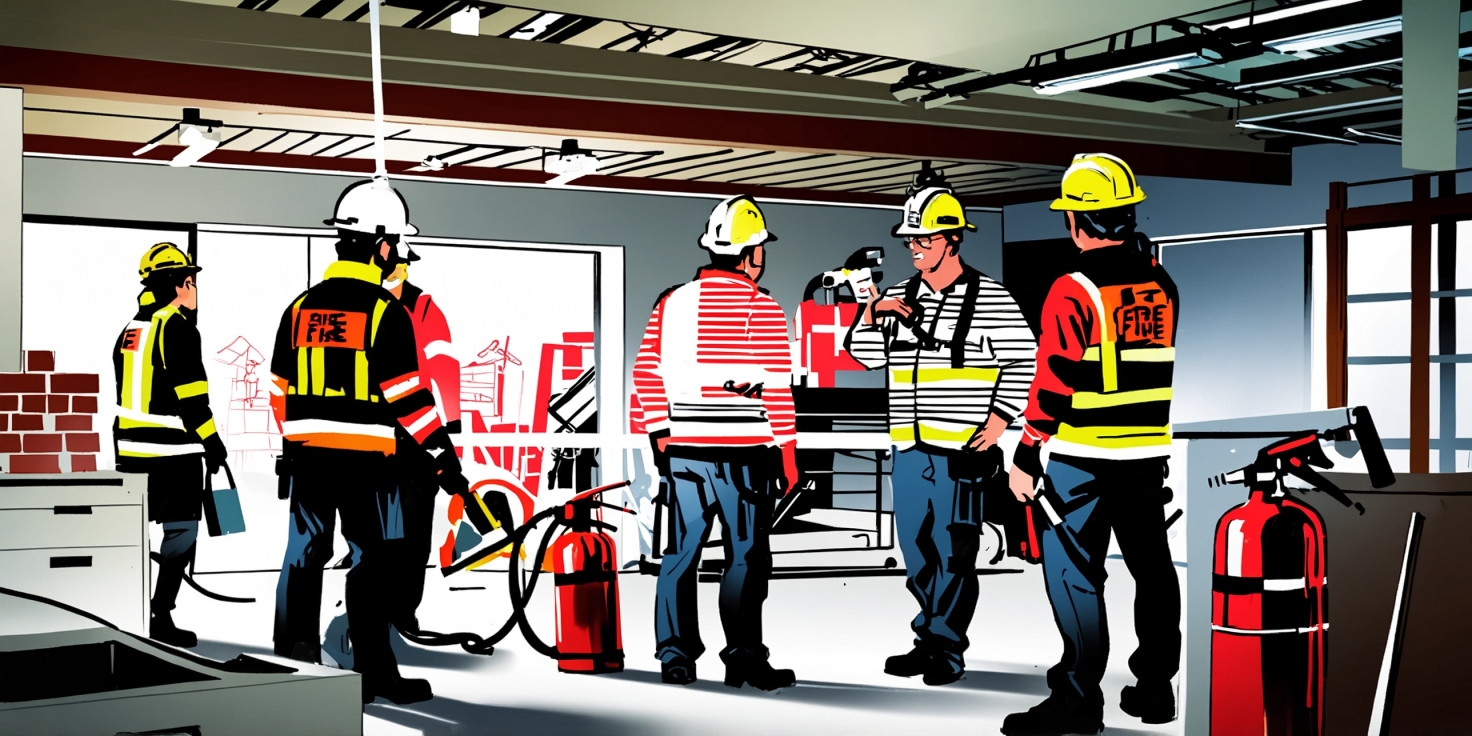
During property renovations, certain tasks such as welding, cutting, grinding, or using open flames significantly increase the risk of fire. These high-risk activities demand vigilant oversight to prevent accidents and ensure the safety of both workers and the property. One of the most effective strategies to mitigate these risks is the implementation of a fire watch. A fire watch involves assigning trained personnel to monitor the area during and after high-risk operations to detect and respond to any signs of fire immediately. This proactive approach is essential in environments where flammable materials, dust, or debris are present, and where fire suppression systems may be temporarily disabled due to ongoing work.

The primary role of a fire watch is to maintain constant surveillance over the work area, especially when hot work is being performed. This includes checking for smoldering materials, sparks, or any unusual heat sources that could ignite a fire. Fire watch personnel should be equipped with fire extinguishers and communication tools, and they must be trained to respond swiftly in the event of an emergency. Their presence is not just a precaution but a critical component of a comprehensive fire safety plan during renovation projects.

Fire watches should begin before the high-risk activity starts and continue for a designated period after the work is completed. This post-activity monitoring is crucial, as fires can sometimes ignite from lingering heat or unnoticed embers. The duration of the fire watch should be determined based on the nature of the work, the materials involved, and the specific risks identified during a pre-job hazard assessment.

In addition to having a fire watch in place, renovation crews should ensure that all workers are aware of fire safety protocols and evacuation procedures. Regular safety briefings and drills can reinforce the importance of vigilance and preparedness. It is also advisable to maintain clear access to fire exits and ensure that fire extinguishers are readily available and in working condition.

For property owners and managers, partnering with a professional restoration and safety service can provide peace of mind. Companies like Projekt Restoration offer comprehensive services that include fire damage prevention and emergency response planning. These experts can help assess the specific fire risks associated with your renovation project and recommend tailored solutions to enhance safety.

Moreover, understanding the broader scope of fire safety during renovations can be beneficial. For example, reviewing the company’s about page can give insight into their experience and commitment to safety, while exploring their blog may provide additional tips and case studies on managing fire risks in various renovation scenarios.

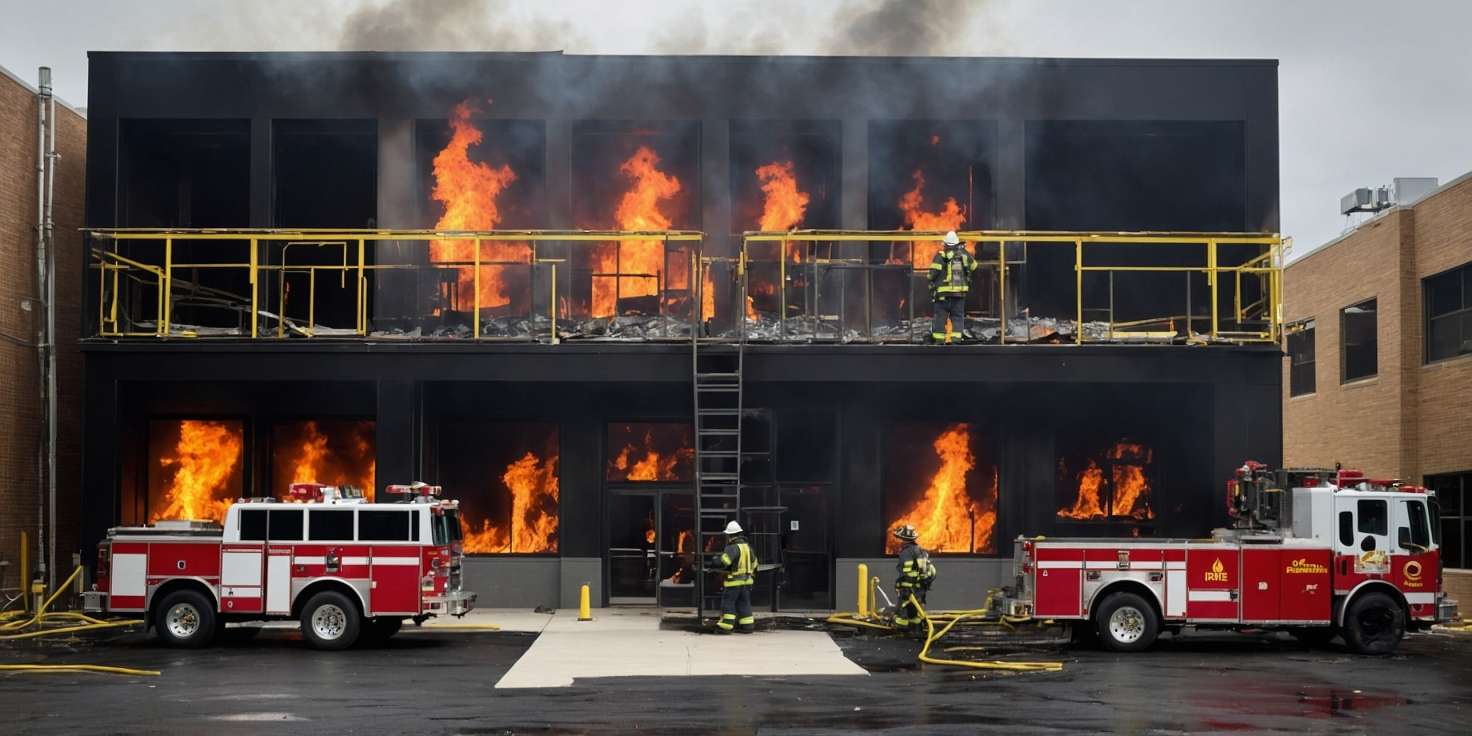
Implementing a fire watch is not just about compliance with safety regulations; it is about protecting lives, property, and investments. Fires during renovations can lead to devastating losses, costly delays, and potential legal liabilities. By taking proactive measures such as assigning a dedicated fire watch, renovation crews can significantly reduce the likelihood of fire incidents and ensure a safer working environment for everyone involved.

Ensuring Access to Fire Extinguishers and Emergency Exits

During any property renovation project, maintaining clear and immediate access to fire extinguishers and emergency exits is a critical component of fire safety. Renovation sites often involve the use of flammable materials, electrical tools, and temporary wiring, all of which increase the risk of fire hazards. Ensuring that fire extinguishers are strategically placed and easily accessible can make a significant difference in preventing small fires from escalating into major disasters. It is essential for renovation crews to be trained in the proper use of fire extinguishers and to understand the different types available, such as those designed for electrical fires or flammable liquids. This knowledge empowers workers to act quickly and effectively in the event of an emergency.

Equally important is the unobstructed access to emergency exits. During renovations, it is common for pathways to become blocked by construction materials, tools, or debris. However, these obstructions can delay evacuation and increase the risk of injury or fatalities during a fire. Renovation crews must regularly inspect and maintain clear exit routes, ensuring that all workers are aware of their locations and that signage is visible and illuminated. Emergency lighting should also be tested periodically to ensure it functions correctly in low-visibility conditions.

In addition to physical access, communication plays a vital role in fire safety. All crew members should be briefed on the location of fire extinguishers and emergency exits during the initial safety orientation. Regular safety drills can reinforce this knowledge and help workers respond calmly and efficiently under pressure. It is also advisable to assign specific team members the responsibility of checking that fire safety equipment is in place and operational at the start and end of each workday.

Fire safety planning should be integrated into the broader renovation strategy. This includes coordinating with property owners and local fire departments to ensure compliance with safety codes and regulations. For example, if a renovation involves changes to the building layout, it may be necessary to update the fire escape plan and install additional extinguishers or signage. These proactive measures not only protect the renovation crew but also safeguard the property and its future occupants.

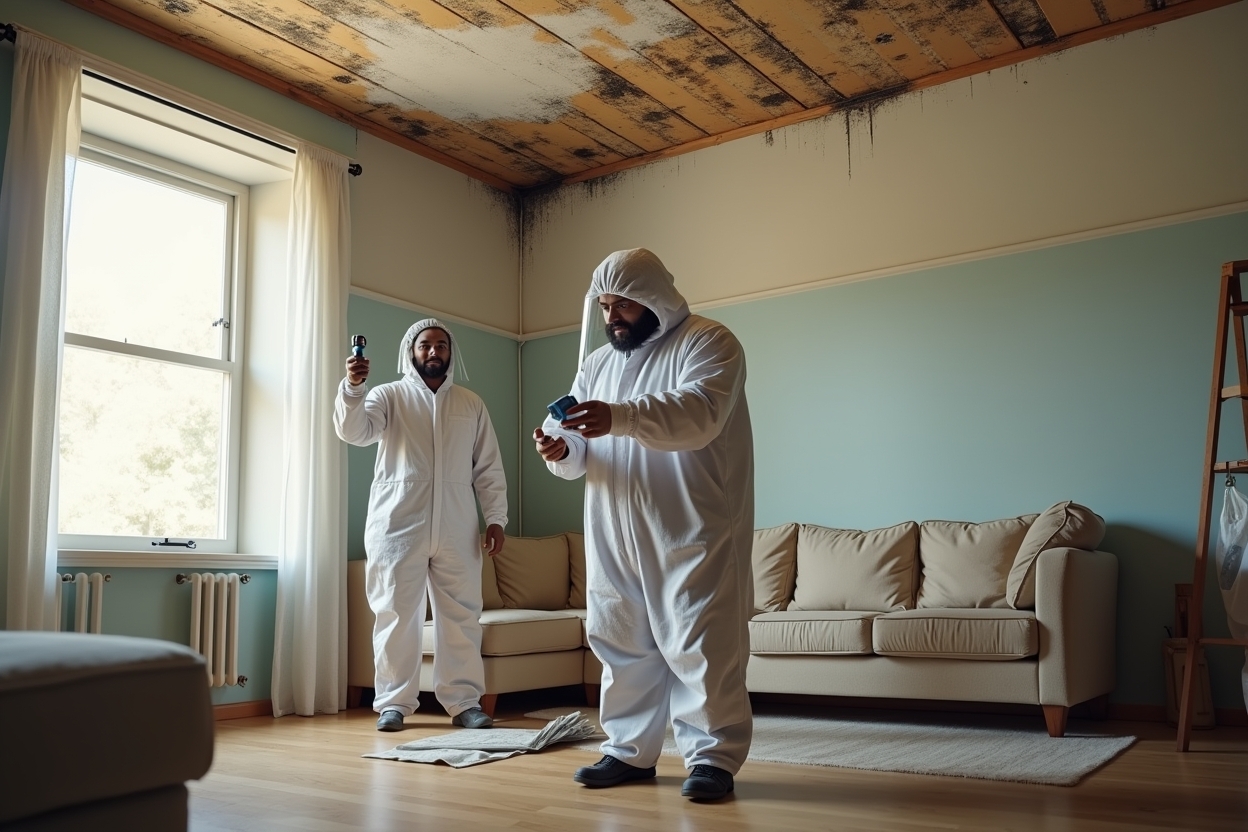
Furthermore, renovation teams should be aware of the potential for hidden fire hazards, such as faulty wiring or compromised insulation, which can be uncovered during demolition or structural work. Identifying and addressing these risks early can prevent future incidents. For more insights into identifying hidden dangers during renovation, you can explore our guide on how to identify hidden water damage early, which also highlights the importance of thorough inspections.

At Projekt Restoration, we emphasize a comprehensive approach to safety across all our services, including fire damage restoration and prevention. Our team is committed to helping property owners and renovation crews implement effective fire safety protocols that align with industry standards. We believe that safety should never be compromised, especially in environments where the risk of fire is elevated due to ongoing construction activities.

In conclusion, ensuring access to fire extinguishers and emergency exits is not just a regulatory requirement but a fundamental aspect of protecting lives and property during renovation projects. By maintaining clear pathways, properly placing fire extinguishers, conducting regular safety training, and integrating fire safety into the overall renovation plan, crews can significantly reduce the risk of fire-related incidents. For more information about our commitment to safety and excellence, visit our about page to learn more about our team and values.

Training Crew Members on Fire Safety Protocols

Ensuring that every crew member is thoroughly trained in fire safety protocols is a critical component of maintaining a secure work environment during property renovation projects. Renovation sites often involve high-risk activities such as welding, electrical work, and the use of flammable materials, all of which can significantly increase the likelihood of a fire. Therefore, it is essential that all team members understand not only how to prevent fires but also how to respond effectively in the event of an emergency. Comprehensive fire safety training should begin with identifying potential fire hazards specific to the renovation site. This includes recognizing overloaded circuits, improper storage of combustible materials, and the use of heat-producing tools. Crew members should be educated on the importance of maintaining a clean and organized workspace, as clutter can obstruct evacuation routes and fuel a fire if one starts.

In addition to hazard identification, training should cover the proper use of fire extinguishers, including the different types and their appropriate applications. For example, electrical fires require a different extinguisher than those caused by flammable liquids. Crew members must also be familiar with the location of fire extinguishers, alarms, and emergency exits. Regular fire drills should be conducted to ensure that everyone knows the evacuation plan and can execute it quickly and calmly. These drills help reinforce the importance of staying alert and prepared at all times. It is also beneficial to assign specific roles during emergencies, such as a fire warden responsible for checking that all personnel have evacuated safely.

Another key aspect of fire safety training is communication. Workers should be encouraged to report any unsafe conditions immediately and to speak up if they notice a colleague engaging in risky behavior. Establishing a culture of safety and accountability can significantly reduce the chances of a fire-related incident. Supervisors and project managers should lead by example, consistently following safety protocols and reinforcing their importance during daily briefings or toolbox talks. Incorporating fire safety into the overall safety training program ensures that it remains a priority throughout the duration of the renovation project.

Moreover, it is important to stay updated with local fire codes and regulations, as compliance is not only a legal requirement but also a practical measure to protect lives and property. Partnering with a professional restoration company that prioritizes safety can also be advantageous. At Projekt Restoration, we emphasize the importance of safety training and provide resources to help renovation crews stay informed and prepared. Our team understands the complexities of working in environments where fire hazards are present and offers guidance to ensure best practices are followed.

For those looking to enhance their knowledge further, our blog offers valuable insights into fire prevention strategies and other safety-related topics. By investing in proper training and fostering a proactive safety culture, renovation crews can significantly reduce the risk of fire incidents, ensuring a safer and more efficient worksite for everyone involved.

Coordinating with Local Fire Authorities and Inspectors

When undertaking property renovation projects, one of the most critical yet often overlooked aspects is maintaining open communication and collaboration with local fire authorities and inspectors. These professionals play a vital role in ensuring that all renovation activities comply with fire safety regulations and building codes. Early and consistent coordination with them not only helps prevent costly delays but also significantly reduces the risk of fire hazards during and after the renovation process.

Before beginning any renovation work, it is essential for crews to familiarize themselves with the specific fire safety codes and requirements applicable in their jurisdiction. Fire codes can vary widely depending on the location, type of property, and scope of the renovation. By consulting with local fire departments and inspectors early in the planning phase, renovation teams can gain valuable insights into necessary fire prevention measures, such as the installation of fire-resistant materials, proper placement of fire extinguishers, and the maintenance of clear egress routes.

Fire inspectors are also instrumental in identifying potential fire hazards that may not be immediately obvious to renovation crews. These can include outdated wiring, blocked fire exits, or the improper storage of flammable materials. By working closely with inspectors, crews can proactively address these issues before they escalate into serious safety concerns. This collaboration ensures that the renovation project not only meets legal standards but also upholds the highest level of safety for workers and future occupants.

Moreover, local fire authorities can provide guidance on emergency preparedness during renovation. This includes developing evacuation plans, conducting fire drills, and ensuring that all workers are trained in basic fire response procedures. Such preparedness is especially important in active construction zones where the risk of fire can be heightened due to the use of power tools, temporary heating sources, and combustible building materials.

In addition to safety, maintaining a strong relationship with fire inspectors can streamline the inspection and approval process. When inspectors are involved from the beginning, they are more likely to be familiar with the project’s scope and progress, making final inspections more efficient and less likely to result in unexpected compliance issues. This proactive approach can save both time and money, helping renovation crews stay on schedule and within budget.

For property owners and renovation professionals seeking comprehensive support, working with experienced restoration companies can be highly beneficial. These companies often have established relationships with local fire authorities and understand the nuances of fire safety compliance. At Projekt Restoration, our team is well-versed in coordinating with inspectors and ensuring that all renovation work aligns with fire safety standards. Our commitment to safety and quality is reflected in every project we undertake.

Additionally, understanding the broader context of fire safety in property renovation can be enhanced by exploring resources and case studies. Our blog offers valuable insights into best practices, common challenges, and expert tips for maintaining fire safety throughout the renovation process. Whether you are a contractor, property manager, or homeowner, staying informed and engaged with local fire authorities is a crucial step toward a successful and safe renovation.

In conclusion, coordinating with local fire authorities and inspectors is not just a regulatory requirement but a strategic advantage for property renovation crews. It fosters a culture of safety, ensures compliance with fire codes, and enhances the overall quality and durability of the renovation work. By prioritizing this collaboration, renovation teams can confidently move forward, knowing they are protecting both their investment and the lives of those who will occupy the space.

In conclusion, fire safety should be a top priority for any property renovation crew. By staying vigilant, following proper safety protocols, and ensuring all team members are trained and equipped to handle potential fire hazards, crews can significantly reduce the risk of fire-related incidents on the job site. From proper storage of flammable materials to maintaining clear evacuation routes and using fire-resistant equipment, every precaution counts. Remember, a safe work environment not only protects lives and property but also ensures the successful and timely completion of renovation projects. Stay informed, stay prepared, and make fire safety an integral part of your renovation process.

How to Detect Water Damage in HVAC Systems

Water damage in HVAC systems can lead to costly repairs, reduced efficiency, and even health hazards if not addressed promptly. Knowing how to detect water damage in HVAC systems is essential for homeowners and property managers alike. Common signs include unusual odors, water stains near vents, mold growth, and inconsistent airflow. Early detection not only helps prevent further damage but also ensures your heating and cooling systems operate efficiently year-round. At COMMITTED TO QUALITY SERVICE, we specialize in water damage restoration using advanced equipment designed specifically for drying structures affected by severe water damage. Our fast, friendly, and professional team is ready to help—call us now at 855-933-7935. Whether you’re dealing with water damage, fire damage, or need expert HVAC inspection, we’re here to restore your peace of mind.

Understanding the Causes of Water Damage in HVAC Systems

Water damage in HVAC systems can lead to costly repairs, reduced efficiency, and even health hazards if not addressed promptly. Understanding the root causes is essential for early detection and prevention. HVAC systems are complex, and several factors can contribute to water damage within them.

One of the most common causes is a clogged or disconnected condensate drain line. When the drain becomes blocked, water backs up and can overflow into surrounding areas. Another frequent issue is a damaged or rusted drain pan, which can leak water over time. Improper installation or lack of regular maintenance can also result in leaks and moisture buildup.

“According to the Environmental Protection Agency (EPA), indoor humidity levels above 60% can promote mold growth, often stemming from HVAC-related water issues.”

Other contributing factors include:

  1. Frozen evaporator coils that thaw and release excess water.
  2. Improperly sealed ductwork allowing condensation to form.
  3. Malfunctioning humidifiers attached to HVAC systems.

These issues not only damage the HVAC unit but can also lead to structural damage and mold growth. For example, unchecked water leaks can seep into walls and flooring, creating the perfect environment for mold spores to thrive. Learn more about the risks of mold remediation and how to prevent it.

To protect your home or business, it’s crucial to schedule regular inspections and maintenance. Visit our services page to explore how we can help you maintain a safe and efficient HVAC system. For more tips on early detection, check out our guide on how to identify hidden water damage early.

For additional information, the U.S. Department of Energy provides helpful insights on HVAC maintenance: https://www.energy.gov/energysaver/heating-cooling.

Common Signs of Water Damage to Look For

Recognizing the early signs of water damage in your HVAC system is crucial to preventing costly repairs and maintaining indoor air quality. One of the most common indicators is unusual moisture or pooling water around the HVAC unit. This could signal a clogged or leaking condensate drain line. Another red flag is a musty or moldy odor, which often points to hidden moisture buildup within the system or ductwork.

Discoloration or water stains on walls, ceilings, or floors near HVAC components can also suggest a leak. In some cases, you may notice peeling paint or warped materials, which are clear signs of prolonged exposure to moisture. If your HVAC system is suddenly less efficient or your energy bills spike without explanation, water damage could be affecting its performance.

Mold growth around vents or within the system is another serious concern, as it can spread quickly and pose health risks. If you suspect mold, it’s important to seek professional mold remediation services immediately.

For more information on how to protect your property, explore our full range of services designed to detect and address water damage early. Staying vigilant and addressing these signs promptly can help you avoid extensive damage and ensure your HVAC system operates efficiently year-round.

Inspecting HVAC Components for Moisture and Leaks

When checking for water damage in HVAC systems, a thorough inspection of all components is essential to identify moisture buildup and potential leaks. Start by examining the air handler, evaporator coils, and condensate drain lines, as these areas are most prone to water accumulation. Look for signs such as rust, corrosion, or water stains, which may indicate ongoing issues. A clogged or damaged condensate drain line can cause water to back up and leak into surrounding areas, leading to structural damage and mold growth.

Inspect ductwork for condensation or pooling water, especially in humid environments. Poor insulation or gaps in the ducts can allow moisture to enter, creating ideal conditions for mold. Additionally, check the drip pan under the evaporator coil; if it’s cracked or overflowing, it needs immediate attention.

Regular maintenance and early detection are key to preventing costly repairs. If you suspect hidden water damage, consider professional help to ensure a comprehensive evaluation. Learn more about our expert services designed to address HVAC-related water issues. You can also explore our detailed guide on how to identify hidden water damage early to stay proactive in protecting your property.

By routinely inspecting HVAC components for moisture and leaks, homeowners can safeguard their systems and maintain a healthy indoor environment.

Checking Drain Lines and Condensate Pans

One of the most common sources of water damage in HVAC systems is clogged or malfunctioning drain lines and condensate pans. These components are responsible for collecting and directing moisture away from the system. Over time, algae, mold, and debris can build up in the drain lines, causing blockages that lead to water overflow. Similarly, a cracked or rusted condensate pan can leak water into surrounding areas, potentially damaging ceilings, walls, and insulation.

To detect issues early, inspect the drain lines for any visible clogs or slow drainage. A musty odor or visible mold near the HVAC unit can also signal a problem. Regular maintenance, including flushing the drain lines and checking the pan for cracks or corrosion, can help prevent costly repairs. If you notice water pooling around your HVAC system, it’s crucial to act quickly to minimize damage.

Understanding the importance of these components is key to maintaining a healthy HVAC system. For more detailed guidance, explore our blog or learn about our comprehensive services designed to address water damage and system inefficiencies. Early detection and routine inspections can save homeowners from extensive repairs and ensure the longevity of their HVAC systems.

Monitoring Indoor Air Quality and Odors

One of the most telling signs of water damage in HVAC systems is a noticeable change in indoor air quality and the presence of unusual odors. When moisture accumulates within ducts or around HVAC components, it creates an ideal environment for mold and mildew growth. These contaminants can release musty or earthy smells that circulate throughout your home or business, signaling potential hidden water damage. Poor air quality may also lead to increased allergy symptoms, respiratory issues, or general discomfort among occupants.

Monitoring the air for persistent damp or moldy odors can help identify water-related issues early. If you detect such smells, it’s essential to inspect your HVAC system for leaks, clogged drain lines, or condensation buildup. Regular maintenance and professional inspections can prevent minor issues from escalating into costly repairs.

In addition to odors, visible signs like water stains near vents or excessive humidity indoors may indicate a problem. Addressing these concerns promptly can protect your property and health. For more information on identifying hidden moisture issues, visit our guide on how to identify hidden water damage early.

To learn more about our comprehensive restoration and inspection offerings, explore our services page. Our team is committed to helping you maintain a safe and healthy indoor environment.

Using Moisture Meters and Detection Tools

To accurately detect water damage in HVAC systems, utilizing advanced moisture meters and detection tools is essential. These devices help identify hidden moisture that may not be visible to the naked eye, allowing for early intervention before extensive damage occurs. Moisture meters measure the moisture content in materials such as insulation, ductwork, and surrounding structural components. Infrared cameras and thermal imaging tools can also reveal temperature variations that indicate the presence of water behind walls or within ceilings.

Using these tools ensures a thorough inspection of your HVAC system, helping to prevent mold growth, corrosion, and reduced efficiency. Professionals often rely on these technologies to assess the extent of water intrusion and determine the best course of action for remediation. For homeowners and property managers, understanding how these tools work can provide peace of mind and support proactive maintenance.

If you’re concerned about potential water damage in your HVAC system, it’s important to consult with experts who specialize in this area. Learn more about our comprehensive services designed to detect and address water-related issues. You can also explore our detailed guide on how to identify hidden water damage early for additional insights. Early detection not only protects your HVAC system but also preserves the overall health and safety of your indoor environment.

When to Call a Professional for HVAC Inspection

If you suspect water damage in your HVAC system, knowing when to call a professional can save you time, money, and prevent further complications. While minor condensation or a clogged drain line might be manageable with basic maintenance, more serious signs—like persistent leaks, mold growth, or unusual odors—require expert attention. Water damage can compromise your HVAC system’s efficiency and even pose health risks due to mold and mildew buildup.

A professional HVAC inspection is essential if you notice water pooling around the unit, inconsistent airflow, or increased humidity levels in your home. These symptoms may indicate hidden water damage that can worsen over time. Certified technicians have the tools and experience to detect underlying issues that may not be visible to the untrained eye.

Additionally, if your system has recently been exposed to flooding or fire, it’s crucial to schedule an inspection immediately. These events can cause internal damage that affects both performance and safety. For more information on how professionals handle such situations, visit our detailed services page.

Don’t wait until a small issue becomes a costly repair. Learn more about early detection by exploring our guide on how to identify hidden water damage early. Taking prompt action ensures your HVAC system remains efficient, safe, and long-lasting.

In conclusion, detecting water damage in HVAC systems early is crucial for maintaining indoor air quality, system efficiency, and avoiding costly repairs. By regularly inspecting components such as drip pans, condensate lines, ductwork, and insulation, homeowners and facility managers can identify warning signs like mold growth, musty odors, or water stains before they escalate. Incorporating routine maintenance and seeking professional assessments when necessary will ensure your HVAC system remains in optimal condition. Staying proactive not only extends the lifespan of your system but also safeguards the comfort and health of your indoor environment.

Schedule Your Mold Inspection Today!

Privacy Policy

Projekt Restoration we respects your privacy and is committed to protecting your personal information. This Privacy Policy outlines how we collect, use, and protect the information you provide when you visit our website, contact us, or use our services related to Mold Remediation, Mold Inspection & Testing, Mold Removal / Cleanup, and Black Mold Removal.


1. Information We Collect

We may collect the following types of personal and non-personal information:

  • Personal Information: Name, email address, phone number, physical address, and any other information you provide when contacting us or requesting services.

  • Usage Data: IP address, browser type, operating system, pages visited, and time/date of your visit.

  • Cookies: We may use cookies to enhance your website experience. You can disable cookies in your browser settings.


2. How We Use Your Information

We use your information to:

  • Respond to your inquiries or service requests

  • Schedule and deliver mold-related services

  • Improve our website and customer service

  • Send service updates, promotions, or important notices (if you opt-in)

  • Comply with legal obligations


3. Information Sharing and Disclosure

We do not sell, trade, or rent your personal information. We may share your data with:

  • Trusted third-party service providers (e.g., payment processors, contractors) to perform services on our behalf

  • Law enforcement or government agencies if required by law


4. Data Security

We implement reasonable safeguards (physical, electronic, and managerial) to protect your information from unauthorized access, alteration, disclosure, or destruction.


5. Your Privacy Rights (California Residents)

Under the California Consumer Privacy Act (CCPA), California residents have the right to:

  • Request disclosure of the personal information we collect and how we use it

  • Request deletion of your personal information

  • Opt-out of the sale of personal information (note: we do not sell your data)

To exercise any of these rights, please contact us at:
📞 Phone: (855) 933-7935


6. Third-Party Links

Our website may contain links to third-party sites. We are not responsible for their privacy practices. Please review their privacy policies separately.


7. Children’s Privacy

Our services are not directed to children under 13. We do not knowingly collect personal information from minors.


8. Changes to This Privacy Policy

We may update this Privacy Policy from time to time. Changes will be posted on this page with the updated effective date.


9. Contact Us

If you have any questions or concerns about this Privacy Policy, please contact:
Projekt Restoration

📞 (855) 933-7935