24 / 7 / 365 Emergency Service

How to Prevent Mold After Carpet Water Damage

Water damage is one of the most common and destructive problems homeowners face. Whether caused by a burst pipe, heavy rainfall, or an overflowing appliance, water can quickly seep into carpets and padding, creating the perfect environment for mold growth. Mold not only damages your property but also poses serious health risks. That’s why understanding how to prevent mold after carpet water damage is essential for every property owner.

At Projekt Restoration, we are committed to quality service. Call Us Now! 855-933-7935 for fast, friendly, and professional restoration services. Our team specializes in water damage restoration, fire damage restoration, mold remediation, and more. We understand the urgency of such situations and offer 24/7 emergency service to help you restore your home or business quickly and efficiently.

In this comprehensive guide, we’ll walk you through everything you need to know about preventing mold after carpet water damage. From immediate steps to long-term solutions, we’ll cover it all to ensure your property remains safe, clean, and mold-free.

Understanding the Risks of Mold After Water Damage

Mold is a type of fungus that thrives in moist environments. When water infiltrates your carpet, it doesn’t just soak the surface—it seeps into the padding and subfloor, creating hidden pockets of moisture. These damp areas are ideal breeding grounds for mold spores, which can begin to grow within 24 to 48 hours of water exposure.

The presence of mold in your home can lead to a variety of health issues, especially for individuals with allergies, asthma, or compromised immune systems. Symptoms may include coughing, sneezing, skin irritation, and even respiratory infections. Beyond health concerns, mold can also cause significant structural damage to your property, weakening floors, walls, and ceilings over time.

That’s why it’s crucial to act quickly when dealing with carpet water damage. The longer you wait, the higher the risk of mold growth and the more extensive the damage becomes. Immediate action not only protects your health but also saves you money on costly repairs and replacements.

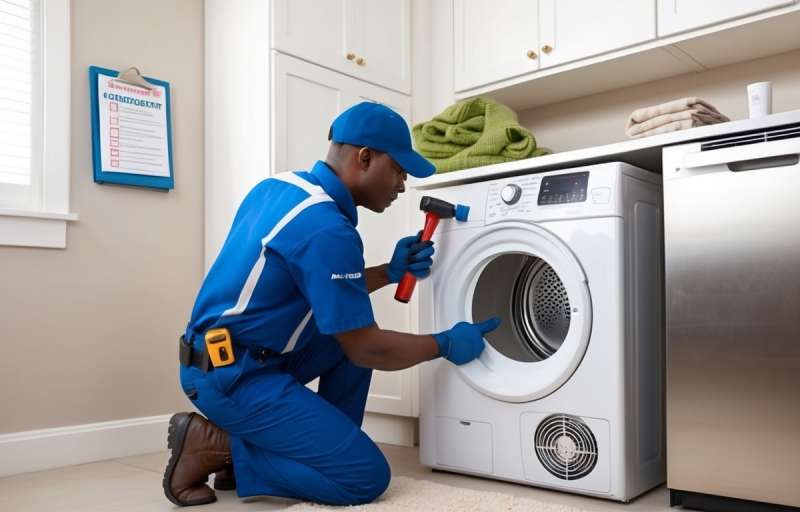
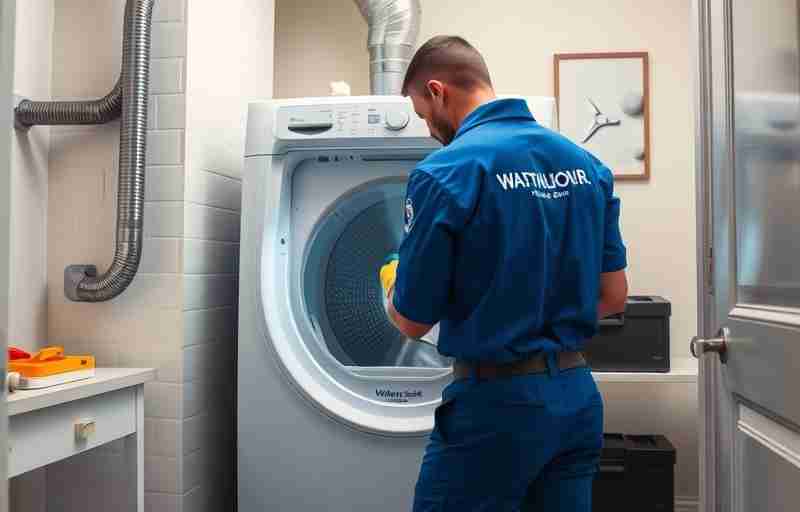
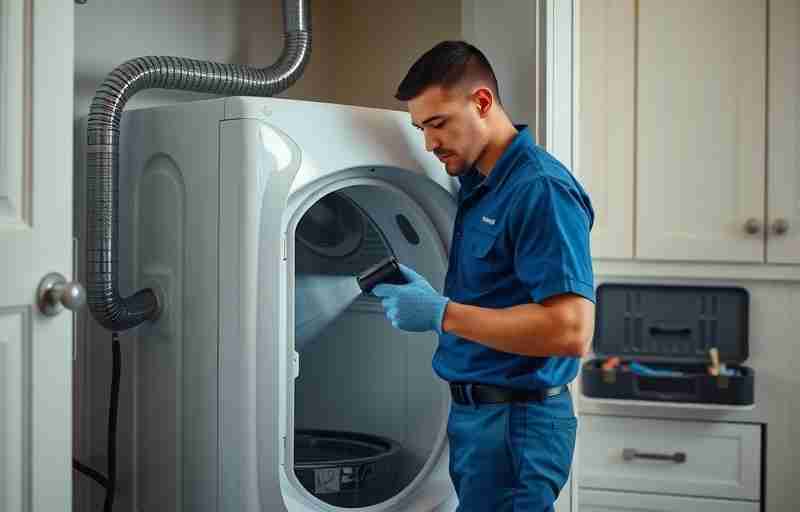
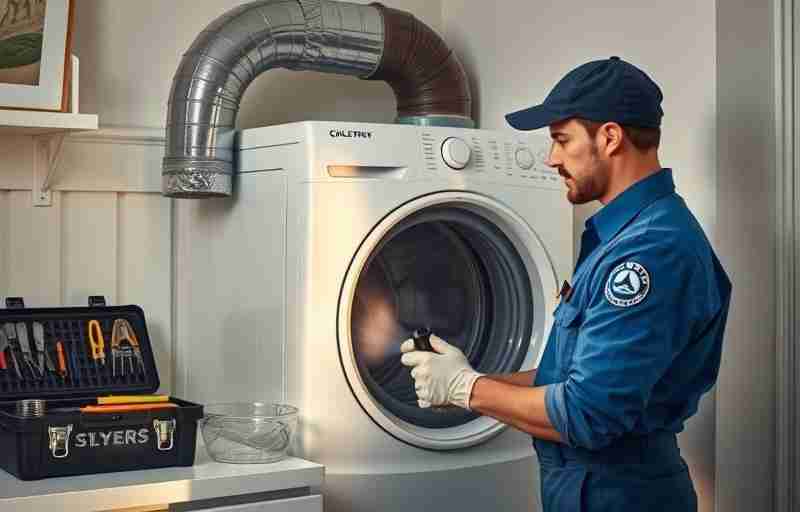
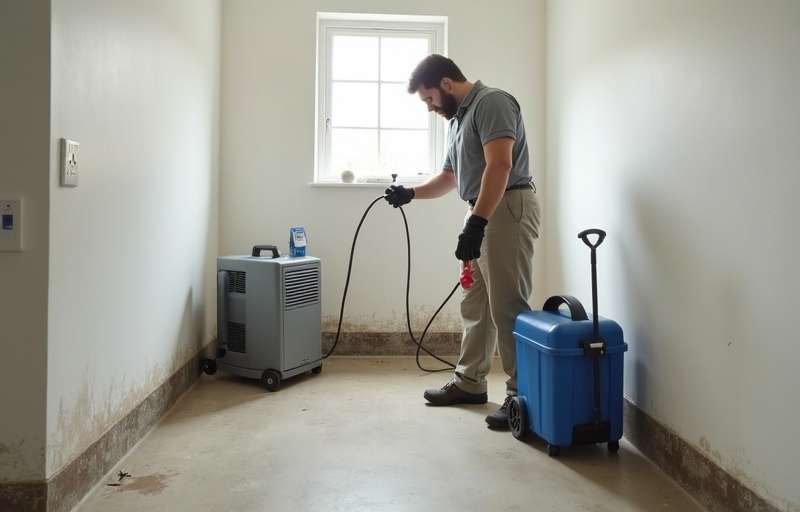
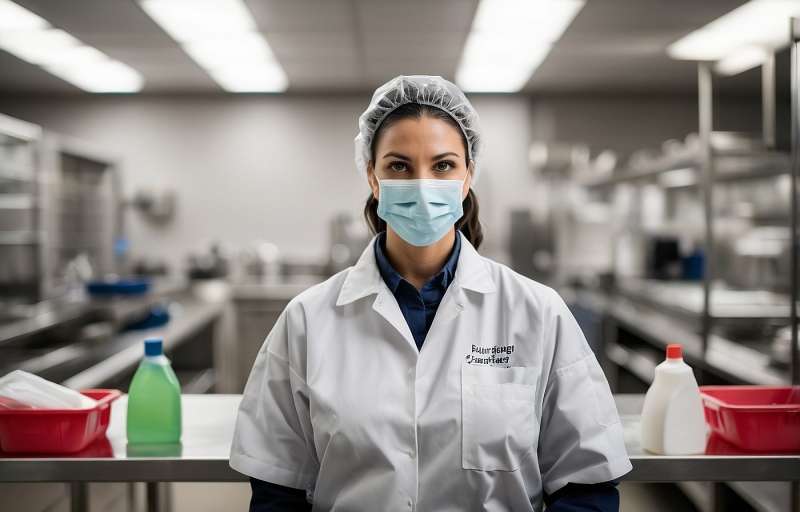
Professional restoration services play a vital role in mitigating these risks. Experts in water damage restoration use specialized equipment to extract water, dry affected areas, and prevent mold from taking hold. At Projekt Restoration, we offer comprehensive property restoration solutions tailored to your specific needs, ensuring your home is safe and sound.

Immediate Steps to Take After Carpet Water Damage

Time is of the essence when dealing with water-damaged carpets. The first 24 to 48 hours are critical in preventing mold growth. Here are the immediate steps you should take:

  • Turn Off the Water Source: If the water damage is due to a burst pipe or appliance, shut off the water supply immediately to prevent further flooding.
  • Ensure Safety: Before entering the affected area, make sure it’s safe. Turn off electricity if water levels are high to avoid electrical hazards.
  • Remove Excess Water: Use a wet/dry vacuum to extract as much water as possible from the carpet. The quicker you remove the water, the less chance mold has to grow.
  • Lift the Carpet: Carefully lift the carpet to allow air to circulate underneath. This helps dry the padding and subfloor more effectively.
  • Use Fans and Dehumidifiers: Place fans and dehumidifiers in the room to speed up the drying process. These tools help reduce humidity levels and prevent mold spores from thriving.
  • Dispose of Unsalvageable Materials: If the carpet padding is soaked and cannot be dried quickly, it may need to be discarded to prevent mold growth.

While these steps can help mitigate damage, they are often not enough to fully eliminate the risk of mold. That’s where professional mold remediation and restoration services come in. Our team at Projekt Restoration is equipped with advanced tools and techniques to thoroughly dry, clean, and restore your property.

We also offer biohazard clean up and reconstruction services if the damage is extensive. Our goal is to provide complete customer satisfaction by restoring your home to its pre-damage condition as quickly and efficiently as possible.

Long-Term Mold Prevention Strategies

Once the immediate threat has been addressed, it’s important to implement long-term strategies to prevent mold from returning. Here are some effective measures you can take:

  • Regular Inspections: Conduct routine checks of areas prone to moisture, such as basements, bathrooms, and under sinks. Look for signs of water leaks, discoloration, or musty odors.
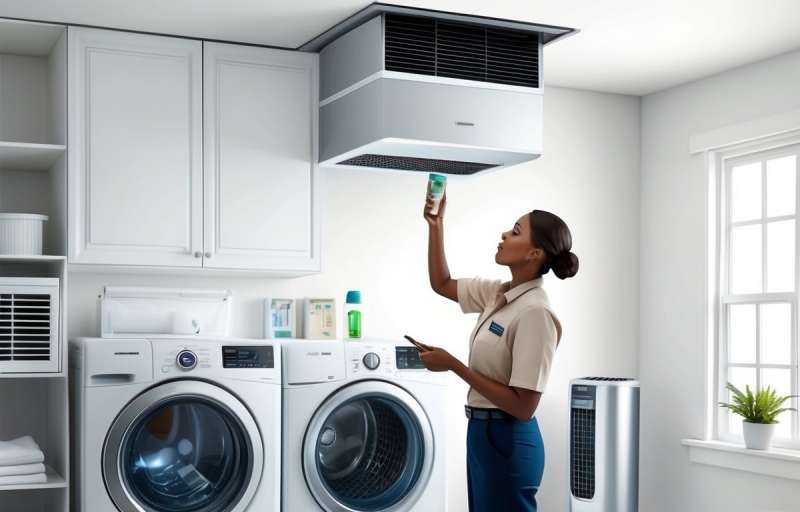
  • Maintain Proper Ventilation: Ensure your home is well-ventilated, especially in high-humidity areas. Use exhaust fans in bathrooms and kitchens, and consider installing a whole-house dehumidifier.
  • Use Mold-Resistant Materials: When replacing carpets or drywall, opt for mold-resistant products. These materials are designed to inhibit mold growth and are ideal for moisture-prone areas.
  • Seal Cracks and Leaks: Inspect your home’s foundation, roof, and plumbing for cracks or leaks. Sealing these areas can prevent water from entering and causing damage.
  • Monitor Indoor Humidity: Keep indoor humidity levels below 60%. You can use a hygrometer to measure humidity and adjust your dehumidifiers accordingly.

Implementing these strategies not only protects your home from mold but also enhances its overall value and livability. At Projekt Restoration, we offer expert advice and services to help you maintain a mold-free environment. Learn more about our approach by visiting our How It Works page.

Our team is dedicated to delivering top-notch property restoration solutions that prioritize your health and safety. Whether you need ongoing maintenance or emergency response, we’re here to help every step of the way.

Why Choose Professional Restoration Services

While DIY methods can be helpful in the short term, they often fall short when it comes to fully addressing water damage and preventing mold. That’s why hiring professional restoration services is the best course of action. Here’s why:

  • Expertise and Experience: Professionals have the training and experience to assess the extent of the damage and implement the most effective solutions.
  • Advanced Equipment: Restoration companies use industrial-grade equipment for water extraction, drying, and mold remediation, ensuring thorough and efficient results.
  • Comprehensive Services: From water damage restoration to fire damage restoration and biohazard clean up, professionals offer a wide range of services to address all aspects of property damage.
  • Insurance Assistance: Many restoration companies assist with insurance claims, helping you navigate the process and maximize your coverage.
  • Peace of Mind: Knowing that your home is in the hands of experts provides peace of mind and allows you to focus on getting your life back to normal.

At Projekt Restoration, we pride ourselves on delivering exceptional service and customer satisfaction. Our team is available 24/7 for emergency service, ensuring that help is always just a phone call away. We serve a wide range of areas—check out our Serving Areas page to see if we’re in your neighborhood.

We understand that every situation is unique, which is why we tailor our services to meet your specific needs. Whether you’re dealing with a minor leak or a major flood, we’re here to restore your property and your peace of mind.

Conclusion

Preventing mold after carpet water damage is a critical task that requires immediate action, strategic planning, and professional expertise. From understanding the risks to implementing long-term prevention strategies, every step plays a vital role in protecting your home and your health.

By acting quickly, using the right tools, and enlisting the help of experienced professionals, you can effectively prevent mold growth and restore your property to its original condition. At Projekt Restoration, we are committed to quality service and dedicated to helping you through every stage of the restoration process.

Don’t wait until it’s too late. If you’ve experienced water damage or suspect mold in your home, contact us today. Our team is standing by to provide fast, friendly, and professional restoration services that prioritize your safety and satisfaction. Explore our full range of services on our Services page and learn more about our mission to deliver excellence in every project by visiting our Our Mission page.

Let Projekt Restoration be your trusted partner in water damage restoration, mold remediation, and complete property restoration. Your home deserves the best—choose the team that’s always ready to deliver.

How to Handle Mold in Industrial Facilities

Mold in industrial facilities is more than just an unsightly nuisance—it poses serious health risks, compromises structural integrity, and can disrupt operations if not addressed promptly. At Projekt Property Restoration, we specialize in professional mold remediation services designed to tackle even the most severe mold infestations in commercial and industrial environments. With our mission to provide fast, friendly, and professional restoration services, we help business owners and property managers restore safe, functional workspaces with minimal downtime. Our highly-trained team uses advanced equipment and proven techniques to identify, contain, and eliminate mold at its source, ensuring long-term protection for your facility. Whether you’re dealing with mold caused by water damage, poor ventilation, or high humidity, our 24/7 emergency service ensures that help is always just a call away. Trust Projekt Property Restoration—“A Restoration Company That Gets Things Back to Normal”—to handle your mold remediation needs with efficiency, transparency, and care.

Identifying Common Sources of Mold in Industrial Settings

Mold growth in industrial facilities is a significant concern that can compromise structural integrity, damage valuable equipment, and pose serious health risks to workers. Understanding where mold commonly originates is essential for effective prevention and remediation. Industrial environments, due to their size and complexity, often harbor hidden moisture sources that create ideal conditions for mold proliferation. Identifying these sources early can save businesses from costly repairs and potential liability issues.

One of the most prevalent sources of mold in industrial settings is water intrusion. Leaks in roofing systems, plumbing failures, or groundwater seepage can introduce moisture into areas that are not regularly inspected. According to the Environmental Protection Agency (EPA), mold can begin to grow within 24 to 48 hours in moist conditions, making timely detection and response critical. Industrial buildings with flat roofs are particularly vulnerable, as pooling water can seep through cracks and deteriorate insulation and ceiling materials.

Another common contributor is poor ventilation. Many industrial facilities, especially older ones, lack adequate air circulation, which can lead to high humidity levels. Areas such as basements, storage rooms, and mechanical spaces often suffer from stagnant air, creating a breeding ground for mold. HVAC systems, if not properly maintained, can also distribute mold spores throughout the facility. The American Industrial Hygiene Association (AIHA) emphasizes the importance of regular HVAC inspections to prevent mold contamination.

Condensation is another frequent culprit. In industrial environments where temperature fluctuations are common, condensation can form on cold surfaces such as metal pipes, windows, and uninsulated walls. This moisture, if not promptly addressed, can lead to mold growth behind walls or under flooring. Facilities that process food or chemicals are especially at risk due to the presence of steam and other vapor-producing operations.

Stored materials and equipment can also harbor mold. Wooden pallets, cardboard boxes, and fabric-based products can absorb moisture and become moldy over time, especially if stored in damp or poorly ventilated areas. Regular inspection and rotation of stored goods can help mitigate this risk. Additionally, industrial cleaning practices that use excessive water without proper drying can inadvertently contribute to mold issues.

Flooding, whether from natural disasters or internal sources like burst pipes, is a major trigger for mold outbreaks. Even after visible water is removed, moisture can remain trapped in walls, floors, and insulation. According to FEMA, mold can develop in as little as 24 hours after a flood event, underscoring the need for immediate and thorough drying procedures. Facilities located in flood-prone areas should have a robust emergency response plan in place.

To illustrate, here are some of the most common sources of mold in industrial settings:

  1. Roof leaks and water intrusion from damaged or aging roofing systems
  2. Poor ventilation and high humidity in enclosed or rarely accessed areas
  3. Condensation on cold surfaces due to temperature differentials
  4. Improperly maintained HVAC systems that distribute mold spores
  5. Flooding from natural disasters or internal plumbing failures
  6. Stored materials that absorb and retain moisture
  7. Inadequate drying after industrial cleaning or maintenance activities

“Moisture control is the key to mold control. When water leaks or spills occur indoors, act quickly. If wet or damp materials or areas are dried 24 to 48 hours after

Effective Mold Remediation Techniques for Large-Scale Facilities

When addressing mold issues in industrial facilities, especially on a large scale, it is essential to implement effective remediation techniques that are both thorough and compliant with industry standards. Mold growth in expansive environments such as warehouses, factories, and manufacturing plants can pose serious health risks to employees and compromise the structural integrity of buildings. The first step in effective mold remediation is a comprehensive assessment of the affected area. This includes identifying the source of moisture, which is often the root cause of mold proliferation. Advanced tools such as infrared cameras and moisture meters are used to detect hidden damp areas that may not be visible to the naked eye. Once the source is identified, it must be eliminated to prevent future outbreaks. This could involve repairing leaks, improving ventilation, or installing dehumidifiers in high-humidity zones.

Containment is another critical component of large-scale mold remediation. Industrial-grade containment barriers, such as polyethylene sheeting and negative air pressure systems, are used to isolate the contaminated area and prevent mold spores from spreading to unaffected parts of the facility. This is particularly important in facilities that handle sensitive materials or products. Following containment, the actual removal process begins. Depending on the extent of the infestation, this may involve the removal and disposal of contaminated materials such as drywall, insulation, and carpeting. In some cases, industrial-strength cleaning agents and antimicrobial treatments are applied to surfaces to kill mold spores and inhibit future growth.

HEPA (High-Efficiency Particulate Air) filtration systems are commonly used during and after the remediation process to capture airborne spores and improve indoor air quality. In large-scale settings, these systems are often integrated into the facility’s existing HVAC infrastructure to ensure comprehensive air purification. Post-remediation verification is also essential. This involves air and surface testing to confirm that mold levels have returned to normal and that the remediation efforts were successful. Documentation of the entire process is crucial, not only for compliance with health and safety regulations but also for future reference and insurance purposes.

Incorporating preventative strategies is key to long-term mold control in industrial environments. Regular inspections, moisture control protocols, and employee training can significantly reduce the risk of future mold issues. Facility managers should consider partnering with professional remediation experts who specialize in industrial settings. These professionals bring the necessary experience, equipment, and certifications to handle complex remediation projects effectively. For more information about the services offered by trusted professionals, visit our services page. You can also learn more about our company and values by exploring the about section.

Ultimately, effective mold remediation in large-scale facilities requires a strategic, multi-step approach that prioritizes safety, efficiency, and long-term prevention. By investing in professional remediation and adopting proactive maintenance practices, industrial facilities can maintain a healthy environment for workers and protect their infrastructure from the damaging effects of mold.

In conclusion, effectively handling mold in industrial facilities requires a proactive and comprehensive approach. Regular inspections, proper ventilation, moisture control, and prompt remediation are key to preventing mold growth and ensuring a safe working environment. By implementing a structured mold management plan and training staff to recognize early signs of contamination, facility managers can minimize health risks, avoid costly damage, and maintain compliance with industry regulations. Prioritizing mold prevention not only protects your infrastructure but also promotes the well-being and productivity of your workforce.

Water Damage Risks in Finished Basements

Finished basements are a valuable addition to any home, offering extra living space, increased property value, and a cozy retreat for family activities. However, they are also highly vulnerable to water damage, which can lead to costly repairs and serious health risks if not addressed promptly. Understanding the water damage risks in finished basements is essential for homeowners looking to protect their investment and maintain a safe living environment. From hidden leaks and poor drainage to sump pump failures and heavy rainfall, several factors can contribute to basement flooding and moisture buildup. At COMMITTED TO QUALITY SERVICE, we specialize in water damage restoration using advanced equipment designed to dry and restore structures affected by severe water damage. Our fast, friendly, and professional team is available to help you mitigate damage and prevent long-term issues. Call us now at 855-933-7935 to learn more about our comprehensive water damage and fire damage restoration services. Don’t let water damage compromise your finished basement—act quickly to safeguard your home.

Common Causes of Water Damage in Finished Basements

Water damage in finished basements is a common yet often underestimated issue that can lead to costly repairs and serious structural problems. Understanding the root causes is essential for homeowners looking to protect their investment and maintain a safe living environment.

Finished basements are particularly vulnerable due to their location below ground level, where moisture and water intrusion are more likely. According to the Insurance Information Institute, water damage accounts for nearly 29% of all homeowner insurance claims, with basements being a primary area of concern.

“Even a small leak can lead to significant damage if left undetected in a finished basement,” warns the Institute for Business and Home Safety.

Some of the most frequent causes include:

  1. Foundation Cracks: Over time, cracks in the foundation can allow groundwater to seep into the basement.
  2. Poor Drainage: Improper grading or clogged gutters can direct water toward the home rather than away from it.
  3. Sump Pump Failure: A malfunctioning sump pump can result in water accumulation during heavy rains.
  4. Plumbing Leaks: Burst pipes or leaking fixtures behind finished walls can go unnoticed until significant damage occurs.
  5. High Humidity: Excess moisture in the air can lead to condensation and mold growth.

To learn more about how to detect early signs of water damage, visit our guide on how to identify hidden water damage early. For a full list of our restoration solutions, explore our services page.

For additional insights, the Environmental Protection Agency (EPA) offers helpful tips on moisture control: https://www.epa.gov/mold/mold-course-chapter-2.

Signs Your Basement May Have Water Issues

Water damage in finished basements can lead to costly repairs and long-term structural issues if not addressed promptly. Recognizing early warning signs is essential to protect your home and maintain its value. One of the most common indicators is a persistent musty odor, which often signals hidden moisture or mold growth. Discoloration or staining on walls, ceilings, or floors can also point to water intrusion, especially if the affected areas feel damp to the touch.

Another red flag is the presence of efflorescence—a white, chalky residue left behind when water evaporates and leaves mineral deposits on concrete surfaces. Cracks in the foundation or walls, especially those that widen over time, may allow water to seep in during heavy rain or snowmelt. Additionally, warped or buckling flooring and peeling paint or wallpaper are signs that moisture is compromising the integrity of your basement finishes.

If you notice any of these symptoms, it’s crucial to act quickly. Professional assessment and remediation can prevent further damage and reduce health risks associated with mold and mildew. Learn more about our comprehensive services designed to address water damage effectively. For more insights on how to protect your home, visit our informative blog. Early detection and intervention are key to preserving the safety and comfort of your living space.

The Cost of Ignoring Water Damage

Neglecting water damage in finished basements can lead to serious and costly consequences. What may start as a small leak or minor dampness can quickly escalate into structural deterioration, mold growth, and compromised indoor air quality. Over time, moisture can weaken the foundation, damage insulation, and ruin flooring, drywall, and personal belongings. These issues not only affect the safety and comfort of your home but also significantly decrease its value.

One of the most dangerous outcomes of untreated water damage is mold infestation. Mold thrives in dark, damp environments like basements and can spread rapidly, posing health risks such as allergies, respiratory problems, and skin irritation. If left unchecked, mold remediation becomes more complex and expensive. Learn more about our professional mold remediation services to prevent long-term damage.

Additionally, water damage can lead to electrical hazards and increase the risk of fire if water reaches wiring or appliances. Homeowners often underestimate the hidden dangers, which is why early detection is crucial. Visit our guide on how to identify hidden water damage early to protect your home before problems escalate.

Ignoring water damage doesn’t save money—it multiplies costs over time. Proactive maintenance and timely repairs are essential to preserving the integrity and safety of your finished basement.

Preventative Measures to Protect Your Basement

Protecting your finished basement from water damage begins with proactive and consistent preventative measures. One of the most effective ways to reduce the risk is by ensuring proper drainage around your home. This includes maintaining clean gutters, extending downspouts away from the foundation, and grading the landscape to direct water flow away from the basement walls. Installing a sump pump with a battery backup system can also help manage excess water during heavy rainfall or plumbing failures.

Regular inspections are crucial. Check for cracks in the foundation, signs of moisture on walls or floors, and any musty odors that may indicate hidden leaks. Sealing basement walls and floors with waterproof coatings can provide an added layer of protection. Additionally, installing a dehumidifier helps control humidity levels, reducing the risk of mold growth and structural damage.

Homeowners should also be aware of early warning signs of water intrusion. Learn more about how to identify hidden water damage before it becomes a costly issue. For professional support, consider exploring our full range of services designed to protect and restore your property.

Taking these preventative steps not only safeguards your basement but also preserves the value and safety of your entire home. For more information or to speak with an expert, visit our contact page today.

How to Properly Waterproof a Finished Basement

Waterproofing a finished basement is essential to prevent costly water damage and maintain a safe, dry living space. Start by inspecting your basement for any cracks in the walls or floors, as these are common entry points for moisture. Sealing these cracks with high-quality epoxy or polyurethane injections can help create a watertight barrier. Next, ensure your gutters and downspouts are directing water at least six feet away from your foundation to reduce hydrostatic pressure.

Installing a sump pump and a reliable drainage system, such as a French drain, can significantly reduce the risk of flooding during heavy rains. Additionally, applying a waterproof membrane or sealant to interior walls adds an extra layer of protection. It’s also important to maintain proper ventilation and humidity control to prevent mold growth, which can be a hidden consequence of water intrusion.

For homeowners unsure where to begin, consulting with professionals who specialize in basement waterproofing services can ensure the job is done thoroughly and correctly. You can also explore our blog for expert tips and insights on protecting your home from water damage. Taking proactive steps now can save you from expensive repairs and health hazards in the future.

Choosing the Right Flooring and Materials for Moisture Resistance

When finishing a basement, selecting the right flooring and materials is essential to prevent long-term water damage. Basements are naturally prone to moisture due to their below-ground location, making them vulnerable to leaks, condensation, and even flooding. Choosing moisture-resistant materials can significantly reduce the risk of costly repairs and health hazards like mold growth.

Opt for flooring options such as vinyl planks, ceramic tiles, or sealed concrete, which are known for their durability and water resistance. Avoid traditional hardwood or carpet, as these materials can absorb moisture and deteriorate over time. Additionally, using water-resistant underlayment and vapor barriers beneath your flooring can provide an extra layer of protection.

Beyond flooring, consider using mold-resistant drywall and waterproof paints to safeguard walls and ceilings. These materials not only help prevent water damage but also contribute to a healthier indoor environment. For more insights into protecting your basement, visit our detailed blog or explore our full range of services.

Proper material selection is a proactive step in minimizing the risks associated with water damage in finished basements. By investing in the right products and installation techniques, homeowners can enjoy a safe, dry, and long-lasting living space below ground.

When to Call a Professional for Basement Water Damage

If your finished basement shows signs of water damage—such as persistent dampness, musty odors, warped flooring, or visible mold—it’s time to consider calling a professional. While minor issues like small leaks or condensation might be manageable with DIY solutions, more severe problems can quickly escalate, compromising the structural integrity of your home and posing serious health risks.

Professionals have the tools and expertise to assess the extent of the damage, identify hidden moisture, and implement effective restoration strategies. Delaying professional help can lead to mold growth, electrical hazards, and costly repairs. If you notice discoloration on walls or ceilings, peeling paint, or a sudden increase in humidity, these are red flags that require immediate attention.

A certified restoration team can also help you navigate insurance claims and ensure your basement is restored to a safe, livable condition. For more information on how experts handle these situations, visit our services page. You can also explore our blog for helpful tips and insights on preventing future water damage.

Ultimately, knowing when to call in professionals can save you time, money, and stress. Don’t wait until minor issues become major disasters—early intervention is key to protecting your investment and your family’s well-being.

In conclusion, while finished basements add valuable living space and functionality to a home, they also come with unique vulnerabilities—particularly when it comes to water damage. From structural issues to mold growth and property loss, the risks are significant but manageable with proper planning and maintenance. By understanding the common causes of water intrusion and taking proactive steps such as waterproofing, regular inspections, and installing sump pumps or drainage systems, homeowners can protect their investment and enjoy peace of mind. Ultimately, staying informed and vigilant is the key to keeping your finished basement safe, dry, and comfortable for years to come.

How to Prevent Fire Damage from Dryers

Dryers are a common household convenience, but without proper maintenance, they can become a serious fire hazard. Knowing how to prevent fire damage from dryers is essential for protecting your home and loved ones. Lint buildup, clogged vents, and faulty wiring are just a few of the leading causes of dryer fires, which can result in devastating property loss. At COMMITTED TO QUALITY SERVICE, we understand the importance of fire safety and offer fast, friendly, and professional fire damage restoration services to help you recover quickly. Our team is equipped with specialized tools and expertise to mitigate fire-affected areas and restore your property to its original condition. Whether you’re looking to prevent dryer fires or need emergency fire damage repair, we’re here to help. Call us now at 855-933-7935 for expert assistance and peace of mind.

Clean the Lint Filter After Every Load

Regularly maintaining your dryer is crucial in reducing the risk of fire damage, and one of the simplest yet most effective steps is removing lint buildup. Lint is highly flammable, and when it accumulates in the filter, it restricts airflow, causing the dryer to overheat. According to the U.S. Fire Administration, nearly 2,900 home dryer fires are reported each year, and failure to clean the lint filter is the leading cause.

After each drying cycle, make it a habit to remove lint from the filter. This not only helps prevent fires but also improves your dryer’s efficiency and extends its lifespan. As a best practice:

  1. Turn off the dryer and allow it to cool before cleaning the lint filter.
  2. Use your fingers or a soft brush to remove lint from the screen.
  3. Check for any tears or damage in the filter and replace it if necessary.

“A clean lint filter allows your dryer to breathe and operate safely,” says the National Fire Protection Association (NFPA).

In addition to cleaning the lint filter, schedule regular inspections of your dryer vent system. Clogged vents can also pose serious fire hazards. For more tips on home safety and fire prevention, visit our blog or explore our services page.

If you’ve experienced fire damage or want to learn more about prevention, our team at Projekt Restoration is here to help. Learn about our mission and values on our Our Mission page or reach out through our Contact page.

For more safety guidelines, refer to the NFPA’s official dryer safety tips: https://www.nfpa.org/Public-Education/Fire-causes-and-risks/Top-fire-causes/Fire-involving-clothes-dryers-and-washing-machines

Inspect and Clean the Dryer Vent Regularly

One of the most effective ways to prevent fire damage caused by dryers is to routinely inspect and clean the dryer vent. Over time, lint and debris can accumulate in the vent system, significantly reducing airflow and increasing the risk of overheating. This buildup is a leading cause of dryer-related fires in homes. To ensure your dryer operates safely and efficiently, it’s essential to check the vent at least once every few months and remove any visible lint or blockages.

Start by disconnecting the dryer from the power source and carefully removing the vent hose. Use a vacuum or a specialized dryer vent cleaning brush to clear out any lint inside the hose and the wall vent. Also, inspect the exterior vent flap to ensure it opens freely and is not obstructed. If you notice excessive lint buildup or reduced dryer performance, it may be time to schedule professional maintenance.

Regular maintenance not only enhances safety but also extends the life of your appliance. For more information on how to protect your home from fire hazards, visit our fire damage page. You can also explore our full range of services to learn how we help homeowners maintain a safe and healthy living environment. If you have questions, our FAQ section provides helpful insights into our processes and safety tips.

Use the Dryer According to Manufacturer Instructions

Following the manufacturer’s instructions when using your dryer is essential for preventing fire hazards and ensuring the appliance operates safely and efficiently. Each dryer model comes with specific guidelines regarding installation, usage, and maintenance. Ignoring these instructions can lead to overheating, lint buildup, and even electrical malfunctions—all of which significantly increase the risk of fire damage.

Start by reading the user manual thoroughly. It provides crucial information about proper venting, load sizes, and recommended cleaning intervals. Overloading the dryer or using improper venting materials can restrict airflow, causing the machine to overheat. Additionally, make sure to clean the lint filter after every load, as accumulated lint is one of the leading causes of dryer fires.

Routine inspections and professional servicing are also recommended. If you notice unusual noises, longer drying times, or a burning smell, stop using the dryer immediately and consult a technician. These could be early warning signs of a potential fire hazard.

For more tips on protecting your home from fire risks, visit our blog. If you’re dealing with the aftermath of a dryer-related incident, our expert team offers comprehensive fire damage restoration services to help you recover quickly and safely. Always prioritize safety by adhering to the manufacturer’s guidelines and scheduling regular maintenance.

Avoid Overloading the Dryer

One of the most common yet overlooked causes of dryer-related fires is overloading the appliance. When a dryer is packed beyond its recommended capacity, it restricts airflow, causing the machine to overheat. This excessive heat can ignite lint or other flammable materials trapped inside, significantly increasing the risk of a fire. To prevent this, always follow the manufacturer’s guidelines for load size and avoid stuffing the drum with too many clothes.

Overloading not only poses a fire hazard but also reduces the efficiency of your dryer. Clothes take longer to dry, which leads to increased energy consumption and wear on the appliance. Regular maintenance and responsible usage are essential to keeping your home safe. Make it a habit to clean the lint filter after each use and schedule periodic inspections of the dryer vent system.

If you’re unsure about proper dryer maintenance or need professional help, consider exploring our wide range of services designed to protect your home from fire and other types of damage. You can also learn more about our commitment to safety and excellence by visiting our mission page. Taking these simple precautions can go a long way in preventing fire damage and ensuring the longevity of your appliances.

Check for Signs of Wear and Tear on Dryer Components

Regularly inspecting your dryer for signs of wear and tear is a crucial step in preventing potential fire hazards. Over time, components such as the lint trap, drum belt, and exhaust vent can deteriorate or become clogged, increasing the risk of overheating and fire. Lint buildup, in particular, is highly flammable and can accumulate in hidden areas, even if you clean the lint screen after every use. Make it a habit to check behind and underneath the dryer for stray lint and debris.

Pay close attention to the condition of the power cord and plug. Frayed wires or scorch marks are clear indicators of electrical issues that need immediate attention. Additionally, listen for unusual noises during operation, as these may signal worn-out bearings or misaligned parts that could lead to overheating.

If you’re unsure about what to look for or how to perform a thorough inspection, consider reaching out to professionals. At Projekt Restoration, we offer a range of services designed to keep your home safe from fire and other hazards. You can also learn more about our commitment to safety and excellence by visiting our mission page.

By staying proactive and addressing minor issues before they escalate, you can significantly reduce the risk of dryer-related fires and protect your home and loved ones.

Keep the Area Around the Dryer Clear of Flammable Items

To reduce the risk of fire damage from dryers, it’s essential to maintain a clean and clutter-free area around the appliance. Flammable materials such as lint, paper, clothing, and cleaning supplies can easily ignite if they come into contact with the dryer’s heat. Always ensure that the space surrounding your dryer is free from these items. This simple precaution can significantly lower the chances of a fire starting in your laundry room.

Regularly inspect the area behind and beside the dryer, as lint and dust can accumulate unnoticed. These particles are highly combustible and can pose a serious fire hazard if not addressed. Additionally, avoid storing items like aerosol cans, cardboard boxes, or plastic containers near the dryer, as they can catch fire quickly in high temperatures.

Proper dryer maintenance is also crucial. Clean the lint filter after every use and schedule routine inspections to ensure the venting system is clear. If you’re unsure about the safety of your dryer setup, consider consulting a professional. At Projekt Restoration, we offer a range of services designed to help homeowners prevent and recover from fire-related incidents.

For more information about our company and how we can assist you, visit our About page. Taking these preventive measures can go a long way in protecting your home and loved ones from the devastating effects of dryer fires.

Schedule Professional Maintenance Annually

To effectively prevent fire damage caused by dryers, it’s essential to have your appliance professionally inspected and maintained at least once a year. Over time, lint and debris can accumulate in areas that are difficult to reach with regular cleaning, such as the dryer vent and internal components. A certified technician can thoroughly clean these parts, check for wear and tear, and ensure that the dryer is operating efficiently and safely.

Annual maintenance not only reduces the risk of fire but also extends the lifespan of your dryer and improves its performance. Professionals can identify potential hazards like faulty wiring, overheating elements, or blocked vents before they become serious threats. This proactive approach is especially important for households that use their dryers frequently or have older models.

In addition to scheduling routine maintenance, homeowners should stay informed about other fire prevention strategies. Explore our blog for expert tips and updates on home safety. If you’re curious about the full range of services we offer to protect your home, visit our services page.

Taking these steps can make a significant difference in safeguarding your property and loved ones from the dangers of dryer-related fires. Don’t wait for a problem to arise—make annual maintenance a priority.

In conclusion, preventing fire damage from dryers is all about consistent maintenance, safe usage practices, and staying informed. By cleaning the lint filter after every load, inspecting and cleaning the vent system regularly, avoiding overloading the dryer, and ensuring professional installation and repairs, you significantly reduce the risk of a dryer-related fire. Taking these simple yet effective precautions not only protects your home and loved ones but also extends the life of your appliance. Remember, a few minutes of prevention can save you from a lifetime of regret. Stay safe and keep your dryer hazard-free.

Mold Prevention for Long-Term Vacant Homes

Leaving a home vacant for an extended period can lead to unexpected issues, with mold growth being one of the most common and costly problems. Mold prevention for long-term vacant homes is essential to protect your property’s structural integrity and indoor air quality. At Projekt Property Restoration, we specialize in mold remediation and understand how quickly mold can take hold in an unoccupied space—especially when moisture goes undetected. Whether you’re a homeowner, property manager, or real estate investor, taking proactive steps to prevent mold can save you time, money, and stress down the line. Our team of highly trained professionals offers expert advice and services, including water damage restoration, roof tarp installation, and biohazard cleanup, to ensure your property remains safe and mold-free. With 24/7 emergency service and a commitment to quality, Projekt Property Restoration is here to help you maintain your vacant property and get things back to normal—fast.

Understanding the Causes of Mold in Unoccupied Homes

Mold growth in long-term vacant homes is a common yet often overlooked issue that can lead to significant structural damage and health hazards. When a property remains unoccupied for an extended period, it becomes more susceptible to environmental conditions that promote mold development. Understanding the root causes of mold in these settings is essential for effective prevention and long-term property maintenance.

One of the primary contributors to mold in unoccupied homes is the lack of climate control. Without regular heating, ventilation, and air conditioning (HVAC) operation, indoor humidity levels can rise unchecked. Mold thrives in environments with relative humidity above 60 percent, and without active systems to regulate temperature and moisture, these conditions become ideal for mold spores to settle and multiply. According to the Environmental Protection Agency (EPA), “Indoor relative humidity should be kept below 60 percent—ideally between 30 and 50 percent—to prevent mold growth.”

Another significant factor is water intrusion, which can go unnoticed in vacant homes. Leaky roofs, broken pipes, or even minor seepage from windows and foundations can introduce moisture into the structure. Since no one is present to detect and address these issues promptly, the moisture can persist and create a breeding ground for mold. Over time, even small leaks can lead to widespread contamination, especially in hidden areas like behind walls or under flooring. For more information on identifying early signs of moisture problems, visit our guide on how to identify hidden water damage early.

Poor ventilation is another common issue in unoccupied homes. When windows and doors remain closed for long periods, air circulation is significantly reduced. This stagnant air traps moisture inside, particularly in areas like basements, attics, and bathrooms. Without fresh air exchange, these damp conditions can quickly escalate into mold infestations. In addition, organic materials such as wood, drywall, and insulation provide the perfect food source for mold spores once moisture is present.

Dust and debris accumulation also contribute to mold problems. Over time, dust can settle on surfaces and absorb moisture from the air. This combination of organic matter and moisture creates a nutrient-rich environment for mold. Insects and rodents, which are more likely to inhabit vacant homes, can also introduce organic waste that further supports mold growth.

Seasonal changes can exacerbate these issues. For instance, during warmer months, high humidity levels and condensation can increase the risk of mold, especially in homes without air conditioning. Conversely, in colder months, unheated homes may experience condensation on windows and walls, leading to moisture buildup. Freeze-thaw cycles can also damage building materials, allowing water to penetrate and remain trapped within the structure.

In some cases, previous water damage that was not properly remediated before the home became vacant can resurface as mold. Mold spores can remain dormant for long periods and become active again when conditions become favorable. This is why professional mold remediation is crucial before leaving a property unoccupied. Learn more about our comprehensive mold remediation services to ensure your property is safe and mold-free.

Additionally, the building materials and construction methods used in older homes can influence mold susceptibility. Homes built with porous materials or lacking modern moisture barriers are more prone to water infiltration and mold growth. Even newer homes can be at risk if construction defects or poor maintenance practices are present.

To summarize, the main causes of mold in unoccupied homes include:

  1. Lack of climate control leading to high humidity levels
  2. Undetected water intrusion from leaks or seepage
  3. Poor ventilation and stagnant air
  4. Accumulation of dust and organic debris
  5. Seasonal temperature and humidity fluctuations
  6. Previous water damage that was not properly addressed
  7. Vulnerable building materials and construction methods

“Mold can begin to grow within 24 to 48 hours in the presence of moisture and organic material,” warns the Centers for Disease Control and Prevention (CDC).

Preventing mold in long-term vacant homes requires a proactive approach. Regular inspections, maintaining HVAC systems, sealing potential water entry points, and using dehumidifiers are all effective strategies. Property owners should also consider professional assessments before and after periods of vacancy to ensure no hidden issues are present.

For those managing multiple properties or planning extended absences, partnering with a trusted restoration company can provide peace of mind. At Projekt Restoration, we offer a full range of services designed to protect your property from mold and other environmental hazards. Our team is experienced in identifying risk factors and implementing long-term solutions tailored to each property’s unique needs.

For further reading and expert advice, explore our detailed resources and tips on our blog. Staying informed and taking preventive measures can save homeowners thousands of dollars in repairs and protect the health of future occupants.

External Resources:

  1. EPA Mold Course: Introduction to Mold
  2. CDC Mold FAQs
  3. National Park Service: Controlling Unwanted Moisture

Understanding the environmental and structural factors that contribute to mold in vacant homes is the first step toward effective prevention. By addressing these causes proactively, homeowners can ensure their properties remain safe, healthy, and mold-free during extended periods of vacancy.

Essential Steps to Keep Your Vacant Property Mold-Free

Preventing mold in a long-term vacant home requires a proactive and strategic approach to ensure the property remains safe, clean, and structurally sound. Mold thrives in damp, dark, and poorly ventilated environments, making unoccupied homes particularly vulnerable. The first essential step is to control moisture levels. This can be achieved by ensuring the property is well-sealed against leaks and that gutters and downspouts are clear to direct water away from the foundation. Regular inspections, even during vacancy, are crucial to identify early signs of water intrusion or humidity buildup. Installing a dehumidifier or using climate control systems can help maintain optimal indoor humidity levels, ideally between 30 to 50 percent. Additionally, it is important to shut off the water supply if the home will be vacant for an extended period to prevent pipe leaks or bursts, which are common causes of hidden water damage.

Proper ventilation is another key factor in mold prevention. Ensure that air can circulate freely throughout the home by keeping interior doors open and using exhaust fans in areas prone to moisture, such as kitchens and bathrooms. If the property has a basement or crawl space, consider using a vapor barrier to prevent ground moisture from seeping in. Cleaning the home thoroughly before it becomes vacant can also help, as mold spores feed on organic materials like dust, wood, and fabric. Remove any perishable items, clean carpets, and ensure that all surfaces are dry and free of debris.

It is also wise to invest in mold-resistant materials if you are renovating or preparing a home for long-term vacancy. These include mold-resistant drywall, paint, and insulation, which can significantly reduce the risk of mold growth. Regularly checking the HVAC system and replacing filters can also help prevent mold spores from circulating through the air. If you suspect any existing mold issues, it is best to consult professionals for thorough mold remediation before leaving the property unattended.

For homeowners who are unsure about the condition of their vacant property or need guidance on preventive measures, reaching out to experts can make a significant difference. At Projekt Restoration, we offer a range of services tailored to protect your property from mold and other environmental hazards. Our team is experienced in identifying potential risks and implementing long-term solutions to keep your home safe during periods of vacancy. Whether you are dealing with a recent water incident or planning to leave your property unoccupied, taking these essential steps can save you from costly repairs and health hazards in the future.

In conclusion, preventing mold in long-term vacant homes requires proactive planning and regular maintenance. By controlling moisture levels, ensuring proper ventilation, and conducting periodic inspections, homeowners can significantly reduce the risk of mold growth. Simple steps like sealing leaks, using dehumidifiers, and keeping the property clean and dry can go a long way in preserving the integrity of the home. Whether you’re leaving a property vacant for a few months or several years, taking these preventative measures will help protect your investment and ensure a healthier environment when it’s time to return.

How to Handle Water Damage in Hospitals

Understanding the Unique Challenges of Water Damage in Hospitals

Water damage in any building is a serious issue, but when it happens in a hospital, the stakes are significantly higher. Hospitals are not just buildings—they’re lifelines. They house sensitive medical equipment, vulnerable patients, and sterile environments that must remain uncontaminated. When water damage strikes, whether from a burst pipe, roof leak, or natural disaster, it can disrupt operations, endanger lives, and cause extensive property damage.

Unlike residential or commercial buildings, hospitals require a specialized approach to water damage restoration. The presence of patients with compromised immune systems, critical care units, and high-tech medical devices means that restoration must be swift, thorough, and compliant with health regulations. That’s where professional restoration services come into play.

At Projekt Restoration, we understand the urgency and complexity of hospital restoration. Our team is COMMITTED TO QUALITY SERVICE. Call Us Now! 855-933-7935 for Fast, Friendly and Professional Service. We offer a full suite of services including water damage restoration, fire damage restoration, mold remediation, biohazard clean up, and reconstruction services.

So, how do you handle water damage in a hospital? Let’s walk through it step-by-step.

Step 1: Immediate Response and Emergency Service Activation

Time is of the essence. The moment water damage is detected, the hospital’s emergency response protocol should be activated. This includes notifying the facility manager, isolating the affected area, and contacting a professional restoration company that offers emergency service.

Why is speed so critical? Because water spreads fast. Within minutes, it can seep into floors, walls, and ceilings. Within hours, it can warp wood, corrode metals, and destroy drywall. And within 24-48 hours, mold can begin to grow, creating a whole new set of health hazards.

Our team at Projekt Restoration is available 24/7 to respond to emergencies. We arrive equipped with industrial-grade drying equipment, moisture meters, and containment tools to stop the spread and begin the drying process immediately. Our goal is to minimize downtime and protect both patients and staff.

Want to know more about how we respond to emergencies? Check out our How It Works page for a detailed breakdown.

Step 2: Assessing the Extent of the Damage

Once the immediate threat is under control, the next step is a thorough assessment. This isn’t just about looking at wet floors. It’s about identifying hidden moisture behind walls, under floors, and in ceilings. Hospitals have complex infrastructures—think of all the pipes, wires, and HVAC systems running behind the scenes. Water can travel through these systems and cause damage far from the original leak.

Using advanced moisture detection tools and thermal imaging, our technicians map out the full extent of the damage. This helps us create a customized restoration plan that addresses every affected area. We also assess the condition of medical equipment and determine whether it can be salvaged or needs replacement.

We document everything—photos, moisture readings, and damage reports—which is crucial for insurance claims and regulatory compliance. If you’re curious about how to spot hidden water damage early, our guide on How to Identify Hidden Water Damage Early is a must-read.

Step 3: Water Extraction and Drying Process

Now comes the heavy lifting—literally. We use high-powered pumps and vacuums to extract standing water quickly. Then, we deploy industrial air movers and dehumidifiers to dry out the space. This step is critical because any lingering moisture can lead to mold growth and structural damage.

Drying a hospital isn’t like drying a home. We have to consider patient safety, air quality, and infection control. That’s why we use HEPA-filtered air scrubbers and create negative air pressure zones to prevent contaminants from spreading. Our team works in coordination with hospital staff to ensure minimal disruption to patient care.

We also monitor humidity levels and moisture content daily to ensure the area is drying properly. This meticulous approach is part of our commitment to customer satisfaction and long-term results. Learn more about our drying techniques on our Water Damage page.

Step 4: Mold Remediation and Air Quality Control

Where there’s water, there’s a risk of mold. And in a hospital, mold is a serious threat. It can trigger allergic reactions, respiratory issues, and even infections—especially in patients with weakened immune systems.

That’s why mold remediation is a non-negotiable part of the restoration process. Our certified mold specialists conduct air quality tests and surface sampling to identify mold presence. If mold is found, we isolate the area using containment barriers and negative air machines. Then, we remove contaminated materials, clean surfaces with antimicrobial agents, and use HEPA vacuums to capture spores.

We don’t just treat the symptoms—we address the root cause. That means fixing leaks, improving ventilation, and ensuring the area stays dry. Our Mold Remediation services are designed to meet hospital-grade standards and ensure a safe environment for everyone.

Want to see our work in action? Browse our Gallery for before-and-after photos of successful mold remediation projects.

Step 5: Structural Repairs and Reconstruction Services

Once the area is dry and mold-free, it’s time to rebuild. Water can compromise walls, ceilings, flooring, and even structural supports. Our reconstruction services cover everything from drywall replacement and flooring installation to electrical and plumbing repairs.

We work closely with hospital administrators to ensure all repairs meet building codes and healthcare regulations. Our team coordinates with architects, engineers, and inspectors to deliver a seamless reconstruction process. And because we handle everything in-house, there’s no need to juggle multiple contractors.

Our goal is to restore the hospital to its pre-loss condition—or better. We use high-quality materials and craftsmanship to ensure durability and safety. Whether it’s a small repair or a full-scale rebuild, we’re here to help you every step of the way.

Learn more about our approach to property restoration on our Our Mission page.

Step 6: Preventative Measures and Future Planning

Restoration is only half the battle. The other half is prevention. After the cleanup is done, we help hospitals implement preventative measures to reduce the risk of future water damage. This includes regular inspections, maintenance of plumbing systems, and installation of water detection sensors.

We also offer training for hospital staff on how to respond to water emergencies. Knowing what to do in the first few minutes can make a huge difference in minimizing damage and protecting patients.

Want to stay informed? Subscribe to our blog for tips, updates, and expert advice on property restoration and emergency preparedness.

Conclusion

Handling water damage in hospitals is a complex, high-stakes process that requires speed, precision, and expertise. From emergency response and water extraction to mold remediation and reconstruction, every step must be executed with care and professionalism. At Projekt Restoration, we’re more than just a restoration company—we’re your partners in recovery.

Our team is COMMITTED TO QUALITY SERVICE. Call Us Now! 855-933-7935 for Fast, Friendly and Professional Service. Whether you need water damage restoration, fire damage restoration, mold remediation, or biohazard clean up, we’ve got you covered. Let us help you restore your hospital to a safe, functional, and healthy environment.

What should hospital staff do first when water damage is discovered?

The first step is to activate the hospital’s emergency response protocol and contact a professional restoration company like Projekt Restoration. Isolate the affected area to prevent further contamination and ensure patient safety.

How quickly should water damage be addressed in a hospital?

Immediately. Water damage can escalate within hours, leading to mold growth and structural damage. Fast action is crucial to minimize risks and maintain a sterile environment.

Can mold remediation be done without disrupting hospital operations?

Yes, with proper containment and scheduling, mold remediation can be performed with minimal disruption. Our team uses HEPA filters and negative air machines to ensure safety during the process.

Are restoration services covered by insurance?

In most cases, yes. We work directly with insurance providers to streamline the claims process and ensure you get the coverage you deserve. Documentation and damage reports are provided for your records.

What makes Projekt Restoration different from other restoration companies?

We specialize in healthcare environments and offer a full range of services including water damage restoration, fire damage restoration, mold remediation, biohazard clean up, and reconstruction services. Our commitment to customer satisfaction and quality service sets us apart.

Fire Safety Planning for Office Buildings

Fire Safety Planning for Office Buildings is not just a legal requirement—it’s a critical step in protecting lives and property. Have you ever wondered how prepared your office is in the event of a fire? At Projekt Property Restoration, we specialize in fire damage restoration and understand the importance of having a solid fire safety plan in place. With fast, friendly, and professional service, we help businesses recover quickly and safely after fire incidents.

A well-structured fire safety plan includes evacuation procedures, fire extinguisher placements, and regular safety drills. According to NFPA, office fires cause over $100 million in property damage annually. This article will guide you through essential fire safety planning steps, highlight common mistakes, and explain how expert services like ours can make all the difference.

But there’s more to fire safety than just alarms and exits. What do top fire safety experts like Dr. Richard Bukowski say about building design and fire prevention? Let’s dive into the key strategies that can keep your office safe and your team prepared.

Understanding the Importance of Fire Safety in Office Buildings

Fires in office buildings pose a serious threat to lives, assets, and business continuity. According to the National Fire Protection Association, U.S. fire departments respond to over 3,300 office property fires annually. These incidents result in millions of dollars in property damage and, tragically, loss of life. Without a proper fire safety plan, even a small spark can escalate into a devastating event.

Inadequate fire preparedness can lead to irreversible consequences. Businesses may suffer extended downtime, leading to lost revenue and damaged reputations. Employees face increased risk, especially in high-occupancy buildings where evacuation becomes complex. Moreover, insurance claims and legal liabilities can cripple financial stability.

Implementing a comprehensive fire safety strategy is not optional—it’s essential. Regular drills, updated equipment, and clear evacuation routes can save lives. For businesses seeking expert support, our services include fire damage restoration and prevention solutions. Learn more about our commitment to safety on our mission page.

Proactive planning not only protects people but also preserves operations. Don’t wait for a disaster to act.

Legal and Regulatory Requirements for Fire Safety

Compliance with fire safety laws is non-negotiable for office buildings. National codes like NFPA and OSHA set the foundation. Local fire departments often enforce additional regulations tailored to regional risks. Building owners must ensure systems meet these standards at all times. Employers are responsible for training staff and maintaining clear evacuation routes. Facility managers oversee daily safety checks and system functionality.

Regular inspections are mandatory. Fire alarms, extinguishers, and sprinkler systems must pass certified checks. Documentation of these inspections must be up-to-date and accessible. Failure to comply can lead to fines, legal action, or worse—loss of life.

Certifications from licensed professionals validate system readiness. These must be renewed periodically. Authorities may request proof of compliance during audits or after incidents. Staying proactive helps avoid costly penalties.

For more on our approach to safety, visit our about page. Need help with fire-related recovery? Explore our fire damage services.

Conducting a Fire Risk Assessment

A fire risk assessment is a systematic process that identifies potential fire hazards in the workplace. Its primary goal is to reduce the likelihood of fire and protect lives and property. The first step involves spotting ignition sources, flammable materials, and potential fuel. Next, assess the level of risk each hazard presents. Consider who might be at risk—employees, visitors, or contractors—and how they could be affected.

Once risks are evaluated, implement control measures to eliminate or reduce them. These may include installing fire alarms, maintaining clear escape routes, and providing fire extinguishers. Regular training and emergency drills also play a vital role in preparedness.

An internal safety officer with proper training can conduct the assessment. However, hiring an external consultant ensures a more thorough and unbiased evaluation. For businesses seeking professional help, our services cover comprehensive fire safety solutions. Learn more about our team and values on our mission page.

Review and update the assessment regularly, especially after changes in layout or occupancy. Staying proactive can make all the difference in an emergency.

Developing a Comprehensive Fire Safety Plan

A well-structured fire safety plan includes clear evacuation procedures, reliable alarm systems, and effective fire suppression equipment. Each component must work seamlessly to ensure rapid response and minimal risk. Evacuation routes should be marked, unobstructed, and regularly practiced through drills. Alarm systems must be loud, accessible, and connected to emergency services. Fire extinguishers, sprinklers, and smoke detectors should be strategically placed and maintained.

Tailoring the plan to your office layout is essential. Consider the number of floors, exits, and occupancy levels. High-traffic areas may require additional signage or alarms. Assign fire wardens to guide employees and ensure accountability during emergencies. Review and update the plan as your office space evolves.

Integrate fire safety with your broader emergency preparedness strategy. Coordinate with local fire departments and conduct regular risk assessments. Include fire safety in your employee training programs. For more insights on protecting your property, explore our fire damage and services pages. A proactive approach ensures your team stays safe and your business remains resilient.

Fire Detection and Alarm Systems

Modern offices rely on advanced systems to detect fires swiftly and accurately. Smoke detectors sense airborne particles, while heat detectors respond to temperature changes. Manual pull stations allow occupants to trigger alarms instantly during emergencies. Each device plays a critical role in early fire detection.

Once activated, the alarm system alerts building occupants through sirens, strobes, or voice commands. These signals prompt immediate evacuation, reducing injury risks. Regular testing ensures every component functions correctly. Without maintenance, even the best systems can fail when needed most.

Integration with building management systems enhances response efficiency. It allows real-time monitoring and automatic alerts to emergency services. This seamless communication can save lives and minimize property damage. For optimal safety, ensure your system complies with local codes and standards.

Routine inspections and updates are essential. Partnering with professionals who understand fire safety is key. Learn more about our services to keep your building protected. Visit our FAQ page for answers to common fire safety questions.

Fire Suppression Systems and Equipment

Modern office buildings rely on several fire suppression solutions to ensure safety. Sprinkler systems are the most common and activate automatically when heat reaches a certain threshold. Fire extinguishers are essential for quick response and should be placed strategically throughout the building. Clean agent systems are ideal for areas with sensitive electronics, as they leave no residue.

Choosing the right extinguisher type is critical. Use Class C extinguishers in electrical rooms to avoid conductive agents. For kitchens, opt for Class K extinguishers designed to handle grease fires effectively. Always match the extinguisher to the specific fire risk in each area.

Routine maintenance is vital for system reliability. Inspect extinguishers monthly and service them annually. Sprinkler systems require professional checks to ensure valves and heads function properly. Clean agent systems should be tested regularly to confirm pressure levels and agent integrity.

Partnering with experienced professionals ensures compliance and safety. Learn more about our services and how we support businesses with fire protection. For more insights, visit our blog and stay informed on best practices.

Evacuation Procedures and Emergency Exits

Designing efficient escape routes starts with a clear layout. Mark all exits visibly and ensure paths remain unobstructed. Use illuminated signs and arrows to guide occupants, especially in low-visibility conditions. Place signage at eye level and near stairwells, elevators, and hallways. Regularly inspect these signs for damage or fading.

Emergency exits must remain accessible at all times. Never block them with furniture, storage, or equipment. Install panic bars on exit doors for quick egress. Conduct monthly checks to confirm all doors open easily and are clearly marked.

Create detailed evacuation maps for each floor. Include exit routes, fire extinguisher locations, and assembly points. Post these maps near elevators, stairwells, and main entrances. Assign trained evacuation wardens for each department. They should guide employees, check rooms, and assist anyone needing help.

For comprehensive support, explore our services and learn how we enhance workplace safety. You can also visit our mission page to understand our commitment to emergency preparedness.

Fire Safety Training and Drills

Consistent fire safety training empowers employees to act swiftly and confidently during emergencies. It reduces panic and ensures a coordinated response. Training should cover essential skills like using fire extinguishers, recognizing potential hazards, and understanding evacuation routes. Employees must know how to respond under pressure.

Interactive sessions improve retention. Include hands-on demonstrations and scenario-based learning. Encourage questions to clarify doubts and reinforce understanding. Update training regularly to reflect changes in building layout or safety protocols.

Fire drills are critical. Schedule them quarterly to maintain readiness. Vary the scenarios to test different aspects of your emergency plan. Monitor response times and identify bottlenecks during evacuation. After each drill, conduct a debrief to discuss what went well and what needs improvement.

Assign roles such as floor wardens and accountability officers. This structure ensures order and accountability. Use feedback from drills to refine procedures and enhance safety measures.

For more insights into protecting your workplace, explore our blog. To learn about our specialized restoration services, visit our services page.

Maintenance and Regular Inspections

Consistent upkeep of fire safety systems is essential to ensure they function during emergencies. Without regular checks, even the best equipment can fail. Fire alarms must be tested monthly to confirm they trigger correctly. Inspect fire extinguishers for pressure levels, damage, and expiration dates. Emergency lighting and exit signs should remain illuminated during power outages. Replace faulty bulbs and damaged fixtures immediately.

Create a routine checklist to streamline inspections. Include smoke detectors, sprinkler systems, fire doors, and evacuation maps. Document all findings and repairs for compliance and accountability. This proactive approach minimizes risks and ensures a safer workplace.

Third-party inspections offer unbiased evaluations. Certified professionals can detect issues internal teams might overlook. These audits also help meet local fire codes and insurance requirements. Schedule them annually or as required by law.

For more on our safety-focused approach, visit our about page. Explore our full range of services to support your building’s safety and compliance.

Creating a Culture of Fire Safety in the Workplace

Fostering fire safety awareness starts with consistent communication. Use posters, emails, and brief training sessions to keep safety top of mind. Encourage employees to report hazards immediately. Make it easy by offering anonymous reporting options and quick response times. Recognize and reward proactive behavior to reinforce positive actions.

Leadership must set the tone. Managers should model safe practices daily and participate in all drills and training. Their involvement sends a clear message that safety is a shared responsibility. Regularly review and update emergency plans to reflect current risks and building layouts.

Create a safety committee with representatives from each department. This promotes accountability and ensures diverse input. Host quarterly fire drills and follow up with feedback sessions. Use these opportunities to identify gaps and improve procedures.

Integrate fire safety into onboarding for new hires. Include it alongside other essential workplace policies. For more on our commitment to safety, visit our mission page. Explore our full range of services to see how we support safer work environments.

Frequently Asked Questions (FAQs)

A comprehensive office fire safety plan must include evacuation routes, emergency contacts, fire extinguisher locations, and employee responsibilities. Conduct fire drills at least twice a year to ensure preparedness. In leased spaces, both tenants and property managers share fire safety responsibilities. Offices should use Class A, B, or C fire extinguishers, depending on the materials present. Always assess accessibility needs to ensure safe evacuation for employees with disabilities.

Fire safety inspections are mandatory and should occur annually or as required by local codes. A fire alarm alerts occupants, while a smoke detector senses smoke and triggers the alarm. Train new employees during onboarding with clear instructions and hands-on demonstrations. Non-compliance with fire safety regulations can lead to fines, legal action, or business closure.

Yes, fire safety systems can integrate with building automation for real-time monitoring and faster emergency response. For more detailed guidance, visit our FAQ page. You can also explore our services to see how we support fire safety compliance.

How to Prevent Mold in Laundry Rooms

How to Prevent Mold in Laundry Rooms—have you ever walked into your laundry area and noticed a musty smell or damp corners? Mold thrives in warm, humid environments, making laundry rooms a prime target. At Projekt Property Restoration, we’ve seen firsthand how quickly mold can spread if left unchecked. So, how can you stop mold before it starts and protect your home?

The answer is simple: control moisture, improve ventilation, and clean regularly. In this article, we’ll walk you through practical steps like using dehumidifiers, sealing leaks, and choosing the right materials for your laundry space. You’ll also learn how to spot early signs of mold and when to call in professionals like us for mold remediation.

But that’s just the beginning. According to mold expert Dr. Harriet Burge, “Indoor mold problems are almost always moisture problems.” So, if you’re serious about keeping your laundry room mold-free, you’ll want to dive into these expert-backed tips. Let’s get started and make your laundry room a cleaner, healthier space today.

Understanding the Causes of Mold in Laundry Rooms

Mold is a type of fungus that spreads through airborne spores. It thrives in damp, dark, and warm environments. Laundry rooms often provide the perfect conditions for mold to grow. High humidity levels, combined with poor ventilation, create a breeding ground for spores. Warmth from dryers and steam from washing machines only intensify the problem.

Moisture is the main culprit. Leaky washing machine hoses, dripping faucets, and condensation on walls or windows contribute significantly. Wet clothes left sitting in machines or hampers also add to the moisture load. Without proper airflow, this dampness lingers, encouraging mold to settle and spread.

Even minor water leaks can lead to major issues if ignored. Regular inspections and maintenance are essential. If you suspect hidden damage, check out our guide on how to identify hidden water damage early. For professional help, explore our full range of services to keep your space safe and mold-free.

Preventing mold starts with understanding its causes. Stay proactive, and you’ll protect your home and health.

Identifying Mold-Prone Areas in Your Laundry Room

Mold often hides in overlooked spots within your laundry room. Check behind washers and dryers where moisture can accumulate unnoticed. Inspect under sinks regularly, especially around pipe joints and seals. Vents and exhaust ducts also trap humidity, making them prime areas for mold growth.

Use a flashlight to examine dark corners and tight spaces. Run your hand along surfaces to detect dampness. Look for discoloration on walls, floors, or ceilings. A musty odor is a strong indicator of hidden mold. If you notice peeling paint or warped materials, investigate further.

Schedule monthly inspections to catch early signs. Keep appliances slightly pulled away from walls to improve airflow. Clean lint traps and vent covers frequently. If you spot visible mold, act quickly to prevent it from spreading.

For professional help, explore our mold remediation services. You can also learn more about our process by visiting how it works. Staying proactive reduces health risks and protects your home from costly damage.

Improving Ventilation and Airflow

Poor airflow creates the perfect environment for mold to thrive. Moisture lingers, and humidity levels rise quickly. To combat this, start by installing a high-quality exhaust fan. It pulls damp air out and keeps the room dry. If possible, open windows during and after laundry cycles. This simple step boosts air circulation significantly.

A dehumidifier is another effective tool. It reduces moisture in the air, especially in humid climates. Make sure to empty and clean it regularly for optimal performance. Additionally, inspect your HVAC system often. Clogged filters or dirty ducts can trap moisture and spread spores.

Schedule routine maintenance to keep your system efficient. Clean air ducts at least once a year to prevent buildup. This also improves indoor air quality. For more expert tips, visit our blog or explore our full range of services.

Consistent airflow and proper ventilation are your best defenses. Don’t wait for mold to appear—act early and stay ahead.

Managing Moisture and Humidity Levels

Keeping moisture under control starts with accurate monitoring. Use a hygrometer to track humidity levels in real time. Place it in a central spot away from vents or windows for reliable readings. Aim to keep humidity below 60% to discourage mold growth. If levels rise, improve ventilation or use a dehumidifier.

Open windows when weather permits, or run exhaust fans during laundry cycles. These simple actions help reduce trapped moisture. In tight or enclosed areas, place moisture absorbers or desiccants like silica gel or calcium chloride. They work silently to pull excess moisture from the air.

Check and replace these products regularly for maximum effectiveness. For added protection, inspect for leaks or damp spots behind appliances. If you notice signs of water damage, consider professional help. Visit our water damage page for expert solutions.

Maintaining proper humidity not only prevents mold but also protects your home’s structure. Learn more about our full range of services designed to keep your space safe and dry.

Proper Laundry Practices to Prevent Mold

Leaving damp clothes in the washer creates a breeding ground for mold. Always remove laundry promptly after the cycle ends. Letting wet garments sit for hours encourages moisture buildup and unpleasant odors. Instead, transfer clothes to the dryer or hang them immediately.

Ensure all items dry completely before storing. Even slightly damp fabrics can foster mold growth in closets or drawers. Use fans or open windows to improve air circulation if air-drying indoors. High-efficiency washers are ideal for reducing excess moisture. They use less water and spin clothes more thoroughly, speeding up drying time.

However, these machines need regular maintenance. Clean the drum, detergent drawer, and rubber seals weekly to prevent mold buildup. Run a cleaning cycle with vinegar or a washer cleaner monthly. For more tips on maintaining a healthy laundry space, visit our blog.

If you suspect mold despite your efforts, explore our mold remediation services. Taking these simple steps can keep your laundry room fresh, clean, and mold-free.

Cleaning and Maintenance Routines

Establish a consistent cleaning routine to keep your laundry room mold-free. Start with a weekly checklist. Wipe down washer and dryer surfaces using a mold-resistant cleaner or a vinegar-water mix. Leave washer doors open after use to air out moisture. Clean the lint trap and inspect dryer vents for buildup. Sweep and mop the floor using baking soda and warm water to neutralize odors and prevent mold growth.

Monthly, deep clean your washing machine. Run a hot cycle with two cups of white vinegar, followed by a baking soda rinse. Detach and clean the detergent drawer. Inspect hoses for leaks or cracks. Vacuum behind appliances to remove dust and lint. Check for signs of hidden moisture or water damage. If you notice any, consider professional water damage inspection.

Use mold-resistant sprays on walls and baseboards. Natural alternatives like tea tree oil also work well. Keep humidity levels low with a dehumidifier or proper ventilation. For persistent issues, explore our mold remediation services. Regular upkeep not only prevents mold but also extends the life of your appliances.

Waterproofing and Mold-Resistant Materials

Using mold-resistant materials significantly reduces the risk of fungal growth in laundry rooms. Mold-resistant paint creates a protective barrier that resists moisture absorption. Opt for moisture-resistant drywall, especially in areas prone to humidity. Vinyl or tile flooring works better than carpet or wood, which can trap dampness.

Seal all visible cracks in walls and floors with waterproof caulk or sealant. This prevents water from seeping into hidden spaces. Apply a waterproof membrane to walls and floors for added protection. Regularly inspect these areas to catch early signs of wear or damage.

Replace old, porous materials like untreated wood or outdated insulation. These materials often retain moisture and promote mold growth. Choose modern alternatives designed for high-humidity environments.

For more expert advice, explore our services or visit our detailed mold remediation page. Taking these steps now prevents costly repairs later. Keep your laundry room dry, safe, and mold-free with the right materials and maintenance.

Addressing Plumbing and Appliance Issues

Hidden leaks and malfunctioning appliances are major culprits behind mold growth in laundry rooms. Even a slow drip from a pipe can create the perfect damp environment for spores to thrive. Washing machines with worn-out hoses or clogged drains often leak unnoticed, leading to moisture buildup behind walls or under flooring.

Regularly inspect all visible plumbing connections for signs of corrosion, rust, or moisture. Tighten loose fittings and replace damaged hoses immediately. Don’t overlook the area behind appliances—dust and lint can trap moisture, accelerating mold development.

For older plumbing systems, schedule professional inspections at least once a year. Experts can detect hidden issues before they escalate into costly damage. Preventative maintenance not only protects your home but also improves appliance efficiency.

If you suspect water damage, act fast. Visit our water damage page to learn how we can help. For more expert tips, check out our detailed blog section. Staying proactive with plumbing care is key to keeping your laundry room mold-free.

Designing a Mold-Resistant Laundry Room

Proper layout plays a crucial role in minimizing mold risks. Start by spacing appliances at least a few inches from walls. This allows air to circulate freely and prevents moisture buildup. Install a ceiling or wall-mounted exhaust fan to improve ventilation. If possible, add a window or vent to bring in natural airflow.

Avoid cluttering the floor with laundry baskets or supplies. Instead, use wall-mounted racks and hooks to keep items elevated. Choose open shelving made of metal or plastic, which resists moisture better than wood. Skip fabric bins—they trap humidity and encourage mold growth.

Keep detergents and cleaning products in sealed containers. This reduces spills and limits exposure to damp air. For added protection, place a dehumidifier in the room to maintain optimal humidity levels.

For more expert tips, explore our blog or learn about our services. A well-designed laundry room not only prevents mold but also enhances your home’s overall hygiene. Make smart choices now to avoid costly repairs later.

Frequently Asked Questions (FAQs)

Mold often starts with musty odors and dark spots on walls, ceilings, or behind appliances. A persistent damp smell is a red flag. Clean your washer monthly and your dryer lint trap after every use. Deep clean both machines every three months. Mold exposure can trigger allergies, respiratory issues, and skin irritation. If you spot mold, ventilate the area, wear gloves, and clean with vinegar or baking soda. For large infestations, contact a professional immediately. Use natural methods like opening windows, using baking soda, or placing charcoal to absorb moisture. Poor ventilation shows through condensation, peeling paint, or lingering humidity. Test airflow by holding a tissue near vents. Dehumidifiers are safe and reduce moisture effectively when used properly. Mold can grow in detergent drawers, rubber seals, and drum interiors. Wipe them dry after each use. Avoid carpeting, untreated wood, or wallpaper in laundry rooms. Opt for tile, metal, or mold-resistant paint instead. For basement laundry rooms, install a sump pump, seal cracks, and use a dehumidifier. For more expert tips, visit our blog or check our FAQ page.

Water Damage Prevention During Construction

Construction projects are exciting, but they also come with a fair share of risks—especially when it comes to water damage. Whether you’re building a new home, renovating a commercial space, or managing a large-scale development, water intrusion can be a costly and frustrating setback. The good news? With the right strategies and a proactive mindset, you can prevent water damage before it ever becomes a problem.

In this guide, we’ll dive deep into how to prevent water damage during construction, why it matters, and what steps you can take to protect your investment. We’ll also explore how professional restoration services like water damage restoration, mold remediation, and even fire damage restoration can help when things go sideways. Ready to build smart and dry? Let’s go!

Table of Contents

  • Why Water Damage Is a Big Deal During Construction
  • Common Causes of Water Damage on Construction Sites
  • Top Prevention Strategies for Water Damage
  • What to Do If Water Damage Occurs
  • How Professional Restoration Services Can Help

Why Water Damage Is a Big Deal During Construction

Imagine spending months planning a dream project, only to have it delayed—or worse, ruined—by a burst pipe or a surprise rainstorm. Water damage during construction isn’t just inconvenient; it can be downright disastrous. It weakens structural integrity, encourages mold growth, and can lead to expensive delays and repairs.

Even a small leak can cause major issues if it goes unnoticed. Moisture trapped in walls or under flooring can lead to long-term damage that’s hard to detect until it’s too late. That’s why early detection and prevention are key. If you’re unsure how to spot hidden water damage, check out our guide on how to identify hidden water damage early.

And let’s not forget the financial side. Insurance may not always cover water damage during construction, especially if it’s due to negligence. That’s why it’s crucial to work with experienced contractors and consider partnering with a professional restoration company like Projekt Restoration to stay ahead of potential issues.

Common Causes of Water Damage on Construction Sites

So, what causes water damage during construction? You’d be surprised how many ways water can sneak in. Here are some of the most common culprits:

  • Weather Exposure: Rain, snow, and humidity can wreak havoc on exposed structures.
  • Plumbing Failures: Improperly installed or tested plumbing systems can leak or burst.
  • Roofing Delays: Leaving a roof incomplete or improperly sealed invites water in.
  • Improper Grading: If the land isn’t graded correctly, water can pool around the foundation.
  • Material Storage: Storing materials like drywall or wood in damp areas can lead to mold and rot.

Each of these issues can be avoided with proper planning and oversight. For example, using temporary roofing or tarps can protect unfinished structures, and regular site inspections can catch plumbing issues before they escalate. Learn more about our commitment to quality service and how we help prevent these issues before they start.

Top Prevention Strategies for Water Damage

Now that we know what causes water damage, let’s talk about how to stop it in its tracks. Here are some tried-and-true strategies to keep your construction site dry and damage-free:

1. Weatherproof the Site

Use tarps, temporary roofing, and weather-resistant materials to shield your site from the elements. Don’t leave framing or insulation exposed to rain or snow.

2. Install Drainage Systems Early

Make sure your site has proper drainage from day one. This includes grading the land, installing gutters, and using sump pumps if necessary.

3. Test Plumbing Before Closing Walls

Always pressure-test plumbing systems before sealing them behind drywall. It’s a lot easier to fix a leak when the pipes are still accessible.

4. Store Materials Properly

Keep sensitive materials like wood, insulation, and drywall in dry, covered areas. Moisture can ruin these materials before they’re even installed.

5. Conduct Regular Inspections

Have a checklist and inspect the site daily. Look for signs of leaks, pooling water, or mold. Catching issues early is half the battle.

Need help implementing these strategies? Our reconstruction services and emergency service teams are just a call away. We’re COMMITTED TO QUALITY SERVICE. Call Us Now! 855-933-7935 for fast, friendly, and professional service.

What to Do If Water Damage Occurs

Sometimes, despite your best efforts, water damage still happens. Maybe a storm hit unexpectedly, or a pipe burst overnight. Don’t panic—here’s what to do:

Step 1: Stop the Source

First things first, identify and stop the source of the water. Shut off the main water supply if needed, or cover the area if it’s weather-related.

Step 2: Call in the Pros

Contact a water damage restoration expert immediately. Time is critical. The faster you act, the less damage you’ll face.

Step 3: Document Everything

Take photos and notes of the damage for insurance purposes. This will help with claims and future prevention planning.

Step 4: Begin Drying and Cleanup

Use industrial fans, dehumidifiers, and wet vacs to start drying the area. Avoid using household equipment—it’s not powerful enough for large-scale damage.

Step 5: Inspect for Mold

Water damage often leads to mold. Schedule a mold remediation assessment to ensure your site is safe and clean.

Need help fast? Our emergency service team is available 24/7 to handle any disaster. We specialize in property restoration and biohazard clean up, ensuring your site is safe and back on track ASAP.

How Professional Restoration Services Can Help

Let’s face it—construction is complex, and things can go wrong. That’s where professional restoration services come in. Companies like Projekt Restoration offer a full suite of solutions to get your project back on track quickly and safely.

Water Damage Restoration

We use specialized equipment to dry out structures, prevent mold, and restore materials. Our process is fast, efficient, and designed to minimize downtime.

Fire Damage Restoration

Fire and water damage often go hand-in-hand. Our fire damage restoration services include smoke removal, structural repair, and odor elimination.

Mold Remediation

We identify and remove mold at the source, preventing it from spreading and causing health issues. Our team is trained in the latest remediation techniques.

Reconstruction Services

Need to rebuild after damage? We offer full reconstruction services to restore your site to its original condition—or better.

Customer Satisfaction Guaranteed

At Projekt Restoration, we’re not just about fixing problems—we’re about building trust. Our goal is 100% customer satisfaction, and we won’t rest until you’re happy with the results.

Check out our gallery to see our work in action, or visit our blog for more tips and insights.

Conclusion

Water damage during construction is more than just a nuisance—it’s a serious threat to your timeline, budget, and safety. But with the right knowledge and a proactive approach, you can prevent most issues before they start. And if disaster does strike, having a trusted partner like Projekt Restoration in your corner makes all the difference.

Remember, we’re COMMITTED TO QUALITY SERVICE. Call Us Now! 855-933-7935 for fast, friendly, and professional help. Whether it’s water, fire, mold, or biohazards, we’ve got your back.

FAQs

What are the first signs of water damage during construction?

Look out for musty odors, discoloration on materials, warping wood, or pooling water. These early signs can indicate a leak or moisture problem that needs immediate attention.

Can mold grow during the construction phase?

Absolutely. Mold can start growing within 24-48 hours of moisture exposure. That’s why quick drying and proper ventilation are crucial during construction.

How quickly should I respond to water damage on a job site?

Immediately. The faster you act, the less damage you’ll face. Call a professional restoration service as soon as you notice the issue to minimize downtime and costs.

Do restoration companies also handle reconstruction?

Yes! At Projekt Restoration, we offer full reconstruction services to rebuild and restore your property after damage. From drywall to flooring, we handle it all.

Is water damage covered by construction insurance?

It depends on your policy. Some insurance plans cover accidental water damage, but not damage caused by negligence. Always review your policy and consult with your provider.

How to Handle Mold in Commercial Kitchens


COMMITTED TO QUALITY SERVICE Call Us Now! 855-933-7935 Fast, Friendly and Professional Service.

Our Services:

  • Water Damage – Water Damage Restoration requires special equipment designed specifically for drying structures that have suffered severe water damage.
  • Fire Damage – The most crucial step in the fire restoration process is to quickly mitigate the affected area and recover as much as possible.

Mold in Commercial Kitchens: The Hidden Threat to Your Business

Mold in commercial kitchens is more than just an unsightly nuisance—it’s a silent saboteur that can compromise food safety, damage your property, and even shut down your operations. Whether you run a bustling restaurant, a hotel kitchen, or a catering business, mold can creep in through unnoticed leaks, poor ventilation, or high humidity. And once it’s in, it spreads fast.

In this comprehensive guide, we’ll walk you through everything you need to know about identifying, preventing, and eliminating mold in commercial kitchens. From mold remediation to restoration services, we’ve got you covered.


Why Mold Loves Commercial Kitchens

High Humidity and Steam: A Mold Paradise

Commercial kitchens are hotbeds—literally—for mold growth. With constant cooking, dishwashing, and refrigeration, moisture levels skyrocket. Mold spores thrive in these damp environments, especially when ventilation is lacking.

Organic Matter and Food Waste: Mold’s Favorite Meal

Leftover food particles, grease, and organic waste provide the perfect buffet for mold. If cleaning protocols aren’t strictly followed, mold can take root in drains, under sinks, and behind appliances.


Early Warning Signs of Mold in Commercial Kitchens

Musty Odors and Discoloration

That earthy, musty smell? It’s a telltale sign of mold. Look out for black, green, or white patches on walls, ceilings, and tiles. Mold often hides in plain sight—or just behind it.

Condensation and Water Stains

Persistent condensation on windows or water stains on ceilings and walls are red flags. These are often signs of hidden leaks that can lead to mold infestations.


Health Risks of Mold in Commercial Kitchens

Respiratory Issues and Allergies

Mold spores can trigger asthma, allergies, and respiratory infections—especially dangerous in a food service environment where staff and customers are constantly exposed.

Food Contamination and Legal Liability

Mold can contaminate food, leading to foodborne illnesses and potential lawsuits. Health inspectors won’t hesitate to shut down a kitchen if mold is found.


Inspection Protocols for Mold in Commercial Kitchens

Visual Inspections and Moisture Meters

Start with a thorough visual inspection. Use moisture meters to detect hidden dampness behind walls and under floors. Document everything for compliance and insurance purposes.

Air Quality Testing and Lab Analysis

Professional air quality tests can detect airborne mold spores. Samples sent to a lab can confirm the type of mold and its toxicity level.


Common Areas Where Mold Hides in Kitchens

Behind Refrigerators and Freezers

These areas often go unchecked during routine cleaning. Condensation and food debris make them prime spots for mold growth.

Under Sinks and Dishwashing Stations

Leaks and splashes create a moist environment perfect for mold. Regular inspection and maintenance are crucial here.


How to Prevent Mold in Commercial Kitchens

Ventilation and Dehumidification

Install high-efficiency exhaust fans and dehumidifiers. Proper airflow is your first line of defense against mold.

Routine Cleaning and Maintenance

Implement a strict cleaning schedule. Use mold-resistant cleaning agents and train staff to recognize early signs of mold.


When to Call for Professional Mold Remediation

Extent of Infestation and Health Risks

If mold covers more than 10 square feet or is found in HVAC systems, it’s time to call the pros. DIY solutions won’t cut it.

Compliance with Health Regulations

Professional remediation ensures compliance with OSHA and local health codes. It also protects your business from liability.


Restoration Services After Mold Removal

Structural Repairs and Surface Restoration

Once mold is removed, damaged drywall, flooring, and insulation may need replacing. Restoration services ensure your kitchen is safe and operational again.

Odor Elimination and Air Purification

HEPA filters and ozone treatments can eliminate lingering odors and spores, restoring indoor air quality.


Water Damage Restoration and Mold Prevention

Fixing Leaks and Drying Out Structures

Water damage restoration is crucial after leaks or floods. Specialized drying equipment prevents mold from taking hold.

Monitoring Moisture Levels Post-Restoration

Use hygrometers and moisture sensors to ensure the area stays dry. Prevention is better than cure.


Fire Damage Restoration and Mold Risk

Water Used in Firefighting Can Lead to Mold

After a fire, water used to extinguish flames can seep into walls and floors. Fire damage restoration must include mold prevention.

Smoke Residue and Mold Growth

Smoke particles can trap moisture, creating a breeding ground for mold. Professional cleaning is essential.


Emergency Service for Mold in Commercial Kitchens

24/7 Response Teams

Mold doesn’t wait, and neither should you. Emergency service teams can respond within hours to contain and mitigate the damage.

Minimizing Downtime and Revenue Loss

Quick action means less disruption to your business. Every hour counts when dealing with mold.


Property Restoration After Mold Damage

Rebuilding and Renovation

From drywall to flooring, property restoration services can rebuild your kitchen to code and better than before.

Insurance Claims and Documentation

Professionals can help document damage for insurance claims, ensuring you get the compensation you deserve.


Biohazard Clean Up in Mold-Infested Kitchens

Handling Toxic Mold Safely

Some molds, like black mold, are biohazards. Biohazard clean up teams use PPE and containment protocols to remove them safely.

Disposal of Contaminated Materials

Contaminated drywall, insulation, and equipment must be disposed of according to EPA guidelines.


Reconstruction Services for Damaged Kitchens

Designing for Mold Resistance

Use mold-resistant drywall, flooring, and paint during reconstruction. Prevention starts with smart design.

Upgrading Ventilation and Drainage

Modern ventilation systems and proper drainage can drastically reduce future mold risks.


Customer Satisfaction and Mold-Free Kitchens

Protecting Your Brand Reputation

Clean, mold-free kitchens build trust with customers and health inspectors alike. Customer satisfaction should always be a top priority.

Staff Training and Awareness

Train your team to spot mold early and follow cleaning protocols. A vigilant staff is your best defense.


Professional Restoration: Why It Matters

Expertise, Equipment, and Experience

Professional restoration teams bring the tools and know-how to handle mold safely and efficiently.

Long-Term Solutions, Not Quick Fixes

DIY methods often fail. Professionals offer comprehensive solutions that prevent recurrence.


FAQs About Mold in Commercial Kitchens

1. How fast does mold grow in a commercial kitchen?

Mold can begin growing within 24–48 hours in moist conditions. That’s why immediate action is crucial.

2. Can I clean mold myself?

Small patches can be cleaned with mold-killing agents, but larger infestations require professional help.

3. Is mold covered by insurance?

It depends on your policy. Most cover mold caused by sudden events like pipe bursts, but not long-term neglect.

4. What’s the cost of mold remediation?

Costs vary based on the extent of damage. On average, expect to pay between $500 and $6,000.

5. How can I prevent mold long-term?

Maintain low humidity, fix leaks promptly, and schedule regular inspections.

6. What certifications should a mold remediation company have?

Look for IICRC certification and EPA compliance. These ensure proper training and safety standards.


Final Thoughts: Keep Mold Out and Business Booming

Mold in commercial kitchens is a serious issue—but it’s one you can tackle head-on with the right knowledge and support. From early detection to mold remediation, restoration services, and emergency service, every step matters. Don’t wait until it’s too late—protect your kitchen, your staff, and your reputation today.

Need help now? Call 855-933-7935 for fast, friendly, and professional service. Visit Project Restoration CA to learn more about our services and how we’re committed to quality service.

Stay mold-free, stay in business.

Schedule Your Mold Inspection Today!

Privacy Policy

Projekt Restoration we respects your privacy and is committed to protecting your personal information. This Privacy Policy outlines how we collect, use, and protect the information you provide when you visit our website, contact us, or use our services related to Mold Remediation, Mold Inspection & Testing, Mold Removal / Cleanup, and Black Mold Removal.


1. Information We Collect

We may collect the following types of personal and non-personal information:

  • Personal Information: Name, email address, phone number, physical address, and any other information you provide when contacting us or requesting services.

  • Usage Data: IP address, browser type, operating system, pages visited, and time/date of your visit.

  • Cookies: We may use cookies to enhance your website experience. You can disable cookies in your browser settings.


2. How We Use Your Information

We use your information to:

  • Respond to your inquiries or service requests

  • Schedule and deliver mold-related services

  • Improve our website and customer service

  • Send service updates, promotions, or important notices (if you opt-in)

  • Comply with legal obligations


3. Information Sharing and Disclosure

We do not sell, trade, or rent your personal information. We may share your data with:

  • Trusted third-party service providers (e.g., payment processors, contractors) to perform services on our behalf

  • Law enforcement or government agencies if required by law


4. Data Security

We implement reasonable safeguards (physical, electronic, and managerial) to protect your information from unauthorized access, alteration, disclosure, or destruction.


5. Your Privacy Rights (California Residents)

Under the California Consumer Privacy Act (CCPA), California residents have the right to:

  • Request disclosure of the personal information we collect and how we use it

  • Request deletion of your personal information

  • Opt-out of the sale of personal information (note: we do not sell your data)

To exercise any of these rights, please contact us at:
📞 Phone: (855) 933-7935


6. Third-Party Links

Our website may contain links to third-party sites. We are not responsible for their privacy practices. Please review their privacy policies separately.


7. Children’s Privacy

Our services are not directed to children under 13. We do not knowingly collect personal information from minors.


8. Changes to This Privacy Policy

We may update this Privacy Policy from time to time. Changes will be posted on this page with the updated effective date.


9. Contact Us

If you have any questions or concerns about this Privacy Policy, please contact:
Projekt Restoration

📞 (855) 933-7935